However your grill season works out for you, I hope these recipes will give some impetus to getting out there. I have to imagine, though I have never done it, that these recipes can be made in the oven. I have not done it, but it is possible. Flavors will be different, assuredly.
For the first of these recipes, I am taking one my husband came up with. It is simple as can be. And of course it is a beef roast, because my husband will not touch something like shellfish. This has become a matter of pride at this late age, to say he has never, nor will he ever, eat shellfish. I, on the other hand, love shellfish, but developed an allergy, so now it is off my menu also. The second recipe below, is one I used very often before finding out why I was so swollen so often. 😧 The third recipe is a chicken recipe I have made repeatedly through the years and is also unfailingly good. I make my own Red Curry Paste also, so I will give you that recipe as well, though you can assuredly buy it at the store. Making it at home means I can control the heat, getting all the flavor without killing off taste buds in the process. ;)
Back to the beef roast. It is started on the grill and seared over high heat for about 15 to 20 minutes per side before removing it to a cutting board and preparing the rest of the recipe. It requires little in the way of prep. It uses only basic ingredients. Nothing fancy. I have yet to even get a photo that is truly worth showing. It looks rather homely. But the flavor? Oh, great heavens, it is magnificent. Serve with some mashed potatoes and you will be happy campers.
| Terry's BBQ Roast |
| Terry's BBQ Roast |
Terry's BBQ Roast
Serves 6 to 8
1 boneless chuck roast, about 3½ pounds
6 - 8 scallions, as needed
1 green bell pepper, more if needed
1 cup barbecue sauce of choice, more if desired
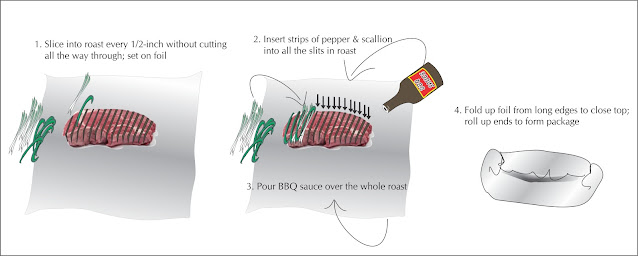
Heat a grill to high. Set the chuck roast onto the grill until it has a really good sear on one side, about 15 or so minutes. Flip the roast and sear the other side the same way. This gives a nice smoky "grilled" flavor, even though not finished on the grill. Remove the roast from the grill and place on a cutting board. Slice into the roast, not quite all the way through, about every half to ¾-inch apart.
 |
| Prepping Terry's BBQ Roast |
Preheat the oven to about 275 degrees. While the roast is grilling, prepare the scallions and green pepper. You will need a good handful of scallions. Some are larger than others so the amount is non-specific. If they are tiny, use an entire bunch; if they are large you might use 6 or so. Cut the scallions into lengths that will fit along the width of the width of the roast, then cut the scallion lengths in halves, lengthwise. Cut the bell pepper into very thin strips along their lengths.
Prepare a piece of foil large enough to fit into a 9 x 13-inch baking dish, ensuring it is long enough to fold and wrap the roast. Use two thicknesses if thin foil, or one if using heavy duty foil. Press the foil into the dish, leaving the rest as overhang until needed. Place the roast carefully into the foil-lined casserole. Stuff lengths of scallion and bell pepper into the cuts in the meat, pressing the vegetables in as much as possible. Cover the roast with at least 1 cup of barbecue sauce. Close the foil around the roast, completely closing it into a packet. Set the pan into the oven and allow to roast for about 2½ hours. Take care when opening the packet, as there will be copious amounts of steam. The roast will be fork-tender and have plenty of "gravy" around it. Great served with mashed potatoes or rice.
~~~~~~~~~~~~~~~~~~~~
For these shrimp - or scallops - not much time is needed, either for the marinating time or the grilling time. Over-grilled shrimp or scallops become rubbery. This marinade is so easy and delicious and requires so little time to flavor the seafood.
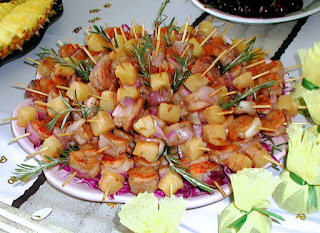
The photo below is of little individually skewered shrimp, along with some red onion and one chunk of pineapple per tiny skewer. These were for a party and I used a half red cabbage as the vehicle to hold all the little skewers, poked into the cabbage "dome" evenly.
Grilled, Marinated Shrimp or Scallops
 |
| Individually skewered shrimp and pineapple |

 Recipe amount is up to you! The marinade is plenty for a goodly amount.
MARINADE:
1 can (6-ounce) unsweetened pineapple juice
¼ cup (2 ounces) soy sauce
¼ cup (2 ounces) olive oil
Shrimp, or scallops as needed
Mix the marinade ingredients together in a zip top bag. Use individual bags or bowls with tight fitting lids, keeping shrimp and scallops separate. Either mix marinade and divide between bags or bowls, or if amounts of shrimp and or scallops is large, made 2 recipes of the marinade, placing each amount into a separate bag/bowl.
Allow either shrimp or scallops to marinate up to an hour or so, maximum, then have a preheated grill ready. The shrimp can be skewered onto long skewers. The scallops do better on a grill pan. They tend to fall off individual skewers. If you prefer to have them skewered, use two skewers about ¼ inch apart and skewer them double to keep them in place.
Grill time is short. The shrimp are done as they turn pink, about 3 to 5 minutes per side. The scallops may take just a little longer, depending on their size. Watch for when they begin to show little cracks in the surface. The shrimp are also great if skewered alternately with pieces of onion and chunks of unsweetened pineapple before grilling.
~~~~~~~~~~~~~~~~~~~~~~~~~
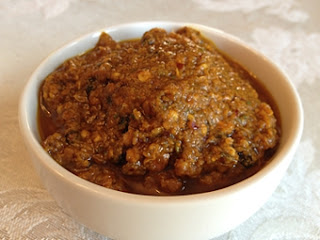
Coming to the third recipe, below, for Thai Red Curry Paste, this is the precursor of the Red Curried Chicken Kebabs recipe. Do not feel you must adhere strictly to this recipe. I realize not everyone has kaffir lime leaves or galangal, and the amount of dried red chilies is totally up to the individual. Use what you have. This makes a delightfully flavored sauce. It is unsalted, so salt must be added into the individual recipe.
Thai Red Curry Paste
 |
| Thai Red Curry Paste |

Makes about 8 tablespoons
2 - 6 dried red chilles
2 shallots, cut in small chunks
1 teaspoon black peppercorns
2 teaspoons cumin seeds
1 tablespoon coriander seeds
1 teaspoon salt
2 teaspoons lemon or lime rind, chopped
1 teaspoon galangal powder (or use 1-inch fresh ginger)
3 - 4 cloves garlic
6 - 8 tablespoons oil, as needed
1 teaspoon turmeric
2 teaspoons paprika
1 - 2 Kaffir lime leaves, if available
Blend all ingredients together. This may take a while and a lot of scraping down the blender container, and require more oil (or water) to get it to blend properly. If you want a smoother paste, grind all the dry spices first, then add in the wet ingredients to finish off the process.
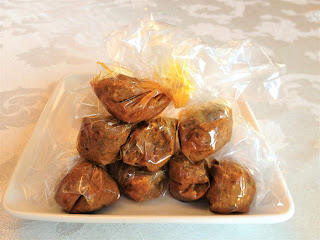
Use what is needed for the recipe, then place individual recipe portions into small sandwich bags with the flap. Tie off the top and freeze until needed, as shown here.
~~~~~~~~~~~~~~~~~~~~~
Red Curried Chicken Kebabs are just flat-out delicious. I have been making these for years and they are a hit each time. I hope they give you the same pleasure!
Red Curried Chicken Kebabs
| Red Curried Chicken Kebabs |
2½ tablespoons Thai Red Curry Paste (recipe above, or use store-bought)
½ cup vegetable oil (I use olive oil or coconut oil)
2 teaspoons Kosher salt, or to taste
2½ pounds skinless, boneless chicken breasts, cut into 1-inch cubes
½ each of red and green bell peppers, cut into 1-inch squares
1 red onion, cut into 1 inch single squares
Minty Yogurt Sauce
¾ cup plain low-fat yogurt
¼ cup mayonnaise, or low-fat mayonnaise
1 tablespoon honey
1 tablespoon fresh lime juice
1 tablespoon fresh mint, finely chopped
In a large bowl, mix the curry paste with the oil and 2 teaspoons of salt. Add the chicken cubes and toss to coat. Let stand at room temperature for up to 2 hours or cover and
refrigerate overnight.
Light a grill. In a medium bowl, whisk the yogurt with the mayonnaise, honey, lime juice and mint and season with salt. Set aside or refrigerate until needed.
Thread the chicken onto 10 skewers, threading a chunk of red or green bell pepper and/or red onion squares between the cubes. Grill over moderately high heat, turning frequently, until lightly charred and cooked through, about 8 minutes. Serve the kebabs with the minty yogurt sauce on the side.
NOTES: If you like pineapple, this could be another addition to your skewers.
These could be made as whole boneless skinless chicken breast or thigh sections. As the recipe states the chunks should be about 1-inch cubes, it might also be good to cut the chicken breasts in half lengthwise, so they are not so thick, and will get more marinade onto the surface area. The timing for grilling bone-in chicken will be much longer - about 25 minutes, or until an instant thermometer reads 165 degrees in the thickest part of the meat.
Anything that can be grilled, can also be broiled. If the weather is not cooperating, or it's the wrong season, try broiling.
The meal is delicious with a nice white wine, Chardonnay, Pinot Gris or Torrontes would be my first choices.
My passion is teaching people how to create a harmony of flavors with their cooking, and passing along my love and joy of food, both simple or exotic, plain or fancy. I continue my journey in ethnic and domestic cuisines, continuing my journey to explore diverse culinary experiences and hopefully to start you on a journey of your own. Join me also at A Harmony of Flavors on Facebook, and Pinterest.

No comments:
Post a Comment