Translate

Saturday, January 21, 2017

Because we All Need Another Dessert

Yes, I know. We just finished with holidays. Everyone wants to lose weight. So why am I posting dessert recipes?

I suppose everyone likes a good dessert. And if you don't, I am not sure I can understand that. But I am open minded ;-)
Pound Cake, Bread Pudding, Coconut Milk
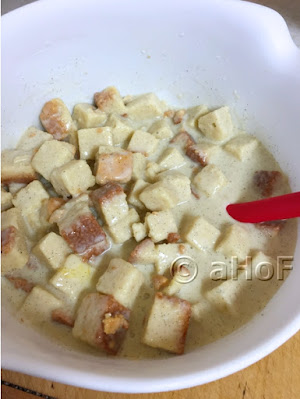
Pound Cake Bread Pudding with Coconut Milk

Pound Cake, Bread Pudding, mixing
Pound Cake Bread Pudding just mixed up
The thing is, I just posted my first Newsletter a few days ago, and in it I offered a "bonus recipe," meaning it is not featured on my website or blog site. Granted, it is not really my own recipe, but one found all over the internet. Why then, you might ask, did I feature it in my first Newsletter? Well, the fact is that I like pound cakes, but my husband is not really fond of them. To me, they are rich and plenty sweet and great all on their own. For my husband there is not a cake anywhere that is not made better with icing or some other topping. I made that pound cake recipe before posting it in my Newsletter, to make sure it worked out as good as it sounded. And it did work out great. I loved it. As is. My husband ate it with some leftover caramel topping. 

The reason that I posted this recipe is that if you run into this situation where you have a whole big pound cake and not many takers, there are multitudes of options for using it up. 

One of the ideas that I just couldn't pass up is bread pudding. I have written this before, but I absolutely love bread pudding. I am very hard pressed to find one I don't like, and there are all kinds out there. When I lived in Louisiana, where bread pudding is something like the "State Dessert," I ate it every single time I went out to eat. Okay a slight exaggeration, but only slight, mind you. Last night, as we were coming around to about a third of the cake left, it seemed like my husband might just be at the end of his pound cake rope. And I felt I just had to try making the remainder into bread pudding. 
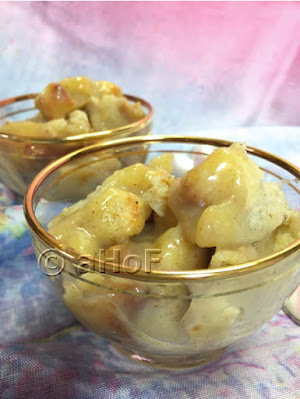
Pound Cake, Bread Pudding, Coconut Milk
Pound Cake Bread Pudding with Coconut Milk  
Again, you may think, "Isn't the pound cake rich enough, already?" And I would answer, "Yes, it certainly is." Still. I just had to try it out. Today I set about doing just that. I used as a basis my original Bread Pudding recipe (find that one here) to see what I did there. My bread pudding is terribly rich, as I always use heavy cream for the mixture. It can be substituted with milk, or 2%, half & half or any combination. While I probably should use something less heavy with fat, I unapologetically state that I have yet to even try that. But as I was perusing my bread pudding recipe, I thought about substituting the heavy cream with unsweetened coconut milk. The pound cake is dense, so I felt that it would be far more thirsty, given a little time, than bread cubes. I used 2 (13.5-ounce) cans of coconut milk, which equaled more liquid than the original recipe's 3 cups. I used the same amount of eggs and lightened up on the sugar, since the cake is already sweet. Just because, I also added 2 ounces of white chocolate. I figured it was already over-the-top, so what could another 2 ounces do? 

It baked up perfectly. I made the same Bourbon Sauce (found here) I usually make to put on top. I am sure it is great on its own, but I love this sauce. And here is what I did:

Pound Cake Bread Pudding with Coconut Milk

Makes one 13 x 9-inch pan
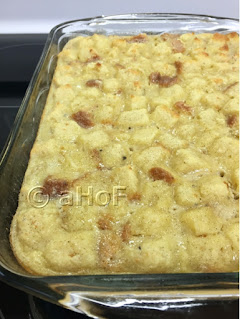
Pound Cake, Bread Pudding, Coconut Milk
Pound Cake Bread Pudding with Coconut Milk


1.5 pounds plain pound cake, cut in 1/2-inch cubes
2 (13.5-ounce) cans unsweetened coconut milk (or regular milk, half & half, cream or any mixture equaling about 27 ounces (about 3¼ cups)
1/4 cup sugar
¼ cup bourbon or rum (or substitute milk)
2 teaspoons vanilla extract
½ teaspoon salt
5 large eggs
2 ounces good quality white chocolate, chopped, optional

Preheat oven to 350 degrees. Spray a 13 x 9-inch pan with cooking spray, or grease with butter and set aside.

In a large bowl, combine the coconut milk, sugar, bourbon. vanilla, salt and eggs. Whisk briskly to combine. Pour in all the pound cake cubes and mix. Allow the mixture to set for about 10 minutes. Fold in the white chocolate. 

Pour into the prepared baking dish. Bake the bread pudding for about 30 minutes, or until a knife inserted halfway between the center and edge comes out clean. If the center is a little jiggly  it's okay, as residual heat will set it up just fine. 


My passion is teaching people how to create a harmony of flavors with their cooking, and passing along my love and joy of food, both simple or exotic, plain or fancy. I continue my journey in ethnic and domestic cuisines, continuing my journey to explore diverse culinary experiences and hopefully to start you on a journey of your own. Join me also at A Harmony of Flavors on Facebook, and Pinterest.

Thursday, January 19, 2017

Quick and Easy No Bake Pie

In general, I am not known for "quick and easy" recipes. I like unusual ingredients, new spices most have never heard of, and unusual combinations. For these reasons I really get into Indian cooking.

Still, on occasion, I just want something quick and easy. I also get tired of cooking at times, or just lack inspiration. 
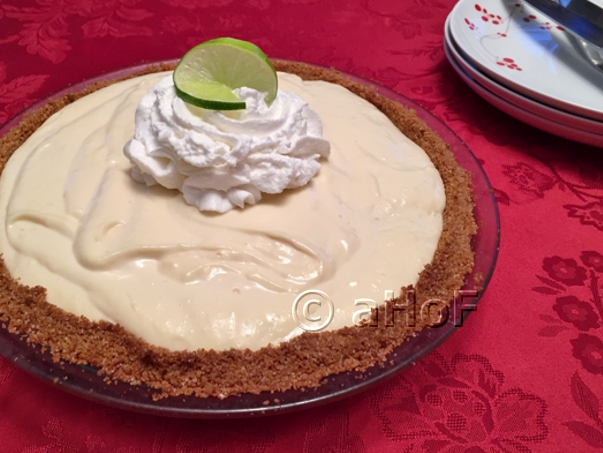
No-Bake, Cheesecake, Pie, dessert, easy dessert, recipe
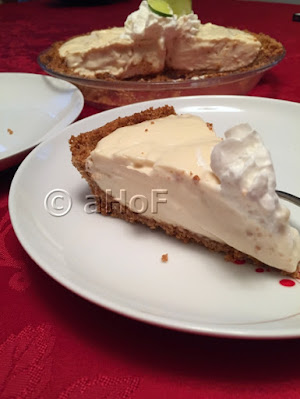
No-Bake Cheesecake Pie


Long, long ago, when I lived in Guatemala, I did not have the sheer volume of spices (though I did have quite a few, plus herbs growing in the garden), or the availability of foods as they are today. When you come down to it, we didn't have internet, nor even a phone, much less a cell phone or gasp! a Smart Phone. We still played 45 or LP records or cassette tapes. We never even owned an 8-track. And for all you youngsters out there who have never known life without internet or cell phones, believe me, there was a time! And during that time, I also did a lot of cooking and baking, but far more simply.

So on occasion, and since I had a lime tree in the backyard, I would make this mixture. It is very simple:
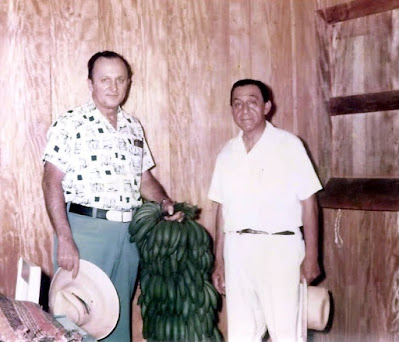
Dad, Father-in-Law, bananas
My Dad & my Father-in-Law with a whole cluster of bananas
  • a can of sweetened condensed milk
  • a can of evaporated milk
  • lime juice
Originally, I made it to serve with bananas, which were very plentiful. My father in law brought us a whole hanging cluster of the fruits, which would stand in the kitchen, ripening slowly. The kids ate them as they ripened. Just placing the two milks into a blender and adding in lime juice until the mixture thickened, was a great topping for fruit, and bananas in particular. Later on, back in the US, I thought it might be great to add in a block of cream cheese. And, voila! a pie was born.
 
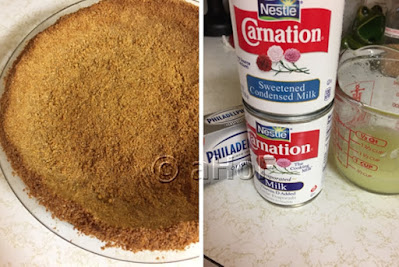
Graham Cracker Crust, Simple Ingredients
Graham Cracker Crust and Simple Ingredients

All that said, I have never been terribly fond of bananas, though with so many around, I occasionally ate one. This thickened creamy mixture made them more palatable. With the addition of cream cheese, it would solidify enough to actually cut into sections, and logically, a graham cracker crust was the last needed ingredient. So I have actually been making the first mixture for 40 years at least, and for 35 of them, I have gone the extra step of using cream cheese. But, I never took a photo!

I made this again in October last year and finally got the photos I needed, but had been busy with many other things and just wasn't blogging as steadily as usual. Here I am, finally, with the recipe for this delicious pie. I would imaging that one could conceivably lay banana slices into the bottom of the crust, before pouring the creamy mixture in, and then this would be a No-Bake Banana Cream Pie! For another variation, use chocolate graham crackers. I am sure lemon juice would work just as well, but I have only used lime juice.

No-Bake Cheesecake Pie
No-Bake, Cheesecake, Pie, quick recipe
No-Bake Cheesecake Pie

Makes one 9-inch pie 

1½ cups finely crushed graham cracker crumbs
⅓ cup melted butter
3 tablespoons sugar
1 (14-ounce) can sweetened condensed milk
1 (12-ounce) can evaporated milk
½ cup lime juice 
1 (8-ounce) block cream cheese

Preheat oven to 350. Mix the crumbs, butter and sugar together and press into bottom and up the sides of a 9-inch pie plate. Bake the crust for about 8 to 10 minutes, until golden. Cool completely before filling.

Place the condensed and evaporated milks into a blender container. Blend briefly to combine. With blender running, add the lime juice and soon the mixture will begin to thicken. Add in the block of cream cheese and blend until completely combined. Pour this mixture into the pie shell and chill until completely set, at least 1 hour. 


My passion is teaching people how to create a harmony of flavors with their cooking, and passing along my love and joy of food, both simple or exotic, plain or fancy. I continue my journey in ethnic and domestic cuisines, continuing my journey to explore diverse culinary experiences and hopefully to start you on a journey of your own. Join me also at A Harmony of Flavors on Facebook, and Pinterest.
Wednesday, January 18, 2017

Aloo Parathas or Potato Stuffed Indian Flatbreads

Most of the second half of 2016 I was focused on Indian foods. In the main, this came about because:
  1. My husband and I love Indian food.
  2. We invited some friends to a finer Indian dinner.
  3. We invited more friends to another fine, and bigger Indian dinner.
I made so many things during that time period, that it became difficult to even find a non-Indian recipe to post here. I didn't want it to seem that Indian was the only cuisine I was interested in, but from July on, it seemed to be the highlight. 
 
Aloo Parathas, potatoes, stuffing, flatbread, Indian recipe
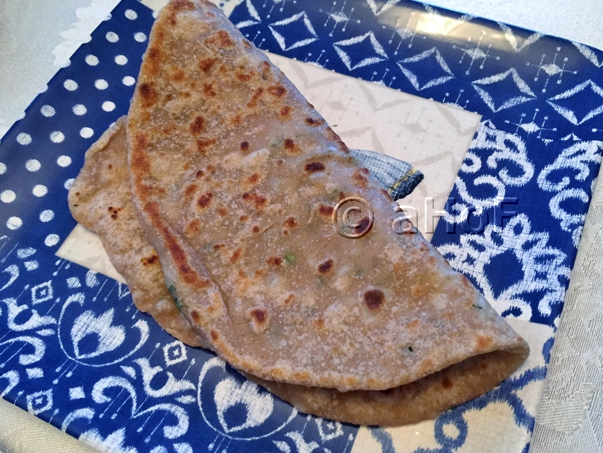
Aloo Parathas

During this time, while I revisited some recipes we already know and love, I also got into looking through Indian blog sites and started copying down recipes I wanted to try. I have mentioned before that I prefer to make things in a better order, using less pots, pans or utensils if possible. I cook alone, and I am sole cook and bottle-washer. I realize that the Indian blogs I read are mostly written in English as a second language. Partly due to this, and I am sure, partly due to a method handed down from mother to daughter, using older methods and less equipment, the recipes can be very clumsy to a modern cook in the USA.  

When I begin with a recipe new to me, I first read and re-read it, setting things in order (to my mind). Then I check at least 6 or more (sometimes up to a dozen!) other recipes in the blog-world, just to check what others do, and most particularly when the recipe is ethnic particular to a country or region. Then I sit to compose what I think would work best for me; flavors & method. And then I give it a try. Sometimes with fantastic results and sometimes not so fantastic, meaning, back to the drawing board.

So it was with Parathas (see my blog of July 4, 2016), an Indian flatbread. Parathas are usually about 6 to 8 inches in diameter, thicker than chapatis (similar to a true, hand-patted corn tortilla in size and thickness) and thinner than Naan breads, which most people are familiar with these days and more akin to soft pita bread in thickness. When I made them the first time, the recipe called for "whole meal flour", which I took to mean whole wheat flour. I grind my own wheat berries here at home, so I also have more of the bran left in whole wheat flour than you'd get elsewhere. The Parathas were very dark in color and certainly lacked tenderness. So I did more research, coming up with some new facts.
  • When an Indian recipe calls for "wholemeal" flour, they are referring to a type of flour available in India, but not everywhere in the USA.
  •  To approximate their wholemeal flour, combine half whole wheat and half all-purpose flour.
  • To be even more authentic, pass the whole wheat flour through a very fine sieve to remove even more bran from the flour, and THEN measure it.
For the remainder of the recipe, I sort of played around, because making something new often requires practice. There are many methods for forming and cooking the parathas, so you kind of have to just test out what works for you, in your own kitchen, with your particular utensils.

My husband was not exactly enchanted with the plain parathas, even after I made them a second time, with great success. He's not crazy about plain flour tortillas either, unless they are stuffed with things for a taco. To make them more interesting (and for me to try a new recipe!), I decided to try stuffing the parathas. There are oodles of recipes out there on various fillings for the parathas, and I went with a common one - potatoes. Of course it is not just plain potatoes; they are mixed with herbs and spices and taste great all on their own. And this time, my husband loved them. And, I made them again for the first of the two Indian dinners mentioned above. 

Making parathas, Stuffed Parathas, step by step
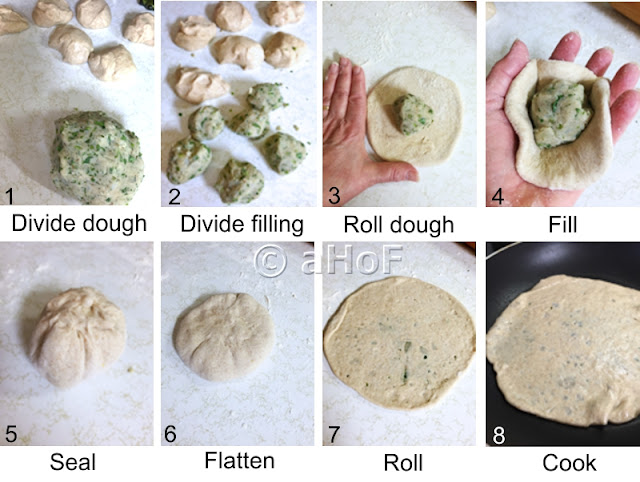
Making the Stuffed Parathas

Problem is, they really have to be made right before eating. They taste good reheated, but lose some of their delicate tenderness after reheating. When I had what seemed like 20 things all going at once (only a slight exaggeration), it made it difficult to squeeze in the time for making the parathas. I did have them all stuffed and rolled out. All I had to do was cook them. This is a relatively quick process, but they are done one at a time. I could have pulled out my big griddle, but there just wasn't enough room, what with everything else out in preparation for the dinner.

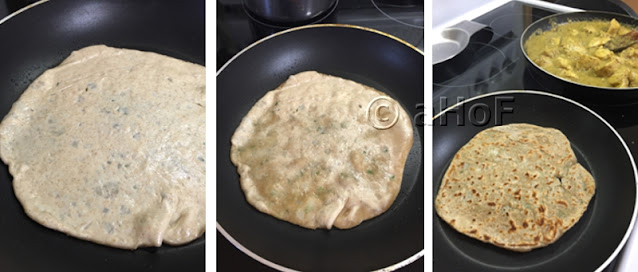
Looking at the sequential photos above, It is a simple enough procedure. The dough is flexible and stretchy. It really doesn't stick to the counter - a little cooking spray (I found) is better than adding more flour to roll them out. The only real trick is stopping before rolling them too thinly, and this is just a matter of getting accustomed to the feel of the dough.

Cooking, Parathas, flatbread, skillet bread
Cooking the Parathas


The recipe itself is simple. Just remember that the dough needs to rest at least 30 minutes before using it, so plan accordingly. If you boil the potatoes beforehand, so they can cool while you make the dough, then you can work with the potatoes while the dough is resting. It all works out easily. And these are truly scrumptious. The one more unusual spice used in this recipe is Amchur powder, so check out this post of May 2014 to read about it.

Parathas, Aloo Paratha, potatoes, flatbread, Indian
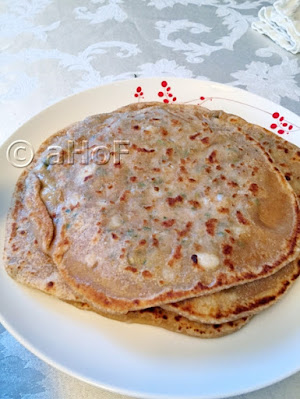
A Stack of Parathas

Aloo Parathas


Makes 6 or 8

PARATHA DOUGH:
1 cup whole wheat flour, passed through a fine sieve
1 cup all-purpose flour
1 teaspoon salt
2 tablespoons melted ghee or vegetable oil
¾ cup water

FILLING
2 medium potatoes, boiled whole
¼ teaspoon salt
½ teaspoon crushed cumin seeds
1 green chilie such as Serrano, minced
2 tablespoons fresh cilantro, minced
½ teaspoon Garam Masala
½ teaspoon amchur powder (or a squeeze of lime juice)

Set potatoes to boil in a saucepan with water to cover. Make paratha dough: combine the two kinds of flour, and salt. Add in the ghee and the water and stir to form a dough. Knead the dough for 2 or 3 minutes. Cover and set aside for 30 minutes (or refrigerate if longer).

Once potatoes are cooked through, drain and set aside to cool to room temperature. Peel the potatoes, discarding skin. Set potatoes in a bowl and lightly mash. Add in all the remaining filling ingredients and stir well. The potatoes do not need to be mashed fine. Once mixed, divide the mixture into
6 or 8 equal pieces and form the pieces into a ball.

Divide the paratha dough into the same amount (6 or 8) of equal pieces as the potato filling. On a floured surface or one sprayed with cooking spray, roll out one paratha ball to about a 5-inch round. Hold the paratha in one hand and set one ball of potato mixture in the center. Bring up all the edges of the dough to encase the potato mixture and press to seal. Set this ball back on the surface and flatten with hands, then roll out the paratha to about 8-inches (if making 6 parathas) or smaller 6-inches if making 8.

Brush oil or ghee in a hot skillet and place one paratha in the pan to cook until one side is deep brown in spots. Brush the uncooked top with oil or ghee and flip over to cook for about another minute until the opposite side has dark spots. Remove and repeat for all the parathas.

Best served hot.


My passion is teaching people how to create a harmony of flavors with their cooking, and passing along my love and joy of food, both simple or exotic, plain or fancy. I continue my journey in ethnic and domestic cuisines, continuing my journey to explore diverse culinary experiences and hopefully to start you on a journey of your own. Join me also at A Harmony of Flavors on Facebook, and Pinterest.
Sunday, January 1, 2017

Wonderful Cran Raspberry White Chocolate Scones

"Pat-a-Cake, Pat-a-Cake . . ." is what popped in my mind as I was readying my scones for the oven this morning.
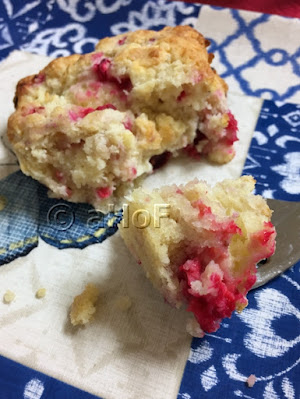
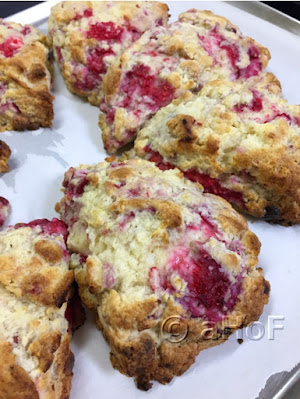
Cran-Raspberry, White Chocolate, Scones, breakfast
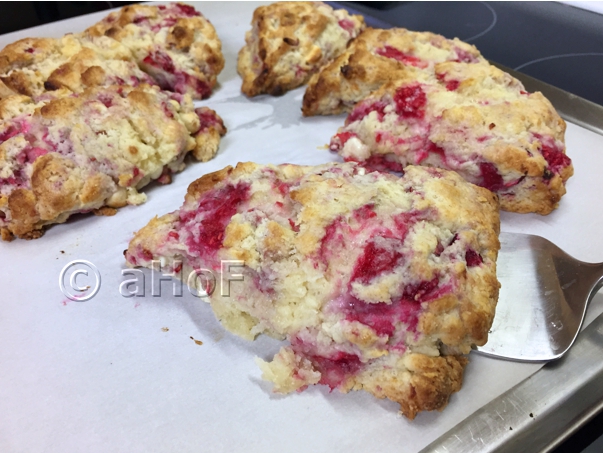
Cran-Raspberry White Chocolate Scones


Happy New Year's Everyone! Perusing Facebook early this AM, I got a reminder of a post I had shared one year ago for Red Berry and White Chocolate Scones. The recipe was found on a site called www.orgasmicchef.com, though the recipe itself was from a guest poster - another blogger whose site is called www.notquitenigella.com. The recipe had things I just love: raspberries, fresh cranberries and white chocolate. The fact that these things were made into scones was a no-brainer. So last year I shared the recipe on FB when it came around, and then managed to forget all about it. 

Till this morning. When I shared the recipe again. But this time the difference was that I actually had fresh cranberries in the fridge, frozen whole raspberries in the freezer and white "chocolate" baking chips in the pantry!

Just because I find a recipe that sounds amazing, does not mean I follow the recipe. I seem to have a built-in need to tinker. Tweak. The only part of the recipe that I followed (sort of) is with the amounts for the three ingredients   already mentioned. Even those were altered a tiny bit. When the first issue of BAKE from scratch magazine came out and it featured scones (which I just love), I was hooked. Their method was quite different from what I had done previously in my recipes for scones, and I liked the way they came out. And yes, I actually did follow (some of) the recipes in that magazine - just to see how they came out. They sort of have a basic main ingredient list and then flavors are added. There is some variation in the basic ingredients, mainly if there is a need to compensate for a moist addition or dry addition. And then there is method . . . . . !

The magazine calls for:
  • starting in a food processor
  • then moving the mixture to a bowl to add in the add-ins, 
  • and then to a cake tin to form the circle, 
  • then they are turned out onto the counter to cut them apart. 
😧

I mean, really??? And that's not counting the measuring cups and things and the knife or bench scraper for cutting, etc.

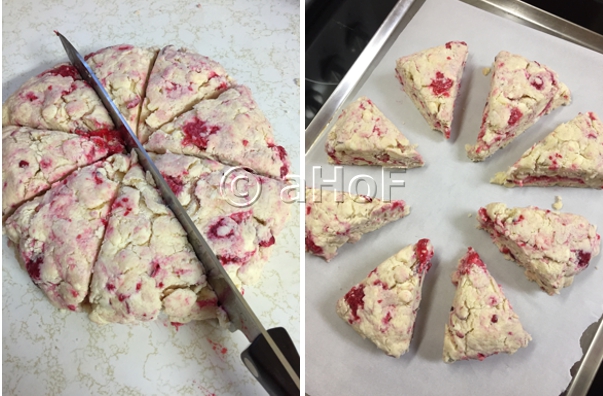
Pat out scone shapes, cut and bake
Pat out then cut and onto pan to bake
I once remarked to my sister-in-law that you can always tell when a person has "staff" to help out with washing the pots, pans, bowls and things. They will tend to use every piece of equipment in the kitchen, just because they can - and then the "help" will clean up afterwards. I am a "one-woman-show" here, and I try to utilize the least amount of things I would otherwise have to wash afterwards. I mix my scones up in a bowl, cut the butter in with a pastry blender. I pat it out on the counter top [at this point is where the "Pat-a-Cake, Pat-a-Cake . . ." popped into my head] to form the round 8-inch circle. In the end I have one bowl, a pastry blender, a knife and the counter to clean. Oh, and maybe a measuring cup and spoon. 
frozen Cranberry, Raspberry, White Chocolate, Scones
Cran-Raspberry White Chocolate Scones

Anyway, back to making these scones. I opted to use the basics from the "BAKE from scratch" magazine, mainly:
  • 2 cups all-purpose flour
  • 3 tablespoons sugar
  • 1 tablespoon baking powder
  • 2 teaspoons salt (which I find way too much, personally)
  • 5 tablespoons unsalted butter
  • 1 cup heavy cream
A friend had given me some fresh raspberries over the summer, which she had frozen individually on a sheet, then packaged. I'd not yet gotten around to using them, so today was the day. I had some fresh cranberries in the fridge, also which I had not gotten around to using. I had no actual white chocolate, but I had white baking chips, so those would have to do for now. And all I can say is Wow! The scones were fantastic. That said, they were still a little soft in the middles even after the 15 minutes at 425 degrees. I might have to lower the temp and let them go a little longer next time - but for now I have absolutely no problem with how they came out.

Here is my recipe:


Cran-Raspberry White Chocolate Scones


Makes 8 scones 
Cran berry, Raspberry, White Chocolate, Scones
Cran-Raspberry White Chocolate Scones


¾ cup individually frozen raspberries
¼ cup chopped fresh cranberries
½ cup white chocolate in small chunks (or white baking chips)
2 cups all-purpose flour
3 tablespoons sugar
1 tablespoon baking powder
½ teaspoon cream of tartar
1¼ teaspoons salt
5 tablespoons cold, unsalted butter
1 cup + 1 tablespoons heavy cream

Preheat oven to 425 degrees. Place a piece of parchment on a baking sheet. Set aside.

Measure out the chopped cranberries and set aside. Measure out the frozen raspberries. Cut them in half if preferred. Set aside. Measure out the white chocolate and set aside.

In a large mixing bowl, combine the flour, sugar, baking powder, cream of tartar and salt. Stir to combine. With a heavy pastry cutter, or two knives or fingers, cut in the cold butter. If doing this with fingers, cut the butter into little cubes, then work quickly so as not to heat the butter too much. 

Mix in the reserved cranberries, raspberries and white chocolate. Stir to distribute. Do not mix too much. With a fork, toss the mixture lightly while drizzling in the heavy cream. Once the cream is all added, continue tossing and scraping sides until most of the mixture is moistened. Do not beat. Spray a clean counter top with cooking spray and turn out the scone mixture. Press and pat the mixture together ["Pat-a-Cake, Pat-a-Cake . . ."] to form an 8-inch circle. Use a long knife and cut across the circle four times, creating 8 scones. Using the knife, separate and lift each scone to the parchment lined baking sheet, setting them at least 1-inch apart.

Bake the scones for 15 minutes, until browned and set. 


My passion is teaching people how to create a harmony of flavors with their cooking, and passing along my love and joy of food, both simple or exotic, plain or fancy. I continue my journey in ethnic and domestic cuisines, continuing my journey to explore diverse culinary experiences and hopefully to start you on a journey of your own. Join me also at A Harmony of Flavors on Facebook, and Pinterest.
Disqus