Translate

Showing posts with label Indian Food. Show all posts

Saturday, June 17, 2023

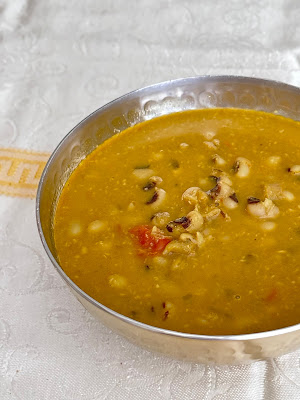
Black Eyed Peas Indian Style

I cannot believe I'm heading on a year of no posts. Still, hoping this will be of interest. 

In all of my life, despite trying all sorts of foods from all over, I have never once tried to make black-eyed peas. I believe i tasted them once, as part of "Texas Caviar" served at a function I was attending. In that mixture, the whole thing was stellar, but I could not pick out one flavor on its own. 
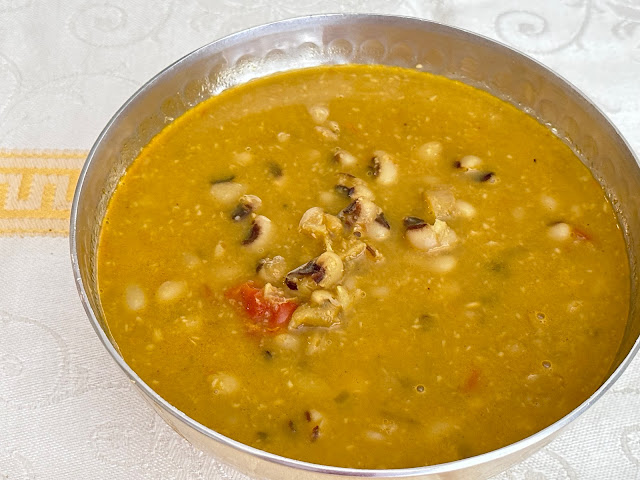
Alsande Tonak, Black-Eyed Peas, Curry
Alsande Tonak or Black-Eyed Pea Curry


Then, rooting around the internet for Indian recipes, I cam upon one called Alsande Tonak, a recipe from Goa. I cannot now place where I found this recipe, yet there are many of them out there to peruse, should you be a "comparison cook," like me. 

I promptly went out and bought some black-eyed peas to try out this recipe, and it was a hit with both my husband and I.

Caveat: 

So many Indian recipes call for using (as in the recipe I used to create my own) 12 or 13 dry red chilies in making the masala, then another teaspoon of hot red chili powder later on. If this is your thing, more power to you! 

While I do like some heat, I would never tolerate that over abundance of a good thing. My poor husband would likely perish at the first taste. He's not one for chili heat at all. So, under this restriction, I scaled back the whole red chilies to 1 and eliminated the chili powder later. 

About the Masala**

Most masalas require toasting each spice separately first, and setting them to cool, then grinding. This masala is going to be toasted later, so the first part can be avoided. Secondly, the masala is more than is needed for the recipe, so you will have some left for another time. Or, double the remainder of the recipe and use all this amount of masala.

About the Coconut***

The very best is having fresh coconut in this recipe. Many supermarkets these days do carry it in the freezer section. Those in my area do not, so I get frozen bags of it when I go to the Indian grocery.

But if you have no access to fresh coconut, use unsweetened dry coconut, about 1/4 cup, and add it to the spices to grind for the masala, then use it as directed for the masala.


Alsande Tonak

(or Black-Eyed Pea Curry) 

Alsande Tonak, Black-Eyed Peas, Curry
Alsande Tonak
Black-Eyed Pea Curry


1/2 pound black eyed peas, soaked overnight
2 fresh tomatoes, chopped
1 small onion or shallot, chopped
2 cups water

TONAK MASALA:
3 whole cloves
1-inch cinnamon stick
3 tablespoons coriander seeds
1/2 teaspoon black peppercorns
1 dried red chili, de-seeded, broken, for less heat
1 1/2 teaspoons fennel seeds
2 - 3 petals of a star anise
2 teaspoons white poppy seeds, optional
----------
1/2 teaspoon turmeric
1/4 teaspoon nutmeg

1 tablespoon cooking oil
1 small onion or shallot, chopped
3 - 5 garlic cloves, minced
3/4 cup frozen grated fresh coconut*** (see above)
3 - 4 teaspoons of the Tonak Masala** (see above)
1 teaspoon of salt, or to taste

Drain the soaking water from the black-eyed peas. Put them in a pot with  the tomatoes, onion / shallot and water and bring to boil. Lower heat, cover and cook for 20 to 30 minutes. They should be quite soft. If not, cook a little longer. 

Meanwhile, make the masala: Take all of the whole spices and grind them to a powder, then add to the powder the turmeric and nutmeg. Set aside.

In a skillet, heat the cooking oil and cook the onion until just golden. Add in the garlic for a minute or so and stir. Add in the grated fresh or frozen coconut and continue to cook, stirring until the coconut is golden. Add in the 3 or 4 teaspoons of the reserved masala and cook, stirring until the masala is well heated through. Add the contents of the pan to the cooked black-eyed peas along with the salt and mix well. If they need more liquid, add more water, then cook until heated through, and serve with roti or rice.


My passion is teaching people how to create a harmony of flavors with their cooking, and passing along my love and joy of food, both simple or exotic, plain or fancy. I continue my journey in ethnic and domestic cuisines, continuing my journey to explore diverse culinary experiences and hopefully to start you on a journey of your own. Join me also at A Harmony of Flavors on Facebook, and Pinterest.

Saturday, June 11, 2022

New Indian Recipes on the Menu

Time seems to escape me these days, yet every so often there is a gathering that warrants a fresh look at my recipes to date, sometimes finding them insufficient, despite the fairly vast number. A month or so past, I entertained my grandson and his friend, who love Indian food. When we chatted, he'd said that the flavors of Indian foods are some of his favorites, though he usually eats very simply. So I created a dinner, not knowing his particular tastes, but hoped it wouldn't be too far out of his comfort zone - and it wasn't! They both ate like two very healthy young men should. I was pleased. 

For that meal, I made some of my more common favorites, Chicken Korma, edging outside the plain rice category with Barley Kichdi as one of the side dishes, and one of my all-time favorites, Palak Paneer, as the other. I also had no clue on their tolerance for heat, so all the dishes were made quite mild in deference to my husband, but I offered an array of chutneys with varying heat levels: Am Chutney or Mango Chutney (no heat), Dhania Poodina or Green Chutney (medium heat), Imli Chutney or Tamarind Chutney (a little heat), and Fresh Ginger slices in lime juice with Serrano pepper and salt, possibly the hottest). They went for the Green Chutney and fresh ginger, polishing them off!

menu, Indian dinner, recipes
Dinner Menu
So, when my son was recently married in Hawai'i, and his lovely bride just turned fifty years beautiful, I made a dinner to celebrate both events when they came to visit this past weekend. They both love Indian food as well, and I have made them many Indian meals already in past. Trying to come up with something to feed them that hasn't already been a part of many menus in past was becoming a challenge. Ana is sensitive to rice, so I wanted to keep that out of the menu completely. I thought of making the Barley Kichdi again, but they've had that more than once and well, not again. The same for the Palak Paneer, which is maybe one of all our favorites, but as I serve it with practically any special meal I felt it was time for a change. 

What to do, what to do?

I finally opted for Telangana Chicken, though I kept it mainly without any of the fiery, spicy heat in deference to Ana and my hubby. Instead of going for rice or even barley, I opted to make a very simple Tadka Dal using only Masoor (red lentils) and Moong (mung bean) dals, and adding a simple Tadka of sauteed mustard and cumin seeds, asafetida, shallot, ginger and garlic, and salt at the end. We all love dal/lentil dishes, so that one was a hit. I wanted to make Channa Masala, but my son objected. I went hunting for something to do with peas and found some few ways, such as Matar Masala (spiced peas), and somewhere i came across a recipe called Sookh Matar, though I can find no other reference to this terminology. I felt after reading that Sookh might refer to the same concept as "sabzi" meaning a dish cooked down to relative dryness - no sauce in it. I wanted more vegetables and also some color so added red bell pepper. It turned out fantastic whatever it may be called.


Matar Masala or Sookh Matar


Serves 6 to 8
Matar Masala (Spiced Peas)


1 large onion in thin half-rings
2 tablespoons coconut oil or sunflower oil, more if needed
--------
1 - 2 tablespoons coconut oil or sunflower oil
1 large shallot, chopped
3 cloves garlic, minced
2 tablespoons minced fresh ginger
1 red bell pepper, chopped
1/2 teaspoon cumin seeds
1/2 teaspoon asafetida

MASALA: mix together and set aside
1/2 teaspoon turmeric powder
1/2 teaspoon crushed coriander seeds
1/2 teaspoon Garam Masala
1/2 teaspoon black salt or regular salt
1/2 teaspoon amchur (dried green mango powder)
1/4 teaspoon black pepper
-----
1 bag (13 ounces) frozen baby peas

Saute the large onion in the oil, stirring very often and watching carefully not to burn, until the onions are a deep caramelized brown. Spread the onions on several thickness of paper toweling to blot and cool. This part can be made days in advance and refrigerated until needed.

Heat a skillet over medium to medium low heat and add in the 1 or two tablespoons of oil. Add in the cumin seeds and asafetida to sizzle for a few seconds, then add in the shallot, garlic, ginger and red bell pepper and saute gently to soften. Add in a tablespoon of water at a time, only if needed for the ingredients not to stick. Add in the masala ingredients and stir until fragrant. IF MAKING AHEAD, the dish can be made to this point, placed in a covered container and refrigerated for up to three days.

To finish the dish, bring the refrigerated mixture back to heat in a skillet, then add the peas with a tiny amount of water and heat them through. Once heated, add in the caramelized onion and stir in to heat through.


~~~~~~~~~~~~~~~~~~~~~

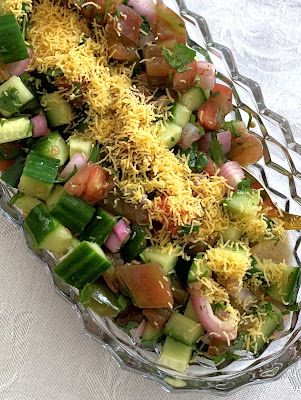
The other new item on the menu was a salad, something I had never created with an Indian meal, but this time I wanted some diversity. 😉 The most common I found was called Kachumber Salat, a combination of cubed cucumber, tomato and onion, seasoned with an array of possible spices and a touch of lime juice. I plan to mix a batch of the masala mixture to keep on and to sprinkle on tomatoes at any time - it was that good!

Kachumber Salat


Serves 6
salad, tomatoes, cucumbers, shallot, recipe
Kachumber Salat


1 cucumber, seeds removed if too large, cut in small cubes
1 - 2 medium tomatoes (I used heirlooms), in cubes
1 large shallot or 1 small onion, in cubes

MASALA:
1/2 teaspoon Chaat Masala
1/2 teaspoon black salt (or regular salt)
1/2 teaspoon crushed cumin seeds
-----
2 tablespoons fresh mint leaves, chopped finely
1/4 to 1/2 cup cilantro, chopped finely
2 teaspoons lime juice, or to taste
pinch chili in powder or crushed chili flakes

IF MAKING AHEAD, the only thing that can be done is mixing the spices together. The tomatoes and cucumber will go watery if done in advance. If raw onion or shallot are not tolerable, cut these ahead of time (up to 20 minutes) and set them into a bowl, covered with white vinegar. Drain and rinse before adding to the remaining ingredients and stir them all together well before serving.


My passion is teaching people how to create a harmony of flavors with their cooking, and passing along my love and joy of food, both simple or exotic, plain or fancy. I continue my journey in ethnic and domestic cuisines, continuing my journey to explore diverse culinary experiences and hopefully to start you on a journey of your own. Join me also at A Harmony of Flavors on Facebook, and Pinterest. 

Tuesday, September 24, 2019

A Keralan Breakfast

If you are new to this blog of mine, I must mention that I am way, way into Indian cooking. I love the flavors, the spices, the smells while cooking. I have yet to visit India, but I study regions and foods continuously. And I am always trying something new. Indian food has been a passion of mine, growing exponentially over the past 20 years. I try to stay as authentic as possible to recipes, including searching out new and/or unknown spices to try.

For those who have read this blog, I apologize for repeating myself. I just cannot help myself when it comes to Indian food!

For the past couple of years, I have had a couple of recipes setting on the back burner, so to speak. Most definitely of interest, but somehow I just never got down to refining a recipe of my own. These recipes are from Kerala, a state that runs down the southwest coast of India (similar to Chile, in South America). Apparently coconut trees are ubiquitous to the area, and Kerala is sometimes called Land of the Coconuts. Rice is another food found everywhere and at most meals. Not surprising then, that coconut and rice together play a huge part in the cuisine of this state. 
Vegetable soup, Ishtu, Indian food, Kerala, breakfast
Vegetable Ishtu

And so, we come to the point of this rambling monologue. The recipes I had been eyeing for a good couple of years were a Coconut Vegetable Stew, called Vegetable Ishtu (or Ishtoo), the locals' pronunciation of the British term of "stew." The stew looked so pretty with its white base and colorful vegetables. Plus, I just love coconut and coconut milk. The other recipe I was eying was one of the many, many possible accompaniments to this stew, called Appam, a bowl-shaped rice and coconut crepe. 

Vegetable Ishtu


Vegetable soup, Ishtu, Indian food, breakfast
Vegetable Ishtu
Serves 4 to 5 as an accompaniment

½ cup peeled, ¼-inch diced potato
½ cup peeled, ¼-inch diced carrots
½ cup frozen baby peas
½ cup cauliflower, in tiny florets, optional

GROUND MIXTURE:
1 tablespoon channa dal/desi channa dal
3 tablespoons raw cashews
1 tablespoon white poppy seed, optional
1 - 3 green chili peppers, seeds removed for less heat
1½-inch piece true cinnamon quill
2 whole green cardamom pods
2 whole cloves

TEMPERING:
1 - 2 tablespoons coconut oil
20 curry leaves
1 onion, chopped finely
1-inch piece fresh ginger, minced

1 can (14.5 ounce) coconut milk
½ -1 teaspoon salt, as needed

Heat a dry skillet over medium to medium high heat and toast the channa dal, stirring constantly, until deep golden. Set in a plate to cool. Toast the cashews briefly, stirring constantly, until they get some browned spots. Place into the plate to cool. Once cooled, put these and the remaining Ground Mixture ingredients into a blender container with ½-cup water and blend to a smooth paste. Set aside.

In a saucepan combine the cubed vegetables and just barely cover with water. Bring to boil, reduce to simmer and cook the vegetables until tender, about 15 to 20 minutes. While the vegetables cook, heat the skillet again and add in the coconut oil. Once hot, drop in the curry leaves to crackle a bit and add in the onion. Saute the onion until nice and soft, but not golden. Add in the ginger and stir, cooking just until fragrant. Add the reserved ground past mixture along with the vegetables with their water and the coconut milk. Add in the salt and taste for seasoning. Stir well and cover over very low simmer, to meld flavors.

~~~~~~~~~~~

Appam, huh?

Appam seems to be a generic term for a whole variety of possible iterations of the basic rice and coconut based bread-like accompaniments that run from thin and crepe-like to pancake thick and all sorts of variations. The terms are very confusing, because many places seem to term Appam and Palappam as the same thing. Then there is Vallayappam, which seems to be the same batter, except instead of thinning to crepe-consistency, this batter is left like pancake batter and made like pancakes, although without flipping them. There are also Idiyappam, where the batter is pressed through a device that results in strings that are bunched into an idli mold and steamed, as for idli. There are some variations that call for the addition of some vegetables and or onion. It seems, truly, that the variations are almost endless, when it comes to Appam.
Appam, Palappam, Indian food, breakfast, bread
Appam / Palappam

What all of this comes down to is the use of rice and coconut in a fermented batter. The batter is fermented, similarly to idli, whether by natural fermentation, the use of yeast or the use of a local fermented alcoholic beverage. In the making of idli, I have yet to have the batter actually ferment, so I end up using a bit of baking soda at the last minute. In the recipe I cobbled together for my Appam, I did use yeast, and the batter fermented beautifully, all bubbly and aromatic in the morning. My Appam (or Palappam) are a bowl-shaped crepe-like creation, and often are cooked until the underside is truly browned. I cooked mine to a bit less done: they were golden underneath, though nowhere approaching browned. They are delicate and soft and white and lacy. 

To make these, a rounded pan, like a small wok (called an appachatti), is used. The batter is poured into the center and quickly swirled, as for crepes, but with the batter going up the rounded edges, then pooling back down to the center. The center remains thicker and soft, while the outer edges become very lacy and a little crisp. As I do not own an appachatti, I used my smallest pan, an old All-Clad "non-stick" 8-inch pan. When I rotated the pan to allow the batter access to the sides, I had to be careful not to get the batter onto the inner rivets, as it would stick. So, my appams were a little lower on one side, but it made no difference at all.

The true recipe for Appam (of any variety) calls for the use of raw rice and fresh coconut. It can also call for additions of Poha rice (a flattened, dried, parboiled rice) or some previously cooked and cooled rice. Some recipes call for a cooked rice flour paste to be added also. As the batter should ferment, and I have no local Indian alcoholic beverage on hand (in the U.S. southwest), I used a yeast version and made a shortcut method that worked wonderfully well.


Appam / Palappam

Appam, Palappam, bread, Indian, breakfast, Kerala
Appam / Palappam

Makes about 20 (10-inch) Appam

2 cups plain white rice flour
1 can (14.5 ounce) unsweetened coconut milk
1½ cups water, plus more for adjusting
¼ cup pre-cooked, cooled white rice
3 tablespoons sugar
½ teaspoon instant yeast
¾ teaspoon salt

Eight hours before using the batter: Mix the coconut milk and water in a blender with the cooked rice, sugar and yeast, blend briefly, then add in the rice flour and starting slowly, blend the mixture to a fine batter. If it is too thick, add in water, ½ cup at a time, until just shy of crepe batter consistency. Pour into a large mixing bowl and cover with plastic film. Allow this to stand on the counter 8 hours, or overnight.

After 8 hours, the batter should be bubbly and yeasty smelling. Stir and add in the salt. If the mixture is still too thick (which is easy to determine once you make one or two), add more water, a little at a time.

Preheat a small, round-sided pan. I used an 8-inch (bottom diameter) skillet. Whatever pan is used, it should have rounded, flared sides. Once very hot, brush with a film of ghee or coconut whatever is needed to be able to very quickly roll the pan so the batter goes up the sides of the pan. Once done swirling, the remaining batter should pool in the center of the pan, while the edges become very lacy. It takes a few minutes at medium heat or higher until the edges begin to loosen. Once the appam is browned on the bottom, remove to a plate. Amount of browning is totally subjective.

Serve these appam with the Vegetable Ishtu recipe above, or (less authentically) with Sambar. It is also great with any chutney, or any meat or fish stew leftover from dinner. 


My passion is teaching people how to create a harmony of flavors with their cooking, and passing along my love and joy of food, both simple or exotic, plain or fancy. I continue my journey in ethnic and domestic cuisines, continuing my journey to explore diverse culinary experiences and hopefully to start you on a journey of your own. Join me also at A Harmony of Flavors on Facebook, and Pinterest.

Friday, February 22, 2019

Indian Street Food

It has probably been more than a year since I first came across mention of something called Pav Bhaji. The first word is pronounced "pao." It is a mushed up mixture of vegetables that is served on or with buns- and a huge pat of butter on top!
 
Pav Bhaji street food, India, Mumbai
Pav Bhaji

When I think of India and breads, I envision lots of flat breads, or Naan, which can be made as a flat bread or made with yeast. Never, though, had I come across a recipe for something that looked like a common bun, as we know them in the U.S. When I saw this recipe, it intrigued me, and for a while I meant to try it out, and then, as with many things, it got buried, and I never got back to it. 

Recently I met a young girl who hails from Mumbai. Anyone from India is of great interest to me, because while I am fascinated with India, Indians, Indian food, culture, etc., I have never been to India, nor eaten anything Indian outside of a few restaurants, nor have I ever had the pleasure of eating at an Indian household. So while my Indian restaurant visits have given me a baseline idea of the flavors involved, I am far removed from actual firsthand experience. Yet I do cook things Indian all the time, because the flavors are exceedingly high on my list of "most amazing flavors." 

So after meeting this young Indian girl, I asked her out to lunch, so I could pick her brain and get ideas - more firsthand. We talked of many, many different foods, and she asked if I had ever tried an Indian street food called Pav Bhaji. Well!
Pav Bhaji, street food, Mumbai
Pav Bhaji just cooked

When I got home, I was busy that day and the next, but finally got around to unearthing all my notes on that dish. Yesterday I put them into action. The dish consists of various parts. The vegetable dish, the main event, is made of mainly potatoes, with other vegetables such as green peppers and tomatoes. Other vegetables that can be added are things like cauliflower and /or peas. And while I have read that carrots are never found in the actual street-vendors' dish, they can be added if making it at home. I always look for more, so I used all these vegetables in my dish. As for the vegetable part of this dish, it can be made into a puree or it can be simply mashed with bits left in it. This is up to your own taste. I chose to mash, not puree my vegetables.

The next part is making or buying a Pav Bhaji Masala. The ingredients in this mixture are similar, but have variances, in the many recipes I looked at online. The spices that seem most common in this mixture are black cardamom, coriander and cumin seed, cloves, cinnamon, tej patta (Indian bay leaf), black peppercorns, aamchur powder (dried unripe mango powder), dried red chilies. Other things added in some recipes are fennel seed, turmeric, powdered ginger, star anise, asafetida and even curry leaves. Of course, the amounts will vary in all recipes, but if you choose to make your own Pav Bhaji Masala, here is my recipe:

Pav Bhaji Masala


Makes about ¼ cup

4 black cardamom pods, seeds removed, pods discarded
3 tablespoons coriander seeds
1½ teaspoons cumin seeds
1 teaspoon black peppercorns
2 dried red chili peppers (remove seeds for less heat), crumbled
3-inches cinnamon stick
6 whole cloves
2 tej patta leaves (do not substitute Bay Laurel leaf), crumbled
----------
1 tablespoon aamchur powder
1½ teaspoon ground turmeric powder
½ teaspoon black salt (or regular salt)

Place the first 8 ingredients into a hot, dry skillet over medium heat and stirring quickly, toast until fragrant. Pour out in a plate to cool, then grind to fine powder, adding in the remaining three ingredients, mixing well. Store in a clean jar with tight fitting lid in a cool, dark place for up to 3 months.

~~~~~~~~~~~~~~~~~~~~~~~~~~~~

The third part of the whole Pav Bhaji experience is the bread. The bread is supposed to be bun-like, made without eggs. The buns are halved and dredged through melted butter with some of the Pav Bhaji Masala on a hot griddle, then served either alongside or filled with the vegetable mixture. 

I have not made the buns, yet. I was making two kinds of breads yesterday, and did not have the time to make a third type of bread, but I will get to those at a later date. In the meantime, I (gasp!) bought some whole wheat dinner rolls to accompany the veggie mixture. 

The Pav Bhaji is then served with a pat of butter melting on top, chopped red onion and a wedge of lemon or lime on the side, as well as a green chutney. I had no green chutney made, so I went ahead without. For the first time, it was fine, as I wanted to really taste what this dish is like, without other distractions. All I can say is AMAZING! I loved this dish. I have no problem eating a vegetarian meal, and this was excellent.

Pav Bhaji

 
Pav Bhaji, street food, India, Mumbai
Pav Bhaji

Serves about 4

2 cups potatoes in small cubes (½-inch)
1½ cups green pepper, chopped small
1½ cups cauliflower, chopped into small bits
½ cup carrots in tiny cubes (about ¼-inch)
½ cup peas (I used frozen)
--------
½ - 1  (15 ounce) can petite diced tomatoes with juices
2 tablespoons Pav Bhaji Masala
2 teaspoons Kasoori Methi (dried fenugreek herb)
1 teaspoon Indian red chili powder (powdered chili peppers)
¾ teaspoon salt
½ cup cilantro, chopped
--------
1 - 2 tablespoons oil or butter
1 shallot, minced
2 cloves garlic, minced
1-inch fresh ginger, minced
2 green chilies, minced (omit seeds for less heat)
--------
4 buns, halved
butter, for buns
butter, to serve
red onion, chopped, for garnish
lemon or lime wedges  
Green Chutney

Place the first 5 vegetables into a saucepan and just cover with water. Bring to boil, then reduce to simmer and cook until the vegetables are soft and can be smashed without resistance.  If there is still a lot of water in the pan, drain off some of it, but some water should remain. Use a potato masher or a glass and smash the vegetables into a chunky mash.

Add to the pot of smashed veggies the tomatoes (amount is up to you), the Pav Bhaji Masala, the Kasoori Methi herb, Indian chili powder and salt and stir in. Stir in the cilantro.

In a skillet over medium low heat, saute the shallot, garlic, ginger and chilies in the oil until the mixture just turns golden, then pour this into the pot with the vegetables. Stir well.

To serve: Halve Pav Bhaji buns or dinner rolls. Melt some butter into the skillet and sprinkle in some of the Pav Bhaji Masala powder. Dredge the cut side of the buns in this butter mixture. Chop some red onion to serve alongside and set out lime or lemon wedges to squeeze over top. If you have some green chutney, serve this also. 

~~~~~~~~~~~~~~~~~~~~~~~~

Green Chutney (Dhania Poodina)

Green Chutney, Dhania Poodina, coriander, mint
Green Chutney or Dhania Poodina

Makes about 1 cup

1 cup (packed) fresh mint leaves
1 cup (packed) fresh cilantro
1 to 5 fresh Serrano peppers (remove seeds for less heat)
½ cup unsweetened coconut, optional
½ small onion or 1 large shallot
1 teaspoon sugar
¼ teaspoon cumin
¼ teaspoon salt
¼ cup lime juice, more, if needed

Place all the ingredients in a powerful blender and puree completely. Store in refrigerator, tightly sealed and use the chutney within three days.  


My passion is teaching people how to create a harmony of flavors with their cooking, and passing along my love and joy of food, both simple or exotic, plain or fancy. I continue my journey in ethnic and domestic cuisines, continuing my journey to explore diverse culinary experiences and hopefully to start you on a journey of your own. Join me also at A Harmony of Flavors on Facebook, and Pinterest.

Wednesday, January 18, 2017

Aloo Parathas or Potato Stuffed Indian Flatbreads

Most of the second half of 2016 I was focused on Indian foods. In the main, this came about because:
  1. My husband and I love Indian food.
  2. We invited some friends to a finer Indian dinner.
  3. We invited more friends to another fine, and bigger Indian dinner.
I made so many things during that time period, that it became difficult to even find a non-Indian recipe to post here. I didn't want it to seem that Indian was the only cuisine I was interested in, but from July on, it seemed to be the highlight. 
 
Aloo Parathas, potatoes, stuffing, flatbread, Indian recipe
Aloo Parathas

During this time, while I revisited some recipes we already know and love, I also got into looking through Indian blog sites and started copying down recipes I wanted to try. I have mentioned before that I prefer to make things in a better order, using less pots, pans or utensils if possible. I cook alone, and I am sole cook and bottle-washer. I realize that the Indian blogs I read are mostly written in English as a second language. Partly due to this, and I am sure, partly due to a method handed down from mother to daughter, using older methods and less equipment, the recipes can be very clumsy to a modern cook in the USA.  

When I begin with a recipe new to me, I first read and re-read it, setting things in order (to my mind). Then I check at least 6 or more (sometimes up to a dozen!) other recipes in the blog-world, just to check what others do, and most particularly when the recipe is ethnic particular to a country or region. Then I sit to compose what I think would work best for me; flavors & method. And then I give it a try. Sometimes with fantastic results and sometimes not so fantastic, meaning, back to the drawing board.

So it was with Parathas (see my blog of July 4, 2016), an Indian flatbread. Parathas are usually about 6 to 8 inches in diameter, thicker than chapatis (similar to a true, hand-patted corn tortilla in size and thickness) and thinner than Naan breads, which most people are familiar with these days and more akin to soft pita bread in thickness. When I made them the first time, the recipe called for "whole meal flour", which I took to mean whole wheat flour. I grind my own wheat berries here at home, so I also have more of the bran left in whole wheat flour than you'd get elsewhere. The Parathas were very dark in color and certainly lacked tenderness. So I did more research, coming up with some new facts.
  • When an Indian recipe calls for "wholemeal" flour, they are referring to a type of flour available in India, but not everywhere in the USA.
  •  To approximate their wholemeal flour, combine half whole wheat and half all-purpose flour.
  • To be even more authentic, pass the whole wheat flour through a very fine sieve to remove even more bran from the flour, and THEN measure it.
For the remainder of the recipe, I sort of played around, because making something new often requires practice. There are many methods for forming and cooking the parathas, so you kind of have to just test out what works for you, in your own kitchen, with your particular utensils.

My husband was not exactly enchanted with the plain parathas, even after I made them a second time, with great success. He's not crazy about plain flour tortillas either, unless they are stuffed with things for a taco. To make them more interesting (and for me to try a new recipe!), I decided to try stuffing the parathas. There are oodles of recipes out there on various fillings for the parathas, and I went with a common one - potatoes. Of course it is not just plain potatoes; they are mixed with herbs and spices and taste great all on their own. And this time, my husband loved them. And, I made them again for the first of the two Indian dinners mentioned above. 

Making parathas, Stuffed Parathas, step by step
Making the Stuffed Parathas

Problem is, they really have to be made right before eating. They taste good reheated, but lose some of their delicate tenderness after reheating. When I had what seemed like 20 things all going at once (only a slight exaggeration), it made it difficult to squeeze in the time for making the parathas. I did have them all stuffed and rolled out. All I had to do was cook them. This is a relatively quick process, but they are done one at a time. I could have pulled out my big griddle, but there just wasn't enough room, what with everything else out in preparation for the dinner.

Looking at the sequential photos above, It is a simple enough procedure. The dough is flexible and stretchy. It really doesn't stick to the counter - a little cooking spray (I found) is better than adding more flour to roll them out. The only real trick is stopping before rolling them too thinly, and this is just a matter of getting accustomed to the feel of the dough.

Cooking, Parathas, flatbread, skillet bread
Cooking the Parathas


The recipe itself is simple. Just remember that the dough needs to rest at least 30 minutes before using it, so plan accordingly. If you boil the potatoes beforehand, so they can cool while you make the dough, then you can work with the potatoes while the dough is resting. It all works out easily. And these are truly scrumptious. The one more unusual spice used in this recipe is Amchur powder, so check out this post of May 2014 to read about it.

Parathas, Aloo Paratha, potatoes, flatbread, Indian
A Stack of Parathas

Aloo Parathas


Makes 6 or 8

PARATHA DOUGH:
1 cup whole wheat flour, passed through a fine sieve
1 cup all-purpose flour
1 teaspoon salt
2 tablespoons melted ghee or vegetable oil
¾ cup water

FILLING
2 medium potatoes, boiled whole
¼ teaspoon salt
½ teaspoon crushed cumin seeds
1 green chilie such as Serrano, minced
2 tablespoons fresh cilantro, minced
½ teaspoon Garam Masala
½ teaspoon amchur powder (or a squeeze of lime juice)

Set potatoes to boil in a saucepan with water to cover. Make paratha dough: combine the two kinds of flour, and salt. Add in the ghee and the water and stir to form a dough. Knead the dough for 2 or 3 minutes. Cover and set aside for 30 minutes (or refrigerate if longer).

Once potatoes are cooked through, drain and set aside to cool to room temperature. Peel the potatoes, discarding skin. Set potatoes in a bowl and lightly mash. Add in all the remaining filling ingredients and stir well. The potatoes do not need to be mashed fine. Once mixed, divide the mixture into
6 or 8 equal pieces and form the pieces into a ball.

Divide the paratha dough into the same amount (6 or 8) of equal pieces as the potato filling. On a floured surface or one sprayed with cooking spray, roll out one paratha ball to about a 5-inch round. Hold the paratha in one hand and set one ball of potato mixture in the center. Bring up all the edges of the dough to encase the potato mixture and press to seal. Set this ball back on the surface and flatten with hands, then roll out the paratha to about 8-inches (if making 6 parathas) or smaller 6-inches if making 8.

Brush oil or ghee in a hot skillet and place one paratha in the pan to cook until one side is deep brown in spots. Brush the uncooked top with oil or ghee and flip over to cook for about another minute until the opposite side has dark spots. Remove and repeat for all the parathas.

Best served hot.


My passion is teaching people how to create a harmony of flavors with their cooking, and passing along my love and joy of food, both simple or exotic, plain or fancy. I continue my journey in ethnic and domestic cuisines, continuing my journey to explore diverse culinary experiences and hopefully to start you on a journey of your own. Join me also at A Harmony of Flavors on Facebook, and Pinterest.

Monday, October 24, 2016

Interesting Dessert with Carrots

Some would immediately say "Ewww", yet we do eat carrot cake! With spices added, and a little sugar, lots of things become not only palatable, but downright delicious. And so it is with this, another Indian recipe for Gajar Burfi, or in other words, a carrot fudge.


Gajar Burfi, Carrot Fudge, Edible Silver Leaf
Gajar Burfi or Carrot Fudge with Edible Silver Leaf

I have encountered many interesting blogs with Indian recipes, and one of them is www.vegrecipesofindia.com. I have not made too much from this site, but it is a veritable treasure trove, if you love Indian food. Since I have an Indian Dinner scheduled next week, I was looking for a dessert - not Gulab Jamun, since I served that to two of the guests last time! The stricture of "no nuts" was a trifle limiting, since so many desserts and other Indian foods use nuts as a matter of course. And then I came upon this recipe for Gajar Burfi. As usual, I looked at a slew of other recipes for this same dessert, and settled with this one as it sounded easy enough. 

Before making it for guests, however, I thought it expedient to at least try it out and see if it was something that tasted good. My husband is a little sketchy on carrots. He will eat them if they are in something like a vegetable soup, or shredded into a stir fry, but not so much blatantly on their own! I am not sure if he will eat this or not, but I am going to hazard a guess that he just might, if he can get past the thought of eating CARROTS for dessert. ;-)

Gajar Burfi, Carrot Fudge
Gajar Burfi or Carrot Fudge
So with that in mind, I set about making half of the recipe - partly as I didn't have enough of the whole milk powder on hand to make the whole recipe, and partly because....what if we don't like it? So, the recipe is pretty much straight from this blog site mentioned above and I would encourage looking through that site.

The recipe is detailed in very large step by step photos on this website, so mine will be just enough to give the idea. Truly, it is a simple recipe. The whole milk powder is not available everywhere - certainly not in this town, to my knowledge. Amazon is my go-to place. The recipe uses a small amount of ground cardamom, but I do encourage you to invest in the whole cardamom seeds and grind them yourself rather than get pre-ground powder. I have tried both, and the powder, which is often the seeds ground along with the husks in the interest of cost, just barely has any flavor in comparison. And who would have known that carrots and cardamom would go so well together? 

One thing about Indian recipes: they rarely will tell you how much a thing makes, or what size of pan to use. When I started this recipe this morning, I greased a 7 x 7-inch pan, thinking this would work for half the recipe. As I got closer to the end of cooking I realized this was far too large a pan. I couldn't find anything else on short notice but a 6-inch diameter round cake pan. Even that is larger than I would have liked for this half recipe I made. So, I believe the 7 x 7-inch pan would accommodate the whole recipe (as written below) just fine, giving a slightly thicker final product. My burfi turned out rather flatter than I'd hoped, and with the round pan, I cut it into wedges rather than squares. All that said, the bit I ate was out-of-this-world good!

This is what to do:

Gajar Burfi, Carrot Fudge, dessert, Indian food, ethnic
Gajar Burfi or Carrot Fudge

Gajar Burfi (Carrot Fudge)


Makes one 6 x 6 or 7 x 7-inch square pan

2 tablespoons ghee
4 cups finely grated carrots
pinch of salt 
1 cup whole milk powder
⅓ cup sugar
½ teaspoon ground cardamom seeds
pistachios (or raisins) for garnish

Grease a 6 x 6 or 7 x 7-inch square pan or tray and set aside.

In a saucepan with a heavy bottom, melt the ghee and add in the grated carrots and the pinch of salt. Use a silicone spatula to toss and stir the carrots over medium to medium low heat for 7 to 9 minutes. The carrots will cook and also dry out considerably in this time.

Take pan off heat and dump in the powdered milk, stirring quickly to combine with the carrots. Return to the heat and add the sugar and cardamom, stirring quickly and scraping the bottom often. There will be some sticking, but most can be avoided by keeping focus on the mixture. The sugar as it melts will loosen the mixture somewhat, but it quickly dries out and the carrots will come together into one mass. Turn the mixture into the prepared pan and smooth it to the edges.
Step by step, making Gajar Burfi, Indian food, dessert
cooking carrots      |  whole milk powder added  |      sugar goes in      |      cooked to a ball      |     turned into pan to mold

Allow to cool, then cut into squares (or wedges if you've used a round pan). Garnish with chopped pistachios or with (white) raisins to serve. 

I believe that the half recipe I made would nicely serve 3 people, with two small, thin wedges constituting a serving. So this whole recipe as it stands above would serve 6. If you are more conservative in your serving portions (I have no willpower!), then the recipe might serve 12.

Then of course, in the interest of making a good thing better, since the main course for my dinner next week is a Royal Biryani, I felt I should invest in some edible silver leaf (varq or vark) to adorn the dish, as is often shown in cookbooks. It so happens that I ordered it over the weekend and it arrived this morning! I got it out, believing (and rightfully so) that it might require a bit of a learning curve to set the silver leaf in place, I got out one of the sheets and experimented. The first photo above shows my very first time with silver leaf! (From Amazon, of course!)


My passion is teaching people how to create a harmony of flavors with their cooking, and passing along my love and joy of food, both simple or exotic, plain or fancy. I continue my journey in ethnic and domestic cuisines, continuing my journey to explore diverse culinary experiences and hopefully to start you on a journey of your own. Join me also at A Harmony of Flavors on Facebook, and Pinterest.

Thursday, July 28, 2016

An Indian Treat Called Gulab Jamun

It may seem strange that though these little fried milk balls are one of my favorite desserts (even outside of purely Indian cooking), today is only the second time, ever, I made them. One of the biggest reasons for this apparent lapse is in the word "fried". 

I absolutely despise frying things. I hate the mess, the hot oil, the drips all over the place to clean, and then what to do with the leftover oil. All that oil, wasted. Because guess what? I hate to fry things! Oh well. Today I made the exception, because I am having guests over next week for an Indian meal, and I am going all out. 
Gulab Jamun, frying, dessert, Indian dessert, milk powder
Gulab Jamun


I am making things for this meal that I have made before, so there is no surprise anywhere. I am going to have Rogan Josh as the main entree with two side dishes: Indian Cabbage and Rice and Palak Paneer (creamed spinach with milk cheese). I will have three chutneys. Two of these are authentically Indian: Imli, or Tamarind Chutney, and Dhania Poodina, a fresh cilantro and mint chutney. The third is a Mango Chutney I make, and which my husband loves. For breads, I am making Naan and also Aloo Parathas, or Parathas filled with spiced potatoes. And for dessert? Gulab Jamun.

Gulab Jamun, Indian dessert, milk powder
Gulab Jamun in tiny 4-inch bowl

What are Gulab Jamun?

As already stated, these are little balls of a milk dough, which are fried and then soaked in a sugar syrup flavored with cardamom and rosewater. The word Gulab means rose, and this is because there is generally rose water flavoring the syrup these little balls are soaked in. Jamun is a reference to a fruit called a Java Plum, and may refer to the size of the little balls. 

In India, these milk balls are made using milk that is cooked down over a long slow period, leaving a very thick curd-like mixture, called khoya or mawa. To read more about this process, go to this site

Despite this being the traditional way to come to the dough for these treats, there are various other simpler methods to make them that do not require so much extra time. Many recipes I have seen say that khoya is sold in the freezer section of grocery stores, next to other Indian foods. All I can say is - not where I live! So then it comes down to the fact that it is a very thickened version of milk we are talking about, and so there are other recipes using various mixtures of milk powder, milk / cream, and / or flour. Some use ground nuts in the dough, or ghee, some add ground cardamom. As with most recipes, though the end product is similar, there are many ways to get there. 

The recipe I have used, sort of cobbled from various recipe techniques, is to make the dough with whole milk powder, flour and cream. The syrup is equal parts sugar and water, with a few saffron threads and cardamom pods thrown in. 

Size change, dough, fried, syrup
Size change from dough to fried to syrup

The totally shocking part of this recipe is the change in size in the Jamun from dough balls, to fried, to soaked in syrup. Look for at least a doubling in diameter  from start to end, about tripling n volume. The first time I made these, I was looking at a recipe that said to make the dough balls "golf-ball-sized." I tried a couple, fried them and found how much bigger they got and resized down to a walnut size. This still left me with very large Jamuns, and once soaked in the syrup, they seemed huge. In restaurants, the size of the Gulab Jamun served are approximately 1¼ to 1½-inches in diameter. In this case, the dough balls to start should be about ¾-inch in diameter, or slightly less. 

Knowing that I am making a very large meal next week, I opted this time to make my Jamun much smaller, about ⅝-inch. Once fried, then soaked in syrup, this left me with Gulab Jamun that were just over an inch wide. I like this size. I can fit 4 or 5 in a small dessert bowl and this should make them just right for after-dinner.

Making the balls this small left me with 95 of the little things. If I serve 5 of them in a little bowl as shown, that would serve 19! Luckily, before putting them in syrup, these can be frozen for a month or two, so they are available whenever you would want a few. I packaged them in little zip-top baggies in portions of 20. In the freezer they went. And all I have to do when I want more is make up the syrup, which takes no time at all. 

Gulab Jamun
Gulab Jamun, Indian, dessert, milk solids
Gulab Jamun


Makes 50 to 90 balls, depending on size.

DOUGH:
1½ cups dry whole milk powder
½ cup all purpose flour
1 teaspoon baking powder
1¼ cups heavy cream

1 quart oil, for frying

SYRUP (For about 25 - 30 jamun. Double as needed.):
1½ cups water
¾ cup sugar
2 - 3 cardamom pods, crushed slightly
1 - strands saffron, optional
2 - 3 drops rose water

DOUGH: Sift together into a bowl the milk powder, flour and baking powder. Add in the heavy cream and stir just until the mixture comes together. Cover with plastic wrap and let set for 10 to 30 minutes, as needed.
dough, formed jamun, frying, draining, step by step
The dough, the formed jamun, frying and draining
Form the dough into balls about the size of a grape. You may need oil or ghee on your hands to roll the balls very smooth. While the rolling process takes place, heat the oil in a saucepan. It will need to be at about 320 to 325 degrees. A thermometer helps to keep tabs on the oil. Do not over heat.

Once the jamuns are all rolled, begin adding them carefully into the hot oil. Use a slotted spoon to move them around in the oil so they color evenly. They should get to a deep mahogany brown. This can take from 6 to 8 minutes, depending on how hot the oil. I fried mine in batches of 25 or so. Once browned, remove to a platter lined with paper toweling. 


syrup, jamun, soaking, Indian dessert
The syrup, the jamun just added, the jamun growing after a few minutes of soaking

SYRUP: If making all of these at one time in syrup, you may have to triple the syrup recipe. Mix the sugar and water together with the cardamom pods and saffron strands. Bring to boil, lower to a simmer and cook gently for about 10 minutes, to bring out the flavors.

When syrup is ready, add in the fried, drained jamun. Let them soak in the syrup for at least 3 hours, or overnight. If refrigerated, bring them back to just tepid, either in microwave or in a pan on the stove.

To serve, sprinkle on some crushed pistachios or organic rose petals, if available.

MAKE AHEAD: If making these in advance (which I highly recommend, as they take some time and mess), once they are fried, but before making the syrup, either refrigerate them for up to 3 days, or pack in a tightly sealed container or zip-top bag and freeze for a month or two. When ready to use, prepare the syrup and add in the jamun to absorb the syrup.


My passion is teaching people how to create a harmony of flavors with their cooking, and passing along my love and joy of food, both simple or exotic, plain or fancy. I continue my journey in ethnic and domestic cuisines, continuing my journey to explore diverse culinary experiences and hopefully to start you on a journey of your own. Join me also at A Harmony of Flavors on Facebook, and Pinterest.

Disqus