Translate

Saturday, December 30, 2017

Some Cookie Recipes that Fell by the Wayside

I know I have been writing blogs about healthier eating. Let's face it though, one cannot eat healthy all the time. A little indulgence here or there is just fine. 

In actuality, I meant to have these cookie recipes out on this blog before Christmas, so everyone might be able to use them for the holidays. Very obviously, that did not happen. With a Wine Tasting and Food Pairing event just before Christmas, and with guests arriving, blogging just did not happen. But, maybe these recipes can stay on the back burner until later on, or next Christmas.

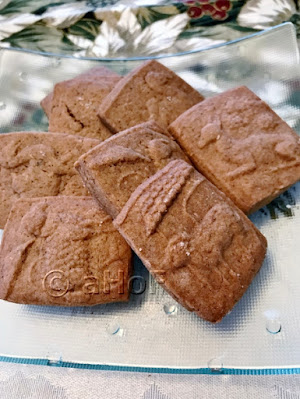
One cookie recipe I had been wanting to try for years was Speculaas, sometimes also spelled Speculoos. Where they originate from is up for grabs, as far as I can tell: Dutch, Flemish, Belgian, German, French. The reason I had wanted to try making these cookies is because of the Biscoff Cookies I had tried. Mine came out more highly spiced and far less sweet than these commercially made cookies, but the recipe is delicious, and the cookies are great with a cup of coffee.
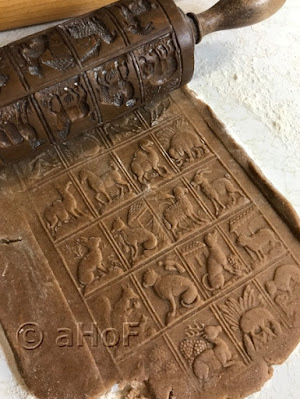
Springerle, Rolling Pin, Speculaas, cookies, roll cookies
My Springerle Rolling Pin making Speculaas
Traditionally, the cookies are a highly spiced shortbread type, rolled thin and stamped with a windmill cookie mold. Any cookie mold will work just fine, or you can just roll the dough and cut out shapes. I chose to use my Springerle rolling pin, creating a lot of small cookies stamped with patterns. My Springerle pin has all sorts of animal pictures carved into it. 

The first thing needed before making these cookies was Speculaas Spice Mix. I looked through countless recipes for "traditional" Speculaas Spice Mixes and all had some things in common, while there were those few that had something different or other.  In general, something like a Pumpkin Pie Spice mixture will work, though there are some spices that are almost always a part of Speculaas that are not in Pumpkin Pie spice, namely coriander seed and white pepper.

Speculaas, Spice Mix, recipe
Speculaas Spice Mix

Speculaas Spice Mix


Makes about ½ cup

3 tablespoons Ceylon cinnamon
1 tablespoon ground cloves
1 tablespoon ground nutmeg
1½ teaspoons ground ginger
1½ teaspoons ground coriander seeds
1½ teaspoons ground white pepper
1 teaspoon ground fennel seeds
1 teaspoon ground cardamom seeds

Combine all spices in a glass jar with tight fitting lid and shake well. Store in a cool dark place. Use approximately 1 tablespoon spice mix to 1 cup of flour in your recipe, according to your taste.
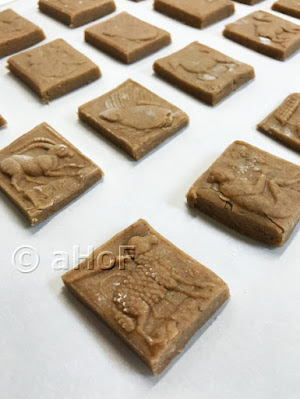
Speculaas, Cookies, ready to bake, recipe
Speculaas Cookies, ready to bake


Next, I took a tour of the internet looking at what kind of recipe constituted Speculaas. I read in many places that these were shortbread cookies, which is generally taken to mean there are no eggs to bind the ingredients. Yet for all that, many recipes called for eggs. I opted to keep the recipe without eggs. In most places, Speculaas are described as a thin, hard cookie. To stamp the cookies with shapes, such as windmills or other, there has to be enough thickness to be able to press down on the stamp (or Springerle Rolling Pin). I opted to roll the dough about ¼-inch thick, and then rolled/pressed evenly with the Springerle rolling pin. Many recipes called for a very low oven and very long baking times, to dry out the cookies and make them crisp. Others baked them at high temperatures for shorter periods to achieve the same thing. I took a middle-of-the-road approach here. I used a 325 oven for part of the time, then lowered it even more for the rest of the time. The cookies came out wonderfully well, and very spicy and delicious, so I am quite content with the recipe.
Speculaas, cookies, spice cookies, recipe
Speculaas

Speculaas Cookies 


Made about 60 cookies

12 tablespoons (170 g) unsalted butter, softened
1 cup (213 g) light brown sugar, packed
⅓ cup (80 g) water
1 teaspoon vanilla extract
2 cups (284 g) all-purpose flour
½ cup (44 g) white rye flour
½ cup (40 g) finely ground almond meal
¾ teaspoon (3 g) salt
½ teaspoon (1 g) baking soda
3 tablespoons (11 g) Speculaas Spice Mix

In a stand mixer, beat the butter with the brown sugar until very light and fluffy. Combine the water and vanilla extract, then begin adding to the butter mixture by teaspoonfuls, beating continuously and waiting until the water is completely incorporated before adding more.

Separately, whisk together all the remaining ingredients to combine. Add the dry ingredients into the bowl and mix on low speed until the dough comes together into a mass. Turn out of the bowl and form into a large ball or roll, wrap in plastic wrap and refrigerate the dough for at least 2 hours, or up to 3 days.

Preheat oven to 325 degrees. Line 2 cookie sheets with parchment.

If using a Springerle rolling pin, or other cookie stamps, roll out the dough to about ¼-inch thick with a regular rolling pin. Use the Springerle rolling pin and dust well with flour. Roll the Springerle pin, pressing evenly over the cookie dough and leaving the dough about 1/8 to 3/16-inch thick. Cut out the cookies and set them about an inch apart onto the prepared parchment lined cookie sheets. Gather up the scraps and re-roll them as needed, to use up the dough.

If cutting out the cookies with cookie cutters or just cutting into small rectangles, roll the dough with a regular rolling pin to about 1/8 - 3/16-inch thick and set the cookies an inch apart onto the prepared cookie sheets.

Bake the cookies for 15 minutes. Rotate the cookie sheets and lower the oven temperature to 275 degrees, leaving the cookies in the oven. Bake the cookies for an additional 20 minutes, until very crisp, but not browned.

---------------------------------------------------------------------------------

Another kind of cookies I made for this year's holidays are Chocolate Cherry Cookies. I based these on a recipe I first encountered on Facebook (see that recipe here, called "Maraschino Cherry Almond Chocolate Cookies"). My reasoning was that my husband has had a "favorite" Christmas cookie his Mom always made, and I have been making them each year since I met him, 28 years ago. These were called Cherry Bon Bons, and while tasty, they are a pain to make! The dough was difficult to work with, and it needed to be formed around a well-drained whole Maraschino cherry, then my husband liked them rolled in the little, hard "rainbow nonpareils" that ended up all over the counters and floor before I was done rolling the formed dough in them. 
Chocolate, Cherry, Cookies, chocolate chips, maraschino cherries
Chocolate Cherry Cookies

The recipe I found seemed to have the things my husband likes best all in one cookie: maraschino cherries, cherry juice in the dough, and even better, chocolate chips, too! As I looked at the recipe, the dough part sounded very similar to the dough for the Cherry Bon Bons. Instead of wrapping it around the cherries, the cherries are chopped up instead. So far, I was really happy with this concept. I made the recipe a bit larger and changed some of the amounts by slight bits and the whole thing came out so great that I am hard pressed to think of ever going back to the Cherry Bon Bons again, no matter how cute they are!

Chocolate, Cherry, Cookies, maraschino cherries
Chocolate Cherry Cookies

Chocolate Cherry Cookies 


Makes about 66 cookies

1 (10-ounce) jar maraschino cherries, drained, syrup reserved
3 sticks unsalted butter, softened
½ teaspoon almond extract
½ teaspoon salt
1½ cups confectioners' sugar
3½ cups all-purpose flour
3 - 4 tablespoons maraschino cherry syrup
1½ cups semi-sweet chocolate chips

Preheat oven to 350 degrees. Make sure the cherries are well drained before starting the recipe. Set them into a sieve or colander and drain, then set them on paper toweling to wick out more moisture. If there is too much residual liquid in the cherries, this will add moisture to the cookie dough and they may not set up so nicely in the oven. Once the cherries are well drained, chop them and set them aside.

In the bowl of a stand mixer beat the butter with the almond extract, salt and confectioners' sugar until creamy. With the mixer on low speed, add in the flour until nearly all incorporated, then adding in 3 of the tablespoons of cherry syrup. If the dough is too dry to come together, add the remaining tablespoon of syrup. Add in the cherries and the chocolate chips. Mix just until combined.

Make 1-inch balls, or use a cookie scoop and place the balls about 1½ - 2 inches apart on a parchment lined baking sheet. Bake for approximately 14 minutes, or until set but not browned. When done, slide the whole parchment sheet with the cookies onto a cooling rack. They will easily release once cooled slightly.


My passion is teaching people how to create a harmony of flavors with their cooking, and passing along my love and joy of food, both simple or exotic, plain or fancy. I continue my journey in ethnic and domestic cuisines, continuing my journey to explore diverse culinary experiences and hopefully to start you on a journey of your own. Join me also at A Harmony of Flavors on Facebook, and Pinterest.

Thursday, December 28, 2017

Flavorful Fish Recipe from the Middle East

I've been testing and trying out flavors of the Middle East, as well as working to amass the tastiest low-cal dishes for our health regimen. Luckily, it seems to be a relatively easy task, and in the same week I read about Chreime (or Chraime), and then saw it on television.

Chreime, Fish Stew, Israeli, Middle East
Chreime or Fish Stew


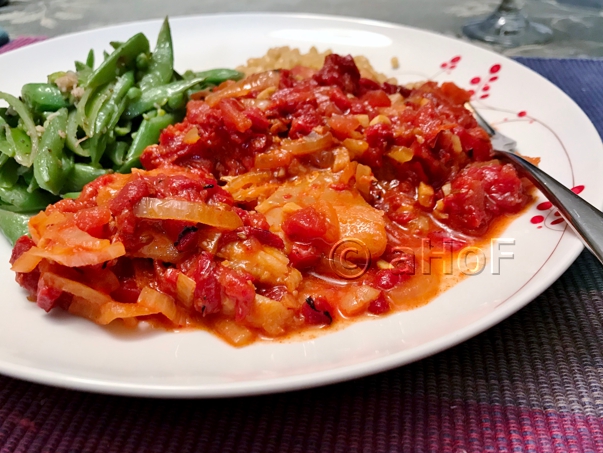
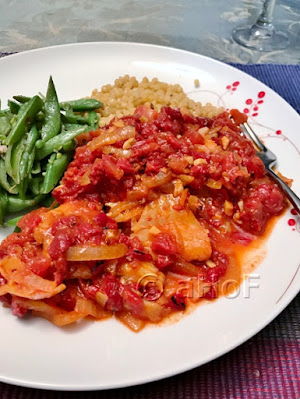
Chreime is a fish stew. It has either tomatoes or roasted red bell peppers, or both. It is best with a nice firm, white fish like halibut, snapper or cod. But where, exactly, this dish originates is debatable, apparently. In the show I saw, they said it was originally a Jewish dish from north Africa, but that it has sort of become a dish of Israel.

Chreime, Fish Stew, Israeli, Middle East, recipe
Cooking Chreime or Fish Stew
I have no roots in Israel or the Middle East, so this is only recounting what I heard or read, but however this dish came to be, it sounded like something that would tempt my husband - who generally does not eat fish. As it happened, one recipe is in one of the many cookbooks he got for me to explore Middle Eastern cuisine (just because I commented that I didn't really know much about that whole section of the world's cooking!). 

When a recipe is well known, there are always going to be similarities. I like to adjust amounts to my own taste. Some recipes use what is to me an extraordinary amount of cumin. I do not care for cumin. If I can actually taste cumin as a stand-out flavor - it's just way too much. Some recipes call for a whole lot of smoked paprika. This is great, as I love it, as does my husband. Others call for just a little bit. Some recipes add lemon juice, some not. As I mentioned, some use red bell pepper, some use tomatoes and some use both. Some use onion, some do not. Some use stock, some add water, some do not. 

What is generally included is the fish of course, and cumin, paprika (smoked or plain or hot!), something as a red base (tomatoes, red bell peppers, roasted red bell peppers, tomato paste, etc) and lots of garlic. So here is what I put together to make this dish, and I have to say, that it is truly flavorful, absolutely delectable, and lo-cal! And best of all, my husband loved it! What better way to enjoy a dinner?

Chreime, Fish Stew, Israeli. Middle Eastern, recipe
Chreime or Fish Stew

Chreime, or Fish Stew

Serves 4

1 pound firm white fish fillets (haddock, snapper, cod)
6 - 8 cloves garlic
½ teaspoon salt
1 tablespoon olive oil
1 onion, chopped
2 red bell peppers, roasted, peeled, chopped, 
    (OR 1 large jar roasted red bell peppers, drained, chopped)
2 tablespoons tomato paste
½ cup water or fish stock
1½ tablespoons smoked paprika
1 teaspoon ground cumin
1 - 2 tablespoons lemon juice
large handful cilantro, coarsely chopped 

In a small bowl or with a mortar and pestle, smash together the garlic with the salt, until it makes a paste. Set aside.

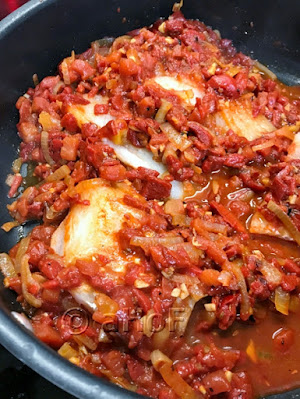
In a large skillet, heat the oil and add in the onion. Cook, stirring, until the onions are soft and translucent. Add in the peppers, tomato paste and stock (white wine can be used, if preferred), stirring to mix. Sprinkle on the paprika, cumin and lemon juice, then add in the garlic paste and bring to a simmer. Nestle the fish fillets in among the sauce and cover. Cook for about 10 minutes (more, or less, depending on the thickness of the fish fillets), or until the fish flakes easily with a fork. Sprinkle on most of the cilantro and stir in, reserving some for garnish. Serve immediately, with either brown rice or couscous.


My passion is teaching people how to create a harmony of flavors with their cooking, and passing along my love and joy of food, both simple or exotic, plain or fancy. I continue my journey in ethnic and domestic cuisines, continuing my journey to explore diverse culinary experiences and hopefully to start you on a journey of your own. Join me also at A Harmony of Flavors on Facebook, and Pinterest.
A Stew with Middle Eastern Flavors

I mentioned in my blog of November 14, 2017 that my husband took my chance comment that I knew little of Middle Eastern cooking and flavors completely to heart and bought me about 8 or more cookbooks on different Middle Eastern foods from varying countries. Many of these dishes are easy to make as a healthy addition to our diet, using additional vegetables and skimping on the breads.
 
Middle East, recipes, Beef, lamb, Stew
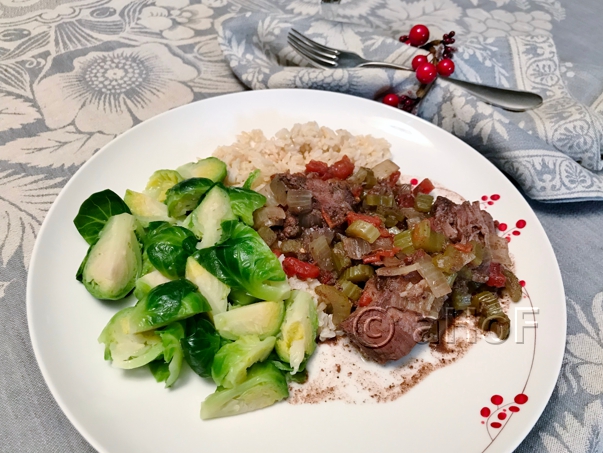
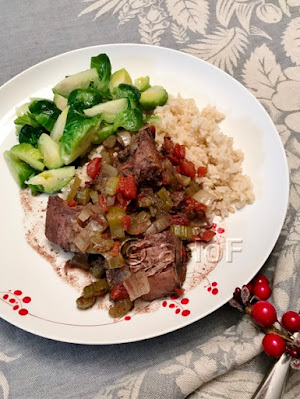
Middle Eastern Beef Stew

I used some of the flavors I saw being used repeatedly in recipes, such as cinnamon and cardamom, making an excellent and light-on-calories but high-in-flavor supper meal using beef or lamb. It was so delicious in fact, that I made it twice in as many weeks. The first time I used beef stew meat, and the second I used a chuck roast, cut into large chunks. The first time I added Brussels sprouts to the stew towards the end of cooking time, and the second time I opted to steam the Brussels sprouts and serve them alongside, for prettier presentation. It made no difference to the flavors, but visual appeal is half the battle, when going for something low cal that tempts.

I used celery in the stew itself, and quite a lot of it. I figured it is a good filler vegetable; few calories but holding its own on stomach space 😀. I served this stew with a little rice, and I always use whole grain brown rice, or red rice or pink rice or other whole rice blends. Altogether, it made a most excellent meal with excellent flavors. If preferred, couscous is a great combination also, though couscous does not generally contain the whole grain.


Middle Eastern Beef Stew

Serves 4 to 6
Middle East, recipe, Beef, lamb, Stew
Middle Eastern Beef Stew


1 pound beef stew meat or a chuck
    roast, cut into chunks
1 tablespoon olive oil
4 cloves garlic, minced
¾ teaspoon salt
1 large onion, chopped
⅛ teaspoon allspice
¼ teaspoon ground cloves
½ teaspoon ground cardamom
½ teaspoon freshly ground black 
    pepper
1 teaspoon cinnamon, preferably true 
    cinnamon (usually "Ceylon")
1 teaspoon rosewater, optional
2 cups celery, chopped
1 cup dry red wine
1 can (14.5 ounces) petite diced 
    tomatoes
1 bay leaf
2 cups Brussels sprouts, halved or 
    quartered

Pat the meat dry with paper toweling. It will not brown quickly if wet. Heat a large skillet and add in the oil. Brown the pieces of meat, about half at a time. Once browned, remove them to a heavy Dutch oven or other oven-proof pot with lid. 

In a small bowl, or using a mortar and pestle, smash the garlic together with the salt. Set aside.

In the same skillet, cook the onions until they are softened and translucent. Add a little more oil, if needed. Remove the onions to the pot. Pour in the wine to deglaze the pan and scrape up all the great color in the pan. Pour this into the pot, then add in all the remaining ingredients, except the Brussels sprouts. Bring to a simmer, then cover the pot and lower the heat to the lowest setting and cook gently for 1½ to 2 hours. Check for tenderness. Check for flavor. Cook for another 30 minutes.

Meanwhile, prepare the Brussels sprouts and (preferably) steam them for about 7 to 10 minutes. Try to keep them steamed just to "al dente" and not over cooked. They taste their very best when they are just under the point of being too soft, and still retain their vibrant color. Sprinkle with salt and serve with the stew, over a little cooked brown rice.


My passion is teaching people how to create a harmony of flavors with their cooking, and passing along my love and joy of food, both simple or exotic, plain or fancy. I continue my journey in ethnic and domestic cuisines, continuing my journey to explore diverse culinary experiences and hopefully to start you on a journey of your own. Join me also at A Harmony of Flavors on Facebook, and Pinterest.
Wednesday, December 27, 2017

Healthy Recipes for the New Year

I may have mentioned that my husband and I have been on a healthy eating regimen for the last half year. Between us both, we have shed 100 pounds, and still have lots to go. In order to accomplish this, we have not been counting calories, nor have we been tightly following any of the popular diet crazes that exist just now.

My philosophy is that all we need is to reduce the amount of processed foods to almost none. This means no boxes or packages of "helpers," use very few cans, and preferably those with either 50% less or no salt. I limit cans to corn (which we eat rarely, due to the high amount of corn already found in our diets these days), tomatoes (paste, sauce, diced), and some beans (VERY well rinsed). I do occasionally use mushrooms from cans, but more often I just cook fresh mushrooms, or use dried and reconstituted.  I make things from scratch at least 95% of the time. And lots and lots of vegetables, very little bread, and only made from freshly ground wheat or rye, with no butter on it. My philosophy says that if the bread isn't good enough to eat without butter, then it's not good bread. We eat fruit, in small portions.

A couple of standby meals for us have been vegetable soup and one of many different takes on a Tarka (or Tadka) Dal. After trying a few recipes from my cookbooks and one from vegrecipesofindia.com, I started improvising and making my own mixtures. These can be as simple or as complex as you choose to make them.

Vegetable Soup, vegetables, flavors
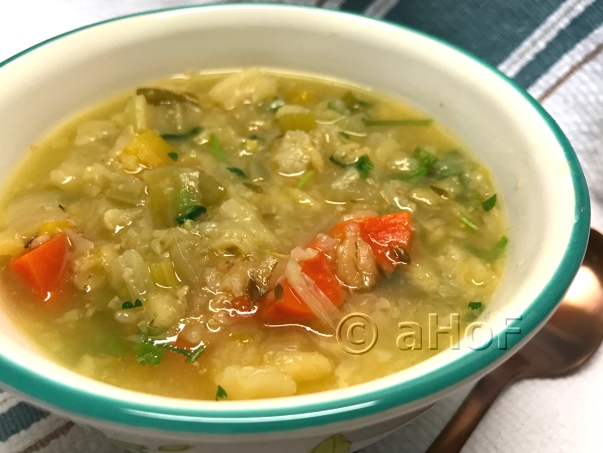
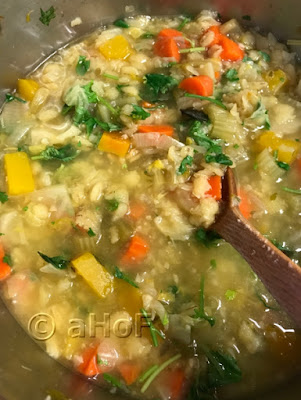
Everything But the Kitchen Sink Vegetable Soup

I made a pot of vegetable soup today, as we have both been feeling so over stuffed as to be uncomfortable. My vegetable soups are made with whatever is on hand at any given time. Sometimes I have more ingredients in the fridge, and sometimes I am running low. My method is to use as many non-starchy vegetables as possible, and then using a handful or so of some whole grain such as long-cooking barley. Other times I toss in a handful or two of some of the Indian lentils (Masoor Dal, Toor Dal, Moong Dal, etc). These thicken the soup slightly, and are filling, while at the same time giving a nice dose of complex carbs. I usually start out with a good stock that I have made previously, but even starting with a pot of water works. I use about 6 to 8 cups of stock or water. And after that, it is all up to what is available. 

Everything But the Kitchen Sink Vegetable Soup


Serves 4 - 6 (or 2 people, for various days of lunches)


Everything but the Kitchen Sink Vegetable Soup
Everything But the Kitchen Sink
Vegetable Soup
These are things I most always use, and make up the basis of the flavors:
  • 1 chopped onion
  • 2 - 4 minced cloves of garlic
  • 1 - 2 tablespoons minced fresh ginger
  • 1 - 2 carrots, diced
  • 2 - 3 stalks celery, chopped
  • 1 green or red bell pepper, chopped
  • pinch saffron
  • 1 bay leaf
And then these are additions that can be added in, depending on what's in the fridge, and what you are in the mood for. I never use everything on the list at one time:
  • 1 cup cauliflower (grated, as my husband can't see it that way!)
  • 1 - 1½ cups chopped cabbage
  • 1 cup chopped fresh green beans
  • 1 cup chopped fresh sugar snap peas
  • 1 cup cubed winter squash, peeled
  • 1 cup cubed zucchini
  • 2 handfuls baby spinach
  • 2 cups chopped kale
  • ¼ - ⅓ cup long-cooking barley
  • ¼ cup red lentils (masoor dal), split pigeon peas (toor dal) or split mung beans (moong dal)
  • tomatoes, chopped
  • cilantro, chopped
  • parsley, chopped
If I missed anything on your "favorite vegetables" list, you can add or substitute. I avoid potatoes, as they are mainly gratuitous starch. I salt the soup at the end of the cooking time, and sparingly. 


Toor Dal, Tomatoes, Spinach, Indian lentils
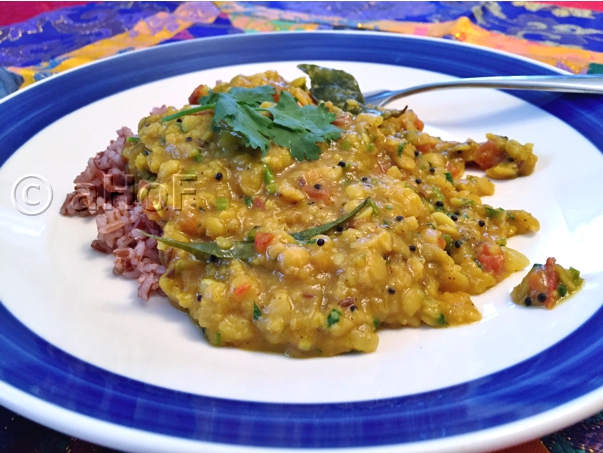
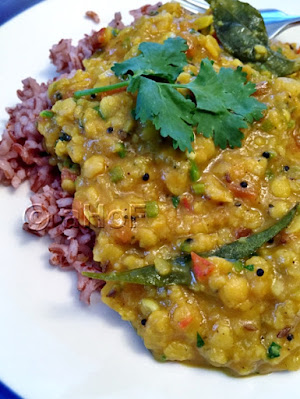
Toor Dal with Tomatoes & Spinach
I mentioned the lentil dishes I have been making, and they are pretty much a staple also, as they are great complex carbs, and add protein to our diet. I make a good sized pot of these lentils, and again, use them over a two - three day period, for lunch. I cook one day, and then have food for the next two. This gives me time to do other tasks on the off days, such as writing this blog! This Dal recipe is quite simple, but extremely flavorful.


Toor Dal with Tomatoes & Spinach

Serves 4 to 6
Toor Dal, Tomatoes, Spinach, Indian lentils
Toor Dal with Tomatoes & Spinach

1 cup Toor Dal (split pigeon peas)
2 Roma tomatoes, diced
½ teaspoon turmeric
1 Serrano pepper, minced (eliminate seeds for less heat, or add more chilies for more heat)
----- 1 tablespoon ghee or oil
1 teaspoon brown mustard seeds
1 teaspoon cumin seeds
1 dry red chili pepper, whole
12 curry leaves (murraya koenigii) 
1 medium onion, chopped
1 tablespoon minced fresh ginger root
3 - 4 cloves garlic, minced
1 teaspoon salt
3 ounces spinach (or substitute kale)
 

Rinse the lentils repeatedly, until the water runs off clear. Place them into a pot with at least 4 cups of water and bring to a boil. The lentils will produce a thick scum, which should be skimmed off. Reduce heat to a simmer. Add in the tomatoes, turmeric and the Serrano pepper and allow the lentils to cook for about 40 minutes, while preparing the flavorings. 

In a skillet, heat the ghee or oil until very hot. Add in the mustard seeds, and if the oil was hot enough, they will begin sputtering and popping all over the place. Cover the pan, shaking it to keep the mustard seeds moving until they slow down considerable, similarly to popcorn. Remove lid and add in, stirring, the cumin seeds, the dried chili pepper and the curry leaves. Saute for about 1 minutes, then add in the onion, garlic and ginger and cook for about 3 to 5 minutes. Add this mixture to the cooked lentils along with the spinach and the salt and stir well. Serve with rice, preferably whole grain rice.


My passion is teaching people how to create a harmony of flavors with their cooking, and passing along my love and joy of food, both simple or exotic, plain or fancy. I continue my journey in ethnic and domestic cuisines, continuing my journey to explore diverse culinary experiences and hopefully to start you on a journey of your own. Join me also at A Harmony of Flavors on Facebook, and Pinterest.
Saturday, December 9, 2017

One of My Traditional Christmas Cookies

Cinnamon Cookies, cinnamon, glace cherries, Christmas
Cinnamon Cookies
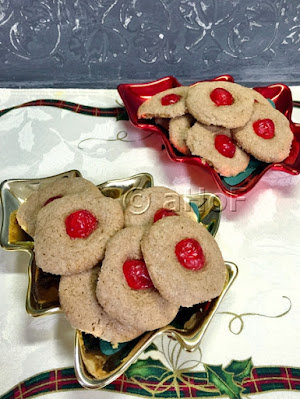
Somehow, in all the years since I started with my website and this blog, I have never yet entered this recipe for Christmas Cookies. I guess it is such a part of the scenery at Christmas that I just forget to share the recipe? Maybe? Whatever reason it may be, these have been overlooked, yet they have been a part of my Christmas Cookie repertoire from my earliest cookie-making days in Guatemala as a new young wife. 

I guess fiddling with recipes has been in my nature even back then when I didn't really know anything about cooking at all. The original recipe started out with my 1966 edition of The Joy of Cooking. That book was where I really picked up a love of understanding a recipe and what makes it work. The recipe I used was one with various alternatives. You could use white sugar or brown sugar. You could use cinnamon or other spices, or no spices. You could make them like "thumbprint" cookies and fill them, or not. There were so many options available, and I chose the route of using brown sugar and the cinnamon, but not making them into thumbprint cookies. And to add my own touch, I set a glace cherry on top. 
 
Cinnamon, Cookies, Christmas, glace cherries
Cinnamon Cookies

While the recipe is not 100% original, in these days it is truly difficult to find anything that is totally original. I sat down a couple of years ago to create a cookie recipe all of my own. I took the amount of flour I thought would give me the size recipe I wanted. I added in sugar in the quantity I thought would be sufficient without being too much. I used butter, because butter is best! Egg, of course. Baking powder, vanilla extract, salt. I wrote down all the quantities I felt would be best for what I wanted. And I made them and they came out truly great. And then? I found a recipe online that was exactly the same! The same proportion of every single thing! I did no copying, no looking at other recipes. I wanted it to be my own. And someone already had the exact same recipe out there. How frustrating.

But really, there are these basic ingredients and only so many ways to alter the proportions. Not trying to justify using a pre-written recipe to build something, but it is just too easy to do. However I came to this recipe, I have been making it since my children were tiny, and we have all loved them, forever. So what are these cookies? I call them Cinnamon Cookies. Uninspired title, perhaps. But that is what they are. And if you like cinnamon, there is nothing NOT to like about these cookies; it uses a whole tablespoon of cinnamon for a quite small recipe. 

These cookies are rolled into balls, then rolled in granulated sugar, then flattened slightly, as with peanut butter cookies. Then I set a half glaceed cherry into the center, pressing a bit to adhere. Over the years, I have tried rolling the balls into green sugar granules and setting a half green glaceed cherry on top, and also used red sugar granules and red glaceed cherry half. But I think after all the experiments, they look best rolled in regular white granulated sugar and with either red or green glaceed cherry on top. The recipe is very small, at only 28 cookies, more or less. I generally double the recipe, and have even quadrupled it, when all the kids were still at home and we also had guests.

Cinnamon, Cookies, Christmas, glace cherries
Cinnamon Cookies

Cinnamon Cookies

Makes about 28 cookies

½ cup unsalted butter, softened
½ cup brown sugar, packed
1 large egg
1 tablespoon cinnamon
1 cup all-purpose flour
⅛ teaspoon salt
- granulated sugar, for rolling
14 - 16 glaceed cherries, halved

Cream together the butter and brown sugar until very light. Beat in the egg to combine completely. Whisk together  the cinnamon, flour and salt, then add in these dry ingredients all at once and mix just until no dry flour remains. Do not over-mix. Bring the dough together into a solid mass and wrap tightly in plastic wrap or place in a zip-top bag. Chill the dough for at least 2 to 3 hours, or overnight.

*DO AHEAD: If prepping early, make the dough, wrap tightly and freeze for up to 3 weeks. Thaw in the refrigerator overnight before using.

Preheat oven to 375. Remove dough from refrigerator and roll into 1-inch balls. Roll each ball in granulated sugar to completely coat, then set at least 2 inches apart on ungreased baking sheet(s). Use a glass or other flat-bottomed object to flatten the cookie balls to about ¼-inch thick discs. Set a half cherry in the center, pressing gently to adhere (the stickiness of glaceed cherries works well, here). Bake the cookies for 10 to 12 minutes, or until set and barely beginning to turn golden at the edges. Remove them immediately to a clean counter or cookie rack to cool.


My passion is teaching people how to create a harmony of flavors with their cooking, and passing along my love and joy of food, both simple or exotic, plain or fancy. I continue my journey in ethnic and domestic cuisines, continuing my journey to explore diverse culinary experiences and hopefully to start you on a journey of your own. Join me also at A Harmony of Flavors on Facebook, and Pinterest.
Sunday, December 3, 2017

Another Stab at a Breakfast Casserole

Not quite a month ago I made a delicious breakfast casserole to mimic one I had eaten out in Washington at Tweets Cafe. It was really the first breakfast casserole of any kind I had made and while it was completely delicious, it did have some technical issues. I have no problem with posting the recipe, because it came out absolutely wonderful both in flavor and in appearance.

Christmas Tree, decorations
My Christmas Tree
As is usually the case with such things, the thoughts keep percolating somewhere in the back of my mind, and in the last couple of days, things got insistent, so I made a decision last evening that I would give it another try. Not the exact same recipe, because I was missing some key elements, most notably Poblano peppers. But, I did have eggs, and cheese and bacon. And that's where my mind shut off for the night last night. I did go so far as contemplate getting out of bed and putting some black beans to slow cook in the Crock Pot overnight, but nixed that idea. I was too tired from getting my Christmas tree together yesterday!

I got up this morning prepared to get into the kitchen and try out all the ideas I'd had since making that last casserole. Again, I was making this just for my husband and myself, so I was going to once more attempt the use of that same tiny Pyrex loaf pan I'd used last time, despite the difficulties I had then with it sticking. I cleaned that Pyrex and scrubbed it well, in hopes that this would help mitigate sticking. Instead of foil, I opted to use parchment to line the pan, but this time only lining it across the wide sides, with overhang, on the off-chance it would come out easily. I did not allow any parchment to go up the narrow sides. I greased the pan, but not the parchment once it was in place. I set the oven to 350 degrees.

Then the decision of what to put into this casserole. I liked the potatoes in the bottom, so once again I used potato, but a half of one larger potato. I fried it the same as last time, using my method for Pan Potatoes. Once done, those went into the bottom of the prepared casserole. Meanwhile, I fried up some bacon, diced small. After setting the crisp bacon aside to drain, I fried a half of a smaller onion (a larger shallot would also work) until translucent, then added in some garlic, some chopped fresh asparagus and red bell pepper, just until slightly softened, but still retaining their color.
 
Bacon, Egg, Casserole, breakfast
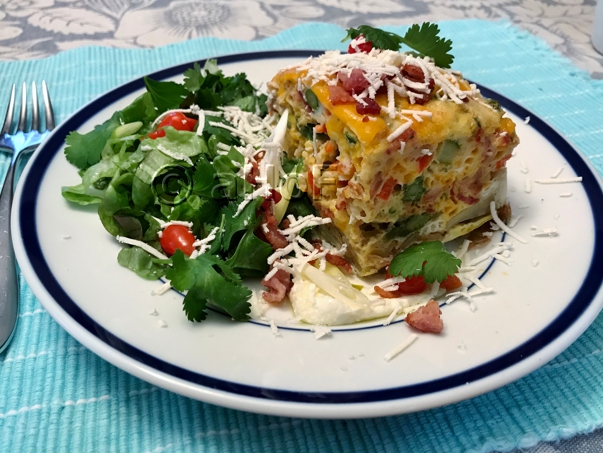
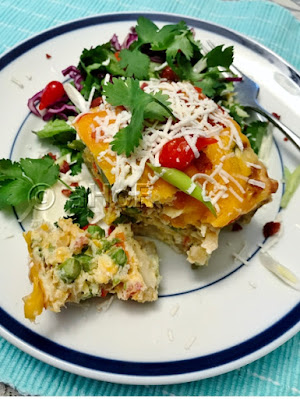
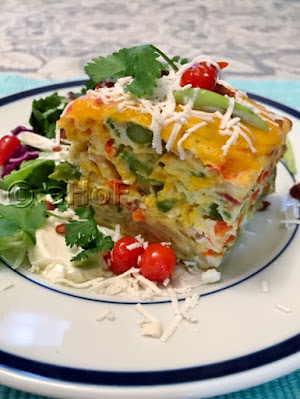
Bacon & Egg Casserole

While that was in progress, I whisked together 5 eggs and added in some fresh thyme leaves, which are still alive in a pot in my sun room, despite pretty chilly temperatures. I added in about 3 tablespoons of cream (milk would do) to the eggs and whisked well. A small amount of the eggs got poured over the potatoes in the little pan, and I rapped the pan several times, coaxing the eggs into and around the potatoes. To the remaining eggs I added the drained bacon, all the vegetables in the pan, along with some cheddar cheese, stirred well and poured this over top of the potato-egg mixture already in the pan. 

Bacon, Egg, Casserole, breakfast, recipe
Bacon & Egg Casserole
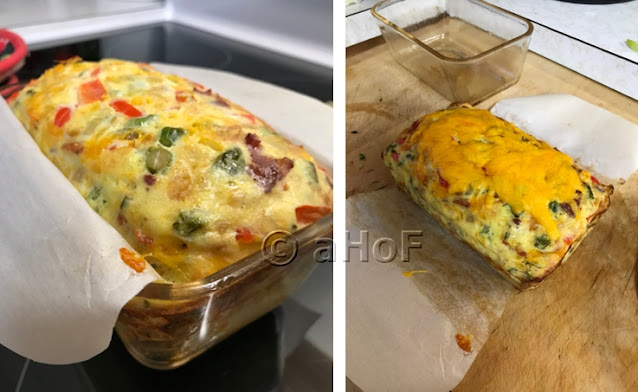
This time, I opted to cover the pan while it baked, hoping that the stored heat would help with getting the eggs set. It certainly worked. The last time, it took a solid hour and a bit of finagling to get the eggs set all the way through, but this time it took not quite 45 minutes and the top of the little casserole was beautifully puffed and rounded. I was so very pleased! Now the remaining question was, would it come out of the pan without such a struggle as last time? Why yes, it certainly did. No only did I not have to run a knife around the edges, but by lifting the ends of parchment, it lifted cleanly out, and once I set it on the cutting board, the parchment simply fell away to the sides. I was so happy, and so amazed.
 
One thing I did, because I have seen others do it, is to top the finished casserole with more cheese and pop it back in the oven to melt. I found this completely superfluous, redundant even, especially with all the garnishes that went on top, as well as an extra sprinkling of cheese. I would stick with just the half cup of cheese that went into the casserole.

Now I really want to go back to remake the first casserole, because the Poblanos in that one were just scrumptious. But for now, I could not have asked for a better turnout. And, although I am calling this casserole "Bacon and Egg Casserole," that is so inadequate, with all the great things in it!

Bacon & Egg Casserole

(with potatoes, asparagus, red bell pepper, onion, garlic and cheese 😉)
Bacon, Egg, Casserole, breakfast, recipe
Bacon & Egg Casserole
(with Sweety Drop Peppers)

Serves 2

4 strips thick sliced bacon, diced
½ large potato, or one small
2 teaspoons olive oil
½ medium onion, or 1 large shallot, finely chopped
1 clove garlic, minced 
½ red bell pepper, chopped
3 - 4 asparagus spears, chopped (about ¾ cup)
5 eggs, whisked
1½ teaspoons fresh thyme leaves
3 tablespoons cream or milk
½ cup shredded cheddar cheese
salt, to taste

GARNISHES:
  • A small "salad" portion per plate: choose from: lettuce, arugula, spinach, baby greens, cabbage, red cabbage, cilantro, etc. 
  • scallions, sliced diagonally
  • cilantro or parsley for sprinkling
  • Feta or more cheddar cheese for sprinkling over top.
  • sour cream or Greek yogurt
  • "Sweety Drop Peppers," optional (find them on Amazon), or cherry tomatoes
casserole, egg casserole, bacon, vegetables, breakfast
Fresh from the oven

Prepare a very small loaf pan, 3.5 x 6 x 2.5-inches, approximately: Spray the pan with nonstick cooking spray. Cut a piece of parchment to fit in and across the widest sides of the pan, with at least an inch of overhang. Set aside. Preheat oven to 350 degrees.

Heat a skillet and add olive oil. Add in the potatoes and fry them on medium heat until crisp and browned, keeping a lid on and only occasionally removing the lid to stir until done, about 15 minutes. Sprinkle with salt. Remove the potatoes to the prepared loaf pan.

Place the diced bacon into a skillet and fry until crisp. Remove to paper toweling to drain; set aside. In the same pan, with the bacon grease (remove some, if it is too much), saute the onion until translucent and soft. Add in the garlic, red bell pepper and asparagus, sprinkle with salt to taste and saute quickly just to soften, but still retain vibrant color. Remove from heat to cool slightly.

In a bowl, whisk together the eggs and add in the cream and thyme leaves. Pour a small amount over the potatoes in the loaf pan. Rap the pan a few times on the counter to settle some of the egg in and around the potatoes. To the remaining eggs in the bowl, add the reserved bacon, the cheese and the onion mixture from the skillet. Stir to combine the ingredients, then pour all of the mixture over the potatoes in the loaf pan. Keeping the parchment overhang on the outside of the pan, cover the pan with foil or a silicone topper. If foil, spray the side of the foil that will touch the eggs. 

Bake the casserole for 40 to 45 minutes, or until it has puffed and is completely set in the center. 

To garnish the plate as I've done, make a small salad portion using greens of your choosing for each plate. Smear a bit of sour cream or Greek yogurt alongside the salad. Once the casserole is done, remove from the pan by using the ends of parchment and set the casserole on a cutting board. With a very sharp knife, trim the edges of the egg straight and cut the casserole in half. Set one half (should be a nice square) onto the sour cream. Sprinkle with more cheddar or with Feta or any cheese preferred. Sprinkle with scallions and cilantro and if available, the Sweety Drop Peppers or halved cherry tomatoes for color.


My passion is teaching people how to create a harmony of flavors with their cooking, and passing along my love and joy of food, both simple or exotic, plain or fancy. I continue my journey in ethnic and domestic cuisines, continuing my journey to explore diverse culinary experiences and hopefully to start you on a journey of your own. Join me also at A Harmony of Flavors on Facebook, and Pinterest.
Friday, December 1, 2017

Falafel for Breakfast, Mealtime or Appetizer

Falafel, pan fried, first attempt
My First Falafel
Not too long ago (July, to be exact), I made Falafel for the first time. I made them again, very shortly after, because my husband and I just truly loved them that much. Then shortly after that, there was a recipe in my September Food and Wine Magazine that was called Baked Kabocha Falafel. While this recipe didn't even have real chickpeas in it, but only chickpea flour, I really didn't want to go there, but the idea of adding squash to the falafel mixture intrigued me. 

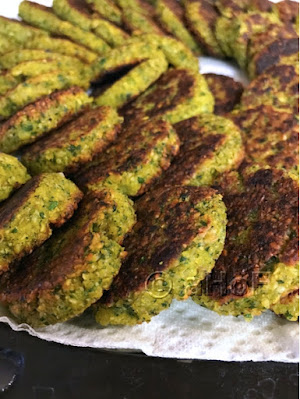
To be clear, I have been pan-frying the falafel, made into small patties. I intensely dislike deep frying anything and avoid it at all cost. Not because of the frying, but just because of all that oil, and what to do with it afterwards, since it isn't likely to be used again in the next 5 years or so... My original intent was to bake the falafel, but ended up just pan-frying them all, and they taste so good, I haven't wanted to mess with the status quo. So pan-frying it continues to be.

I sat down with the original recipe I had created and thought about just how much squash should be added, or how much chickpea mixture to remove, in order to make the recipe taste good. I came up with amounts I felt would work and got to it. I still wanted to soak the chickpeas for 24 hours prior to making the mixture, so those went to soak. Meanwhile, I didn't have Kabocha squash but did have a Butternut Squash waiting to be used. I baked the butternut squash, in order to introduce the least additional liquid to the falafel recipe, and then once baked, I measured out 12 ounces of squash. To make the mixture, I did exactly the same thing as I had done previously: everything into the food processor and processing until well broken down, scraping the bowl often, to evenly distribute the ingredients. 

Butternut Squash, Falafel, made from scratch
Butternut Squash Falafel
Lo and behold, I liked this mixture even better than the original one! 

One, it was easier to work with and form into patties. And two, I think it tasted just a tiny bit better. I grant you, the taste was not hugely different, but the ease of forming the patties really made these worthwhile. It seemed the pureed squash almost acted as a binder of sorts. I used no flour, no chickpea flour and no other binding agent. And these come out so great! 

So, now I have a Wine Tasting that I have to create foods for coming up on December 20th. Yikes! Nearly Christmas! And in thinking about what to make for this wine tasting, I had already come up with the Smoky Andouille & Corn Pouches, which pair excellently with a Malbec. And then I came up with the Mock Wellington Bites, which will pair well with a Cabernet Sauvignon, or other strong Red. Aside from those two, I am making two appetizers I have made before, and which are so flavorful: Hoisin Pork with Blackberry Chutney which pair with Pinot Noir and Spanakopita Cups that pair excellently with the austere features of a good Sauvignon Blanc or other white wine with that tartness level.

Butternut Squash, Falafel, Appetizers, small bites, finger food
Butternut Squash Falafel as Appetizers
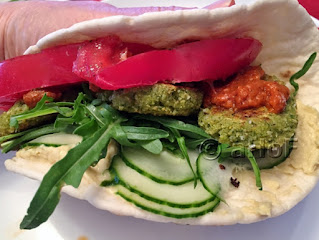
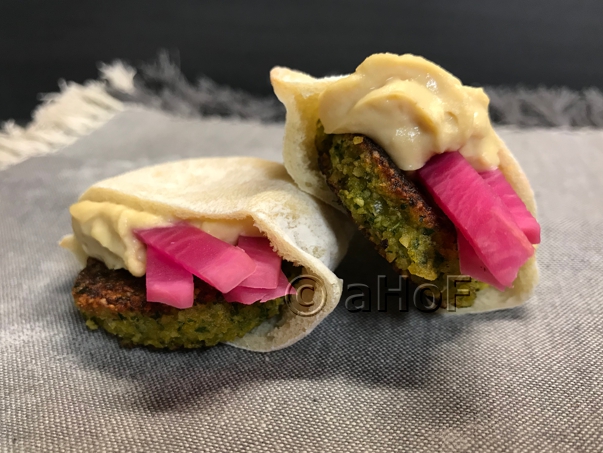
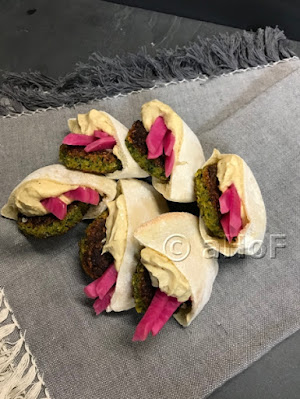
I decided to make these Squash Falafel, along with some mini Pita Breads, using a little Hummus and Turnip Pickle to decorate them. As it happened, the mini pita breads (I made 40 little breads rather than the 8 a recipe called for) worked perfectly. Cutting each one in half, each half held one little falafel patty perfectly. They are so darned cute and so amazingly tasty. I tasted them with a Chardonnay, which was perfect, but would love to try them with either an Albariño or Torrontes, or even a Pinto Gris to see how those might pair. But for now, I know that they pair with Chardonnay, and that's a great start.

These do not need to be used as an appetizer portion, not by any means. Since I do need appetizer portions for the Wine Tasting, mini pitas were a great holder, but if you aren't up to making all these little pita breads, consider cutting large, soft flatbreads into small squares (or even rounds) and spreading with a little hummus or tahini and yogurt spread and setting one little falafel on top, then garnish with something like these Turnip Pickles or with olives or other condiment.

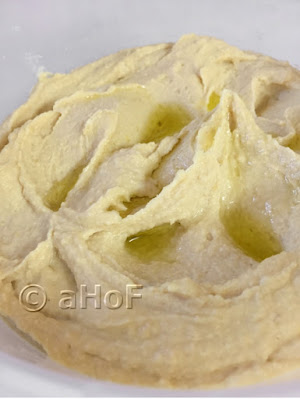
As I write this and thought about it, I realize I never have placed my hummus recipe in this blog, so I will rectify that oversight here, also.

Butternut Squash Falafel


Butternut Squash, Falafel, appetizer, tiny bites, finger food
Butternut Squash Falafel as Appetizers
Makes about 38 (1½-inch diameter) falafel patties

1 cup (6.55 oz / 186 g) dried chickpeas
12 ounces baked butternut squash
½ medium onion, in chunks
½ cup fresh cilantro leaves
¼ cup fresh parsley leaves
¼ cup fresh mint leaves
1 teaspoon ground cumin
1 teaspoon ground coriander seed
2 cloves fresh garlic, minced
1 teaspoon salt
freshly ground black pepper, to taste

Place the dry chickpeas into a large bowl and cover with water to rise above the chickpeas by at least 3 inches. Cover with plastic wrap or a lid of some kind and soak for 24 hours. Bake the squash in a 400 degree oven for about 50 minutes, or until tender all the way through when pierced with a knife. Allow to cool, then remove skin, scoop out seeds and weigh out 12 ounces of the squash. Use any remainder for another purpose.

Drain the chickpeas, discarding the water. Place the chickpeas into a food processor along with all the remaining ingredients. If your food processor is small, divide the ingredients into two or even three batches. Process each batch until the chickpeas are like coarse meal. There should be no large lumps of chickpea left. Stop and scrape down the sides of the bowl often. 

Place the mixture, covered, in the refrigerator for at least an hour, or overnight. Use a small scoop of about a tablespoon of the mixture and form a small, round patty about ⅜ to ¼-inch thick and about 1½-inches in diameter. Have a skillet heated to medium or medium low. Use oil as needed (I used olive oil) to keep the patties from sticking to the pan and fry them on each side until they hold their shape and are deeply golden browned on both sides. Fry them in batches, as needed, removing to paper toweling to drain.


Hummus, recipe, chickpeas
Hummus

Hummus


Makes about 2 cups 

1 (15-ounce) can garbanzo beans/chickpeas
2 cloves garlic
3 tablespoons Tahini (sesame paste)
3 - 4 tablespoons lemon or lime juice, to taste
⅓ to ½ cup good quality olive oil
salt and pepper, to taste

Drain the chickpeas and run them under water for at least a couple of minutes. Drain well and place in food processor along with the garlic (mince first or it could end up in large chunks), tahini and about 2 tablespoons of the lemon/lime juice. Process until smooth, stopping to scrape down sides as needed. Gradually drizzle in the olive oil, until incorporated. Taste for salt and pepper, and add salt and more lemon juice if needed, to taste.

NOTES: To make this into red pepper hummus, drain a tiny jar of roasted red bell pepper with the initial ingredients. Substitute the red bell pepper for a few artichoke hearts, if desired, or with spinach.


My passion is teaching people how to create a harmony of flavors with their cooking, and passing along my love and joy of food, both simple or exotic, plain or fancy. I continue my journey in ethnic and domestic cuisines, continuing my journey to explore diverse culinary experiences and hopefully to start you on a journey of your own. Join me also at A Harmony of Flavors on Facebook, and Pinterest.
Tuesday, November 21, 2017

A Wellington Style Appetizer for the Holidays

I have mentioned that I will be making appetizers for a wine tasting on December 20th. Kind of close to Christmas for my comfort, but I am diligently working on things that can be made ahead. A week or two ago I wrote about a recipe I made for Smoky Andouille Corn Pouches. That experiment turned out well, so I will be proceeding with that recipe for the wine tasting, as those little pouches paired excellently with a Malbec I happened to have.
Mock Wellington, small Bites, appetizer, wine pairing
Mock Wellington Bites

So, in casting about for something else new to make, and pair with a red wine (since this group mostly prefers red wine), I thought about Beef Wellington. However, I didn't want to spend a bundle and I wanted them to be tiny enough for a couple of bites. In order to manage this, I felt that the meat would have to be diced very small. My reasoning on this: a single larger cube of meat would be harder to bite into. We are talking about walking around with a little appetizer in hand. We do not want someone to take a little bite and end up with the meat on the floor, or worse yet, take a bigger bite and end up with a large piece of meat in their mouth and the rest of the pastry empty. 
Sauteed Mushrooms, Fried Meats, Assembly
Sauteed Mushrooms, Fried Meats and Assembly

To balance this out, I felt that small diced meat would be best. And then, what else would go in them? Long, long ago, my husband and I frequented a restaurant in Kalamazoo. They had a most wonderful Individual Beef Wellington on the menu, and I have recreated this, using the things I knew were in there (filet mignon, bacon, mushroom), and then adding in things that would make these basic ingredients taste exceptional. They have always turned out wonderfully flavored and perfectly done, so I went with the flavors I used for those. Mushrooms? Absolutely. I pulsed them fine in the food processor and sautéed them in butter and oil until they started browning, then added in garlic and fresh thyme leaves and some dry Sherry for flavor, cooking it out completely.
Mock Wellington Bites, small appetizer, finger food
Mock Wellington Bites

I diced bacon and fried it crisp and set it aside while quickly sautéing the tiny cubed meat over very high heat. I did this in batches (with my extractor fan on high so the smoke alarm wouldn't deafen me!), so it wouldn't steam in the pan, then removed to a bowl. It still released a lot of liquid, which I poured off. Once the meat was done, and cooled, the bacon went in with the finished meat, along with freshly minced rosemary and some Gorgonzola crumbles. The Gorgonzola is one thing I never put in my Beef Wellingtons, but I was going for maximum flavor, something that would pair well with a strong red, like a Cabernet Sauvignon.

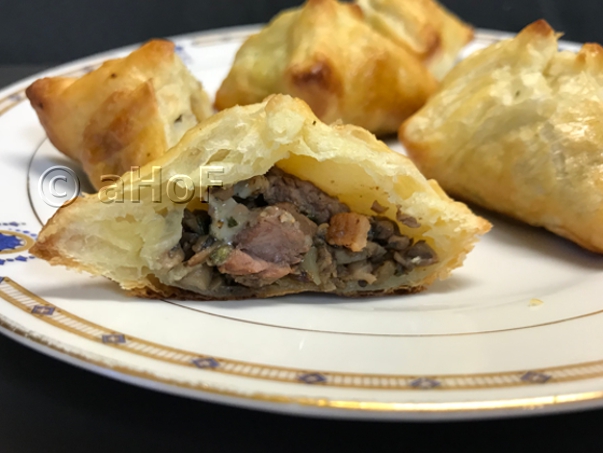
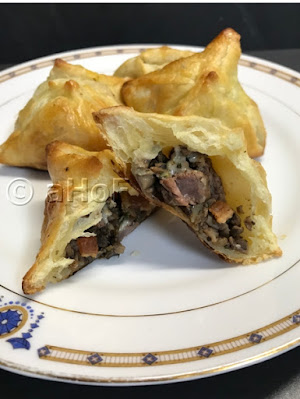
Of course, this excellent set of mixtures would be wrapped in puff pastry, so I tried out folding little pouches just as I'd done for the Smoky Andouille Corn Pouches. It seemed to work well. I froze the pouches, to be baked later. A day later I tried out baking just 4 of the pouches to see how they baked and how the whole little package came out. As it happens, they came out really wonderfully well. The only thing was that because they were so small, at 475 degrees the outside of the pastry got beautifully browned while the inside of the pastry was still doughy. I will lower the temperature to 400 degrees when baking the remainder. 

I felt that freezing the little pouches before baking was a good idea for a few reasons. First, it keeps the pastry in place while it begins baking, so they tend not to pop open in the oven, and they expand beautifully this way. Secondly, the insides are already cooked, so they only need reheating while the pastry gets baked. Thirdly, freezing means I can have them prepared way ahead and baked briefly just before serving. Best of all worlds.


Mock Wellington Bites


Makes 32 Little Bites
Mock Wellington Bites, tiny appetizers, finger foods, puff pastry
Mock Wellington Bites

MEAT:
5 - 6 slices thick bacon, diced
2 tablespoons bacon fat, reserved from frying
1 pound sirloin steak, in ¼-inch cubes
½ teaspoon salt
Freshly ground pepper, to taste
1 tablespoon fresh rosemary, minced finely
½ teaspoon Beef & Pork Seasoning
6 ounces Gorgonzola Crumbles

MUSHROOMS:
1 tablespoon each butter and olive oil
1 pound mushrooms, finely minced
½ teaspoon salt
2 cloves garlic, minced finely
1½ - 2 teaspoons fresh thyme leaves, minced
⅓ cup dry Sherry (NOT cooking Sherry!), or white wine, optional
-----

½ medium onion, minced finely
½ teaspoon salt
-----
1 Package Puff Pastry (2 sheets)
1 egg, for egg wash when baking

Remove the Puff Pastry Sheets from the freezer, unwrap and set on the counter to thaw completely.

Heat a large skillet and fry the diced bacon until crisp. Remove the bacon to paper toweling to drain, reserving 2 tablespoons of the bacon grease aside.

Use 1 tablespoon of the bacon grease in the pan and heat to high heat. Add half the meat cubes and sear them briefly, tossing until very little pink remains. Turn out into a bowl. If more grease is needed, add the second tablespoon of grease to the pan and sear the second half of the meat, adding it to the bowl when done. Giving the meat a few minutes to settle, drain off any liquids that form. Add in the salt, pepper to taste, rosemary and Beef & Pork Seasoning and toss well. Once the meat has cooled, add the drained bacon and the Gorgonzola Crumbles and toss well. Set aside.

In a clean skillet, heat to medium or medium high heat and add in the butter and olive oil. Add the mushrooms and the first ½-teaspoon salt and sauté, stirring and tossing continually. They will release a lot of liquid, but keep stirring until it has all evaporated and the mushrooms begin to take on a bit of golden brown color. Add in the garlic and thyme leaves and toss to distribute. Add the Sherry or wine, if using, and stir, cooking until all the wine has evaporated. Remove the mushrooms to a bowl.

Add the onions and the next ½-teaspoon salt to the pan and sauté the onions gently, over medium low heat, stirring often, until they get a golden color. Add the onion to the mushrooms and mix well. Set aside and allow to cool.

Flour a surface and unroll one Puff Pastry sheet. If it is completely thawed, it will open without cracking. If it wants to crack apart at one of the folds, it is not thawed enough. Once ready, lightly dist the top surface with flour.

Roll out the pastry sheet to about a 16½ x 16½-inch square. Keep it as squared as possible. Trim off the outer edges all the way around, leaving a 16 x 16-inch square. Cut the large square into 16 smaller, 4 x 4-inch squares: first cut the square in half in one direction, then each half into halves in the same direction. Repeat this halving in the opposite direction. Have a small cup of water at hand, for moistening the edges of the squares, when folding.


Folding, puff pastry, pouches, Wellington Bites
Folding the Wellington Bites


Using a teaspoon measure, scoop a generously rounded, packed portion of the mushroom mixture onto the center of each 4-inch square. Neaten it into a flat circle and then using the same teaspoon, scoop up a generous portion of the meat mixture, placing it atop the mushrooms on each square. Press the meat into neat mounds. Moisten all four edges of the square. Lift two corners, bringing the points together and sealing the seam. Lift another point to the center and press to catch the point with the previous two, then seal that edge. Now, bring up the remaining point to the center, pressing it with the other points, to adhere, then press the remaining two edges to seal. Do this with each of the 16 squares.

Set the little packets onto a baking sheet once they are completed. Repeat this whole process with the remaining Puff Pastry sheet, for a total of 32 little pouches. Set the baking sheet into the freezer and allow the packets to freeze for at least an hour. If baking that day, preheat the oven to 400 degrees.

DO AHEAD: If making these ahead, once frozen, remove all the little frozen pouches to a zip-top bag and keep them frozen for up to 3 weeks. When ready to bake, preheat oven to 400 degrees. Set the frozen pouches onto a baking sheet.

Whisk the egg lightly with 1 tablespoon of water, for the egg wash. This will make the pouches bake beautifully golden, with a pretty shine. Using a pastry brush, brush the top sides of the pastries with the egg wash. Do not allow egg to drip onto the baking sheet, as this can "glue" them to the pan, making removal from the tray very difficult later. Bake the pastries for 10 or 12 minutes, as needed for the pastry to become beautifully golden and puffed. Serve hot or at room temperature, preferably with a nice glass of Cabernet at hand.
😀

My passion is teaching people how to create a harmony of flavors with their cooking, and passing along my love and joy of food, both simple or exotic, plain or fancy. I continue my journey in ethnic and domestic cuisines, continuing my journey to explore diverse culinary experiences and hopefully to start you on a journey of your own. Join me also at A Harmony of Flavors on Facebook, and Pinterest.
Disqus