Translate

Wednesday, December 9, 2015

Inspired Pork Shoulder Roast in Slow Cooker

The words "Inspired" and "Pork Shoulder" might not sound like they should go together, for some. Still, I have to say that this recipe might just have been the absolute best pork I have ever had, and that is going some long, long way!

I started out the day wondering what to do with the pork shoulder roast I had bought, and cast around for inspiration. I went to see what herbs are still alive in my sun room and came back with handfuls of oregano and parsley. Okay, while oregano is not my normal go-to herb for pork, it was still so full and lush that I went for it. Thinking of a somewhat sweet and sour effect, I used some currant jelly that was taking space in the fridge, along with lime juice. And then came the real inspiration: roasted garlic. Granted, this is a step that must be accomplished well in advance, but should you make some roasted garlic for any other reason and have some leftover (as I did), then this is a truly inspired use for it.

Making Roasted Garlic

Roasted Garlic, roasting, foil
Roasted Garlic
For any of you who may not yet know how to make roasted garlic, it is simplicity itself. Preheat the oven to 400 degrees. Cut a square of foil (per head of garlic) and have it ready. 

With a very sharp knife, cut across the top of a whole head of garlic, removing about ¼ inch and exposing most of the garlic cloves (some outermost cloves will remain below the cut line but this is of no importance). Set the head of garlic onto the center of the foil, cut side up. Drizzle the top with about a tablespoon of olive oil. At this point, I also had fresh thyme handy, and stripped a stem of thyme leaves and strewed them over the garlic, but this is entirely optional. Bring the foil up and around the garlic to make a little packet and set the packet(s) onto a baking sheet, or in a casserole, or in the wells of a muffin tin. Bake the garlic for 40 to 60 minutes. The timing will depend on how large the heads of garlic are and how caramelized you want the final product. You will know by the delicious aroma when they are nearing perfection.

Once the garlic is finished roasting, allow the packets to cool, then you may either use immediately or refrigerate. They may be refrigerated as is, or you can remove the individual cloves from their skins very easily. They just slide out whole. For those few cloves that did not have an end cut off, just tear through the skin at one end and squeeze. Store the cloves, along with any olive oil from roasting. Once all the cloves are in a jar, top off to cover with more olive oil and seal tightly. This way they will keep for a very long while.
 
Pork Shoulder, Roast, Slow cooker
Pork Shoulder Roast Low and Slow

Using this Inspiring Garlic

At this point, with roasted garlic in the fridge, this is where I was when that inspiration hit. My jar of garlic in olive oil had gotten hidden in the back of the fridge and I had forgotten about it. But really - pork and garlic are a match made in heaven any day, so I got out my jar, which held about a whole head worth of garlic cloves. I scraped the entire jar worth into the slow cooker!  And the flavors when the roast was done were so out-of-this-world I could hardly believe my taste buds. This recipe is a true must-try for anyone who loves pork!

The garlic, having been roasted previously, starts out already sweet in this recipe, so the flavor of garlic as one would think might be overwhelming, just made a most delightful underlying flavor structure, without being able to precisely identify what that flavor was. I made gravy with the pot liquid and oh heavens! I did mash up the garlic in the mixture, but otherwise left all the liquid as is, with all its bits and pieces. My husband has been truly chowing on this roast! As I was doing the same myself, I completely forgot to take photos, until I was nearly done with my meal!

My next use for roasted garlic will have to be a dip. There are so many luscious recipes out there just waiting.

Pork Shoulder Roast, Low and Slow

Pork, Shoulder Roast, Slow cooker
Pork Shoulder Roast Low and Slow
Serves about 6 - 8

1 (4 - 5 pound) boneless pork shoulder roast
1 whole head roasted garlic cloves (see above)
½ cup fresh Italian parsley, chopped
¼ cup red currant jelly
2 tablespoons minced fresh oregano leaves
2 tablespoons lime juice 
1½ teaspoons salt
½ teaspoon freshly ground pepper

Set the pork roast into the slow cooker and add remaining ingredients. Cover and set on High (my slow cooker has "Low" or "High" as settings - you may need to alter this for your slow cooker) for 6 hours. Tear the roast apart and serve.

I served this roast with sweet potatoes and apple and a side of broccoli. On the second night I made mashed potatoes to go with leftovers. 


My passion is teaching people how to create a harmony of flavors with their cooking, and passing along my love and joy of food, both simple or exotic, plain or fancy. I continue my journey in ethnic and domestic cuisines, continuing my journey to explore diverse culinary experiences and hopefully to start you on a journey of your own. Join me also at A Harmony of Flavors on Facebook, and Pinterest.

Sunday, November 29, 2015

Fermented Red Cabbage Kraut

Fermenting, Red Cabbage, Kraut, Beet
Fermented Red Cabbage Kraut with Beet
Since this past June when I started fermenting foods, I have discovered a lot of flavors heretofore missing from my taste repertoire. Each one is an experiment, and I never know what will be great or what will fall flat. My original sauerkraut recipe was delicious, and I truly thought nothing could beat it. Then I made a Lacto-Fermented Picalilli and my taste buds really took notice. Since those initial ferments I have made a lot of different things, some great and a couple that were certainly not to my taste.

Not too long ago I started a red cabbage ferment with some red beet grated in. I do not like raw beets. I absolutely love cooked beets, just about any way. Making this red kraut, which I hoped to enhance color-wise with the beet, was a total experiment. This time it was a tremendously successful experiment. I cannot taste the beet at all, and the color is lovely. The overall flavor is far better than the green cabbage kraut. I just love it!

Fermenting, Red Cabbage, Kraut, Beet
Fermented Red Cabbage Kraut with Beet

Red Cabbage Kraut with Beet

Fermenting, Red Cabbage, Kraut, Beet
Fermented Red Cabbage Kraut with Beet

1½ pounds red cabbage, finely shredded
1 beet, about 5.5 ounces, peeled and shredded
2 cups baby arugula leaves
1 large red onion, cut in thin slivers
2 red Fresno chilies, sliced
2 cloves fresh garlic, minced
1 teaspoon dried hibiscus flower tea 
¼ cup liquid from a previous ferment, as a starter
1 teaspoon juniper berries
½ teaspoon allspice berries

4 - 5 teaspoons coarse sea salt 

2 - 4 cabbage leaves for covering the final mixture

BRINE, if needed:

1½ teaspoons coarse sea salt, dissolved in:
1 cup water

Place all the ingredients into a very large bowl with the salt. Use hands to squeeze the mixture or some implement to smash down the mixture and break down the cell walls of the vegetables (such as a meat tenderizer or a heavy rolling pin). The goal is to break down the vegetables enough so that the overall size and amount shrinks to about half the original bulk. This can be done in short bursts, allowing the mixture to rest for an hour in between and form its juices. It is preferable to have the cabbage make its own juice, but if there is not enough juice to cover the mixture when the vegetables are pressed down, then the added brine may be needed.

Pack the mixture into one very large or two smaller bail-wire jars (Fido) fitted with an airlock. Allow about ⅓ empty jar space above the vegetables. Press the mixture into the jars very tightly, ensuring that the juices completely cover the vegetables. Cover with the reserved cabbage leaves and weight the vegetables with glass weights or zip-top baggies of water. The goal is to keep everything submerged. Close the lid and have the airlock in place. Set the jar in a dark corner to ferment for 2 to 4 weeks. This time will depend on how warm or cool the room temperature is. Cooler will take longer fermenting time. Warmer will ferment more rapidly. 

Once fermented to your taste (or when all bubbling stops), re-pack the ferment into jars with a plastic lid and refrigerate.  


My passion is teaching people how to create a harmony of flavors with their cooking, and passing along my love and joy of food, both simple or exotic, plain or fancy. I continue my journey in ethnic and domestic cuisines, continuing my journey to explore diverse culinary experiences and hopefully to start you on a journey of your own. Join me also at A Harmony of Flavors on Facebook, and Pinterest.

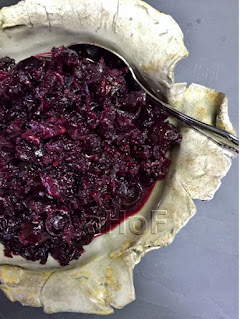
A New and Delightful Cranberry Relish

I had guests with us for much of November, with only a brief hiatus between. While I cooked a lot, I went for the tried and true recipes, rather than invent new ones. Still, in planning for Thanksgiving dinner I was thinking ahead. I wanted to try a type of fermented food I hadn't yet gotten to, namely a Cranberry and Honey Ferment.
 
Honey, Ferment, Cranberry, Blueberry, Relish
Honey Fermented Cran-Blueberry Relish


Cardamom pods, seeds
Cardamom pods and seeds
I had seen things fermented with honey, though adding honey to most ferments will stop any fermentation from occurring. Honey is antibacterial, after all. Still, I know that Mead is made with honey, so obviously it will ferment. My understanding is that some sort of water-based food needs to be added to get the fermenting action started, but once started, it does ferment well. Getting the fermentation started takes a little while, so I started it out in October, giving my cranberry ferment a little over 6 weeks fermentation time. I read that in this type of ferment, one should stir the mixture daily until the fermentation begins. Even still, and with the use of an airlock valve, it started to develop Kahm yeast. I intensely dislike the flavor this yeast gives the foods, so I meticulously wiped off the inside jar and carefully skimmed off the white yeast from the top of the ferment. After a couple more days, fermentation took over and there was no more yeast problem.

I happened to have some fresh blueberries on hand when I started this ferment, so I opted to add some in with the cranberries. I also used fresh ginger, which became a quite prominent flavor, so if you really love ginger (which I do), then the recipe will be just fine. If you do not care for ginger, lessen the amount used in this recipe, or omit it altogether.
Honey, Ferment, Cranberry, Blueberry, Relish
Honey Fermented Cran-Blueberry Relish


Other flavors I used were whole cardamom seeds, pecans and orange peel. I always add orange peel and orange juice to my cooked cranberry sauce, and I love that mixture, so I kept it in this recipe also. It took no time at all to combine these ingredients, and outside of the Kahm yeast developing, with the need for a little cleanup, it sat happily bubbling on the counter for 6 weeks. I bottled it and refrigerated it the Friday before Thanksgiving.

I absolutely love, love, love this particular ferment! It was well worth the wait. I would have given it more time to ferment (it was till bubbling actively) if I'd had more time, but it got started late, so I live with these results, which are spectacular. The outcome is plenty sweet, despite the fact that no cooking took place. The main difference is that the fermented cranberries are not thickened. Cranberries have natural pectin, so cooking them and with the berries bursting in the pan, the pectin goes to work and this thickens a cooked cranberry sauce. Not so here. This fermented sauce is a bit runnier, but just as sweet.

Honey Fermented Cran-Blueberry Sauce 

Makes about 4 cups
Honey, Ferment, Cranberry, Blueberry, Relish
Honey Fermented Cran-Blueberry Relish

4 cups fresh cranberries (about 14 ounces)
4 ounces fresh blueberries 
1 tablespoon fresh ginger, in thin matchsticks
1 teaspoon whole cardamom seeds
½ teaspoon pink Himalayan sea salt
1 tablespoon dried orange peel
1 cup coarsely chopped pecans (2.25 ounces)
1¼ cups raw, organic honey

relish, ingredients mixed, ferment
freshly mixed and set to ferment
In a food processor, pulse the cranberries and blueberries to roughly chop. Pour into a bowl and stir in the remaining ingredients. Pour the mixture into one large (1.5 - 2 liter) wire bail jar (Fido) with an airlock in place. Open the jar once a day and stir down the mixture, for about a week. Once it begins to bubble on its own, leave off stirring and allow the fermentation to run its course. This will take a minimum of 6 weeks and up to 3 months. Once fermented, pour into smaller jars and refrigerate.


While on the topic of cranberry relish, this is the recipe I use every year for Thanksgiving, and I also made it this year, for those who preferred a more traditional taste and feel. Last year I altered it slightly, using Port wine and dried cherries and it was also spectacular, but this one has been my preferred recipe for many many years now.

Cranberry, Orange, Relish
Cranberry Orange Relish

Cranberry Orange Relish

Makes about 4 cups

10 - 12-ounce bag fresh cranberries
1¾ cups white sugar
1 cup orange juice
1 teaspoon orange zest, freshly grated
½ cup slivered almonds, optional

Combine the first 4 ingredients in a medium saucepan and bring to boil. Reduce heat to medium and cook, uncovered for about 10 to 20 minutes or until the berries have popped and thickened. The mixture will thicken more as it cools. If desired, mash the berries while they cook, to release the insides, which thickens even more. If desired, add in the almonds. Remove from heat and cool before storing in a tightly sealed container in the refrigerator for up to 3 weeks.


My passion is teaching people how to create a harmony of flavors with their cooking, and passing along my love and joy of food, both simple or exotic, plain or fancy. I continue my journey in ethnic and domestic cuisines, continuing my journey to explore diverse culinary experiences and hopefully to start you on a journey of your own. Join me also at A Harmony of Flavors on Facebook, and Pinterest.

Thursday, November 12, 2015

Two Recipes from Magazines

I generally do not make things directly from a magazine, but alter them in some way - sometimes a lot. I had guests for a couple of weeks, and it seemed just easier to revisit some old tried and true recipes, or ones that were requested. Our friend Rich was visiting when pheasant hunting season started, and when he came home with 3 pheasants the first evening, he specifically requested the Pheasant Alfredo we thought up last year. To pair with it, I also made the Fall Fruit Compote, although this year I could not find quinces, so I substituted slightly green pears instead.

magazine recipe, pumpkin, tart, caramel
Pumpkin Caramel Tart
As I said, I usually do not make a recipe straight from a magazine, but I did receive my latest Bon Appetit magazine, the November / Thanksgiving issue. In general, Bon Appetit is my least favorite of all the cooking magazines out there. I am not dissing the magazine per se, but everyone has a cooking style of some sort, and some things they prefer or not. This November issue however, just had one recipe after another jump out at me. I rarely find really interesting recipes in the Thanksgiving issue, because we have a menu, and my husband prefers not to deviate from that menu. When he finds something he likes - that's it! Most times I flip through the November issues of any cooking magazine, note all the strange ways to prepare a turkey, remark on all the side dishes my husband would never touch, and set the magazine aside.

magazine recipe, pumpkin, caramel, nuts, tart
Pumpkin Caramel Tart sliced
This time, there were so many recipes I wanted to try I was all agog. Now, with Rich - our "all-things-pumpkin-but-particularly-pumpkin-pie fanatic" visiting, I especially took note of a recipe for a Pumpkin Caramel Tart with Toasted Hazelnut Crust (find the recipe online here). The tart called my attention because of the fact that it used very little liquid, so instead of a custardy pumpkin pie, it looked denser and richer. Granted, it called for making your own caramel first, but I was game. The hazelnuts in the crust did not call my attention at all, and because the recipe also called for roasting, then caramelizing extra hazelnuts to strew over top, I would really need to love hazelnuts. As they are just not my favorite nut by a long shot, I switched the nuts used to pecans. 

Outside of that, I made no changes at all. To me, it was heavenly. The crust was okay. I might tweak that part next time. Despite the fact that the only spice in this tart was cinnamon, and not even all that much cinnamon, the spice seemed extra concentrated. My guys were divided on it. My husband loved it and preferred it over pumpkin pie. Rich loved it, but preferred pumpkin pie when push came to shove. For me, the filling was marvelous, and on a special occasion I would make it again, in a different crust. But the real reason I would only make it for a special occasion is that it took so many gadgets and utensils to accomplish. I had my sink piled precariously high with pots, food processor pieces, bowls, baking sheets, spatulas, spoons and you-name-it that I just don't want to do it often, despite the wonderful flavors. I would still recommend it!

The other recipe I made a few days ago came from a brand-new publication called "Bake from Scratch" (check it out here). It apparently is a quarterly magazine, with no ads. It is absolutely stunning in its look and feel, with smooth, heavy pages and gorgeous photography. The recipes sound scrumptious, too. It is pricey, but it caught my eye while looking for something else entirely in the grocery store, so I bought it on a whim. Many recipes are calling to me, but it has been a while since I made scones, and this magazine had recipes for EIGHT kinds of scones. Scone heaven, for sure. Most of the recipes absolutely call me to make them, and I started off this little journey with Cranberry Pistachio Scones. By the way, I am not affiliated in any way with this magazine, not being paid for promoting it. It is just too gorgeous a windfall not to share!
Cranberry, Craisins, Pistachios, Scones
Cranberry Pistachio Scones
magazine recipe, Photos, Magazine
Photos from the Magazine

As for the scone recipes, I have made scones lots of times, and my go-to method is using at least 1 whole stick of butter and then buttermilk as the liquid. I like my old scone recipes just fine. But the scones in this magazine all called for less butter and a cup of heavy cream instead of buttermilk. I must say that for scones made without any egg (which I prefer, as it seems most authentic), these scones came out quite moist - much more than mine! I generally do not use icing or glaze on scones. I did make a quick glaze out of some leftover browned butter icing with orange juice added to thin it down to pouring consistency. This was for my husband, as he selected this particular recipe for me to try first, based solely on the fact that it showed the most frosting in the magazine photo! What a great criteria!

If you can still get your hands on this magazine, while it is expensive, is one of those "you-get-what-you-pay-for" things. And I highly recommend the scones! Next up are the Cheddar and Black Pepper - or maybe the Fig, Thyme and Goat Cheese, or maybe . . . . 


My passion is teaching people how to create a harmony of flavors with their cooking, and passing along my love and joy of food, both simple or exotic, plain or fancy. I continue my journey in ethnic and domestic cuisines, continuing my journey to explore diverse culinary experiences and hopefully to start you on a journey of your own. Join me also at A Harmony of Flavors on Facebook, and Pinterest.

Saturday, October 31, 2015

Mushroom Gnocchi Fricassee with Sage

Recently I got the urge to make gnocchi. I don't do this often, and I had a fool-proof recipe to use whenever that urge should strike. It is a messy business, much like making pie dough, which I dislike doing because of the mess. Some people love to make pies and do it almost exclusively. I love pie, but to make one I have to really be motivated. That's why I generally go for making cakes. To me it is much simpler.

Back to the gnocchi. I had seen an episode of The Chew where Mario Batali made gnocchi and there was some discussion on the use of egg in making gnocchi. Some purists say there should never be egg in gnocchi and others claim the opposite. I had only made the no-egg kind of gnocchi, relying on properly baked potatoes and cooling and such. In this particular case, I opted to give the egg a go and see how they might come out. 

Mushroom, Gnocchi, Fricassee, Sage
Mushroom Gnocchi Fricassee with Sage

And then, how to serve them? With a sauce? Just sauteed, with some bread crumbs over top? I have made tomato sauce in past, or just buttered with Parmesan and they were great. This time though, I was making a new recipe for a pork tenderloin using sage leaves, and wondered what might taste best with a strongly flavored pork dish. My husband used to love a mushroom fricassee dish long ago, and I had always meant to get into trying something out in that vein. Like many things, it sort of went by the wayside, but I had bought dried mushrooms so I would be ready to reconstitute and make this dish. Unfortunately, many years have gone by. I still had the mushrooms though.

My decision was to make a wild mushroom (dried and reconstituted, as there are no such exotic things as chanterelles, morels or lobster mushrooms found fresh up in these parts) fricassee, and toss in the gnocchi with more sage. Ultimately, the dish was fabulous. The strong favors of all the mushrooms went superbly with the pork tenderloin which was strongly flavored with sage and prosciutto. A true match made in heaven. If you love mushrooms and have access to dried mushrooms, this recipe is one to go for. If, even better, you have access to fresh wild mushrooms, whatever assortment you might like, I would suggest at least a pound or 1 1/2 pounds of fresh mushrooms for this dish.

Mushroom Gnocchi Fricassee with Sage

Serves 6 to 8
Mushroom, Gnocchi, Fricassee, sage, side dish
Mushroom Gnocchi Fricassee, served

GNOCCHI:
14 to 16 ounces russet or Idaho potatoes
½ cup all-purpose flour
½ cup cake flour
1 teaspoon salt
1 egg yolk

MUSHROOM FRICASSEE:
1.25 ounces dried assorted wild mushrooms
     (I used ½-oz. lobster mushrooms, ½-oz chanterelles, ¼-oz morels) 
2 tablespoons unsalted butter
1 tablespoon olive oil
½ medium onion, finely chopped
½ teaspoon salt
2 cloves fresh garlic, minced
1 tablespoon fresh sage leaves, minced
½ cup dry vermouth or dry white wine
¾ cup heavy cream

Set the dried mushrooms in a medium bowl and cover with boiling water. Cover and allow them to reconstitute for at least 30 minutes.

Scrub the potatoes and bake them in a preheated 400 degree oven for about 50 minutes or until they are tender all the way through. They must be baked, without wrapping in foil or anything that might trap moisture. Moisture is the enemy in making gnocchi. Remove from oven and remove the skins. Rice the potatoes and allow them to cool completely without mixing them, as this would compact the potato and the starches will become gluey. 

Gnocchi dough, ready to use, making gnocchi
Gnocchi dough, ready to roll and cut
Combine the two kinds of flour (if cake flour is not available, use only all-purpose flour). Once potatoes are completely cooled through, add in one-half of the flour, with the salt and the egg yolk. Stir gently, tossing, rather than mixing too roughly at first. If needed, add in a little more flour. Turn the mixture out onto a floured surface and knead the mixture together until it holds together to make a dough that is not too sticky, adding more flour only if needed. This is a balancing act, as too much flour will make the gnocchi heavy and dense, while not enough flour will have the gnocchi fall apart and disintegrate in the cooking water. 

Have a pot of boiling, salted water ready to test the gnocchi. Roll out the gnocchi dough, ½ of the dough at a time, into long ropes about ¾-inch in diameter. Cut the gnocchi in about 1 inch lengths. If desired, the little gnocchi may be rolled against the tines of a fork to leave a ridged design, though this is unnecessary. Test one of the gnocchi in the boiling water. If it keeps its shape, cooks through, and floats to the surface when done, then proceed with the remaining gnocchi. Boil them in batches without crowding the pot, for about 2 minutes per batch. Once done, scoop them out with a colander or a slotted spoon into a bowl.

Cooking, mushrooms
Cooking the mushrooms
While the potatoes are cooling, make the Mushroom Fricassee. Drain the mushrooms and keep ready. Over medium heat, add the butter and oil to a large skillet, and add in the onions. Sprinkle the salt over the onions while cooking. Saute until golden and then add in the reserved mushrooms, the garlic and sage and cook for about 3 minutes, until fragrant (left photo, at right). Add in the vermouth or wine and cook (right photo, at right), raising heat if necessary, to evaporate the alcohol almost completely. Add in the heavy cream and lower heat, cooking slowly for about 15 minutes. Add in the reserved gnocchi and toss well. Serve immediately.


My passion is teaching people how to create a harmony of flavors with their cooking, and passing along my love and joy of food, both simple or exotic, plain or fancy. I continue my journey in ethnic and domestic cuisines, continuing my journey to explore diverse culinary experiences and hopefully to start you on a journey of your own. Join me also at A Harmony of Flavors on Facebook, and Pinterest.

Saturday, October 24, 2015

Fruity Sides for Jerk Chicken Meal

I have no background anywhere near the Caribbean, but it is hard to think Jerk Chicken (or pork or lamb) without the thought of tropical fruits coming to mind. When I made up my Jerk Marinade recipe recently, I also wanted something appropriately Caribbean to accompany the meat.

Grilling, Pineapple, Mango, Salsa, side dish
Grilled Pineapple Mango Salsa

My first thought was some sort of fruity salsa; maybe something with mango, green pepper, some chilies and lime juice. The more thought I put to this, the more I recalled seeing pineapple grilled and with the char marks from the grill, and my mind went in that direction. In the end, I grilled both some sliced pineapple and some mango slices and both went just perfectly together with the other salsa additions. 

Keep in mind that to grill mango, the fruit must be just a little firm. Too soft and it is difficult to keep the fruit together just to eat, and far less so if placed on the grill. For this salsa, try and select a mango that is still quite firm; not too green and not too ripe. While I wanted this salsa to accompany the grilled Jerk Chicken, it would also be quite at home at a party with some tortilla chips alongside. In the end, this is what I concocted as my salsa. 

Grilled Pineapple Mango Salsa

Grilling, Pineapple, Mango, Salsa, side dish
Grilled Pineapple Mango Salsa
Makes about 2 cups

1 good-sized mango, slightly under-ripe
½ fresh pineapple, peeled, sliced 
1/2 cup pickled or fresh red onion, chopped
1 red bell pepper, chopped (about ¾ cup)
1 hot pepper of choice, minced
1 small tomato, seeded, chopped (about ½ cup)
½ cup fresh cilantro, chopped
juice of 1 lime (about 1½ to 2 tablespoons) 
1 jalapeno, minced (more, if desired) 
½ teaspoon salt, or to taste

Heat a grill to high and quickly grill the mango slices and pineapple slices until they acquire nice char lines on either side. The goal is to sear them, but not necessarily cook through.

Once grilled, cut the pineapple and mango into small cubes and place them in a mixing bowl with the remaining ingredients. Toss all ingredients well and taste for seasoning.

Now that I had a salsa I was pleased with, I gave thought to another side dish, and of course rice seemed the most appropriate. To give another nod to the Caribbean flavors I was looking for, I used more of the pineapple I had grilled and added this to the rice as it cooked, along with other similar ingredients to the fruit salsa. 

Caribbean flavors, Rice, side dish
Caribbean Rice


I have never, ever had difficulty with making rice, though I hear and read often that others have lots of difficulties with making it. I don't have any idea why I have never had problems making rice, but this is the recipe I created, and it came out beautifully light and fluffy and full of flavor.

Caribbean Rice

Serves 4 to 6

1 cup white rice (I used Basmati)
1 cup fresh pineapple, grilled
¾ cup chopped red bell pepper
½ cup scallions, chopped
1 teaspoon salt
1 tablespoon cooking oil or coconut oil
2 cups water
1 cup frozen peas
¼ cup fresh cilantro, minced

In a medium saucepan, combine the rice, pineapple (cut into small cubes), red bell pepper, scallions, salt, cooking oil and the water. Bring to a boil, reduce heat to low and cover tightly. Time for 15 minutes, at  which point the rice should be cooked and fluffy. Add in the frozen peas, give the whole mixture a quick toss with a fork, then cover and turn the burner off, allowing the peas to heat through while keeping their bright green color. Before serving, add in the cilantro and stir. Serve immediately.

About Plantains

To round out the fruity flavors of this meal, I also opted to fry a plantain and serve alongside. To those who might know nothing of plantains and be afraid to use them, here is a little guidance:

Plantains are related to bananas, but are far more starchy and need to be cooked to be edible. They may be eaten while still quite green, in which case they have no particular sweetness and can be used as a vegetable. Partially ripe plantains will be yellow, but they are still quire firm. There is more sweetness developed in the fruit at this point and these plantains may be cooked and used as a slightly sweeter side dish, as with sweet potatoes, or they may be sliced and fried. As they cool from cooking, these partially ripe plantains will become rather unpalatably firm, so eat them while warm. Very ripe plantains will have turned nearly completely black. At this point in ripeness, the plantain is very sweet, cooks quickly and easily, and is wonderful used in more of a dessert category.


Green Plantains
Green Plantains
"Green" plantains can be green, or already turning slightly yellow, but still quite hard. Green, they are harder and dryer and look much like a very large green banana. Look for plantains that have slightly rounded ridges. Too sharp ridges indicate the plantains were picked far too green. They may be cooked in plain water, until tender enough to pierce with a fork, as for potatoes. Serve them cooked this way or try a recipe for "Tostones", a Puerto Rican (and many other Caribbean countries) dish that makes great use of the green plantain. For Tostones, the green plantain is peeled and then sliced across into about 1-inch thick slices. The slices are fried in oil until golden on each side, then removed from the pan, blotted dry and smashed flat. These flattened discs are returned to the pan and fried once more until golden and cooked through.

Medium Ripe Plantains
Medium ripe plantains are nicely uniform yellow. At this point they will look like very large ripe bananas, but are still harder than a fully ripened plantain and while sweeter, they will not yet have full sweetness. These plantains can be used either as a part of a meal or as a dessert. They can be grilled while still in their skins, until they are soft completely through, then skins are removed and they can be eaten this way. 

Fully Ripe Plantains
Fully ripened plantains are nearly or all blackened. They should be quite soft to the touch, though nothing at all like a blackened banana. They retain enough firmness to easily peel, slice and cook them, but now the full sweetness comes through and they will retain the cooked softness more easily once cooled. They may still be cooked in water and used as a side dish, only now with more natural sweetness. These ripened plantains are wonderful as a simple dessert. Peel them and fry them whole, or slice lengthwise and fry, sprinkling them with a little cinnamon and sugar towards the end of cooking. Serve with sour cream. A Guatemalan dessert of Rellenitos de Platano is a perennial favorite at our house. 


My passion is teaching people how to create a harmony of flavors with their cooking, and passing along my love and joy of food, both simple or exotic, plain or fancy. I continue my journey in ethnic and domestic cuisines, continuing my journey to explore diverse culinary experiences and hopefully to start you on a journey of your own. Join me also at A Harmony of Flavors on Facebook, and Pinterest.

A Caribbean Meal to End the Grilling Season

Jerk Chicken, Rice, Fruit Salsa
Jerk Chicken with Caribbean Rice and Fruit Salsa
Up in these northern climes, we have been in full Fall mode since day-one of the Autumn solstice. It is imperative to make use of any day that it is nice enough to use the grill. Soon there will be snow and sub zero temperatures and it becomes less exciting (if even possible) to be outside. Period.

So, in that vein, I decided to make a Caribbean style meal all around. My choices were Jerk marinade for both lamb chops and chicken, alongside such things as Caribbean Rice and a most excellent Grilled Pineapple and Mango Salsa.  As for the Jerk marinade, I had made Jerk chicken in the past. Some recipes I had used were so-so, to my taste buds, and others were a bit better. I had never used any chilies in the marinade, despite chilies being one of the main ingredients. My husband is not one who tolerates very highly spicy hot foods, and while I enjoy them, I also don't care to burn off my taste buds. 

Jerk seasoning, Lamb Chops, Grilling
Jerk Lamb Chops hot off the Grill
This time, however, I opted to use a couple of Habanero chilies (Scotch Bonnet were unavailable) in the jerk marinade, and was ultimately quite disappointed that there was really no heat at all in the finished food. Either this batch of Habaneros were duds, or they are breeding them with alternate levels of heat! I did remove the seeds, but even so, I had always been afraid to use these chilies in past, after all the hype. Despite the lack of chili-kick, there was nothing wrong with the flavor of the jerk marinade, and it came out great on both lamb chops and on chicken. 

Jerk seasoning, Chicken, fried plantains
Jerk Chicken Meal with fried plantains
As usual when I am researching for a new recipe, I first gather information, and then compare what is done. Another aspect is taking into account anything that can be found that would make a dish more authentic to an area. In this case of Jerk marinade, I found a site that gave a very few parameters, stating that the most famous of Jerk food restaurants do not divulge their recipes, so a lot is open to interpretation. What I gleaned was that absolute must-haves in a jerk marinade are:
  • allspice
  • fresh thyme
  • Scotch Bonnet chilies
  • scallions
  • fresh ginger
Other things commonly added:
  • cinnamon
  • nutmeg
  • brown or white sugar
  • soy sauce 
  • oil
With this list in mind, I also opted for a few other ingredients such as garlic, bay leaves, lime juice and black peppercorns. Ultimately, I feel that the sugar I used might have easily been left out altogether. While it tasted good, it was more sweet than I had ever tasted, so felt less "right". So, in my estimation, more chilies and less, if any, sugar. You may find this list of ingredients works for you, although it is always encouraged to make a recipe your own. Here is my jerk marinade recipe, which makes plenty enough to use for a meal with enough left over to freeze a couple of containers for later.
Jerk seasonings, Chicken, grilling, entree
Jerk Chicken

Jerk Marinade

Makes 2½ cups
Jerk seasoning, marinade, Lamb Chops, Grilling, Asparagus
Jerk Lamb Chops with Grilled Asparagus

WHOLE SPICES:
1 tablespoon whole allspice berries 
3-inches true (soft-quill) cinnamon stick, broken
½ of one whole nutmeg, broken
1 teaspoon black peppercorns
2 whole bay leaves, center vein removed, crumbled

8 - 10 scallions, with green tops, in 1-inch pieces
1 medium onion, cut in wedges
6 cloves fresh garlic
1 large knob fresh ginger
1 - 5 Habanero chilies (or Scotch Bonnet, if available)
1½ tablespoon fresh thyme leaves

1 lime, juiced
¼ cup brown sugar
¼ cup soy sauce
¼ cup olive oil or other cooking oil
½ teaspoon salt

Heat a dry skillet to quite hot and add in all the whole spices. Using a wooden spoon, stir the spices constantly until they are very fragrant but not browned. Immediately turn them out onto a plate to cool. Once cooled, pour into a blender container.

Add all the remaining ingredients into the blender and blend to a paste. Use this paste to marinate 2 whole chickens, cut up, or divide the marinade into two or three portions and marinate smaller amounts of pork (tenderloin or pork chops) or chicken, or lamb chops as desired. This marinade can be frozen for later use. 

Marinate any meat for a minimum of 24 hours for best flavor. Grill the meats to desired doneness for best flavor, although it may also be baked or broiled.  


My passion is teaching people how to create a harmony of flavors with their cooking, and passing along my love and joy of food, both simple or exotic, plain or fancy. I continue my journey in ethnic and domestic cuisines, continuing my journey to explore diverse culinary experiences and hopefully to start you on a journey of your own. Join me also at A Harmony of Flavors on Facebook, and Pinterest.

Thursday, October 8, 2015

Beans Beans They're Good For Your Heart

I have made quite a few bean meals lately, but these have mostly been Guatemalan recipes. I made Piloyes with Chorizo a couple of months back, using some new runner beans, "Ayocote Morado", that I found from Rancho Gordo - XOXOC Project. The dish turned out most excellently, and the beans were creamy and had great bite and flavor. 

Frijoles Blancos, white beans, Chorizo, air dried chorizo
Frijoles Blancos con Chorizo
I got 4 different kinds of beans in a sampler pack when I got those, and had been itching to try another Guatemalan bean dish - this is one I had a recipe for, but had never made or eaten in the past. I had seen photos of the dish, but couldn't quite "taste" it in my mind. I wanted to make this dish so I could try it out, but also so I could put my own stamp on it, and have photos to show and use in the Guatemalan cookbook I made for two of my children. I am currently updating the book again, for my son, and trying to make as many dishes as I can, so most of the book is straight from my own experiences. 

beans, chorizo, recipe, Guatemala
The beans and chorizo I used
So this new dish is called Frijoles Blancos con Chorizo, or White Beans with Chorizo. In actuality, there is more pork meat than chorizo in the dish, but regardless, I did have a small package of chorizo in the freezer, waiting on this dish, as well as the pork. The pork that is called for in the original recipe is pork spine meat. This is not necessarily found in just any supermarket, so I opted for another bony pork cut: little riblets. These are narrow strips of the ribs, cut across the bones, so the bones are only about 2 inches long, maximum. There is plenty of bone end exposed, so all the bone-rich flavor is released into the stew. And the beans, of course, have also been waiting for me. This time the beans I used were "Alubia Blanca." These are smaller, similar to Navy beans in size. They made an excellent base for  this dish.

Since my tomato plants are still producing, I had plenty of tomatoes to use for the sauce that is added toward the end of cooking. The recipe calls for Roma tomatoes, and this is the kind I would normally use, but I had no Romas this time. Instead, I used some smaller round tomatoes and cut them in half and scooped out the seeds, leaving a far less watery tomato. 

Guatemalan recipes are rarely anything but complex and/or time consuming. Guatemalan women often had a maid, and the maid was the chief cook and bottle washer, so to speak. Most recipes in Guatemala call for at least two different cooking methods, and often three. One assumes that the average Guatemalan woman has the entire day to spend in the kitchen cooking. This bean recipe was no different. First the beans are set to cook with the garlic, chorizo and pork, then the potatoes are added and this is cooked down to tenderness. Separately, the tomatoes, onion and garlic are broiled or otherwise charred (either on a grill or in a dry skillet). Once they are charred, these are pureed in a blender or through a food mill. Then the resultant mixture is fried down a bit before being added to the beans. Kind of a pain to do all these steps.

However!

The results are spectacular. There are no two ways about it. I had never tried this dish in Guatemala, so it was a complete surprise for me. While I expected a bean dish made with pork and chorizo to be tasty, I just never imagined it would be this amazing. My husband and I really chowed on this stew last evening, so I hope that some of my readers might try this out. It is well worth the time. The tomato sauce part can easily be made ahead of time and refrigerated, or even frozen for later use, and is a delicious sauce on its own. The use of a slow cooker makes the cooking of the beans easy and simple; set it and forget it. 
This is what I did:

Frijoles Blancos con Chorizo or White Beans with Chorizo

Serves 6 to 8
Frijoles Blancos, white beans, alubia blanca, Chorizo
Frijoles Blancos con Chorizo

1 pound white beans (Navy beans, Alubia Blanca), soaked overnight
3 cloves fresh garlic, peeled & sliced
2 small chorizo (about 3.25 ounces), preferably air-dried
1 pound pork riblets or pork spine meat
2 small potatoes, peeled, cubed
2 teaspoons salt

RECADO / SAUCE:
1 pound Roma tomatoes
1 large onion, peeled, cut in wedges
3 cloves fresh garlic, peeled
2 teaspoons fresh thyme leaves
1 - 2 tablespoons shortening, lard or bacon grease for frying
½ teaspoon salt

If using a slow cooker, pour in the beans with their soaking water and add in the sliced garlic, chorizo, cut in slices, and the pork riblets. Add in the cubed potatoes and set to cook for 5 to 6 hours, or until tender. Add the 2 teaspoons of salt once the beans are already tender. 

slow cooker, ingredients, pork riblets, beans, chorizo
r
If cooking in a large pot or Dutch oven, repeat the steps above and bring the pot to boil. Reduce to a bare simmer and cover, cooking until the beans are tender, about 2 to 3 hours. Add the salt once the beans are tender.

To make the sauce, cut the tomatoes in half, lengthwise and scoop out the seeds. Line a rimmed baking sheet with foil and set the tomatoes on the sheet, cut side upwards. Add the onion wedges to the sheet and set under a preheated broiler, very close to the heat element. Watch the vegetables carefully, and have a blender container and tongs at the ready. Once the tomatoes have gotten charred and slightly blackened, remove them to the blender container. The onions will need to be turned once or twice during the broiling, to get a bit of char on different sides. Near the end of the onion cooking time, add the 3 whole garlic cloves to the pan and watch. They will turn brown, at which point they should be turned to brown on the opposite side. Remove the onions and garlic to the blender as they reach your desired doneness. Add in the fresh thyme leaves and blend the mixture to a relatively smooth paste. Season with the ½ teaspoon of salt.


cooking, sauce, before and after
cooking down the sauce: before and after
Heat a large skillet and add in the shortening, lard or bacon grease. Pour in the pureed mixture and cook over medium heat, stirring to help with evaporation. Once the mixture is cooked down it will be added to the pot of cooked beans. If using a slow cooker, make this sauce an hour ahead and pour it in to meld flavors for at least 45 minutes more. If cooking in a Dutch oven, allow the sauce to meld flavors at a simmer for about 15 to 20 minutes. Serve hot, as is, or with rice.


My passion is teaching people how to create a harmony of flavors with their cooking, and passing along my love and joy of food, both simple or exotic, plain or fancy. I continue my journey in ethnic and domestic cuisines, continuing my journey to explore diverse culinary experiences and hopefully to start you on a journey of your own. Join me also at A Harmony of Flavors on Facebook, and Pinterest.
Wednesday, October 7, 2015

Guatemalan Adobo

Lomito, Adobado, grill
Lomito Adobado, hot off the grill
In these days of internet and innumerable TV cooking shows, many have already heard of Adobo (a marinade), or Adobado (a meat that has been marinated in Adobo Sauce). An Adobo is generally a marinade or a sauce, or a marinade that is also used as a sauce once cooked with the meat. The marinade is often for a meat, and sometimes the meat is grilled after marinating, and sometimes it is cooked or braised. The sauce or marinade itself will vary to some degree, depending on the country or region of a country, and like any other recipe, will vary even in a region, as cooks add "a little of this or that." 

While I lived in Guatemala in the 1970s, the only way I had Carne Adobado (meat in adobo sauce) was buying the meat already in its adobo, and then cooking it at home. I never made the adobo sauce myself. I had a recipe, hand copied from somewhere, but only ever tried to make it once a long while back, when I was again in the States and missing those flavors. The flavors of the sauce made from that copied down recipe came absolutely nowhere near what I had eaten in Guatemala, and in disgust I set the recipe aside, never to use it again. 

Lomito, Adobo, Guatemala, Rice, Frijoles Volteados
Lomito Adobado with Guatemalan Rice and Frijoles Volteados
Then a few years ago I created a Guatemalan cookbook/memoir of a sort as a gift for my oldest daughter's 40th birthday. Any and all recipes, whether copied from someone's book, or a Guatemalan newspaper clipping or from something I approximated myself (with or without help from someone in Guatemala), went into the book, along with memories I had of the food, where I had eaten it and also with many photos found on the internet, of places and things I had seen while there. She loved the book, and the trip down memory lane. But still, many of the recipes were ones I had never actually made myself. 

Since then, 4 years have passed, and I have created a revised edition of this book, again printed here at home, and gave it to my second daughter as she turned 40. At this point, I had tried out more of the recipes, in an effort to get some photos of the finished product for the book. I am still in the process of making more of the recipes, both to test the recipe and to get photos of the dish. One of these was the Lomito Adobado, made last week sometime, and today I am trying out a White Bean with Pork and Chorizo dish (Frijol Blanco con Costilla de Cerdo y Chorizo). This latter will be featured in another blog.

So, back to the Lomito Adobado... In Guatemala, pork was not easy to come by, and so I take leave to doubt that the Carne Adobado was actually made with pork, yet the recipe I had scribbled down does call for pork (loin or tenderloin). I believe that the meat used in the pre-marinated version I got in Guatemala was likely beef, and a cheaper cut, at that. Regardless, the flavors of the marinade itself were what absolutely made the dish, and this time I decided to see if I could do a better job through "taste-memory" at a 40+ year remove.
old recipe, Lomo Adobado
My old recipe for Lomo Adobado

Ultimately, while the flavors were not absolutely what I recalled, it surely came far closer this time, and I used pork tenderloin, sliced on a bias, as the meat.  I began with the recipe as the card indicated, tasted the adobo and found it severely wanting, as I had that last time. Still, it was a platform from which to build. I thought about other flavorings, spices and seasonings commonly used in Guatemala and added "a little of this and that", until it finally tasted very close to my taste-memory. I did use slightly less of the annatto powder than I might have, and the color was just a bit paler than I recalled, but it was absolutely delicious, nonetheless, and my husband and I ate that dinner with great enjoyment. I served it with Guatemalan Rice and Frijoles Volteados.

Lomito, Adobo marinade, Guatemala, Rice, Frijoles Volteados
Lomito Adobado with Guatemalan Rice and Frijoles Volteados

Lomito Adobado

Serves 4

This Adobo Sauce marinade makes enough for 3 recipes: freeze remainder in separate containers. Make this three days before you want to serve your meal.
Lomito, tenderloin, pork,  Adobado, marinade
Lomito Adobado

1.5 pounds pork tenderloin, cut into 4 sections, on a bias

ADOBO SAUCE (marinade):
1½ - 1¾ pounds Roma tomatoes
1 large onion, in wedges
6 - 8 cloves garlic
1 red bell pepper
1 guajillo chile pepper, soaked in hot water
1 teaspoon dried oregano leaf
1 teaspoon cumin seeds
½ teaspoon black peppercorns
¼ teaspoon allspice berries
4 whole cloves
4-inches of true cinnamon (soft quills) stick
¾ teaspoon salt
2 - 3 teaspoons powdered annatto
3 - 4 teaspoons vinegar
2 - 3 teaspoons fresh lime juice

Preheat oven to 375 degrees. Line a rimmed baking sheet with foil and lightly spray with cooking spray. Cut the Roma tomatoes in halves, lengthwise and scoop out seeds and excess moisture. Set them, cut sides up, on the baking sheet and bake for about 45 minutes. Remove them to a blender container. Remove the soaked chili from the water, remove the seeds and stem and add the chili to the blender. If you want more heat, you might leave the seeds in. 

Make Adobo Sauce: Switch the oven to broil and set the top rack to whatever height will accommodate the red bell pepper. Set the bell pepper and the onion wedges on the sheet and set to broil. With tongs, toss the onion wedges as they begin to blacken at the edges, separating for even coloring, then remove to the blender. Turn the bell pepper occasionally until it is blackened all over, then remove the pepper to a sealed zip-top bag or other container to steam for about 10 minutes. Set the garlic on the baking sheet and broil until they begin to brown a bit; remove to the blender. Add the oregano to the blender.

Heat a dry skillet over medium high heat and add in the cumin, peppercorns, allspice berries, cloves and the cinnamon, crumbled. Toss with a wooden spoon or spatula to lightly toast and bring out the aromas of the spices. Do not allow them to burn! Remove to the blender container. Add in the salt and annatto powder and blend until smooth. Blend in the smaller amounts of vinegar and lime juice, taste and add more if needed for piquancy. 

This makes about 3 cups of adobo. Divide the extra 2 cups into two freezer containers,
adobo, adobado, marinade, sauce
Adobado Sauce, finished
label and freeze. Place the remaining 1 cup of adobo sauce into a zip-top bag large enough to hold the adobo and the pork. Combine the two in the bag and seal tightly. Squish the bag around to ensure all the meat is well coated. Refrigerate for three days.

When ready to cook, heat a grill to medium high heat and grill the pork pieces until they reach your desired doneness. Internal cooking temperature should be a minimum of about 150 degrees. Allow the meat to rest, covered with foil, for 10 to 15 minutes before serving.  If a grill ins unavailable, the meat can be roasted at 375 degrees for 25 to 35 minutes, or until the internal temperature is at least 145 to 150 degrees. Tent with foil before serving, the same as if grilling.


My passion is teaching people how to create a harmony of flavors with their cooking, and passing along my love and joy of food, both simple or exotic, plain or fancy. I continue my journey in ethnic and domestic cuisines, continuing my journey to explore diverse culinary experiences and hopefully to start you on a journey of your own. Join me also at A Harmony of Flavors on Facebook, and Pinterest.

Disqus