Translate

Saturday, January 23, 2016

Potato Pancakes and Huevos Rancheros

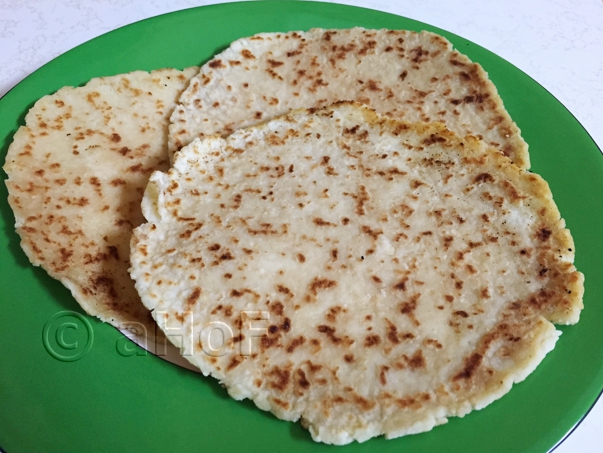
First off, I have to relate what I mean by "potato pancakes". In our house, as we grew up, my Mom would take leftover mashed potatoes, cold from the fridge. She would cut in flour as for making pie pastry (using a fork or pastry cutter) until the mixture would hold together to make balls, and then roll these balls of dough into thin "pancakes". Back then, her favorite frying medium was Crisco, so into a relatively hot skillet went a dab of Crisco, and then in went the thin, round pancake. She would cook them until the bottom was dotted with brown, then flip for a minute or so until the opposite side had browned spots, and then begin cooking the next one. These were what I knew as "potato pancakes."


Potatoes, leftover mashed potatoes, Pancakes
Mom's Style of Potato Pancakes

In our house, these were as much a treat as rice pudding, so whenever Mom made white rice or mashed potatoes for dinner, we would all clamor for her to "make too much." This would ensure that we would have a treat the next day. And it was a real treat to have potato pancakes, made this way. She would often serve them to my sisters, brother and me for lunch. The first one or two would be sprinkled with salt. Warm from the pan, they were nicely flexible, so she would roll them up and serve them. Once we had eaten them this way, then we would have them with a little jelly rolled in; the "cherry" on top of what was already a spectacular treat. 

These childhood memories stay strong in me, even at age 65. To this day, though I don't make them often, I do still make them. I even made them when I lived in Guatemala, and when making them alongside a maid named Graciela, she dubbed them "Tortillas de Papa", meaning nothing more than "tortillas made of potato" or "potato cakes". I asked her if she could try patting them out by hand, just as when she made fresh corn tortillas. She could, and she did! So, my children also grew up with my Mom's style of potato pancakes, now and again. I don't really know if they are so near and dear to their hearts as they are to mine, but they do know them. 

How are they Made?
Potatoes, leftovers, mashed potatoes, Pancakes
Potato Pancakes


I have no real recipe for these. How much flour to add to the cold mashed potatoes is changeable, depending on how wet your mashed potatoes were to begin with. Last evening I started with approximately 
  • 2 cups of cold mashed potatoes. 
I added in about 
  • ¼ cup of all-purpose flour 
to begin, cutting it in. The mixture was still too wet and soft to form, so I added in about another 
  • ¼ cup of all-purpose flour. 
I added more flour, in smaller amounts until I could pick up some of the mixture in my hands, make a cohesive ball of "dough" that would hold together, and then roll it out. Like with pie dough, the mixture should not be over-handled. The flour that is added will build gluten and toughen the mixture. To roll them out, sprinkle a generous amount of flour onto a surface. Form a 2-inch ball of the dough into a smooth round, then flatten it and place onto the floured surface. Sprinkle a little more flour on top, then with a rolling pin, roll it out to about ⅛-inch thick and about 6-inches in diameter. Last evening I got 8 potato pancakes from the amount of potatoes I started with.

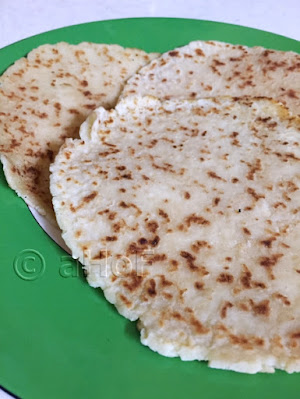
Heat a skillet to about medium heat, then add in a little bit of your preferred oil. I find that cooking spray works well, so as not to add too much oil to the pan. One of those "Misto" sprayers with your favorite oil would work. Set one of the rolled out pancakes into the hot pan and allow it to cook until it has formed myriad brown spots, as in the photos above. This could take from 2 to 3 minutes, depending on the heat level. Flip the pancake and cook about one minute more, until the opposite side also has browned spots. Remove to a plate, add a little more oil, and continue with the remainder of the pancakes. 
Potato Pancake, Huevos Rancheros, breakfast
Potato Pancake Huevos Rancheros

For whatever reason, though I have made these often enough in the past 26 years, my husband never even tasted them. Again, for whatever reason, last night he asked if he could have some of them. Since I made plenty, this was no problem. I explained that they were good just with salt. He ate them with his vegetable soup for dinner. There was one remaining on his plate, and I told him to try it with jelly. He did, and loved it! A new convert!


Potato Pancakes, beans, eggs, salsa, huevos rancheros
Potato Pancakes, topped with beans, then with eggs, and finally, with salsa
As I ate them with some pork for dinner last night, I thought of using them instead of tortillas in the style of "Huevos Rancheros." I felt that since they are made of potato, and potatoes (usually in the form of hash browns or home fries) are served with breakfasts, that this would be a good plan. I had beans cooked up already, just because I love them, so I was all set. This morning I got everything out, starting with two of the leftover potato pancakes. I heated some of my "refried beans" and then fried 2 eggs. To top it off I used some of my fermented salsa. It was most excellent and everything I had hoped!


My passion is teaching people how to create a harmony of flavors with their cooking, and passing along my love and joy of food, both simple or exotic, plain or fancy. I continue my journey in ethnic and domestic cuisines, continuing my journey to explore diverse culinary experiences and hopefully to start you on a journey of your own. Join me also at A Harmony of Flavors on Facebook, and Pinterest.

Friday, January 22, 2016

Tej Patta - A Much Mistaken Case of Identity

Tej Patta, Tamla Patra, Leaves, Indian Bay Leaf
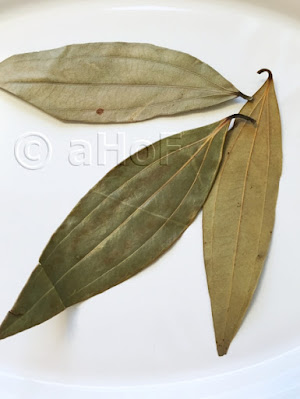
Tej Patta or Tamal Patra leaves
I have had a lot of years cooking Indian foods now, and in most every recipe, conspicuous by its absence, was bay leaf. A couple of years ago, I heard a friend say she put bay leaf in her Garam Masala. I sputtered a bit and then asked why she used bay leaf in Garam Masala? "Because the recipe said so," she said. All I could figure was that it was not a true Indian recipe. Things do tend to creep into a recipe when in the hands of someone not of the culture. Granted, I am not of the culture either, but I try to stay as authentic to the flavors as possible, going to lengths to search out the proper spices.

So imagine my surprise when not too long ago, I heard about "Indian Bay Leaf". I found that this is not a bay leaf as we know it at all, but something that looks sort of vaguely similar, and has been called "bay leaf" or even "Indian bay leaf," when if fact it has a closer relation to cinnamon. Wikipedia has this to say:


"Cinnamomum tamala, Indian bay leaf, also known as tejpat, tejapatta, Malabar leaf, Indian bark, Indian cassia, or malabathrum, is a tree within the Lauraceae family which is native to India, Bangladesh, Nepal, Bhutan, and China. It can grow up to 20 m (66 ft) tall."

Tej Patta - Cinnamomum tamala / C. tejpata / C. malabathrum


Called "Tej Patta" (among other spellings) in Hindi, "Tamalapatra" in Sanskrit, and called by other names in other languages or dialects, these leaves come from a tree that is in the Lauraceae family (as with our Bay Laurel leaves), but comes instead from a variety of cassia tree. Tej Patta leaves bear more resemblance in flavor to cinnamon or cloves, quite dissimilar to the piney, resinous flavor of bay laurel leaves.
Bay Laurel, comparison, Tej Patta Leaves
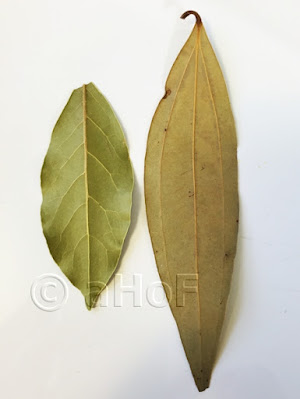
Bay Laurel and Tej Patta Leaves - comparison
Tej Patta grows mainly in the northeast of India, extending into the slopes of the Himalayas, Nepal and Burma. The trees are not generally under commercial cultivation, so quality is not highly regulated. Not all leaves sold have the same strength of flavor.

Its usage in Indian cooking is mainly confined to the Mughlai (moog-lie) cooking style of the imperial courts of Delhi and Agra, in foods such as Biryani and Korma. In these regions it is used almost daily and is well known. If an Indian recipe calls for "bay leaf", it is automatically known, in India, by Indians, this refers to Tej Patta, or its misleading name: "Indian Bay Leaf."

Tej Patta is characterized by its three lengthwise veins instead of the bay laurel leaf's many branched veins off of one central vein. Note these differences in the photo at left. The size of the leaves in the packet I bought runs from just slightly larger than a mid sized bay laurel leaf upwards to about 6 or more inches in length.

If an Indian recipe calls for "bay leaf" or "Indian Bay Leaf", do not substitute a Bay Laurel leaf. Instead add just a little more cinnamon, or perhaps one clove or one allspice berry instead. The leaves are not so strongly flavored, and it is suggested that they be broken before adding to a dish to help increase potency of flavor. If in doubt, leave it out. A bay laurel leaf will lend the wrong flavors to the dish. Most things are available online these days, and true to form, I found them on Amazon.com.


My passion is teaching people how to create a harmony of flavors with their cooking, and passing along my love and joy of food, both simple or exotic, plain or fancy. I continue my journey in ethnic and domestic cuisines, continuing my journey to explore diverse culinary experiences and hopefully to start you on a journey of your own. Join me also at A Harmony of Flavors on Facebook, and Pinterest.
Monday, January 18, 2016

A Remade Pumpkin Loaf Really Stands Out

Pumpkin Loaf or Bread is delicious. By its very nature it will be moist and tender. With a good amount of canned pumpkin or other squash puree, moistness is almost (but not quite) guaranteed. Still, sometimes I just can't help myself and I feel the need to tinker. 

Pumpkin, Nut, dessert loaf, dessert
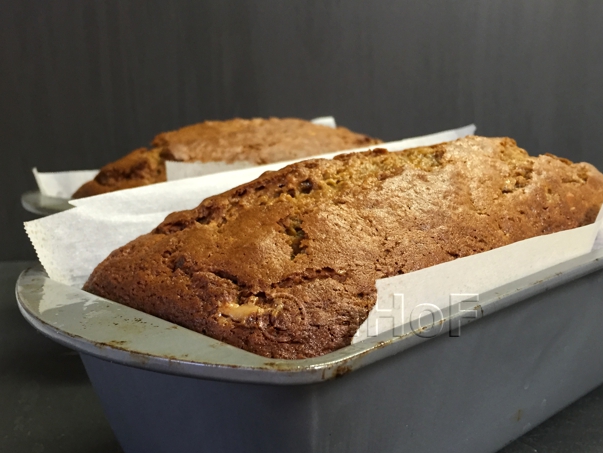
Pumpkin Nut Loaf, straight from the oven
Last week I finally got around to baking and pureeing the huge Jarrahdale squash I had bought in late September. The beautiful blue-green color of the large squash had begun to turn to light orange, ripening itself over the months. This is by far the longest I have allowed a squash like this to set before doing something with it. Since we went away over the holidays and then things got upped a bit last minute to leaving a week earlier than planned, there were many things left un-done. The squash was really large. I never weighed it, but once baked and pureed, I got 14 cups of beautiful, bright golden puree. Since I still had a few packages of squash puree from last year, I figured it was time to use some of it.

Pumpkin, Nut Loaf, dessert lof, dessert, recipe
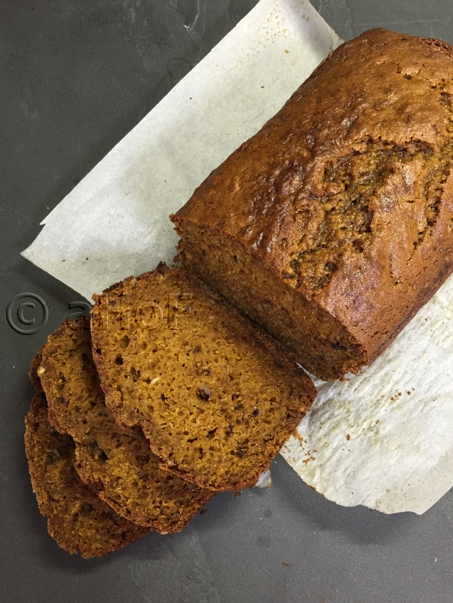
Pumpkin Nut Loaf, sliced
The museum had a closing reception for an art exhibit yesterday, and I was asked to make something to serve at the reception. "Pumpkin" bread was my thought. I had a perfectly good recipe for Pumpkin bread already (find that recipe here), but like I said, sometimes I just feel the need to tinker with a recipe and see what happens. I sat to look at the recipe I had used previously, which used 1 cup of pumpkin or squash puree. When I puree my squash, I divide it up in 2-cup batches in freezer zip-top bags. If I was going to thaw 2 cups of squash, then I needed to use 2 cups. With that in mind, I opted to double the recipe. One loaf for the reception and one loaf for us. 

As an aside, while at the art reception yesterday (a mixed bag of art styles by artists from all over the state), I met a most talented man named Jim Green. He makes bronze sculptures, and the one that was exhibited at the museum was called Marsh Song. It was of a lone cattail, with a Marsh Wren perched on the head of the cattail. The piece was about 2 feet tall. It had such a serenity to it, and yet I could just "feel" that moment of startling flight as the bird would take off. It was one of the most lovely things I have seen. We talked for a long time. I highly recommend checking out his website: http://www.jimgreenart.com to see some of his excellent work.

Back to the Recipe

The next thing I noticed is that white sugar was used in the old recipe, so I went for brown sugar. The spice amounts were also increased, and then I added in sour cream to the recipe. The brown sugar and the sour cream are going to make for a moist loaf anyway. I lowered the overall fat content by using half oil and half applesauce. I also added in a tiny mount of black strap molasses. In addition to the nuts, I used up a half cup of some "Heath" Bits 'O Brickle Toffee Bits that were left over from a previous recipe, plus 1 teaspoon of cream cheese flavoring with 1/2 teaspoon butterscotch flavoring. It would be just as good to use a teaspoon or two of vanilla.

The recipe is very easily mixed together using just a spatula. Here is the recipe with its makeover:


Pumpkin Nut Loaf

Pumpkin, Nut Loaf, dessert, dessert loaf
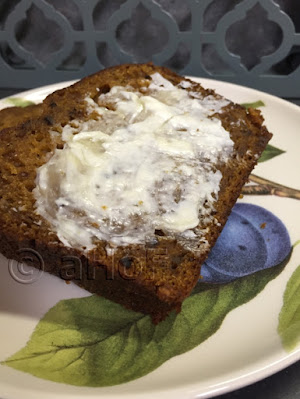
Pumpkin Nut Loaf, served

Makes two 8 x 4-inch loaves

DRY INGREDIENTS:
3 cups all-purpose flour
2 teaspoons baking soda
2 teaspoons cinnamon
1½ teaspoons salt
1 teaspoon nutmeg
½ teaspoon cloves

WET INGREDIENTS:
2⅔ cups brown sugar
½ cup oil (I used olive oil)
½ cup applesauce
4 eggs
2 cups pumpkin or squash puree
2 teaspoons molasses
2 teaspoons vanilla

1 cup ground nuts (I used walnuts)
1 cup sour cream
1/2 cups Toffee Bits (Maple Flav'r Bites, or raisins, or dates)

Preheat oven to 350 degrees. Spray two 8 x 4-inch loaf pans with cooking spray. If desired, as added precaution, line the pans with parchment.

In one bowl whisk together the dry ingredients and set aside. In another bowl, whisk together the brown sugar with the oil and applesauce. Add eggs, one at a time, whisking to incorporate one before adding the next. Whisk in the pumpkin puree with the molasses and vanilla. Once completely combined, stir in the nuts, sour cream and any other addition desired. Once well combined, divide the batter between the two loaf pans. It will fill the pans pretty high. Bake the loaves for approximately 1 hour and 15 minutes, or until a tester inserted in the center comes out almost clean. A few crumbs are fine. Allow the pans to rest for about 5 minutes, then remove the loaves to a wire rack to cool.


My passion is teaching people how to create a harmony of flavors with their cooking, and passing along my love and joy of food, both simple or exotic, plain or fancy. I continue my journey in ethnic and domestic cuisines, continuing my journey to explore diverse culinary experiences and hopefully to start you on a journey of your own. Join me also at A Harmony of Flavors on Facebook, and Pinterest.
Thursday, January 14, 2016

A New Delicious Indian Style Side Dish

I may have mentioned a time or two 😉 how much I love Indian food. Everything about the flavors just hit the spot, for me. Some time ago I made a recipe for Cauliflower in Indian Spices, but had yet to try making something with cabbage. I chanced to see a recipe in passing, a few days back, and looked at it more closely. I took the usual route of looking at other similar recipes before sitting down to compose something that fit my own criteria. 
 
Indian food, ethnic, flavors, Cabbage, Rice
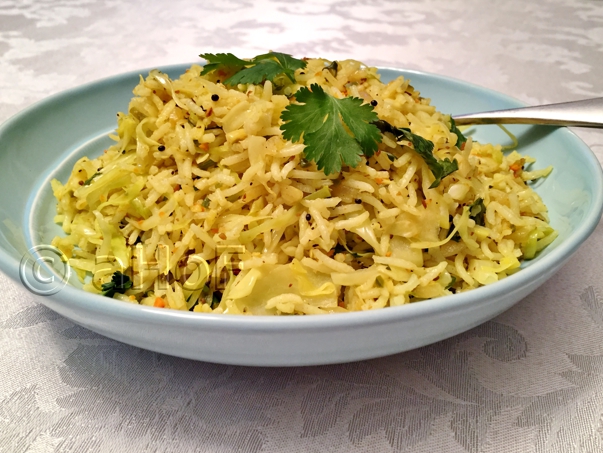
Indian Cabbage and Rice

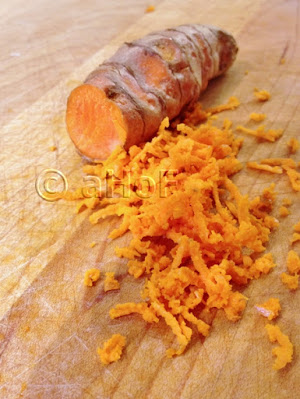
My husband and I had been in Denver over the recent holidays, and while there I went to Whole Foods Market. We have nothing at all like that near us, so when the opportunity strikes, I take it. While there I bought quite a few turmeric roots, fresh. I always put turmeric powder into my oatmeal in the morning, mainly for health benefits, and since returning with the fresh roots, I have been grating that into my oatmeal instead. So when I sat to compose a recipe for Indian Cabbage and Rice, my plan was that fresh turmeric would be an ingredient. Hurray! Another use for the fresh turmeric. I will be sad to see it gone, truly, because the flavor is so different when it is fresh!

Turmeric - Curcuma longa

Fresh root, Turmeric Root
Fresh Turmeric Root

Turmeric is a plant of the ginger family, and native to southwest India. It is used throughout south Asia in cooking for its pungency and color as well as for deep golden dyes. The part used is the root, in actuality a rhizome. The roots are lifted out and sold fresh or dried and ground. When fresh, the roots are a deep orange color and the favor is described as peppery, warm and bitter. Ground turmeric is most often found in areas where the plant will not grow, and it is easily found most anywhere. It is known for the deep, golden yellow color it gives, particularly to things like yellow mustard. It is also usually a significant ingredient in commercial yellow "curry powders."

When using turmeric, whether fresh or dried, care is needed when using it, as it will stain. The intense yellow color will stain hands, nails, cutting boards and anything else it comes in contact with. 

In cooking, the use of turmeric is an excellent way to brighten colors in a dish Adding a small bit to a food that is already yellow, such as egg salad, makes the color more appealing. Turmeric is an excellent addition to bean and lentil dishes as the flavors compliment these legumes. Indian lentil and dal recipes most often call for turmeric. 

Indian food, ethnic, flavors, Cabbage, Rice
Indian Cabbage and Rice
Turmeric is most often used in savory culinary applications, although it can be used in sweet applications. A tiny pinch in a bread, cake or cookie recipe will impart golden color without imparting much flavor.  

Back to My Cabbage and Rice

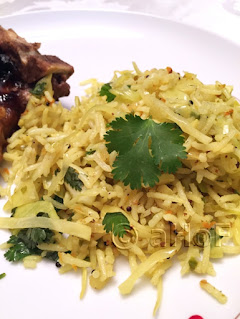
I love rice, and I love cabbage. I love Indian spices. I figured this whole dish would be a match made in heaven. Speaking for myself, I just couldn't get enough of this dish last evening. I kept sneaking bites while waiting for the pork chops to finish cooking. I snuck more bites after dinner while cleaning up after the meal. While the flavors didn't jump out and scream at you, they were certainly a lovely mixture. If you look closely at the photos, you can just pick out the little bits of bright orange turmeric in the dish. Of course, dried turmeric can be used instead, and once my precious fresh roots are gone, I will make this dish again with dried turmeric powder.

Indian Cabbage and Rice


Indian food, flavor, ethnic cooking, Cabbage. Rice
Indian Cabbage and Rice
Makes 6 or more servings

RICE:
1 cup basmati rice
2 cups water
1 teaspoon salt
1 tablespoon butter or ghee

WHOLE MASALA:
2 whole green cardamom pods
2 whole cloves
1-inch true cinnamon, broken
1 teaspoon crushed coriander seeds
1 teaspoon brown mustard seeds
½ teaspoon cumin seeds
1 "tej patta" or "tamal patra" leaf, optional
1 pinch asafoetida, optional

CABBAGE:
2 tablespoons oil or ghee

1 medium onion, finely chopped
1-inch fresh ginger root, minced
2 - 4 cloves garlic, minced
1 - 2 jalapeno chilies, minced
1-inch fresh turmeric root, grated, OR use ground, below: 
½ small cabbage, shredded (about 5 cups)

1 teaspoon Garam Masala
½ teaspoon ground turmeric, if no fresh is available
2 - 3 teaspoons vinegar
½ cup chopped cilantro

Set the rice ingredients into a medium saucepan, bring to boil and reduce to a strong simmer. Cover with a lid and time for 15 minutes. Rice should be cooked through and no more liquid visible. Set aside once cooked.

In a large skillet, heat the oil or ghee. Add in all the Whole Masala ingredients and swirl the pan until the spices begin to crackle and sputter. Add in the onion, reduce heat and cook, stirring often, until the onion is translucent. Add in the ginger, garlic, chilies and turmeric root, if available. Cook and stir until the mixture is very fragrant, about 3 minutes. Add the cabbage and stir well, mixing and tossing often while the cabbage cooks, about 10 minutes, or until it is as tender as desired. Once cooked, stir in the remaining 4 ingredients and stir well. 

Add in the cooked rice and stir well to completely combine and serve immediately. 


My passion is teaching people how to create a harmony of flavors with their cooking, and passing along my love and joy of food, both simple or exotic, plain or fancy. I continue my journey in ethnic and domestic cuisines, continuing my journey to explore diverse culinary experiences and hopefully to start you on a journey of your own. Join me also at A Harmony of Flavors on Facebook, and Pinterest.
Wednesday, January 13, 2016

The Cardamoms and Their Differences

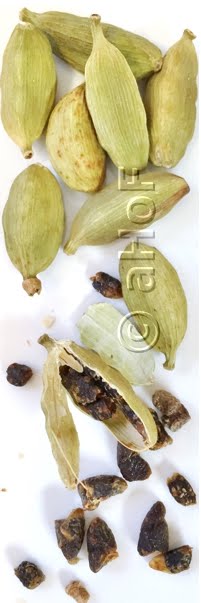
Green Cardamom - Elettaria cardamomum

Green Cardamom, Pods, Seeds
Green Cardamom Pods & Seeds
Cardamom is an ancient spice, existing in India more than a thousand years before the birth of Christ. It is the third most expensive spice, after saffron and vanilla. The spice eventually reached Europe along the caravan routes. Ancient Greece and Rome valued cardamom as an ingredient in perfumes, as well as breath fresheners and digestive aids. These days, outside of the Eastern and Middle-Eastern countries where it is most known, the Scandinavian countries are the biggest importers of cardamom, using it to flavor their spiced cakes, pastries and breads.

Green cardamom pods come from a perennial bush of the ginger family that can grow to up to 12 feet tall. It is native to India, and grows wild in rain forests of southern India and Sri Lanka, at relatively low altitudes. The plant will only flower and fruit in tropical climates. Guatemala is now the largest exporter of cardamom, even more so than India. The plant needs wet soil and heat to grow and bear the little fruits, harvested just before fully ripe and dried, either in the sun, similarly to coffee, or in special drying rooms. The very best dried cardamom pods are pale greenish in color. Each half-inch paper-like pod holds approximately 12 to 20 dark brown or black highly aromatic seeds. It is best to buy either whole pods or whole seeds that have been removed from the pod. The pods themselves have little flavor and commercially it is too easy to grind the whole pod together, thus lowering the price and the quality of the ground spice.

Grinding the seeds is simple in a mortar and pestle or a small spice grinder, and one is assured of the quality of the product. Many dishes in India call for whole, unbroken or only slightly crushed pods to be used. Anyone who has eaten Indian cuisine, or cooked Indian dishes, knows well how often cardamom is an ingredient. It is almost always used in a Garam Masala mixture, often seen as an ingredient in Northern Indian dishes such as rice biryani, creamed spinach and dhal. In addition to its use in savory dishes, cardamom is used extensively in breads and sweets.

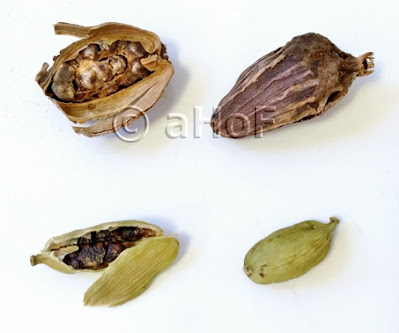
Black Cardamom, Green Cardamom, comparison
Black Cardamom, top. Green Cardamom, bottom
Cardamom has a lovely flavor and aroma, quite penetrating and strongly aromatic. While it is one of the most expensive spices, very little is needed to impart flavor. An Indian dessert called Gulab Jamun uses the seeds ground in either the little balls of dough before frying, or in their syrup, or both. In northern European countries it is used in Stollen breads as well as many other cakes, pastries and cookies. In some places in the Middle East, cardamom is mixed with green coffee beans and roasted together and ground. Some of these mixtures may have as much as 40 percent cardamom. There are also white cardamom pods commercially available, and some feel these are superior. In reality, these are no more than bleached pods of the green cardamom. If cardamom is not yet known in your lexicon of spices, search for it in a good quality spice shop and try it out.


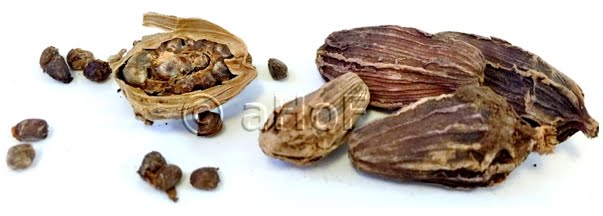
Black Cardamom - Amomum subulatum 

Black Cardamom, pods, seeds
Black Cardamom pods and seeds
Black Cardamom or Hill Cardamom is related to green cardamom and are both from the ginger family, but there the comparison stops. The flavors of black cardamom are far different and do not lend to use in sweet dishes. The seed pods are larger and coarser and have a camphor like flavor and a smoky character from the method of drying over fires. It is commonly used in savory dhal or rice mixtures, and in some northern Indian garam masalas.


My passion is teaching people how to create a harmony of flavors with their cooking, and passing along my love and joy of food, both simple or exotic, plain or fancy. I continue my journey in ethnic and domestic cuisines, continuing my journey to explore diverse culinary experiences and hopefully to start you on a journey of your own. Join me also at A Harmony of Flavors on Facebook, and Pinterest.
Cinnamon and Cassia are Not Necessarily Interchangeable

Cinnamon & Cassia


What we commonly know in the U.S. as “cinnamon” is actually Cassia (cinnamomum aromaticum). It is a relative of true cinnamon, but not the real thing. The rest of the world uses true cinnamon (cinnamomum verum), in their cooking or baking, yet here we use something completely different.

As background, I first found out how much difference there was between these two spices when I lived in Guatemala. The cinnamon there tasted very different from what I knew growing up in Ohio; making things like an apple pie or apple crisp just taste different. They were very good, but didn’t taste like what I had known. I chalked it up to differences in quality of product, or maybe my baking skill was inadequate. Any typical Guatemalan foods I ate or made with cinnamon tasted just fine of course, with nothing to compare
.

Cassia, Cinnamomun aromaticum, Cinnamon, Cinnamomum verum
Cassia at left and Cinnamon at right

It wasn’t until much later, when once again living in the U.S., I tried making a Guatemalan dish, Platanos en Mole (Plantains in Mole Sauce), using the cassia available. The dish just tasted wrong. I couldn’t understand it. I had made this dish many times in Guatemala. I had a lot more cooking and baking skill by this time. What was wrong? I started checking into spices in general, with an eye to those things I knew were different, and discovered that we in the U.S. are being marketed a completely different product.

Cassia cinnamon is a very good spice. I do not for a second propose we do away with it! What would our apple pies taste like without it? It is a wonderful spice, worthy of the space in our cupboards. However, I propose that true cinnamon have an equal place.

Cinnamon of either kind is the bark of the tree. The bark is peeled off and dried, curling into what are known as “quills” or ground into powder. This is where the similarity ends. Cassia quills are very thick curls, strong and sometimes hard to break. It has a strong taste, warmer and more potent. There is some very good quality cassia to be found these days, such as “Korintje AA”. A lovely spice to perk up anything commonly made with “cinnamon” here in the US.

For my cooking classes I take both types of cinnamon: a high quality cassia quill and ground Korintje AA cassia, alongside true cinnamon quills and ground cinnamon. True cinnamon quills are curled and layered together in a tight roll, and are very thin and easily crushed. The flavor is more delicate, with an evanescent citrusy or lemony quality. I set the quills side by side and demonstrate the differences, first breaking a cassia quill, with the ensuing loud “snap” when it breaks. Then I show the cinnamon quill, layered together, and how very easily it breaks and crumbles. With the ground version of each side by side, I ask the class members to smell the two; first the cassia that is the most familiar, and then the cinnamon. The startled reactions when they realize exactly how big a difference exists between these two spices, is quite rewarding. True cinnamon is found in most any Mexican grocery section these days. Good quality spice shops carry excellent quality cinnamon and also excellent quality cassia. If you want to make any ethnic food from anywhere else in the world, or just become familiar with a new flavor – go for true cinnamon. It’s worth the effort.


My passion is teaching people how to create a harmony of flavors with their cooking, and passing along my love and joy of food, both simple or exotic, plain or fancy. I continue my journey in ethnic and domestic cuisines, continuing my journey to explore diverse culinary experiences and hopefully to start you on a journey of your own. Join me also at A Harmony of Flavors on Facebook, and Pinterest.
Tuesday, January 12, 2016

An Updated Scone Recipe

A couple of months back I discovered a brand-new publication called "BAKE from scratch". I have written about the magazine, most recently in my blog post of November 12, 2015. The magazine is absolutely gorgeous. I am not affiliated with the magazine, or it's owners or contributors in any way. I just fell in love with the magazine. I just today bought the 2nd edition. In the Premiere edition, there were recipes for 8 different kinds of scones. Let me say right here,
"I LOVE SCONES!"
So, over the course of the couple of months since I bought that premiere edition, I have made all but one of the scone recipes. I took the magazine with me when we went out to Denver over the holidays. We were gone three weeks and I made two of the scone recipes while visiting with my sisters. One of them that I had been putting off making was for Earl Grey Currant Scones. What is interesting is that a couple of years back I had created a recipe for Earl Grey Currant Scones with Lavender and Pecans. At that time, I used my own "base recipe" and tweaked it to use the ingredients as I wanted them. Some of my methods were a little fussy, perhaps. Still, the scones were, hands-down, the best scones, ever. Obviously, this is my own personal taste, but even smelling them baking was amazing. This is that older recipe I created two years ago:

Earl Grey Currant Scones with Lavender and Pecans


Makes 8 scones

Earl Grey, Currant, Scones, Lavender, Pecans
Earl Grey Currant Scones with Lavender and Pecans

1 tablespoon loose leaf Earl Grey tea, or 2 teabags
¼ cup boiling water
½ cup currants
¾ cup buttermilk
1 tablespoon lavender flowers
1 cup cake flour
1 cup all-purpose flour
¼ cup organic coconut sugar
1½ teaspoons baking powder
½ teaspoon baking soda
½ teaspoon salt
1 stick unsalted butter, very cold
⅔ cup pecans, in coarse chunks
More buttermilk and sugar for brushing and sprinkling


Preheat oven to 400 degrees (375 on Convection Bake). Lightly grease a baking sheet and set aside. Soak the Earl Grey tea in the boiling water for 5 minutes. Strain the tea over a small bowl with the currants. Press down on the tea - leaves or bag - to get all the liquid possible. Set aside. Measure out the buttermilk and stir in the lavender flowers to soak. Set aside.

In a large mixing bowl, sift or whisk together both kinds of flour, the sugar baking powder, soda and salt. Either grate the cold butter into the flour mixture on a large holed grater, or cut the butter into small cubes. Work the butter into the flour mixture until crumbly, using either fingertips or a pastry cutter. Add both the currants with any remaining tea and the buttermilk/lavender mixture and toss lightly with a fork until the mixture begins to come together. Add in the pecans.

Turn the mixture out onto a floured surface and pat out to about a 10-inch diameter circle. Fold the dough in half, patting and pressing out again to a circle. Repeat the folding and patting put about 6 to 8 times. Now pat out the dough to about an 8-inch diameter circle. Cut across into either 6 or 8 wedges. Place them on the prepared baking sheet, about ½ inch apart. Brush the tops with some buttermilk and sprinkle a good pinch of sugar evenly over the surface. Bake the scones for about 20 minutes, until golden.


~~~~~~~~~~~~~~~~~~~~~~~~~~~~~~

There is little about scones I don't like. I am of the "no egg" mindset when it comes to scones, and that usually leaves them a bit dry and crumbly. I love them anyway. I have always loved using buttermilk in scones or biscuits, so I compensated on the fat (for moistness and tenderness) by using a whole stick of butter.  
Earl Grey, tea, Currants, Scones, recipe, breakfast
Updated Earl Grey Currant Scones with Lavender and Pecans

Enter the New Magazine 

When I got the "BAKE from scratch" magazine and found all the scone recipes, I noticed that they, too had a base recipe, off of which all the recipes were created. Some that had something moist added in (sweet potato or ricotta, for example) used a little more flour to compensate. All the recipes used about the same amount of salt, baking powder and sugar. Instead of buttermilk, they used heavy cream and they used less butter than I had been using in my recipes. 

While visiting with my sisters, I made the recipe for Earl Grey Currant Scones from "BAKE". I was interested in them from various angles. Would they be more moist and tender, due to the amount of butter and the use of heavy cream? Would they be better than how mine came out, or would they fall behind in the flavor department? One thing that was done very differently in the magazine's recipe is that instead of brewing the Earl Grey tea, they ground it, left it dry and added it to the flour. While they did not plump the currants at all, if one has moist currants it doesn't really matter. 

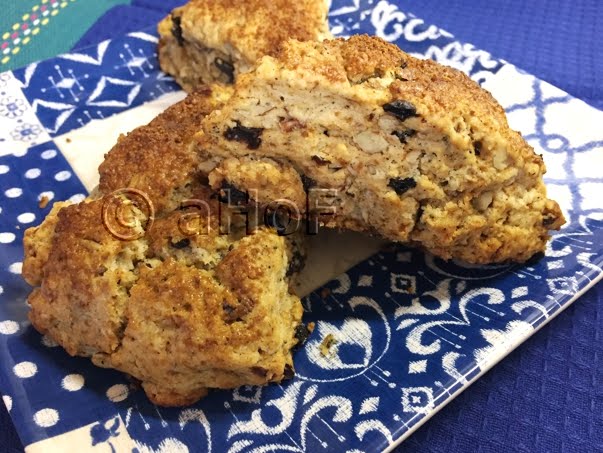
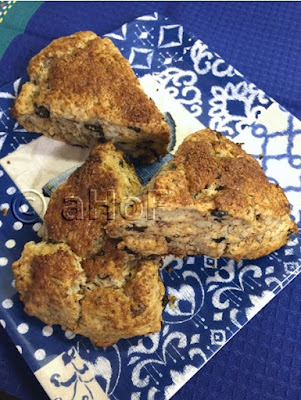
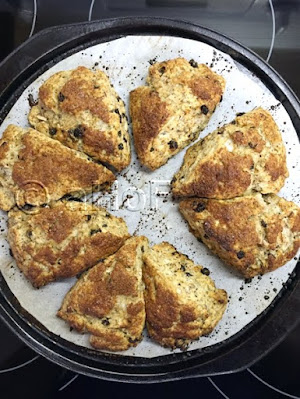
Earl Grey Currant Scones, just baked
Updated Earl Grey Currant Scones
with Lavender and Pecans
Ultimately, while I liked the recipe from "Bake", I did miss the addition of the lavender and pecans. I resolved to make some changes in my recipe and see how they would come out. I used heavy cream instead of buttermilk. I used 5 tablespoons of butter instead of 8. I used more baking powder, no soda and more salt. But to make the recipe less fussy, I also ground the whole leaf Earl Grey tea and added it to the flour mixture. I kept the part about soaking the lavender flowers. 

The outcome was wonderful. While the look of the scones was no different from my old ones, and even the flavors were not different enough to detect from memory (last time I made them was 8 months past), I think that there was a difference in moistness and tenderness. I believe from now on I will make my Earl Grey Currant Scones with Lavender and Pecans using this new method.

MAKE-AHEAD ALERT!

Something I started doing while at my sister's house making scones: I combined the dry ingredients and cut in the cold butter the night before, adding in the currants or nuts (as the recipe might call for) and then covered the bowl tightly and refrigerated overnight. This saved time in the morning, when all I had to do was preheat the oven, add the cream to the dry mixture and form the scones before baking. This is something I found particularly helpful, particularly in guest situations, when preparing things in the morning can end up chaotic. Having most of the prep done and cleaned up is wonderful, and I will be using this method most often from now on, guests or no!

Updated Earl Grey Currant Scones with Lavender & Pecans

Earl Grey, Scones, baked, breakfast, do ahead
Earl Grey Currant Scones, just baked
Makes 8

1 cup heavy cream
1 tablespoon dried lavender flowers
1 tablespoon Earl Grey tea (from sachets or whole, ground) 
2 cups all-purpose flour
¼ cup coconut sugar
1 tablespoon baking powder
1 teaspoon Kosher salt
5 tablespoons cold, unsalted butter
½ cup currants
½ cup chopped pecans

extra 1 - 2 tablespoons heavy cream
extra sugar for topping

Preheat the oven to 425 degrees. Set a piece of parchment onto a baking sheet.

Stir the lavender flowers into the cream and set aside while prepping the dry ingredients. In a large bowl combine the flour, tea, sugar, baking powder and salt. Stir to combine. If you own a very sturdy pastry cutter, add in the cold, unsalted butter and cut in until the mixture resembles coarse crumbs. Otherwise, grate the cold butter into the flour mixture with a larger holed grater and proceed to cut in the butter as described. Stir in the currants and the pecans. Add in the heavy cream and lavender flowers and mix quickly with a fork to moisten. Gather the mixture gently and quickly, as for pie dough, handling as little as possible. 

Depending on where you live and what the humidity level is, you might need a little more cream to get all the crumbs to come together.
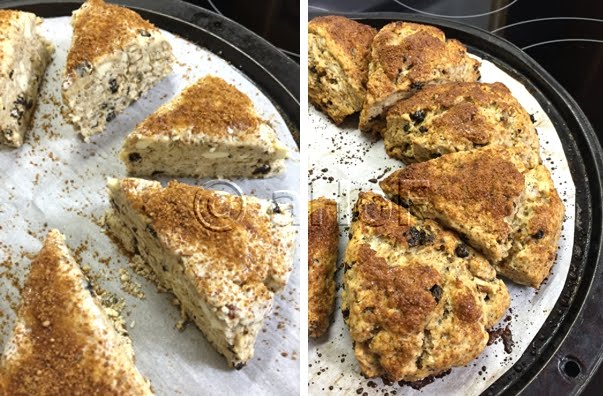
Before and After, Baking, rising in oven, spacing scones
Before and After Baking - showing why they must be set apart to bake!

Once most of the crumbs adhere together, spray a counter with non-stick spray and turn out the dough. Pat into an 8-inch circle. Use a large chef knife or a bench scraper to cut the circle into 8 wedges. Use the knife or scraper to lift each wedge to the prepared parchment lined pan, keeping them at least 1-inch apart. Brush the tops with the extra heavy cream and then sprinkle the tops with the extra sugar.

Bake the scones for 13 to 18 minutes, until golden.


My passion is teaching people how to create a harmony of flavors with their cooking, and passing along my love and joy of food, both simple or exotic, plain or fancy. I continue my journey in ethnic and domestic cuisines, continuing my journey to explore diverse culinary experiences and hopefully to start you on a journey of your own. Join me also at A Harmony of Flavors on Facebook, and Pinterest.
Sunday, January 10, 2016

A Really Savory Bean Dip

I did a lot of cooking, baking and other kinds of kitchen work over the holidays despite being at my sister's house. She had just started a new job recently and had no real time off, yet she had the entire family descending upon her over the Holidays, so I did what I could to remedy things for her.  While she did have the house all decorated, she had not had time to bake any cookies or in any way prep for the rest of the family.

Southwestern, Bean Dip, dip, appetizer
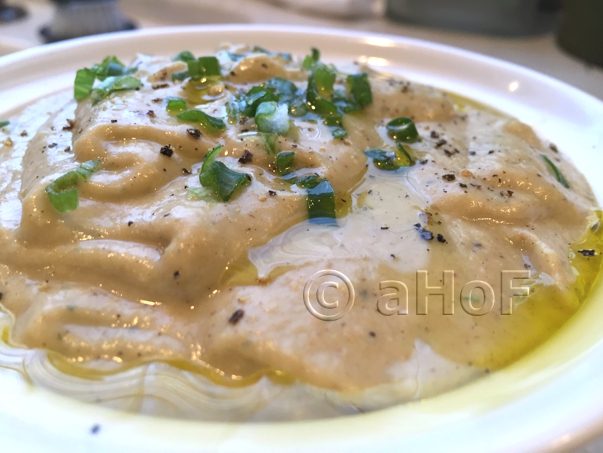
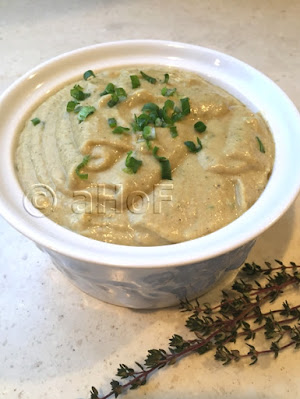
Southwestern Style Bean Dip

I took one batch of cookie dough with me when we went out to Denver, and baked the cookies at her house the next day. I made dinners most days and in between made various kinds of cookies and fudge, aside from the other pastries I had brought along. We certainly lacked for nothing over the holidays, in any way shape or form. 

Still, sometimes inspiration strikes, so on New Year's Eve I came up with a dip recipe and made free with my sister's kitchen and staples. I was thinking about hummus. Yet my sister has some food taboos that can be tricky to work around. One of these is sesame, in any form. I love hummus. I love hummus just as it is normally made - with sesame tahini. First I checked to see if she had a can of chickpeas. No. Okay, since I couldn't make a traditional hummus, the next best thing was white beans. 

Southwestern flavors, Bean Dip, appetizer, recipe
Southwestern Style Bean Dip
I have made a variation on hummus in the past, using white beans and sesame tahini. This time, no tahini would be used anyway, so I started moving away from even trying to call this vague idea of a concept "hummus" anymore. So ultimately I went for a dip. A dip can be almost anything. I kept on with the white bean idea, since I love beans. Then with the idea of hummus still in my mind I kept the idea of using lime juice and olive oil to thin the pureed beans and give them some zip. My sister grows herbs in the summer, as do I. However, it is a little harder to keep my herbs going so much into winter. In Denver, thyme, at least, keeps fairly well even if it's been covered in snow. Which it had been! I went and clipped some thyme, shook off the snow, and proceeded to use it in the bean dip. 

Next I sat to ponder what other flavors would go into this dip. What would enhance the flavor profile I had so far? My sister had a small can of diced green chilies in the pantry, so I tossed them in. She had some scallions chopped in the fridge, and I tossed those in as well. Next? Spices!

Since I had a vaguely Southwestern flavor profile going, I opted for a little cumin and some ancho chili powder for spice. All this was pureed in a food processor, and if I do say so, it was absolutely perfect. I cannot think of a single thing that could have made it taste any better. Except possibly more chili - either in the form of fresh chilies or more powdered chili. But, since not everyone likes things too spicy, I left good enough alone. I was pleased, and most of the dip disappeared in the first half hour. I would term that a success.

Southwestern Style Bean Dip

Makes about 3 cups
Southwestern flavor, Bean Dip, appetizer, recipe
Southwestern Style Bean Dip

1 can (15-ounces) white beans
1 can (4 ounces) diced green chilies
2 tablespoons scallions, minced
1½ teaspoons fresh thyme leaves, stripped from stems
1 teaspoon ancho chili powder
1 teaspoon onion powder
¼ teaspoon ground cumin
¼ teaspoon ground coriander
3 tablespoons lime juice
½ cup olive oil

chopped scallions and fresh cracked black pepper for garnish
drizzled olive oil for garnish

Drain the beans in a colander and then run water over them for at least 2 or 3 minutes, until all foaming subsides. Pour the drained beans into the bowl of a food processor. Add in the next 9 ingredients and puree until smooth. Pour into a bowl to serve and garnish with the scallions, black pepper and a drizzle of olive oil. Serve the dip with vegetable crudites, crackers of tortilla chips.


My passion is teaching people how to create a harmony of flavors with their cooking, and passing along my love and joy of food, both simple or exotic, plain or fancy. I continue my journey in ethnic and domestic cuisines, continuing my journey to explore diverse culinary experiences and hopefully to start you on a journey of your own. Join me also at A Harmony of Flavors on Facebook, and Pinterest.
Friday, January 8, 2016

Little Corn Tamales from Guatemala

While this recipe is one generally made towards the end of corn growing season in August, I am posting it here today because I realized that in all this time since starting my website and blog, I had never entered this recipe. What an oversight!

While going back through older blog posts, I was correcting errors and remedying broken links when I found the post from December of 2012 where I wrote about tamales in general, listing the various sorts found in Guatemala. There are many and varied types of tamales found there. By far, for the most part they are savory. The little corn tamales I am writing about today are sweet. Sweet like corn bread or other lightly sweetened breads. 


I had not had access to field corn for all the years back in the U.S., up until just a few years ago. I finally got the chance to make them, much to my delight. I photographed every step of the way in the process, in order to have the photos for demonstration later, for my kids and anyone else who might be interested. The only problem?

I forgot to take photos once they were steamed and ready to eat! I had to go online and find photos from someone else to demonstrate the final product.... This photo above is from a website from El Salvador, but the tamalitos in the photo look exactly like mine!

Spanish Language Terms

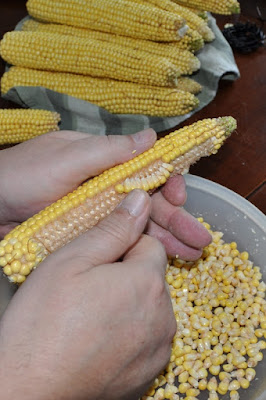
Removing Kernels from Cobs
In Guatemala, these little corn tamales are called "Tamalitos de Elote." A "tamal" is one tamal. "Tamales" means more than one tamal. When the diminutive ending of "ito" is applied, this means that something is smaller. So, "Tamalitos" are little tamales. The word "elote" means corn, but refers to younger corn and not dried. Dried corn is maiz, in Spanish, or maize.

Now that that is straight, I will go a step further and relate what was spoken to me about just the right point to pick the corn for Tamalitos de Elote. I was told that the corn had to be dried far past eating as young corn, but not yet dried all the way through. The kernels must be dried to the point where if a fingernail is poked into a kernel, a little "milk" must still seep out. At this point, while not terribly easy, the kernels can be stripped off the cobs with the germ still attached. Too much earlier and it is a near impossibility to remove the kernels from the cob. Even at this stage, while stripping the kernels, some will pop and the milk will spray all over the place. My husband helped me the day I made these and we marveled for months after at the places we still spotted dried corn milk!


Green corn husks for use as wrappers

The Wrappers

Unlike other tamales, which are wrapped in maxan leaves (Calathea lutea), banana leaves or dried corn husks, Tamalitos de Elote are wrapped in their own green corn husks, shown at right. The husks must be removed carefully, so as to preserve sufficient large segments for wrapping the batter.This is easiest if the base of the cob is sliced off, leaving a smooth edge at the bottom of the husks, and making them easy to remove intact.

Tamalitos de Elote 

or, Sweet Corn Tamalitos 


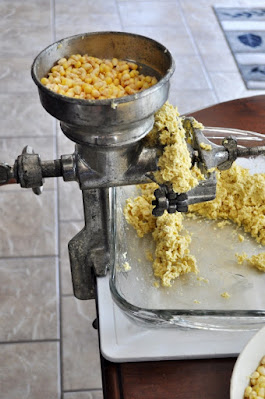
Grinding Corn Kernels
Grinding Corn Kernels, 1st grind
Makes about 2 dozen tamalitos

12 ears corn, nearly dry, kernels removed whole
½ to ¾ cup sugar
1 stick unsalted butter, melted
½ teaspoon salt
½ teaspoon true cinnamon
½ teaspoon baking soda

Grind the corn: I used a traditional hand grinder, brought back with me from Guatemala. The setting needs to be very tight, so as to grind as finely as possible. Even so, the whole batch must be ground through a second time in order to make the mixture finely enough textured. (Possibly a Vitamix blender as an alternative would result in finely enough ground corn.) 


Mix the resultant corn mush with the butter and sugar (start with the smaller amount, tasting and sweetening to your taste). It should be something like the sweetness of a Jiffy® Corn Muffin mix. Add in the butter, salt, cinnamon and baking soda and stir well. 

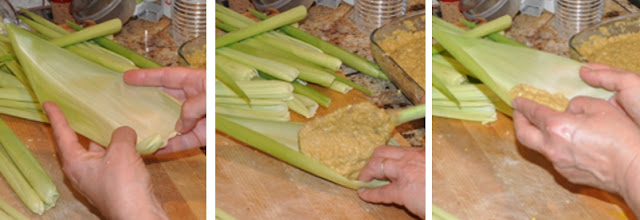
Sequence of wrapping the tamalitos
1) widest husks   -   2) a dollop of batter goes in   -   3) fold in the edges of husk to envelop

Using the green corn husks, select the ones with the greatest width as shown above. 1) Hold the widest end downwards, spread it open and 2) place a dollop of about ½ cup of the batter onto the husk. 3) Fold in both edges to cover the mixture. This is facilitated by the fact that the corn husks are naturally rounded and conform themselves to wrapping very easily.

4) Finish folding in both edges of the husk, and 5) a long tube shape is formed. 6) Flip the pointed end of the husk back along the length of the filled section. 7) Turn the tamal so the folded edge is downwards.

Sequence of wrapping the tamalitos
4) fold in husk   -   5) makes a long tube   -   6) flip pointed end up   -   7) Turn so pointed and open ends are upwards

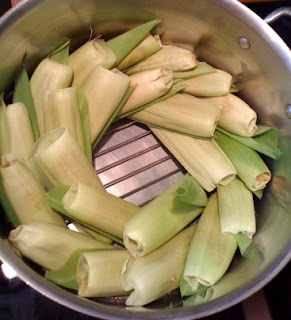
Set this little packet into a large pot with a rack in the bottom. Set the remaining tamalitos against each other so the open ends lean upwards, to avoid spills. Pour about 2 cups water in the bottom of the pot. The water should not touch the tamalitos. Bring to boil, cover, reduce to a simmer and steam 1 hour.
Tamalitos in pan, with open ends upwards

Once the tamalitos are cooled, they may be stored in the refrigerator for about a week. 

To reheat, place a steamer rack into the bottom of a pot with water in the bottom, not touching the rack. Set tamales into the steamer and bring the water to boil. Cover and steam for 20 to 25 minutes.

TO SERVE: Serve these little gems as breakfast, or with breakfast, or as dessert - with butter, or honey, or sour cream, Mexican Crema or Queso Fresco.

NOTE: These tamalitos may be frozen. In this case, proceed exactly as for reheating the refrigerated tamalitos, except the frozen tamales can be set right into the steamer, and must be allowed at minimum 30 to 40 minutes steaming time. Watch the water level carefully. If frozen corn tamalitos are not steamed for long enough, they may be warm, but will result in a mealy product that is no joy to eat. 


My passion is teaching people how to create a harmony of flavors with their cooking, and passing along my love and joy of food, both simple or exotic, plain or fancy. I continue my journey in ethnic and domestic cuisines, continuing my journey to explore diverse culinary experiences and hopefully to start you on a journey of your own. Join me also at A Harmony of Flavors on Facebook, and Pinterest.
Disqus