Translate

Wednesday, January 29, 2014

Thai Green Curry Paste in a Recipe

chicken, slicing
lines showing how to slice across the grain
Yesterday I finally got around to trying a recipe with my recently made (and frozen) Thai Green Curry Paste. I got chicken breasts to use for my recipe, though boneless chicken thighs or pork tenderloins would work well also. In order to slice meat thinly, it is best to start with it still partially frozen. For the chicken breast, or for any meat used, it is also good to slice it across the grain of the meat. When the meat is cooked in the dish with the cut across the grain, it allows very easy cutting and eating with a fork. 


tecniques, carrots, slicing
julienned carrots
The vegetables for a Thai Green Curry recipe are usually things like green or red bell pepper and hot green chiles, more garlic and lemongrass (there is garlic and lemongrass in the Thai Green Curry Paste used in the recipe). I also used julienned carrot. Coconut milk is generally the liquid. My favorite brand of coconut milk is Thai Kitchen; it just tastes like fresh coconut, to me. I did not use extra hot chiles, as my husband would not tolerate them, but feel free to use as many as you can stand! 

Keffir Lime Leaves, dried leaves, ingredients
My Dried Keffir Lime Leaves
Many recipes call for Keffir lime leaves (sometimes spelled Kaffir Lime). I have never yet had the fortune of having a real, fresh Keffir Lime. I hope someday to have that experience and really know the difference between those and Persian limes. Meanwhile, the best I could do with my Thai curry was to use dried Keffir lime leaves. The only place I found them (at the time I was looking, a couple of years back) was Savory Spice Shop, in Colorado. I am sure they are available elsewhere, but this was where I found mine. Keffir limes are indigenous to Southeast Asia and now grow in Hawaii as well. The leaves often have a double leaf, looking like two leaves growing end to end. The fruit's skin is extremely puckery; far moreso than a Persian Lime. Wikipedia has an excellent photo of both the fruit and the double leaves. 
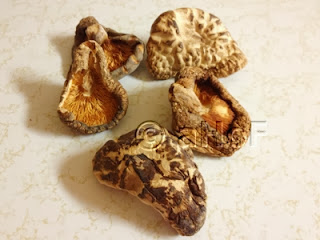
shiitake, mushrooms, dried mushrooms
Dried Shiitake Mushrooms

The recipe turned out very well, overall. The flavors were great and everything cooked just as I wanted, meaning nothing was too overcooked. I believe that Thai flavors are not really my preferred flavors. While the meal was truly delicious, had it been an Indian Curry, I would have loved it far more. I just love some of the warm Indian spices more than Thai flavors. Regardless, I may be in a great minority on that, so do not let that stop anyone from trying this dish. It really was wonderful. 


Thai Green Curried Chicken


Serves 4 to 6

2 pounds skinless, boneless chicken breast (about 4), partially frozen
chicken, Thai recipe, Green Chili Paste
Thai Green Curried Chicken

3 tablespoons soy sauce
4 dried Shiitake mushrooms
2 teaspoons coconut oil
1 onion, in wedges or cubes
4 - 8 tablespoons Thai Green Curry Paste
1 can coconut milk (not sweetened)
2 carrots, peeled, julienned
1 green or red bell pepper, cut in cubes
2 - 4 Thai chilies, optional
3 cloves garlic, minced finely
3 - 4 tablespoons fresh ginger, minced finely
2 Keffir lime leaves, or 1 - 2 teaspoons lime zest
fresh cilantro leaves, as garnish
roasted cashews for garnish

Slice the chicken across the grain of the meat, into thin slices. Set them into a bowl and toss with the soy sauce. Set the Shiitake mushrooms to soak in about 1 1/2 cups boiled water. Cover and allow them to reconstitute for at least 20 minutes. Heat the coconut oil in a very large skillet or wok and cook the chicken, about half the pieces at a time. They need only be partially cooked. Removed them to a plate when done. Add the onions to the skillet and saute them for about 3 to 4 minutes. Add in the Thai Green Curry Paste and stir until fragrant, about 1 to 2 minutes. Add in the coconut milk and stir to combine. Add in the vegetables, garlic and ginger with the lime leaves and return the chicken to the skillet. Stir together carefully and allow to simmer for 15 to 20 minutes, stirring occasionally. Garnish with cilantro leaves and cashews. Best served over white rice.


My passion is teaching people how to create a harmony of flavors with their cooking, and passing along my love and joy of food, both simple or exotic, plain or fancy. I continue my journey in ethnic and domestic cuisines, continuing my journey to explore diverse culinary experiences and hopefully to start you on a journey of your own. Join me also at A Harmony of Flavors on Facebook, and Pinterest.

Friday, January 24, 2014

Mom and Dad's Bean Soup is a Delight

soup, bean soup, ham bone soup, ham
My Bean Soup, last evening
Long, long ago, when I was quite young, my Dad brought home a recipe for Bean Soup. They didn't often really cook together. Dad worked long hours and didn't always have time. He was inventive through, and loved to try new things, so I think that must be where I got my gene for trying new things! They made the bean soup though, and it didn't quite suit. So they tinkered with it, tweaked it, and over time, this is what they came up with; a delicious, stick-to-your-ribs kind of soup that is just heaven on a cold day. The photo below left is one my Dad took with his Sony Mavica camera. He was so proud to be able to take photos and immediately email them to all of us children. Dad passed on later that year, and Mom some years later, but their recipes live on.

bean soup, ham bone soup, supper
Mom & Dad's Bean Soup, 2001

ham bone, beans, soup
ham bone and beans in the pot with water - note the line
To make this soup, it is best to have a leftover ham bone from whatever occasion you have eaten a ham. It is also good to leave a bit of ham on the bone so you get some nice meaty bites in the finished soup. Whenever the occasion arises and a ham bone is left, freeze it, well wrapped until needed. If you really do not have a ham bone, it is possible to make this soup with smoked ham hocks. There was a time when ham hocks had a bit more meat to them, but these days, there is almost none. Still, the flavor will be there and that is the most important part. If you use ham hocks, you might consider adding in 1/2 to 1 pound of cubed ham. Other than the ham bone, the soup is really very simple. Nothing out of the ordinary goes in but beans, barley, onion, carrots, potatoes bay leaves and ketchup.

ingredients, potatoes, carrots, bay leafI don't recall Mom ever soaking the beans for the soup, and I never have when I make my own. Great Northern beans are best, though Navy Beans are fine. When Mom and Dad made the soup in later years, they started playing with the recipe a bit, using celery, which they never did when I was young, and sometimes substituting a bag of baby carrots for regular carrots, sliced. The soup will thicken as the beans are cooked for more than 2 hours. If you stop the cooking when the beans are just tender, the soup will not be as thick, though just as tasty. My preference is that the soup be so nice and thick you can almost stand your spoon up in it, but that is my choice.

Another thing my Dad always did, and I follow suit, is to add a little vinegar to the soup in his bowl. It really enhances the flavor of the soup. I know some may thing this is odd, but I love it, so give it a try. Anywhere from a teaspoon to a tablespoon per bowl, to taste. This soup is heavenly good on its own, but a nice slice of bread with butter is a wonderful addition to the meal.

Bean Soup

The finished soup

1 leftover ham bone, with up to 1 pound meat left on
1 pound Great Northern Beans, picked over and rinsed
1 large onion, diced
1 - 2 bay leaves
1 cup barley, preferably the long-cooking kind
3 - 4 large carrots, scrubbed, sliced in coins
2 - 4 potatoes, depending on size, peeled, cubed
3/4 - 1 cup ketchup

Put first five ingredients into a very large soup pot and add water. The ham bone should stick out by about 1/3 (note the line I made on the photo above to show where the water line was). Bring to a boil and reduce heat. Simmer, covered, for about an hour or so. Add the carrots, potatoes and ketchup, cover and continue to cook for at least another hour or two, until soup is slightly thickened and beans are falling-apart tender. Remove the ham bone from the pot and set it on a plate. When cool enough to handle, break off all the meat and break it up into shreds. Discard the bone and any fat. Return the meat to the pot and stir in. Remove bay leaves and pass the vinegar!


My passion is teaching people how to create a harmony of flavors with their cooking, and passing along my love and joy of food, both simple or exotic, plain or fancy. I continue my journey in ethnic and domestic cuisines, continuing my journey to explore diverse culinary experiences and hopefully to start you on a journey of your own. Join me also at A Harmony of Flavors on Facebook, and Pinterest.

Wednesday, January 22, 2014

A Wonderful, Warming Winter Stew

beef, stew, beer, bacon, onions, dinner recipe
Carbonnades Beef Stew with Beer
I read about this stew a very long time ago. The book, no longer in print, was called Glorious Stew, by Dorothy Ivens, copyright 1969. It has been one of my favorite cookbooks since I got it as a soon-to-be new wife, way back then. The stew is supposedly Flemish in origin, and according to Ms. Ivens, the meat was meant to be cut in thin, flat pieces. Two things that made this stew stand out was the amount of onions and that it used beer as some of the cooking liquid.

I tried making the stew as Ms. Ivens suggests, but over time, some things just seemed easier to do a slightly different way. I liked the idea that the onions should be equal in weight to the meat. Onions are very sweet when cooked, and these just seem to melt down to nothing during the stewing period. I like beer, and learned to drink heartier beer while living in Guatemala, so a heartier beer is what I have always used. Ideally, a Belgian Ale would be the right beer for this stew. In Guatemala, I only had Guatemalan beer to choose from. Since living in the US again, I have used German beer over the years. Now, beers from anywhere in the world are available, so finding a Belgian Ale is not such a difficult thing to find anymore. Still, as with wine; if it is good enough to drink, then it is good enough to use for cooking.
ingredients, beef stew, dinner recipe,
Ingredients for Carbonnades

This recipe is found all over the internet, and is made in widely varying manners. The only thing that is consistent is the use of beer as some or all of the cooking liquid. There are enough beers available singly that even if beer is not your drink of choice, a bottle can still be acquired to use for the stew. The alcohol is cooked out completely with the long stewing process, but the flavor is just wonderful. My husband absolutely dislikes anything bitter, and never, ever drinks beer. That does not stop him from loving this stew! I generally use one normal sized bottle of beer. If needed, I may open a second and use a little more (then I drink the remainder!).
Bacon, Beef cooking steps
Steps 1: Bacon and Beef in Pot

For me, a stew is a one-pot meal. I might, on a rare occasion, serve a salad first, but generally, if I make a stew; that is dinner. My husband will eat bread with it, but I find a stew filling enough on its own. The stew has potatoes in it. I put the potatoes in at the beginning of the cooking period, as I do not like extra pots to clean afterwards. If you prefer potatoes that still taste and look like potatoes, peel them and cut in chunks near the time the stew is finished. Cook them in salted water until just tender and then drain and add them to the stew as it is served. If tarragon vinegar is not available, use cider vinegar and add in a half teaspoon of dried tarragon or 1 to 1½ teaspoons chopped fresh tarragon.


Carbonnades Beef Stew with Beer


Makes about 4 servings

2 pounds beef rump or chuck
cooking steps, making beef stew, onions, beef
Step 2: Onions and seasonings in the pot
2 - 4 slices bacon, cut across into 1/4-inch pieces
2 pounds white onions, thinly sliced
2 teaspoons sugar
2 tablespoons chopped fresh parsley
1 bay leaf
1½ teaspoons fresh thyme leaves
2 cloves garlic, smashed
2 teaspoons salt
a few grinds of pepper
1 - 2 cups beer; Belgian Ale preferred
4 medium potatoes, peeled, cut in chunks
2 tablespoons cornstarch
3 tablespoons tarragon vinegar
Extra parsley for garnish

Preheat the oven to about 300 degrees. The stew should be able to maintain a simmer; adjust the temperature later, accordingly.

Cut the meat into 1 to 1½-inch cubes. Set the cubes of meat on paper toweling to dry; this ensures it will brown in the pan. Have a large stew pot or braising pan with a lid ready.


cooking steps, beer, stew, making stew
Step 3; adding the beer to the pot
In a skillet, brown the bacon. Remove the bacon from the skillet with a slotted spoon and add to the stew pot. Retain the bacon grease in the skillet and add in the onions. Saute the onions until they are limp and golden colored, but not browned. Remove them to the stew pot with the slotted spoon. A few pieces at a time, brown the meat cubes. Do not crowd the pan or they will steam. Remove them to the stew pot as they are browned.


To the ingredients in the stew pot, add the
cooking steps, adding potatoes, beef stew
Step 4: Potatoes into the pot
sugar, 2 tablespoons parsley, bay leaf, fresh thyme, garlic, salt and pepper. Pour in the beer and stir all the ingredients to combine. Set the stew pot on a burner and gently bring up to a simmer. Cover with the lid and set the pot in the preheated oven. Check the pot after about 45 minutes to see if it is at a simmer. If it is boiling, lower the heat; if it is not simmering, raise the heat slightly. Check again about halfway through the cooking time to make sure there is still enough cooking liquid. If it is dry, add either more beer, or supplement with beef stock or water. Cook for 2 to 2½ hours in all, or until the meat is tender.

In a small bowl, combine the cornstarch and vinegar. Set the stew pot on top of the stove, remove the lid and set the burner on medium low. Gently stir in the tarragon and cornstarch mixture, stirring until the stew has thickened slightly. Allow the stew to continue at a simmer for about 5 minutes more, to ensure the cornstarch is completely cooked through. Garnish with more parsley before serving.


My passion is teaching people how to create a harmony of flavors with their cooking, and passing along my love and joy of food, both simple or exotic, plain or fancy. I continue my journey in ethnic and domestic cuisines, continuing my journey to explore diverse culinary experiences and hopefully to start you on a journey of your own. Join me also at A Harmony of Flavors on Facebook, and Pinterest.

Sunday, January 19, 2014

Making Thai Green Curry Paste; a Midwest Adventure

To start, I must first admit to knowing very little of Thai cuisine. Along with that, while I haven't made it a quest to find good Thai restaurants, I have been unimpressed with those I have tried. To date, the one time I ate at a Thai restaurant and enjoyed a soup (one of the Tom Yum, with chicken), it was at some little hole-in-the-wall place in the middle of nowhere, California, while on a trip. Admittedly, if it wasn't for my daughter in law, Julia, who is a true Thai food fan, I would never have eaten at that Thai place, or any other!

Ever since, I have been curious. Though, as I said, I have been unimpressed with any places I have tried since. When I read recipes, they do not inspire me. They just do not jump out as interesting. I know Thai food is supposed to be quite healthy; generally simple ingredients. Maybe that is part of the problem. I tend to love anything that has a multitude of ingredients going on. Indian cuisine just so completely engulfs my imagination and my palate. A list of 20 ingredients, with 15 of them spices - that is something I love.

Thai, ethnic, curry paste, recipe
Thai Green Curry Paste
Somewhere I saw a recipe for Thai Green Curry Paste and thought the ingredients sounded good together. I sat down to create what I thought would be good ingredients for a recipe of my own. In general, some things seem to be ubiquitous in any TGCP  recipe: cilantro, green chiles, lemongrass, fresh galangal (preferred) or ginger, garlic, Keffir Lime (preferred) or regular lime, coriander, cumin, pepper and some kind of oil and a fish sauce. Other possible additions are things like shallot, Thai Basil, shrimp paste, coriander roots, turmeric, soy sauce. 

I read one person's blog, very obviously a Thai person, who emphatically stated that Keffir limes are not to be substituted with Keffir lime leaves. They stated that this would be like saying if you didn't have an orange, you could use orange leaves instead. There is no resemblance. This makes sense. I have dried Keffir lime leaves in my spice cabinet, but no way to get the actual Keffir limes. I realize that Keffir and Persian limes also have no resemblance, but the regular Persian limes were all I had. Likewise, I had fresh ginger, but no way to get fresh galangal (a cousin to ginger, but with much stronger, more pungent flavor, said to help reduce fishy flavors). Where I live, I cannot get fresh lemongrass, though there are those tubes (Gourmet Garden brand, Lemongrass) in the grocery, stating Lemongrass Paste on the front, though the ingredient list contains other things to "stabilize" the ingredients or whatever. Still, it was the best I could do. Such times as I have been able to acquire fresh lemongrass, I have never been able to make the inner white parts smooth. Unless I slice exceptionally thinly across the lower stem, there are just fibrous bits in there.

Thai Green Chilies are also not available everywhere here. Generally Serrano and Jalapeno are the most accessible. Since my husband would not tolerate too much heat anyway, and if I want him to taste-test my experiments, I used seeded jalapenos, definitely at the lower end of the heat spectrum. If you want more heat, keep the seeds, of whichever chili is preferred. Fish sauce or shrimp paste? Nope. I could probably get one of those items, but if it tasted fishy, again my husband would not touch it. I have been able to sneak a little anchovy paste into a Caesar's Salad occasionally, but I would never use a fish sauce for anything else, so it would be a waste to keep. 

Okay, with all this in mind, it is obvious that my "Thai" Green Curry Paste is a very Americanized, upper-midwest-grainbelt sort of interpretation. Still, the flavors turned out an interesting mix; bright, clean, not-too-hot, a little bitter and very green. One recipe I saw said to use whole limes, skin and all. This captured my taste-imagination, so I did that. I am sure that is where the bitter notes came in. Had I used Keffir Lime peel and galangal, I would likely have some pungent bitter notes as well. Most authentic recipes call for pounding all the ingredients in a mortar and pestle. I have many mortars and pestles; none large enough to accommodate this many ingredients. Instead I used my Vita-Mix Blender, which comes with a plunger that allows one to push down the ingredients and keep blending. Using a regular blender might require stopping and starting numerous times, including starting out with some ingredients cut very small, or pre-ground. So, this is what I did:

Thai Green Curry Paste


This makes about 2 cups.

1 large bunch fresh coriander, stems and all
6 green jalapeno chilies, stemmed and seeded
2 shallots
5 Tablespoons Gourmet Garden Lemongrass Paste
4 large cloves garlic
1 chunk fresh ginger, about golf ball size, skin left on, cut in smaller chunks
2 whole limes, washed and cut in chunks
1 teaspoon coriander seeds
1 teaspoon cumin seeds
1 teaspoon peppercorns (white, if available)
3 - 4 tablespoons oil (I used olive; all I had on hand - not very "Thai", I know)
1 tablespoon soy sauce

In a dry skillet over high heat, toast the coriander, cumin and pepper for a few minutes until fragrant. Place into the blender, along with all the rest of the ingredients. Blend, stopping as necessary to stir down ingredients, until the paste is as smooth as possible.


A good measure is 1½ to 2 tablespoons per person for a Thai Curry. Freeze it in portions to have on hand. I made 4 tablespoon (¼ cup) portions, since there are two of us in the house. I use the little old-fashioned sandwich baggies with a flap, put the paste into one corner, tie a little knot in top and freeze these little portions of anything (Red Curry Paste, leftover tomato paste, etc.) 

For use, in general, heat some oil in a pan and add in the Curry Paste to release flavors, add in coconut milk, vegetables (peppers, zucchini, carrots, peas and/or chicken or shrimp) and cook to desired doneness. Additions might be chicken stock, Thai basil, a pinch of sugar. I will be trying this out in the very near future. The paste also tasted wonderful raw, so it could also make something in a RAW food diet taste marvelous.


My passion is teaching people how to create a harmony of flavors with their cooking, and passing along my love and joy of food, both simple or exotic, plain or fancy. I continue my journey in ethnic and domestic cuisines, continuing my journey to explore diverse culinary experiences and hopefully to start you on a journey of your own. Join me also at A Harmony of Flavors on Facebook, and Pinterest.

Saturday, January 18, 2014

Back to Yeast Waffles

waffles, waffle batter, yeast, breakfast recipe
Overnight Yeast Waffles
I can be very persistent. Just ask my husband!

When I made the waffles about a week ago, trying for a recipe that would be similar to Marion Cunningham's Yeast Waffles, well, it just took too long for the results. The result was wonderful after 3 days in the fridge. Great, if you are having guests and need something spectacular for breakfast and need things done ahead; not so much if you want relatively instant results. 

I consider overnight as "instant" because it is quick to mix up the night before and let it set out overnight. It is ready for use immediately, in the morning. Just add eggs and baking soda and presto - Waffle Batter! The recipe of last week used no time at room temperature to ferment. The fermentation was a long and very slow process in the fridge. I had come to expect the fermented yeastiness of M.C.'s Yeast Waffles. My batter of last week never had that. While it did finally come out tasting of yeast after 3 days in the fridge, it was not strong, nor fermented in flavor. So, I went back to the drawing board. I did some research into such things as sourdough starters, along with other recipes for yeast waffles. 


Batter bubbling away at 10 PM
10 PM: Batter risen considerably
I think these days everyone is so fearful of germs and food poisoning, they forget that sourdough comes from fermenting a yeast batter, generally at least starting out on the counter (as in NOT refrigerated). I read online and about everyone that had posted MC's Yeast Waffle recipe, now called for mixing the batter and then putting it in the fridge overnight. This will never give that great sour, fermented quality that is so unique to these waffles. It will give nice waffles, just not what I was looking for. Granted, it is possible to have a starter go bad; just not overnight. If ir did, it would become very obvious in that it will develop an off color, sometimes pinkish, and smell just wrong. There is no lovely fermented tang; it just plain stinks. 

Long, long ago, I had a sourdough starter going for some time. Once it was there bubbling away, I looked for recipes to use the starter. I made waffles and pancakes, bread and cake. The thing about a sourdough starter is that the longer it lives (as in, using a portion, then refreshing the remainder with more flour and water, so the fermentation is continuous), the more sour the flavor. The stronger the sour flavor, the more it comes through in what you make. Breads become quite tangy, and so do waffles and pancakes. At that point, I was not so enamored of the sourdough starter. I didn't want quite that much sour tang in my waffles or pancakes. So, what to do?

Here entered M.C.'s Yeast Waffle recipe - a real "a-HA!" moment. 


waffles, risen waffles, breakfast recipe
Note light through bubbles when held up to light
So, back to the reason for this post. I created another batter last evening. It is similar to M.C.'s Yeast Waffles. There are only so many things to change. You need certain proportions of flour, yeast, sugar, salt. Other additions are butter or oil, milk, eggs and baking soda. I lessened the amount of butter a bit, and added an egg. I added a pinch of powdered vanilla pod (I save the pod from a vanilla bean when I scrape the seeds, allow it to thoroughly dry, then pulse to a fine powder in a coffee grinder used just for this). A splash of good vanilla extract would be great also. I used nonfat dried milk powder. The batter really took off. I mixed it up at 8 PM. I checked it at 10 PM, before going to bed. It was merrily and actively bubbling away and had risen noticeably in the bowl. This morning, it was still bubbling, though more slowly, and had noticeably fallen in the bowl. This is normal, and expected.

Once I added the eggs and baking soda, I had my "Belgian" waffle maker going. I had never made this kind of waffle in the deeper welled waffle maker and was curious if they would rise to fill the spaces, as the dough is relatively runny. The deeper wells did fill, but I think it just works more nicely in a regular waffle iron. The dough baked into very light and crisp waffles with noticeable tiny bubbles baked into the waffle. They smelled heavenly of the yeasty tang and tasted even better. Success! 


Note height of batter in the bowl
yeast batter, waffles, breakfast recipe
Still bubbly, risen and fallen overnight
One more thing: I am baking bread and other wonderful yeasty things all the time, so I buy SAF Instant Yeast by the pound brick. Instant (or Rapid-Rise / Quick-Rise) Yeast requires no "proofing." If you have a packet of regular yeast, use 1/2 cup of the water called for, warmed separately, to proof the yeast. Save this mixture until the end of the mixing of the batter. I also do not keep milk in the house. I have instant dry milk powder or evaporated milk for those times I need milk for a recipe. If preferred, use 2 cups of milk when melting the butter. The other half cup of water can be added to the milk, or used to proof the yeast if needed.


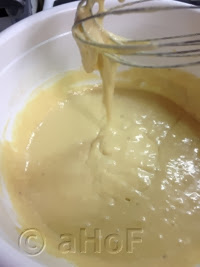
waffle batter consistency, breakfast, making waffles
Thin, gloppy batter
Overnight Yeast Waffles


2½ cups water
5 tablespoons unsalted butter
2 cups all-purpose flour
⅔ cup instant dry milk powder
1 packet of instant rise yeast (about 2 1/2 teaspoons)
2 tablespoons sugar
1 teaspoon salt
3 eggs
½ teaspoon baking soda

Mix the water and butter in a microwave safe container and heat on short bursts to melt the butter without overheating the water. Make sure the water is just tepid before adding to the dry ingredients.

Separately, in a large, glass or plastic bowl, combine the flour, milk powder, yeast, sugar and salt. Add in the tepid water and butter mixture and stir well to combine. Cover lightly with plastic wrap and set in a warm place to ferment overnight. (If it is very cold outside, you may place the bowl in the oven with the oven light on. Keep the bowl at the furthest point from the light as possible. Some oven lights make the oven too hot, and could hinder the process or kill the yeast.)

Next morning, set up a waffle iron. Add the eggs and baking soda to the fermented batter and whisk in to combine. Pour about ½ to ⅔ cup onto the waffle iron and bake according to directions; usually about 2 to 2½ minutes. Makes about 10 to 12 (7-inch round) waffles.


My passion is teaching people how to create a harmony of flavors with their cooking, and passing along my love and joy of food, both simple or exotic, plain or fancy. I continue my journey in ethnic and domestic cuisines, continuing my journey to explore diverse culinary experiences and hopefully to start you on a journey of your own. Join me also at A Harmony of Flavors on Facebook, and Pinterest.

Wednesday, January 15, 2014

Quick Tuesday Supper

I love to cook. I cook a lot, and often. Sometimes, I just want something quick and easy, and last evening that was it. I had been emailing back and forth with my sisters about Bean Soup, a recipe my Mom and Dad created a l-o-n-g, long time ago. I started my website and blog one year and 4 months ago, and in all that time I have not made Bean Soup. It is one of my favorite things in winter. The main reason I couldn't just run to the kitchen and put on a pot of soup was because I had no leftover ham bone (with a bit of meat left on). Usually, whenever I have a ham bone left, I freeze it until such time as it is needed. In the last 24 years since being with my current husband, the use of a ham bone has been divided between My Mom and Dad's Bean Soup, and his Mom's Famous Baked Beans. The last couple of times a ham bone was available in this house, it went to make Baked Beans.

ham, peas, leftovers, quick meal
Creamed Ham and Peas, on Toast
Thus, my quickie dinner of last evening. I needed a ham bone. Therefore, I needed a ham! I went out and bought one. I mean, after emailing about it for days, I just want that soup. Now I had a ham and I needed to make dinner. A quick and easy dinner with many kinds of leftovers, such as ham, turkey or chicken, and even canned tuna, is to make a cream sauce or bechamel, and add in some meat and vegetables. My husband and I love peas, so peas was my choice last night. Another of my Mom's easy dishes was Creamed Tuna and Peas, basically with this same recipe. I loved that, growing up. My husband will not eat tuna, so I just don't make it just for myself.

When making this meal of Creamed Ham and Peas, no salt is needed in the recipe, as the ham is salty. If making this dish with turkey or chicken, some salt will be needed. I don't believe Mom ever added salt to her Creamed Tuna and Peas, but when using canned tuna and peas, there is plenty of salt there, also.


ham, peas, quick meal, leftover meal
Creamed Ham and Peas being made

Creamed Ham and Peas


4 tablespoons unsalted butter
5 tablespoons all-purpose flour
1 can (12 ounces) evaporated milk +
1 cup water (or use total liquid amount as 1 1/2 cup milk)
2 cups diced ham
1½ cups frozen peas

In a skillet over medium heat, melt the butter. Add in the flour and stir with a spoon or spatula to completely combine the two. Off the heat, add in the evaporated milk and stir to completely combine the butter and flour roux with the milk. Back on the heat, add in the water and stir constantly, until the mixture thickens and is bubbling. (This is your basic Bechamel Sauce).

Add in the ham and the peas, stirring so nothing sticks to the bottom of the pan, until the mixture is completely heated through. Easy!


This kind of creamed meal can be served over toast (and we all know what that is called), or over pasta or rice. It can be made and placed in a casserole with some grated cheese over top and baked for 20 to 30 minutes until bubbly. It can be combined with pasta, placed in a casserole and topped with buttered bread crumbs and baked as stated. In other words, this kind of dish is just plain versatile. It can be dressed up by adding in some shredded cheddar or jack cheese to melt while in the skillet or it can have some cream cheese melted in. Since it was already late when I got to making the dish, I made it at its most basic. I just wanted to point out that it can be embellished in so very many ways.


My passion is teaching people how to create a harmony of flavors with their cooking, and passing along my love and joy of food, both simple or exotic, plain or fancy. I continue my journey in ethnic and domestic cuisines, continuing my journey to explore diverse culinary experiences and hopefully to start you on a journey of your own. Join me also at A Harmony of Flavors on Facebook, and Pinterest.

Tuesday, January 14, 2014

Easy Stir-Fry

stir fry, cooking method, vegetables
Vegetable Stir-Fry, closeup
I have been making a stir-fry of sorts for a lot of years. It changes with vegetable availability; both seasonal and just what I have on hand at any given moment. It can be as simple as onion, garlic, ginger, celery, carrot, green pepper and peas - to the additions of bok choy, bean sprouts, frozen peas, snow or sugar snap peas, cabbage or Napa cabbage, squash, green beans, lemongrass, and the list continues. One of the reasons I love to make this stir fry is that I love vegetables. Another reason is that, for whatever reason, though my husband dislikes things like cabbages, carrot or squash, I can put them in this stir-fry and he loves it. I have even sneaked a little broccoli (a true hatred, alongside fresh tomato or large chunks of tomato in anything). When I use bok choy, I slice the white parts on an angle, similarly to the celery. I finely chiffonade the greens and add them at the end. 

What I love best is that there are a lot of vegetables with little calorie count, so I get the bulk that  makes me feel full, with a lot less calories than in most normal meals.

You may wonder about meat. I usually do add meat - either chicken or pork. The way I make it is to use either a pork tenderloin or pork chops, meat cut off of any bone or fat, or chicken breasts. It is best if the meat is only partially thawed, as it makes cutting into thin strips far easier. I slice the meat across the grain, thinly, and then again, into thin strips a little wider than matchsticks. It's hard to get the meat quite that small, and it isn't necessary. Once I have the thin pieces of meat, I prep some fresh garlic and ginger by mincing very finely. I set a nonstick fry pan on relatively high heat, add in some olive oil or coconut oil and add the meat. I stir-fry the meat tossing quickly, until it starts to brown. I toss in the ginger and garlic (about 2 - 3 tablespoons, minced all together). This gets tossed quickly until very fragrant, and then I sprinkle on some soy sauce or Shoyu. Once the soy sauce is evaporated (doesn't take long), I remove the pan from the heat and drizzle on a little Asian dark sesame oil. Once the vegetable part of the stir fry is done, I add the meat and mix it in. Easy. 
stri fry, rice, vegetables
Vegetable Stir-Fry


This method of preparing the meat is also something I do when making a more substantial luncheon salad, usually for guests. I love salad, and prefer to toss in just about anything I can find. The meat just makes it heartier. Another thing I have done is to use a rotisserie chicken from the store - just shred and add to the vegetable part of the stir fry.

This is a basic recipe. Feel free to embellish however you might prefer.


Vegetable Stir-Fry

sesame, toasted sesame oil, dark sesame oil
Asian (Dark) Sesame Oil

1 tablespoon oil or coconut oil
1 - 2 large onions, sliced in wedges
1 juicy lemon or lime, or 2 tablespoons vinegar
1 bell pepper, cut in long strips
2 - 3 large stalks celery, cut thinly at an angle
2 cups very thinly sliced cabbage
1 large carrot, grated (large holed grater - or julienne)
3 - 4 cloves garlic, minced
1 chunk of fresh ginger, about equal to the amount of garlic, minced
1 cup frozen peas, OR
1½ cups sugar snap peas or snow peas
3 - 4 tablespoons soy sauce or Shoyu
3 tablespoons sesame seeds, preferably unhulled, raw
2 tablespoons Asian Dark Sesame Oil
¾ cup cashews of choice (I use raw), optional
cilantro, for garnish
cooked rice, for serving

Heat to medium high a very large skillet. Add in the oil or coconut oil, then add the onions. Toss the onions frequently, until they begin to just barely turn color. Add in some vinegar or the juice of one juicy lemon or lime. This seems to help the onions taste better and gives a little zip to the flavor. Continue cooking until the juice or vinegar evaporates. Add in the bell pepper, celery and cabbage and toss for a few minutes until wilted. [In general, add any vegetables that take longer to cook to your desired doneness, first.]

Now add in the garlic and ginger and toss well, until it becomes fragrant. Add in the shredded carrot, sesame seeds and cashews. Drizzle on the Asian dark sesame oil and toss to combine.

Serve over a bed of white or brown rice, rice noodles, or other oriental style noodle.

This makes 4 very hefty portions. It takes about 1 hour, start to finish, if making the meat to add in; otherwise about 45 minutes.


My passion is teaching people how to create a harmony of flavors with their cooking, and passing along my love and joy of food, both simple or exotic, plain or fancy. I continue my journey in ethnic and domestic cuisines, continuing my journey to explore diverse culinary experiences and hopefully to start you on a journey of your own. Join me also at A Harmony of Flavors on Facebook, and Pinterest.

Monday, January 13, 2014

The Yeast Waffle Saga, Continued


yeast waffles, experimentation
Waffle from Day 1, left;  the other after 48 hours, right
The story continues. I made a yeast waffle batter last Friday, in the hopes it would be easy to have wonderfully yeasty waffles right then and there. Not.

I made a good amount of batter (recipe in my last blog post), so I put it into the fridge, covered loosely with plastic wrap. It grew to fill the bowl, smelled more like yeast after 24 hours and I had hopes that now I would have that wonderfully yeasty waffles. Not. 

Definitely better than the day before. (Again, see my last post). The texture had changed a bit and they were better. Just not what I had hoped. I put the remaining batter back in the fridge. 

Sunday morning I brought it back out and made another couple of waffles. The batter smelled good, but there was still no yeast aroma while baking, and none perceptible when eating. I shared with my husband, including a piece of one of the waffles I had in a baggie from Day 1. In the photo at top you can see the immense difference in the texture of the waffles. The one made that first day was heavy and dense with no real great flavor. After 48 hours, the batter was so much better, I had hopes for that batter after all.
yeast waffles, experimentation
Beautiful texture and flavor after 72 hours

Today, after 72 hours, I made the last of the batter. It smelled yeasty when it was being cooked, for the first time. Again I shared with my husband, so he could see the differences. We agreed that today, finally, there was a yeasty flavor in the finished waffle. The texture had become light, crisp and airy and just about everything I had hoped for. The texture is visible in the photo at left.

I still would like something to be quicker to have ready. I do not mind making a batter the night before, to be ready to bake in the morning. This recipe, after 3 days in the fridge, gave me the flavor, aroma and texture I wanted. I would conclude that this recipe would be perfect if one knew that guests would be coming and wanted something really wonderful that could be prepped 3 days in advance and crossed off the to-do list. For something a bit more immediate, I am already planning another idea.

And then, while I stressed repeatedly to my wonderful husband that I DID NOT WANT another waffle iron, he got me another waffle iron. I was telling him about Liege Waffles. They are made with a very rich yeast dough (as opposed to a batter), formed into balls and set onto a "Belgian Waffle Maker" with a latch. The real Liege Waffles are also studded with Pearl Sugar. This sugar is particularly large and will caramelize inside the waffle while it cooks, so you end up with these little crunchy pockets of caramelized sugar. I talked to him about the fact that I would like to try something like that dough, even without the Pearl Sugar, but I wasn't sure my regular waffle iron would stay closed enough to make that kind of waffle. But then, I said to him, I really do not make waffles that often. The only reason I made them 4 days in a row was that I was conducting an experiment. And, I have never been overly fond of those huge, deep wells in the Belgian waffles. So he got me a Belgian Waffle Maker with a latch. Oh well.

So, tonight I created a very rich yeast dough. It is softer and more buttery than a bread dough. It is resting in the fridge, and I will experiment with that style of waffle tomorrow, in my new deep-welled Belgian Waffle Maker. I would also like to experiment with a brioche type dough and see how that fares as a waffle. For now, I will be dreaming - again - of yeast waffles in the morning, aaaahhhhh.....


My passion is teaching people how to create a harmony of flavors with their cooking, and passing along my love and joy of food, both simple or exotic, plain or fancy. I continue my journey in ethnic and domestic cuisines, continuing my journey to explore diverse culinary experiences and hopefully to start you on a journey of your own. Join me also at A Harmony of Flavors on Facebook, and Pinterest.

Saturday, January 11, 2014

Yeast Waffle Experiences

Long ago I found a recipe for Marion Cunningham's Yeast Waffles in the local newspaper. I tried the recipe and it was fantabulous! The smell of the waffle baking with its yeasty aroma so like bread baking; the flavor with the yeast right out there and apparent, the tender crispness of the waffle - all these made for one heady breakfast experience. I have been making them almost exclusively ever since.

I have tried other kinds of waffle recipes. Though I am not particularly fond of chocolate at most times and really not for breakfast, I did try a recipe that uses cocoa and Porter beer with its chocolatey undertones. That recipe is wonderful, and I usually serve those chocolate waffles with strawberries cut up into sour cream with a little sugar. Wonderful. I also spent time exploring ways to add fiber into the diet and made lots of waffles with added oat bran or wheat bran or corn meal. Nothing beats the yeast waffles recipe for flavor.
waffles, yeast, delayed baking, breakfast
My Refrigerator Yeast Waffles with Pecans and Blueberries

Waffle irons come is many sizes and shapes. These days many also have perfected the timing so one no longer has to make a guess when it might be done. I got a waffle iron from Williams Sonoma about 10 years ago. It has a slide bar to set, from 1 to 7, how done you want the waffle to be. It has a little red light to tell you it is heating or cooking, and a green light when the waffle is done, along with a little high-pitched whistling sound. It works great, and I have absolutely no complaints. It is a round waffle maker. If the batter goes all the way to the rim (which usually means it will overflow a little), it makes about an 8-inch diameter waffle. If the batter stays inside the rim, it makes about a 7-inch waffle. I have never had a Belgian waffle maker. I have never cared for the exceptionally deep wells it creates. I don't know why. It's just my thing. 

M.C.'s recipe calls for mixing the yeast, milk, butter, salt sugar and flour and mixing well, then lightly covering and leaving the bowl on the counter overnight. In the morning, or when ready to make the waffles, the batter will have risen noticeably. The smell is heavy with the slight fermenting of the yeast. At this point eggs and a little baking soda are added and whisked in and the batter is ready to bake. Obviously, I cannot just publish Marion Cunningham's Yeast Waffle recipe as mine (which I just read she got from Fanny Farmer's Cookbook), so I decided to try making a recipe for a yeast batter and see how it would go. 

waffles, batter, yeast, fermented
Batter after 24 hours in fridge
I wanted to make a batter that was ready to use right away. I mixed basically the same ingredients, but in different proportions, adding in baking soda. I am not a chemist, and am not sure exactly what the soda does in a yeast mixture (as opposed to it working with soured milk or buttermilk in a quick bread, cake or pancake). I feel it must help with the bubbling and puffing, particularly if the batter is left out to ferment. Well, my batter had not been fermented, but I added it anyway. I made the waffles yesterday. I was unimpressed. There was absolutely no yeast smell from the batter nor any aroma while baking. The waffles were fine. While there was nothing inherently "wrong" with them, they were just - plain - waffles.  I also made a couple of pancakes with the batter, and those worked fine, too, but were similarly uninteresting.


Consistency of the batter
I decided to put the rest of the batter in the fridge. I covered it lightly with plastic wrap. The batter grew to completely fill the bowl by this morning. I stirred it down and tried again. This morning the batter noticeably smelled like yeast, though without that wonderfully pungent fermented quality. I had hopes. I made waffles. I sprinkled ¼-cup chopped pecans onto the batter in the iron. The waffles tasted better, but still no real yeasty aroma while baking, nor anything to indicate they are yeast waffles while eating them. I am going to give them another day in the fridge and try again tomorrow. I like things that are ready right away and not something I have to wait for days to develop flavor. I think I am going to go back to making a new recipe that will ferment overnight and see what I can come up with. Meanwhile, this is my recipe, to date:


Refrigerator Yeast Waffles

¼ cup warm water
1 package yeast
1 cup whole wheat pastry flour (or use all-purpose for the total amount)
2 cups all-purpose flour
waffles, breakfast, recipe, yeast, refrigerator ferment
Refrigerator Yeast Waffle with pecans

2 tablespoons sugar
1 teaspoon salt
½ teaspoon baking soda
2¾ cup milk or half & half
3 eggs
1 stick unsalted butter, melted

Stir the yeast into the warm water and let it froth. In a large bowl, combine the flours, sugar, salt and soda. Whisk together the milk and eggs; add in the melted butter. Pour this mixture into the dry ingredients and mix well. Add the yeast and beat to combine. Store in a plastic or glass bowl in the refrigerator overnight and up to 4 days: make sure the batter has a LOT of room to grow, or you will find a mess next day. Cover lightly. If you top with a lid that seals tightly, it could explode as the batter expands.

This will make approximately 10 (7-inch) round waffles or about 20 pancakes. As each waffle iron is different size and shape, you will have to experiment to see how much batter to use per waffle. Bake according to waffle iron instructions. I had mine set on the higher side of medium.


My passion is teaching people how to create a harmony of flavors with their cooking, and passing along my love and joy of food, both simple or exotic, plain or fancy. I continue my journey in ethnic and domestic cuisines, continuing my journey to explore diverse culinary experiences and hopefully to start you on a journey of your own. Join me also at A Harmony of Flavors on Facebook, and Pinterest.

Thursday, January 9, 2014

Gremolata or Persillade or Pesto or Pistou

lemon, garlic, parsley
Basic Ingredients
It seems that many countries have the same basic idea for an herbed topping for foods. The idea is implemented and played upon, given names to fit the language and voila. Similar, I guess, to how my sisters and I could all look at a recipe, but once we took that recipe and made it ourselves, we each would end up with a different final product. It is so simple to take a recipe and change this, add that, leave out another thing and make it reflect our own taste and style.


Gremolata

lemon, parsley, garlic
Gremolata, freshly made
Somehow, somewhere through all of my cooking career, I "knew" about Gremolata. Enough so that when I brought up the subject with one of my daughters, I instinctively knew what the basic ingredients were, though I had not yet made it myself, to date. I knew that it had parsley, lemon zest and garlic. I "knew" it could have olive oil.


Pesto

The same could be said of pesto. Up to just a few years ago I had never made pesto, though I knew the basic ingredients were basil, garlic, pine nuts, olive oil and Parmesan. Now I make it all the time, and use it extensively. Pesto can be made by coarsely chopping all the ingredients, or finely chopping the ingredients. It can be made by pounding the ingredients in a mortar and pestle, or it can be made by either pulsing or pureeing in a food processor. It all depends on your particular need.


pesto, spread, condiment, basil, parsley,  garlic
My Favorite Pesto

My Favorite Pesto


Makes about 2 cups
2 cups basil leaves, packed into measure
2 cups Italian parsley, packed into measure
4 - 6 cloves garlic
3 tablespoons pine nuts
1 cup grated Parmesan
2 tablespoons butter
⅓ cup olive oil

Combine all but olive oil in a food processor. Process until very finely ground, scraping down sides as needed. Drizzle in olive oil while processing, until well blended.

NOTES: This recipe is versatile, and many variations on the theme are in evidence these days. Pine nuts are very expensive, but walnuts make a perfect substitution. Some make pesto with young spinach leaves instead of basil. Some use no parsley at all.

The amount of garlic is completely “to taste”, though if raw garlic is a problem, chop it first and soak in a tablespoon of white vinegar for up to 10 minutes before using. Drain the garlic and add to the food processor.

If 2 cups of pesto is too much, but basil is in abundance, this recipe freezes perfectly. Divide into small containers and freeze until needed. I had so much basil and parsley growing last summer, I made 5 (2-cup) containers and froze them. I had plenty of wonderful pesto, redolent of summer, to keep me all winter long.

Persillade

Another herb mixture is the French persillade. In French, "persil" means parsley, so it is no stretch to realize that a persillade contains parsley. Beyond that, I was unsure. It appears that the basic ingredients for a persillade are parsley and garlic, chopped together.

Pistou

A sort of crossover is from Provence, France, bordering the Mediterranean to the south and Italy to the east. Pistou is a Pesto crossbreed. "Pistou", in the Provencal language means "pounded" so similarly to pesto, it is a pounded mixture of basil, garlic and olive oil, but without pine nuts. The cheese used in Pistou is dependent on the particular area and what is available, although because the Pistou is used as a garnish to the Soupe au Pistou (Pistou Soup, similar to Italy's Minestrone), the cheese should not be one that would become stringy in the hot liquid.

Chimichurri

Argentinian chimichurri is yet another type of topping/sauce with the main ingredients of parsley and garlic with olive oil. They take it much farther and add a lot more ingredients, such as oregano and red wine vinegar to name only a few. Most of the Latin countries have some version of a chimichurri sauce. Guatemalan Chimichurri was most often used as a marinade for meat to be grilled instead of a topping for after cooking the meat.


Okay, that was a lot of information. I guess it just struck me how many countries have a similar thing, changing it to suit their need or availability of products. So, back to Gremolata. Gremolata is an underused condiment. Being so easy to make, I hope to spread the word a bit here and give some ideas. In its  basic form, Gremolata is parsley, lemon zest and garlic, chopped together. It can have other things added, depending on need, such as olive oil, or salt and pepper. It is best to have the parsley leaves dry when chopping, so be sure that they are washed well ahead and allowed to become completely dry before proceeding. Wash the lemon well before zesting. The garlic should be fresh, for the best flavor. Once garlic begins that little green sprout it becomes bitter; it might be okay for cooked foods but not when the fresh flavor is so important. The amounts can be completely up to the person making it. Yesterday I made some using about 3 tablespoons of finely chopped parsley, 2 garlic cloves and the zest of one very small lemon. When I made Gremolata Walnut Pinwheels, I added salt and pepper and some olive oil so it would stick inside the puff pastry.
gremolata, puff pastry,
Gremolata Walnut Pinwheels

Gremolata Walnut Pinwheels


Makes approximately 70 pinwheels


GREMOLATA:
¾ cup parsley, chopped
2 - 4 cloves of garlic, minced (use amount of garlic to taste)
3 - 4 tablespoons lemon zest (about 2 lemons)
¾ teaspoon salt
¾ teaspoon freshly ground pepper
3 tablespoons olive oil
------

1 cup walnuts, chopped
1 package Puff Pastry Sheets

Set the puff pastry sheets to thaw. This will take from 30 to 40 minutes, to thaw enough to open the sheets without breaking at the folds.

Combine the first 6 ingredients (the gremolata). Preheat the oven to 375 degrees.
When the pastry is thawed, first take one and roll it in only one direction, making a long piece about 18 inches long by the width of the original sheet. Spread half of the gremolata over the sheet. It will be quite sparse, but this is fine. Sprinkle ½ cup of the walnuts over the gremolata. Roll up from the long side, creating a long narrow roll. With a sharp knife, slice the roll into generous ¼-inch thick slices and lay them onto a baking sheet. If they are too distorted, press them slightly to a rounder shape, but they will round nicely in the oven.

Bake for 20 to 25 minutes, or until they are nicely golden.

NOTES: My daughter and I feel that these would serve as a lovely accompaniment to a nice soup such as a creamy tomato soup, or a salad, as well as an appetizer.


gremolata, condiment, flavor enhancer
Freshly Chopped Gremolata
Beyond using in puff pastry though, Gremolata is a wonderfully fresh way to lift and brighten the flavors of vegetables. Sprinkle it on cooked green beans or asparagus to brighten flavors. Sprinkle it into a soup, much like the Pistou. Sprinkle it over fish or seafood dishes, bean dishes, eggs. It is great as is, but switch the parsley to mint and you have an instantly perfect condiment for lamb. 

Think up new ways to use it. It is too simple to not take advantage. Without adding olive oil  it has no calories to speak of. Mix up a batch of whatever combination suits your need or mood.


My passion is teaching people how to create a harmony of flavors with their cooking, and passing along my love and joy of food, both simple or exotic, plain or fancy. I continue my journey in ethnic and domestic cuisines, continuing my journey to explore diverse culinary experiences and hopefully to start you on a journey of your own. Join me also at A Harmony of Flavors on Facebook, and Pinterest.

Disqus