Translate

Showing posts with label Indian recipe. Show all posts

Saturday, June 17, 2023

Black Eyed Peas Indian Style

I cannot believe I'm heading on a year of no posts. Still, hoping this will be of interest. 

In all of my life, despite trying all sorts of foods from all over, I have never once tried to make black-eyed peas. I believe i tasted them once, as part of "Texas Caviar" served at a function I was attending. In that mixture, the whole thing was stellar, but I could not pick out one flavor on its own. 
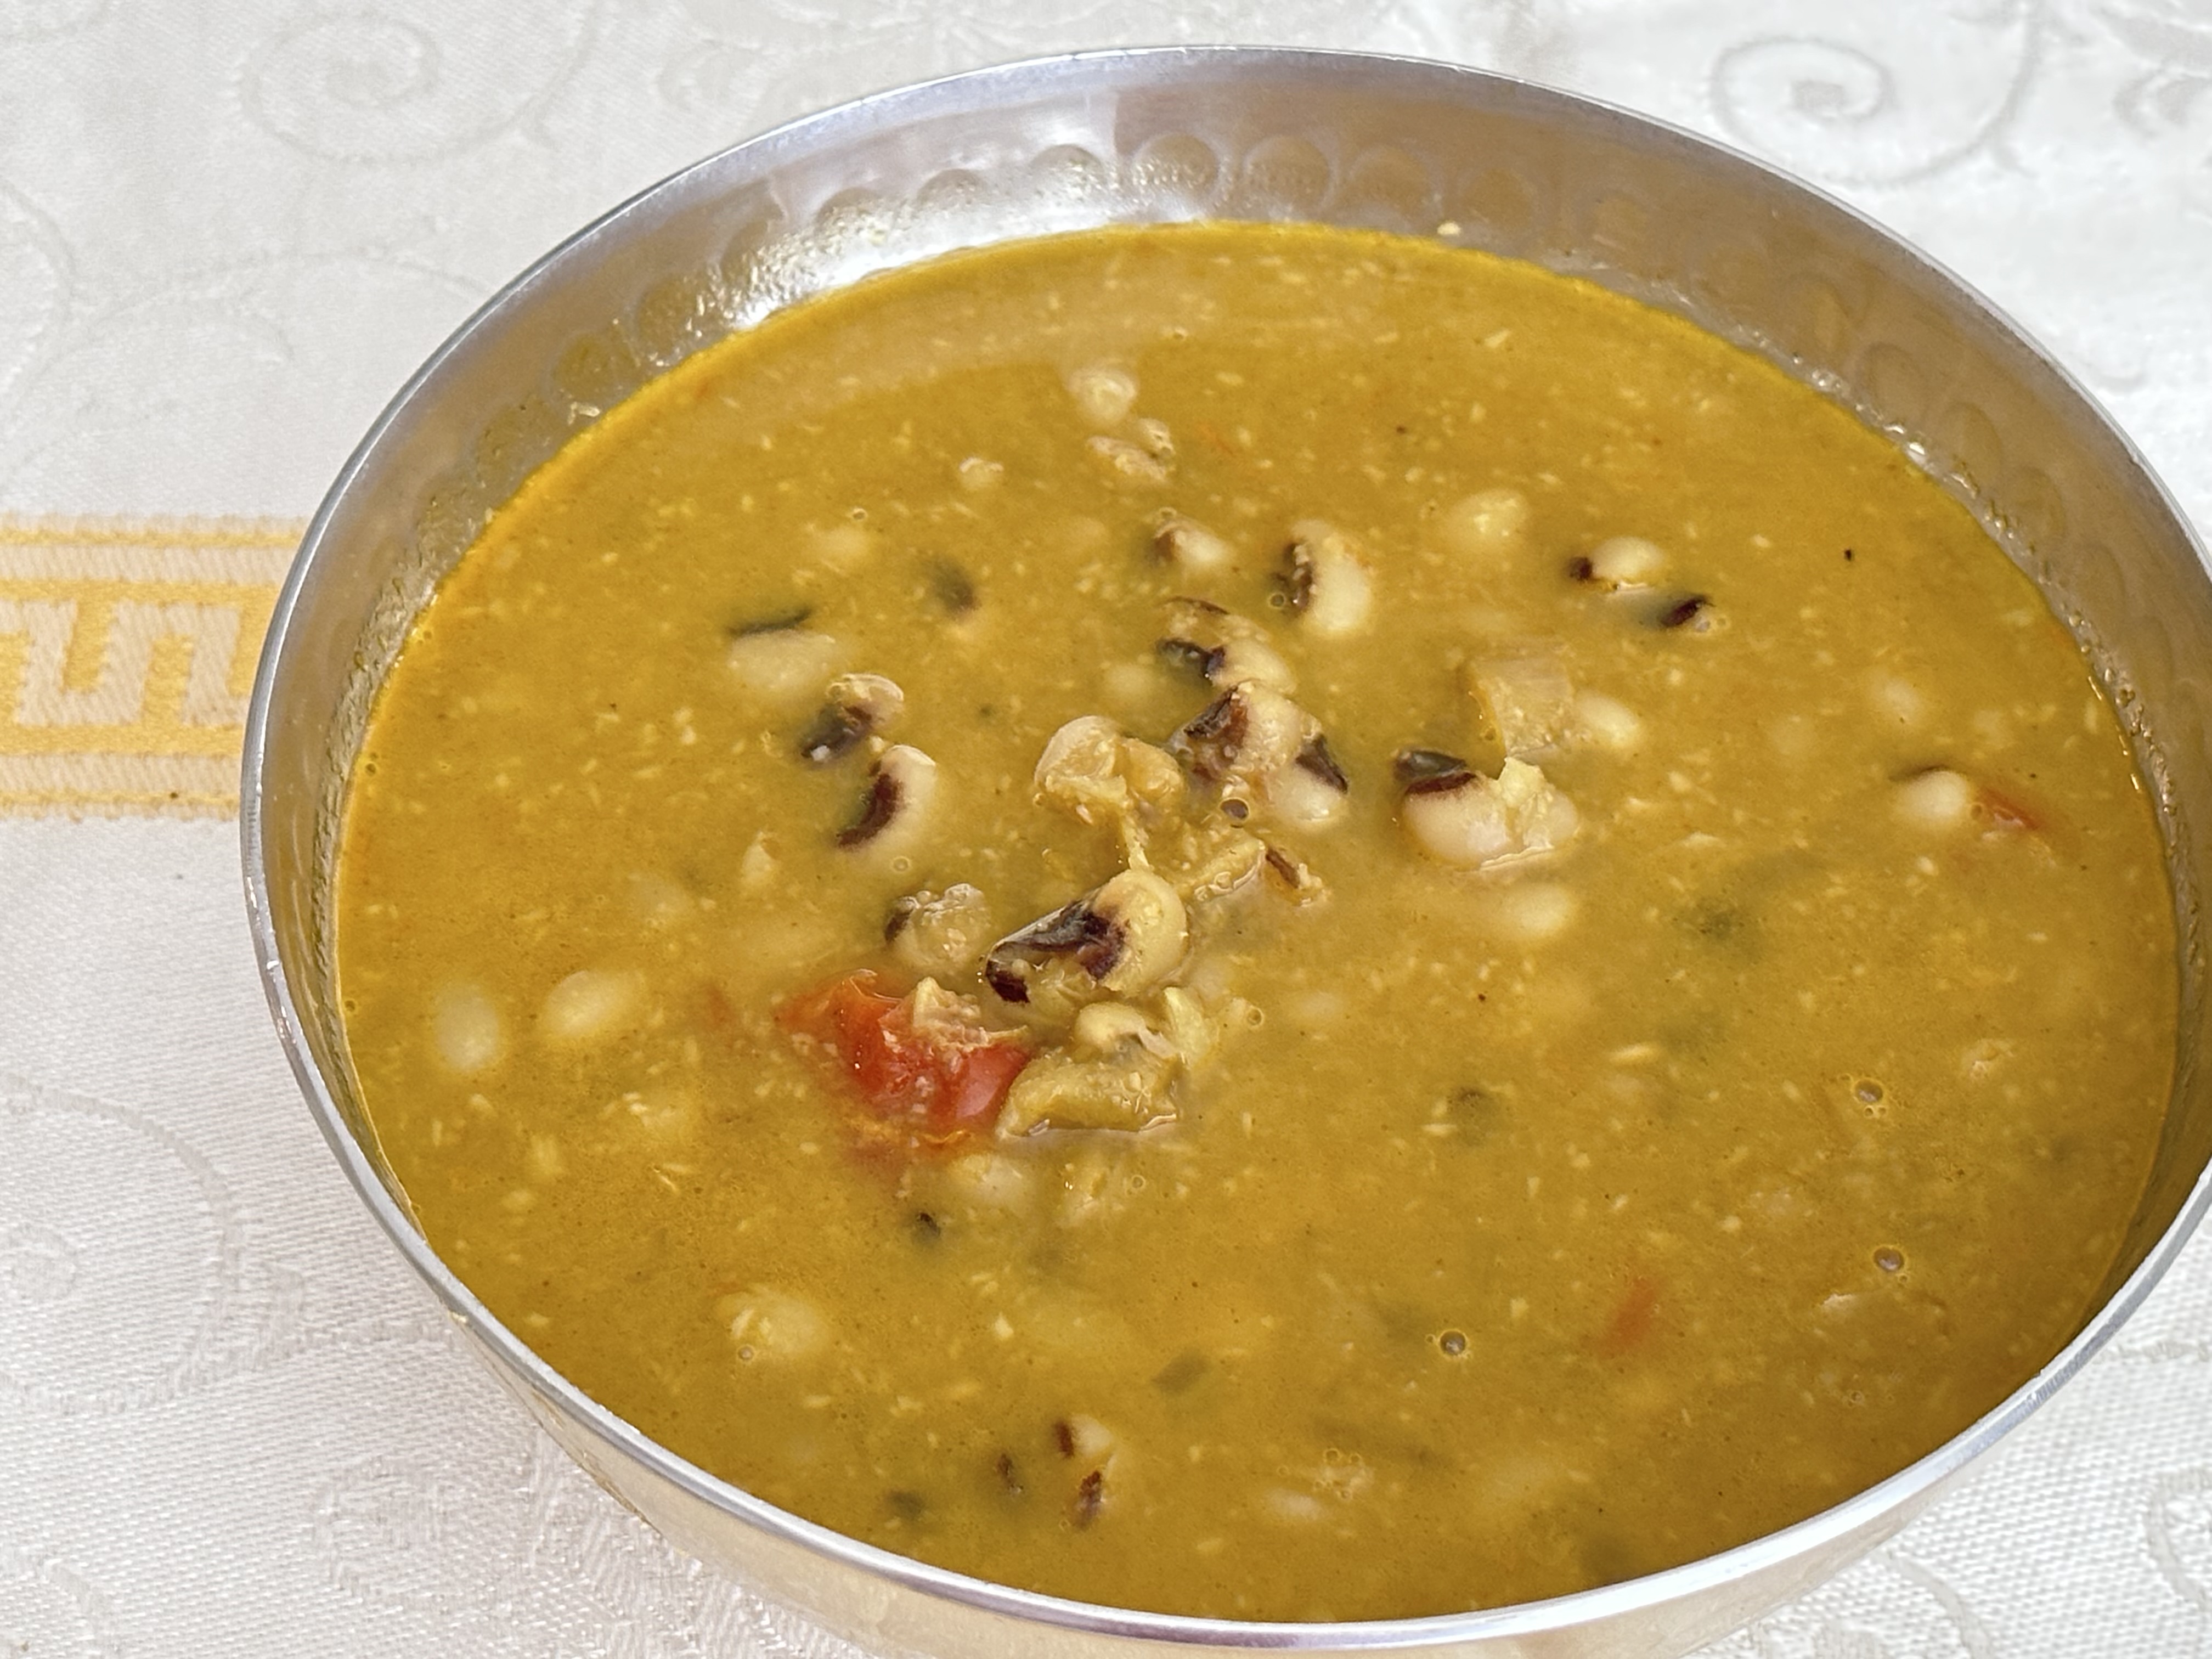
Alsande Tonak, Black-Eyed Peas, Curry
Alsande Tonak or Black-Eyed Pea Curry


Then, rooting around the internet for Indian recipes, I cam upon one called Alsande Tonak, a recipe from Goa. I cannot now place where I found this recipe, yet there are many of them out there to peruse, should you be a "comparison cook," like me. 

I promptly went out and bought some black-eyed peas to try out this recipe, and it was a hit with both my husband and I.

Caveat: 

So many Indian recipes call for using (as in the recipe I used to create my own) 12 or 13 dry red chilies in making the masala, then another teaspoon of hot red chili powder later on. If this is your thing, more power to you! 

While I do like some heat, I would never tolerate that over abundance of a good thing. My poor husband would likely perish at the first taste. He's not one for chili heat at all. So, under this restriction, I scaled back the whole red chilies to 1 and eliminated the chili powder later. 

About the Masala**

Most masalas require toasting each spice separately first, and setting them to cool, then grinding. This masala is going to be toasted later, so the first part can be avoided. Secondly, the masala is more than is needed for the recipe, so you will have some left for another time. Or, double the remainder of the recipe and use all this amount of masala.

About the Coconut***

The very best is having fresh coconut in this recipe. Many supermarkets these days do carry it in the freezer section. Those in my area do not, so I get frozen bags of it when I go to the Indian grocery.

But if you have no access to fresh coconut, use unsweetened dry coconut, about 1/4 cup, and add it to the spices to grind for the masala, then use it as directed for the masala.


Alsande Tonak

(or Black-Eyed Pea Curry) 

Alsande Tonak, Black-Eyed Peas, Curry
Alsande Tonak
Black-Eyed Pea Curry


1/2 pound black eyed peas, soaked overnight
2 fresh tomatoes, chopped
1 small onion or shallot, chopped
2 cups water

TONAK MASALA:
3 whole cloves
1-inch cinnamon stick
3 tablespoons coriander seeds
1/2 teaspoon black peppercorns
1 dried red chili, de-seeded, broken, for less heat
1 1/2 teaspoons fennel seeds
2 - 3 petals of a star anise
2 teaspoons white poppy seeds, optional
----------
1/2 teaspoon turmeric
1/4 teaspoon nutmeg

1 tablespoon cooking oil
1 small onion or shallot, chopped
3 - 5 garlic cloves, minced
3/4 cup frozen grated fresh coconut*** (see above)
3 - 4 teaspoons of the Tonak Masala** (see above)
1 teaspoon of salt, or to taste

Drain the soaking water from the black-eyed peas. Put them in a pot with  the tomatoes, onion / shallot and water and bring to boil. Lower heat, cover and cook for 20 to 30 minutes. They should be quite soft. If not, cook a little longer. 

Meanwhile, make the masala: Take all of the whole spices and grind them to a powder, then add to the powder the turmeric and nutmeg. Set aside.

In a skillet, heat the cooking oil and cook the onion until just golden. Add in the garlic for a minute or so and stir. Add in the grated fresh or frozen coconut and continue to cook, stirring until the coconut is golden. Add in the 3 or 4 teaspoons of the reserved masala and cook, stirring until the masala is well heated through. Add the contents of the pan to the cooked black-eyed peas along with the salt and mix well. If they need more liquid, add more water, then cook until heated through, and serve with roti or rice.


My passion is teaching people how to create a harmony of flavors with their cooking, and passing along my love and joy of food, both simple or exotic, plain or fancy. I continue my journey in ethnic and domestic cuisines, continuing my journey to explore diverse culinary experiences and hopefully to start you on a journey of your own. Join me also at A Harmony of Flavors on Facebook, and Pinterest.

Monday, June 1, 2020

Venturing Afield with Indian Recipes

Last year I created for myself a cookbook of Indian recipes I had made, plus adding in some that I wanted to try. Of course, with as much as I love Indian foods and flavors, I am constantly finding new things to try. And so it was that in the course of researching Indian food, or spices or whatever of the moment took my interest, I discovered recipes for Bisi Bele Bath.

You might well be saying "Bisi . . . . .what????" That is pretty much what I did. 

Bisi Bele Bath, Indian food, ethnic
Bisi Bele Bath

Many, many Indian recipes call for a pre-made spice mixture. Of course, many households make up their own, but in this day and age, pre-mixed spices exist in packets, boxes or jars, and many Indians choose to go this route. It certainly would cut down on the amount of different spices one must keep in the home. Making from scratch means a very long list of spices needed to be on hand. As it happens, I have an amazing amount of Indian spices on hand! 

Bisi Bele Bath, Indian food, lentils, rice
Bisi Bele Bath
So when I came upon recipes for Bisi Bele Bath, a vegetarian recipe of rice, lentils and vegetables from the Indian state of Karnataka, of course it called for a spice mixture. Some recipes online had all the spices listed and created the mixture as with any recipe: get out the spices, measure, toast, grind (or not). Other recipes I encountered called for using a Bisi Bele Bath Spice Mix, with their own recipe available on their site. And some few other recipes called for a particular favorite brand of Bisi Bele Bath Spice Mix. Reading all these recipes, it became a personal challenge then, to make up my own spice mix for this dish.

Coming back to the unusual name for this dish, it is explained everywhere online that Bisi = Piping Hot; Bele = Lentils; Bath = Made with Rice. So, in essence, Bisi Bele Bath means "A Piping Hot Lentil and Rice Dish." Paraphrasing. The addition of vegetables to this dish is optional. Vegetables can be added to the meal in other ways, if you choose.

Bisi Bele Bath Spice Mix 


Makes enough for a few recipes of Bisi Bele Bath

4 dried red chilies (with or without seeds)
-----
4 tablespoons coriander seeds
1 teaspoon cumin seeds
¼ teaspoon fenugreek seeds
-----
1½ tablespoons channa dal (Bengal gram/desi chickpea)
2 teaspoons urad dal
-----
4 whole cloves
3 green cardamom pods, lightly crushed
4-inch piece soft (true) cinnamon, or 1-inch piece of cassia bark 
1 - 2 pieces mace blades* (see Note)
1 teaspoon black peppercorns
4 Kapok buds (Marathi moggu)* (see Notes)
-----
1 tablespoon white poppy seeds
-----
4 teaspoons dried unsweetened coconut
-----
1 teaspoon asafetida
-----
10 - 12 fresh curry leaves

Heat a dry skillet over medium to medium high heat. Have a wide plate or bowl ready to hold the hot spices for cooling, after toasting. Each section of the spices will be toasted separately, turning out to the plate to cool. Toast until the spices are fragrant, but in no way burnt.
  1. First, toast the dried chilies. If you wish less heat, break them and remove seeds, along with stems. Toast the chilies until they begin to change color; turn out to the plate to cool.
  2. Add in to the skillet the coriander, cumin and fenugreek seeds and stirring constantly, allow them to change color slightly and smell wonderful, then
    turn out to the plate to cool.
  3.  Now add in the two dals (dry, uncooked) and stirring constantly, allow them to become golden brown, but not burnt. Then,
    turn out to the plate to cool.
  4. Add to the skillet the cloves, cardamom pods, cinnamon pieces, mace blades, black peppercorns and Kapok buds, if using. Toast them until fragrant, how long will depend on how high the heat. Stir constantly until colored, then turn out to the plate to cool.
  5. Pour in the white poppy seeds and keep them moving, just until they start to change color, then turn out to the plate to cool.
  6. Add in the dry coconut and stir quickly, it will go from white to blackened in seconds! Once the coconut turns golden, turn out to the plate to cool.
  7. Add in the asafetida and stir quickly, just until it smells of onions, then turn out to the plate to cool.
  8. Add in the fresh curry leaves and toss, stirring until they are completely dried and crisped, then turn out to the plate to cool.    
Allow the spices to cool to nearly room temperature, then grind them to powder using a spice grinder/coffee grinder used only for spices. This may require grinding in various batches. Once ground, stir well to distribute evenly, then keep stored in a tightly sealed glass jar in a cool, dark place.

NOTES:  If mace blades are not available, substitute by adding in about ¼ teaspoon ground mace at the end, after all spices are ground to powder. Kapok buds, or Marathi moggu, are a new spice for me. I ordered them and used them as the recipes say this is an authentic flavor. If you do not have or cannot get them, just omit.

~~~~~~~~~~~~~~~~~~~~~~

In the U.S., we don't often go for, or even think of, mixing up lentil and rice dishes, unless you are vegetarian, and then it is important because rice and lentils combined make a complete protein. Simply cooked rice and lentils are not much of a draw, as they haven't much flavor. All I can say is that this dish does not lack flavor! It is a thick, soft mixture, which may not seem to appeal. But flavors are wonderful, so despite what your eyes may tell you, it is worthwhile giving this dish a try.

Bisi Bele Bath, Indian food, lentils, rice, spices
Bisi Bele Bath

Bisi Bele Bath


Serves 4 to 6 

¾ cup toor dal (aka ardhar dal)
¾ cup long or short grain rice
5 cups water
-----
¼ tamarind, from a compressed block 
1 cup water, hot
2½ tablespoons Bisi Bele Bath Spice Mix
-----
1 tablespoon ghee or oil
1 medium onion, chopped
1 teaspoon salt
-----
½ cup cubed carrot
½ cup green peas
½ cup potatoes in small cubes
½ cup green beans, cut in little pieces

TEMPERING / FLAVORING:
1 tablespoon ghee or oil
1 teaspoon brown mustard seeds
10 fresh curry leaves  
1 dried red chili, whole
10 cashews
½ teaspoon asafetida/hing 

Before beginning any prep, rinse the toor dal in copious quantities of water, until the water runs mostly clear. Then, cover the dal with water and set aside for ½ hour. At this time also, set the tamarind chunk to soak separately, in the hot water.

Once dal has soaked, combine the dal with the rice in a pot of adequate size, cover with the 5 cups of water and bring to boil. Reduce to simmer and cook until the rice and dal are both very soft, 20 to 30 minutes. Use a spoon or a potato masher to mash up the mixture. Set aside.

In a skillet, heat the ghee and add in the chopped onion and salt to cook until soft. While onion is sauteeing, break apart and strain the tamarind in a strainer over a bowl, to catch all the liquids. Press to get as much from the tamarind as possible, then discard the seeds and fibers. Add the Bisi Bele Bath Spice Mix to the tamarind and stir. Once the onion is nicely soft, add the tamarind liquid into the skillet, along with the carrots, peas, potatoes and green beans, then cook the vegetables until tender, adding water if needed for cooking. Once done, pour the contents of the skillet into the rice and lentil pot.

Set the skillet back on the heat and add in the ghee for tempering. Once ghee is very hot, add the brown mustard, until the seeds begin popping. Quickly add in the curry leaves, dried chili, whole cashews and the asafetida/hing. Cook for just a few minutes, until everything is very fragrant. Pour half of the contents of the skillet into the pot with the lentils and rice, stirring well, then pour the mixture into a serving bowl, garnishing with the reserved tempering mixture for presentation.


My passion is teaching people how to create a harmony of flavors with their cooking, and passing along my love and joy of food, both simple or exotic, plain or fancy. I continue my journey in ethnic and domestic cuisines, continuing my journey to explore diverse culinary experiences and hopefully to start you on a journey of your own. Join me also at A Harmony of Flavors on Facebook, and Pinterest.

Monday, January 13, 2020

Indian Adventures and New Vegetables

A few days ago I got to go to a Patel's Grocery store in Chandler, AZ. I have been in various Indian or International groceries in past, one quite recently down in Tucson. And I have no complaint. It is a marvel to have some of the foods right there, at hand. Things I usually have to go online to find. One of my difficulties since moving to Arizona was that during summer I could not successfully order fresh curry leaves online and have them arrive in any fit shape to use for cooking. The heat here in summer is intense, to say the least. The "fresh" leaves arrived blackened and smelling awful. 

Having been in these varying groceries over the years, all of them small, though fairly well stocked with Indian basics, none of these remotely prepared me for Patel's. I didn't even know something like this existed. It is big! And, OMG, so many foods! So many veggies! I'd never been in an Indian grocery with any fresh produce but the most simple, and that generally wilted and sad looking. While many of the vegetables at Patel's were rather wilted looking, I can understand this. Our regular local grocery doesn't do any better. And at Patel's the produce area was HUGE! 

Bottle Gourd, Lauki, Sorakkai
Bottle Gourd or Lauki or Sorakkai


There were so many things I just had absolutely no idea where to start. As I had never had access to all these unknown vegetables, I didn't even know what some were. Where does one start when one is so unfamiliar with so many things?

So, I watched people. And finally I asked a young Pakistani woman what the vegetable she was holding was used for? What does one need to know when making a selection? How is it used?

Bottle Gourd, Lauki, Sorakkai
Bottle Gourd or Lauki or Sorakkai
She was as sweet as could be. The sign above the vegetables told me these were Bottle Gourds, or "Lauki."Which told me absolutely nothing. As well versed as I am in so much of Indian Cuisine, I had never had any access to anything new, veggie or fruit-wise, so my recipes reflect an Indian method and flavor applied to only veggies I already know, such as potatoes, tomatoes, carrots, squash, peas, etc. The young woman told me to look for Lauki that are not very soft, as softness would indicate that the seeds inside were too developed and you would lose too much of the vegetable. Was one supposed to peel it, I asked? Yes, indeed, I was assured. I asked how she cooked this vegetable, and she replied that she fried onion, garlic, ginger, added tomatoes, turmeric and cooked the cubed Lauki until soft, but not mushy. Okay, I felt I had at least an idea of where to start. 

I bought one and brought it home. As it turned out, the seeds inside were exceedingly small, so the majority of the vegetable was perfect for cutting and cooking. Actually, it reminded me very much of a slightly overgrown zucchini in texture and also the seed arrangement. Now, I needed a recipe.
Lauki Sabzi, Sorekkai Poriyal
Lauki Sabzi or Sorekkai Poriyal

Looking online for Bottle Gourd recipes, I came upon a few, quite similar to one another. Having now a few other things on hand, such as frozen grated fresh coconut, I opted to use this recipe by Swasthi, changing it only a little. My first introduction to Bottle Gourd was as "Lauki," apparently a Hindi word. Later, I found it also called "Dudhi, though I am not sure in which of the many, many Indian languages. When looking for recipes with Bottle Gourd, I also came upon it called "Sorakkai." Apparently this is a Tamil word. I went to work. I also made a new recipe of Nariyal Chutney, which tasted far better when using fresh (albeit frozen) coconut. With some leftover rice, this recipe made a wonderful lunch!

Just FYI, I believe the word "Sabzi" or "Subzi" indicates a dry "curry" possibly in Hindi, one without sauce, but lots of flavors added. As I read further, it appears possible that a similar indication, for a dry curry or sauteed dish is "Poriyal," in Tamil language in the south of India. So, this dish can be called Lauki Sabzi or Sorekkai Poriyal. Or Bottle Gourd Dry Curry!

Lauki Sabzi or Sorekkai Poriyal

(Bottle Gourd Dry Curry)
Lauki Sabzi, Sorekkai Poriyal
Lauki Sabzi or Sorekkai Poriyal


Serves 2

2 cups bottle gourd, peeled, cubed (can easily substitute zucchini)
1 tablespoon cooking oil
½ teaspoon brown mustard seeds
½ teaspoon cumin seeds
1 teaspoon channa dal (or Bengal Gram or senaga pappu)
1 teaspoon urad dal (or skinned black gram or minapa pappu)
1 medium shallot, minced
10 to 12 curry leaves (about 1 stem)
2 cloves garlic, minced finely
1 - 2 green chilies, minced finely (remove seeds for less heat)
1 tablespoon Idli Podi
- pinch of turmeric, or 1 teaspoon finely grated fresh turmeric root
2 tablespoons fresh, grated coconut or frozen grated coconut
½ teaspoon salt, or as needed

Prepare the bottle gourd: peel the gourd, then check if the seeds are too big (which makes the center airy and light, with no substance but for seeds). If the seeds are prominent, core out the center and discard. Cut the remaining flesh into half-inch cubes and set aside.

Heat a skillet that will accommodate all the bottle gourd chunks over medium to medium high and add the oil. Once well heated, add in the mustard seeds. As soon as they begin to pop and crackle,  add in the cumin seeds and the channa and urad dals and saute quickly, stirring constantly until the dals are deep golden. Immediately add in the shallot and curry leaves and stir to combine, then add in the garlic and green chilies. Stir in the bottle gourd pieces and stir well to coat with the spices, lower heat slightly and cook, stirring often until the bottle gourd is tender, but not mushy. This can take as little as 5 minutes, or as long as 12 to 15, depending on the gourd itself. If it is taking a while, cover the skillet for a few minutes until it is tender.  Add in the turmeric (powder or root), the Idli Podi and the coconut with the salt and stir well, cooking a further 3 or so minutes to meld flavors. 

Serve with rice and chutney or chutnies and flat bread of choice: chapati, paratha or other.


My passion is teaching people how to create a harmony of flavors with their cooking, and passing along my love and joy of food, both simple or exotic, plain or fancy. I continue my journey in ethnic and domestic cuisines, continuing my journey to explore diverse culinary experiences and hopefully to start you on a journey of your own. Join me also at A Harmony of Flavors on Facebook, and Pinterest.

Monday, August 19, 2019

How to Make Your Own Ghee

As I began learning about Indian food and flavors many years ago, one of the things I realized was that ghee is called for in a LOT of recipes. In the interest of keeping to my idea of making everything (as far as possible) from scratch, I read about making ghee, finding it was really quite simple. 

Ghee, butter, clarified butter,
Ghee

What is Ghee?


Ghee is nothing more than clarified butter taken a step further, and allowing the browning of milk solid bits that fall to the bottom of the pan. This last step imparts a lovely, nutty flavor to the ghee, and in turn to any food cooked with it. 

When making ghee, I would first suggest that one invest in some decent quality butter. I have mostly used Land o Lakes® brand unsalted butter. I have on occasion tried using a lesser quality brand, only to find that the water content of the butter was so high, it caused huge molten bubbles to spew out of the pan. Thankfully I was not burnt, though this could certainly be an expected outcome. For your peace of mind, stick to a butter with lower water content. Most European butters have far lower water content, but are more expensive. 

What to Expect


There are a few steps that will mark the 15 minute progress through this process of making ghee, and skimming off the foam that continually forms is ongoing throughout. Use a pan large enough to accommodate a pound of butter. If your pan does not have a light colored interior, you may not be able to distinguish when the milk solids are browned, though you may be able to smell the nutty aroma once this occurs. Keep the heat at medium to medium low throughout, or a temperature that maintains an active simmer. There are also some visual and audio cues that will help define the approximate 5-minute stages:
  1. The butter will melt, figure 1, and as it comes to a low boil, immediately begins foaming, figure 2 (the beginning of the skimming process). At this time, the liquid is totally opaque and bubbles are of all sizes: large, medium and small, figure 3. The sound of the bubbles is rather loud and crackling, as water is being boiled out.
  2. As the skimming of foam continues, the bubbles will start to come to a more consistent size and the foam changes its look. At the same time the bubbling sound becomes quieter, figure 4.
  3. Step by step, Making Ghee
    Steps to watch for in Making Ghee
  4. Toward the last five minutes, as skimming off foam continues, the liquid will begin to come clear, and the bottom of the pan becomes visible, figures 5 & 6. At the point where the pan bottom becomes visible (between foaming), milk solids will be seen accumulating on the bottom. They may not be browned yet, but will be visible. Once these milk solids brown, figure 7, your ghee will be ready. The photo makes the ghee appear to be deep brown, but the color is simply the solids in the pan bottom. The bubbles will be exceedingly tiny, fine and of a consistent size. The sound will have become very quiet, like a low buzz.
Once the ghee is done, if it seems that the browned solids are loose instead of firmly stuck on the pan bottom, use a coffee filter to strain out the solids. I have never had this problem, so once done, I place a metal spoon into a 12 to 14-ounce glass container and pour in the hot ghee. Allow it to cool for about 10 minutes, then remove the spoon and cap your jar. 

The ghee can be kept in the cabinet to use whenever needed, and will keep well for months, as all the milk solids (the part that could go rancid) have all been strained or cooked out. If the process was not completed well and the ghee spoiled, the culprits would be either not skimming off all the foam or some milk solids left in the liquid. If you will not be using the ghee in any reasonable period of time, keep it in the fridge until needed. Remove and bring to room temperature when needed for cooking (otherwise you nearly have to chip it out with a knife, it becomes so hardened in the fridge!).

There are many ways to use ghee. Obviously, if you love Indian cuisines as I do, you will have many opportunities to use it. But if not? Firstly, think about the nutty aroma and flavor and imagine what that flavor would enhance, then use it. It can be used in any application for cooking in butter, although ghee will not burn  as will butter. (What burns when adding butter to a hot pan is the milk solids, which have already been removed from the ghee.) 

When my children were teens, I concocted a noodle dish for a meatless supper once, and long after they pleaded that I make it again and again. Cook some curly egg noodles and drain. Add in some ghee to the hot noodles and stir, then add freshly-ground coarse black pepper to taste (we like a lot!), a drained can of mushrooms and a large handful of basil, cut in chiffonade: stack a goodly pile of basil leaves, roll them into a tight roll, then slice across the roll very thinly. If desired, sprinkle on some shredded Parmesan cheese.

Another dish I created, this one in the style of Kashmir, I called Kashmiri Style Chicken. Original, huh? But it is delicious, so here is that recipe also:
Kashmir, India, Chicken, curry, dinner, ghee
Kashmiri Style Chicken

Kashmiri Style Chicken


Serves 4 to 6
Kashmir, India, Chicken, recipe, ghee, curry
Kashmiri Style Chicken


WHOLE SPICES
½ teaspoon black peppercorns
½ teaspoon black "onion" or nigella seed (Kalonji/Calonji)
½ teaspoon fennel seed
1 teaspoon coriander seed
1 teaspoon cumin seed
1 teaspoon green cardamom seeds
2 inches true cinnamon

1 tablespoon Garam Masala
1 teaspoon turmeric
¼ - 1 teaspoon Kashmiri chili powder (not the mixture used for Chili con Carne)
 

2 tablespoons ghee or oil
1 onion, thinly sliced, lightly chopped
1 walnut sized piece fresh ginger, minced
1 - 2 cloves garlic, minced
1 tej patta leaf 
1 can coconut milk
1 tablespoon lemon juice

1 - 1½ pounds boneless, skinless chicken (breast or thighs)
1 can petite diced tomatoes
1 teaspoon salt

In a dry skillet over high heat, toss the first seven whole spices for 2 to 4 minutes, or until very fragrant. Turn out onto a plate to cool, then grind in a spice grinder. Add the next 3 pre-ground spices to this mixture and set aside.

Heat ghee in a large skillet and saute the onions, ginger and garlic for about 5 minutes, stirring often. Add all the spices, including the tej patta leaf and saute for 2 - 3 minutes more. Add the coconut milk and lemon juice and allow the mixture to reduce for a few minutes.

Cut the chicken into 1-inch cubes and add to the skillet along with the tomatoes and salt and cook for about 15 to 20 minutes, until the chicken is cooked through. Serve with rice or naan bread.


My passion is teaching people how to create a harmony of flavors with their cooking, and passing along my love and joy of food, both simple or exotic, plain or fancy. I continue my journey in ethnic and domestic cuisines, continuing my journey to explore diverse culinary experiences and hopefully to start you on a journey of your own. Join me also at A Harmony of Flavors on Facebook, and Pinterest.

Friday, February 22, 2019

Indian Street Food

It has probably been more than a year since I first came across mention of something called Pav Bhaji. The first word is pronounced "pao." It is a mushed up mixture of vegetables that is served on or with buns- and a huge pat of butter on top!
 
Pav Bhaji street food, India, Mumbai
Pav Bhaji

When I think of India and breads, I envision lots of flat breads, or Naan, which can be made as a flat bread or made with yeast. Never, though, had I come across a recipe for something that looked like a common bun, as we know them in the U.S. When I saw this recipe, it intrigued me, and for a while I meant to try it out, and then, as with many things, it got buried, and I never got back to it. 

Recently I met a young girl who hails from Mumbai. Anyone from India is of great interest to me, because while I am fascinated with India, Indians, Indian food, culture, etc., I have never been to India, nor eaten anything Indian outside of a few restaurants, nor have I ever had the pleasure of eating at an Indian household. So while my Indian restaurant visits have given me a baseline idea of the flavors involved, I am far removed from actual firsthand experience. Yet I do cook things Indian all the time, because the flavors are exceedingly high on my list of "most amazing flavors." 

So after meeting this young Indian girl, I asked her out to lunch, so I could pick her brain and get ideas - more firsthand. We talked of many, many different foods, and she asked if I had ever tried an Indian street food called Pav Bhaji. Well!
Pav Bhaji, street food, Mumbai
Pav Bhaji just cooked

When I got home, I was busy that day and the next, but finally got around to unearthing all my notes on that dish. Yesterday I put them into action. The dish consists of various parts. The vegetable dish, the main event, is made of mainly potatoes, with other vegetables such as green peppers and tomatoes. Other vegetables that can be added are things like cauliflower and /or peas. And while I have read that carrots are never found in the actual street-vendors' dish, they can be added if making it at home. I always look for more, so I used all these vegetables in my dish. As for the vegetable part of this dish, it can be made into a puree or it can be simply mashed with bits left in it. This is up to your own taste. I chose to mash, not puree my vegetables.

The next part is making or buying a Pav Bhaji Masala. The ingredients in this mixture are similar, but have variances, in the many recipes I looked at online. The spices that seem most common in this mixture are black cardamom, coriander and cumin seed, cloves, cinnamon, tej patta (Indian bay leaf), black peppercorns, aamchur powder (dried unripe mango powder), dried red chilies. Other things added in some recipes are fennel seed, turmeric, powdered ginger, star anise, asafetida and even curry leaves. Of course, the amounts will vary in all recipes, but if you choose to make your own Pav Bhaji Masala, here is my recipe:

Pav Bhaji Masala


Makes about ¼ cup

4 black cardamom pods, seeds removed, pods discarded
3 tablespoons coriander seeds
1½ teaspoons cumin seeds
1 teaspoon black peppercorns
2 dried red chili peppers (remove seeds for less heat), crumbled
3-inches cinnamon stick
6 whole cloves
2 tej patta leaves (do not substitute Bay Laurel leaf), crumbled
----------
1 tablespoon aamchur powder
1½ teaspoon ground turmeric powder
½ teaspoon black salt (or regular salt)

Place the first 8 ingredients into a hot, dry skillet over medium heat and stirring quickly, toast until fragrant. Pour out in a plate to cool, then grind to fine powder, adding in the remaining three ingredients, mixing well. Store in a clean jar with tight fitting lid in a cool, dark place for up to 3 months.

~~~~~~~~~~~~~~~~~~~~~~~~~~~~

The third part of the whole Pav Bhaji experience is the bread. The bread is supposed to be bun-like, made without eggs. The buns are halved and dredged through melted butter with some of the Pav Bhaji Masala on a hot griddle, then served either alongside or filled with the vegetable mixture. 

I have not made the buns, yet. I was making two kinds of breads yesterday, and did not have the time to make a third type of bread, but I will get to those at a later date. In the meantime, I (gasp!) bought some whole wheat dinner rolls to accompany the veggie mixture. 

The Pav Bhaji is then served with a pat of butter melting on top, chopped red onion and a wedge of lemon or lime on the side, as well as a green chutney. I had no green chutney made, so I went ahead without. For the first time, it was fine, as I wanted to really taste what this dish is like, without other distractions. All I can say is AMAZING! I loved this dish. I have no problem eating a vegetarian meal, and this was excellent.

Pav Bhaji

 
Pav Bhaji, street food, India, Mumbai
Pav Bhaji

Serves about 4

2 cups potatoes in small cubes (½-inch)
1½ cups green pepper, chopped small
1½ cups cauliflower, chopped into small bits
½ cup carrots in tiny cubes (about ¼-inch)
½ cup peas (I used frozen)
--------
½ - 1  (15 ounce) can petite diced tomatoes with juices
2 tablespoons Pav Bhaji Masala
2 teaspoons Kasoori Methi (dried fenugreek herb)
1 teaspoon Indian red chili powder (powdered chili peppers)
¾ teaspoon salt
½ cup cilantro, chopped
--------
1 - 2 tablespoons oil or butter
1 shallot, minced
2 cloves garlic, minced
1-inch fresh ginger, minced
2 green chilies, minced (omit seeds for less heat)
--------
4 buns, halved
butter, for buns
butter, to serve
red onion, chopped, for garnish
lemon or lime wedges  
Green Chutney

Place the first 5 vegetables into a saucepan and just cover with water. Bring to boil, then reduce to simmer and cook until the vegetables are soft and can be smashed without resistance.  If there is still a lot of water in the pan, drain off some of it, but some water should remain. Use a potato masher or a glass and smash the vegetables into a chunky mash.

Add to the pot of smashed veggies the tomatoes (amount is up to you), the Pav Bhaji Masala, the Kasoori Methi herb, Indian chili powder and salt and stir in. Stir in the cilantro.

In a skillet over medium low heat, saute the shallot, garlic, ginger and chilies in the oil until the mixture just turns golden, then pour this into the pot with the vegetables. Stir well.

To serve: Halve Pav Bhaji buns or dinner rolls. Melt some butter into the skillet and sprinkle in some of the Pav Bhaji Masala powder. Dredge the cut side of the buns in this butter mixture. Chop some red onion to serve alongside and set out lime or lemon wedges to squeeze over top. If you have some green chutney, serve this also. 

~~~~~~~~~~~~~~~~~~~~~~~~

Green Chutney (Dhania Poodina)

Green Chutney, Dhania Poodina, coriander, mint
Green Chutney or Dhania Poodina

Makes about 1 cup

1 cup (packed) fresh mint leaves
1 cup (packed) fresh cilantro
1 to 5 fresh Serrano peppers (remove seeds for less heat)
½ cup unsweetened coconut, optional
½ small onion or 1 large shallot
1 teaspoon sugar
¼ teaspoon cumin
¼ teaspoon salt
¼ cup lime juice, more, if needed

Place all the ingredients in a powerful blender and puree completely. Store in refrigerator, tightly sealed and use the chutney within three days.  


My passion is teaching people how to create a harmony of flavors with their cooking, and passing along my love and joy of food, both simple or exotic, plain or fancy. I continue my journey in ethnic and domestic cuisines, continuing my journey to explore diverse culinary experiences and hopefully to start you on a journey of your own. Join me also at A Harmony of Flavors on Facebook, and Pinterest.

Wednesday, December 27, 2017

Healthy Recipes for the New Year

I may have mentioned that my husband and I have been on a healthy eating regimen for the last half year. Between us both, we have shed 100 pounds, and still have lots to go. In order to accomplish this, we have not been counting calories, nor have we been tightly following any of the popular diet crazes that exist just now.

My philosophy is that all we need is to reduce the amount of processed foods to almost none. This means no boxes or packages of "helpers," use very few cans, and preferably those with either 50% less or no salt. I limit cans to corn (which we eat rarely, due to the high amount of corn already found in our diets these days), tomatoes (paste, sauce, diced), and some beans (VERY well rinsed). I do occasionally use mushrooms from cans, but more often I just cook fresh mushrooms, or use dried and reconstituted.  I make things from scratch at least 95% of the time. And lots and lots of vegetables, very little bread, and only made from freshly ground wheat or rye, with no butter on it. My philosophy says that if the bread isn't good enough to eat without butter, then it's not good bread. We eat fruit, in small portions.

A couple of standby meals for us have been vegetable soup and one of many different takes on a Tarka (or Tadka) Dal. After trying a few recipes from my cookbooks and one from vegrecipesofindia.com, I started improvising and making my own mixtures. These can be as simple or as complex as you choose to make them.

Vegetable Soup, vegetables, flavors
Everything But the Kitchen Sink Vegetable Soup

I made a pot of vegetable soup today, as we have both been feeling so over stuffed as to be uncomfortable. My vegetable soups are made with whatever is on hand at any given time. Sometimes I have more ingredients in the fridge, and sometimes I am running low. My method is to use as many non-starchy vegetables as possible, and then using a handful or so of some whole grain such as long-cooking barley. Other times I toss in a handful or two of some of the Indian lentils (Masoor Dal, Toor Dal, Moong Dal, etc). These thicken the soup slightly, and are filling, while at the same time giving a nice dose of complex carbs. I usually start out with a good stock that I have made previously, but even starting with a pot of water works. I use about 6 to 8 cups of stock or water. And after that, it is all up to what is available. 

Everything But the Kitchen Sink Vegetable Soup


Serves 4 - 6 (or 2 people, for various days of lunches)


Everything but the Kitchen Sink Vegetable Soup
Everything But the Kitchen Sink
Vegetable Soup
These are things I most always use, and make up the basis of the flavors:
  • 1 chopped onion
  • 2 - 4 minced cloves of garlic
  • 1 - 2 tablespoons minced fresh ginger
  • 1 - 2 carrots, diced
  • 2 - 3 stalks celery, chopped
  • 1 green or red bell pepper, chopped
  • pinch saffron
  • 1 bay leaf
And then these are additions that can be added in, depending on what's in the fridge, and what you are in the mood for. I never use everything on the list at one time:
  • 1 cup cauliflower (grated, as my husband can't see it that way!)
  • 1 - 1½ cups chopped cabbage
  • 1 cup chopped fresh green beans
  • 1 cup chopped fresh sugar snap peas
  • 1 cup cubed winter squash, peeled
  • 1 cup cubed zucchini
  • 2 handfuls baby spinach
  • 2 cups chopped kale
  • ¼ - ⅓ cup long-cooking barley
  • ¼ cup red lentils (masoor dal), split pigeon peas (toor dal) or split mung beans (moong dal)
  • tomatoes, chopped
  • cilantro, chopped
  • parsley, chopped
If I missed anything on your "favorite vegetables" list, you can add or substitute. I avoid potatoes, as they are mainly gratuitous starch. I salt the soup at the end of the cooking time, and sparingly. 


Toor Dal, Tomatoes, Spinach, Indian lentils
Toor Dal with Tomatoes & Spinach
I mentioned the lentil dishes I have been making, and they are pretty much a staple also, as they are great complex carbs, and add protein to our diet. I make a good sized pot of these lentils, and again, use them over a two - three day period, for lunch. I cook one day, and then have food for the next two. This gives me time to do other tasks on the off days, such as writing this blog! This Dal recipe is quite simple, but extremely flavorful.


Toor Dal with Tomatoes & Spinach

Serves 4 to 6
Toor Dal, Tomatoes, Spinach, Indian lentils
Toor Dal with Tomatoes & Spinach

1 cup Toor Dal (split pigeon peas)
2 Roma tomatoes, diced
½ teaspoon turmeric
1 Serrano pepper, minced (eliminate seeds for less heat, or add more chilies for more heat)
----- 1 tablespoon ghee or oil
1 teaspoon brown mustard seeds
1 teaspoon cumin seeds
1 dry red chili pepper, whole
12 curry leaves (murraya koenigii) 
1 medium onion, chopped
1 tablespoon minced fresh ginger root
3 - 4 cloves garlic, minced
1 teaspoon salt
3 ounces spinach (or substitute kale)
 

Rinse the lentils repeatedly, until the water runs off clear. Place them into a pot with at least 4 cups of water and bring to a boil. The lentils will produce a thick scum, which should be skimmed off. Reduce heat to a simmer. Add in the tomatoes, turmeric and the Serrano pepper and allow the lentils to cook for about 40 minutes, while preparing the flavorings. 

In a skillet, heat the ghee or oil until very hot. Add in the mustard seeds, and if the oil was hot enough, they will begin sputtering and popping all over the place. Cover the pan, shaking it to keep the mustard seeds moving until they slow down considerable, similarly to popcorn. Remove lid and add in, stirring, the cumin seeds, the dried chili pepper and the curry leaves. Saute for about 1 minutes, then add in the onion, garlic and ginger and cook for about 3 to 5 minutes. Add this mixture to the cooked lentils along with the spinach and the salt and stir well. Serve with rice, preferably whole grain rice.


My passion is teaching people how to create a harmony of flavors with their cooking, and passing along my love and joy of food, both simple or exotic, plain or fancy. I continue my journey in ethnic and domestic cuisines, continuing my journey to explore diverse culinary experiences and hopefully to start you on a journey of your own. Join me also at A Harmony of Flavors on Facebook, and Pinterest.

Sunday, September 10, 2017

Indian Lentils Make a Fantastic and Healthy Meal

If you have no interest in Indian cooking, and Indian flavors, then this blog will not be for you. Personally, Indian flavors just fascinate and intrigue, so every time I discover something new, it is time to celebrate. Just recently I discovered a few new lentils and lentil dishes and set off on a new path of flavors and textures.

My husband and I both (thankfully, both!) love Indian flavors. I am the more adventurous of us two, and tend to look for more and more interesting foods and new flavors. When I discovered various new lentils and the confusion surrounding them as far as what they are called and the things that get lost in translation, I wrote a blog about how to sort through all these terms. Click here to read about untangling all of those interesting lentils and sorting through the confusion. 

Lentils, Dal, cooking lentils, Indian lentils, ethnic
Mixed Lentil Dal (note the rose-colored rice)
I had been using the little red lentils (more like salmon colored) for many years now, and really loved the one "dahl" dish I made with them. Then, discovering some dishes with other lentils I had possibly read about, but had no knowledge of, I set about understanding all I could. Once becoming conversant with the different split and peeled lentils, or "dals," and tasting many of them on their own, to better recognize their flavors, I am now mixing and making some of my own dishes. Our diet has changed since June, with both of us losing weight, and I have worked to create a diet filled with vegetables and high-fiber lentils. I had been following recipes from a couple of books I have, and wrote about some of these recipes in that same blog about untangling lentil terminology.

Lentils, Dal, Indian lentils, ethnic flavors
Mixed Lentil Dal
After trying some of these recipes, I set about using some of the lentils in dishes with my own spin. I generally add in lots more vegetables to the dish to make it as nutritious as possible. I serve my lentil dishes with rice, but I have been using whole grain rices such as brown rice, Wehani rice, red rice, burgundy rice, etc. Most of these are available from either Lotus Foods or Lundberg. I buy these through either Amazon or Vitacost. The red rices cook up to a deep pinkish rose color, and make quite the contrast with the yellow of the lentil dishes, as seen in the photos here.

In the process of experimentation, I came up with a combination that just tasted so good to both of us that I have to share. I made it with a combo of 
  • Toor Dal (split peeled pigeon peas), 
  • Masoor Dal (split, peeled "red" lentils), 
  • Moong Dal (split, peeled mung beans) and 
  • Urad Dal (split, peeled black gram). 
Common flavoring ingredients, added once the lentils are cooked, are such things as onion, garlic, ginger (sort of the trinity of Indian flavors!), mustard, cumin and coriander seeds. Other possible additions are such things as curry leaves, asafoetida, green chilies and tomatoes. I used most of these in my Mixed Lentil Dal, and added in some other vegetables, mainly red bell pepper, cauliflower and kale.
Dals, Lentils, toor dal, masoor dal, moong dal
Four Dals Used in Mixed Lentil Dal

My husband is not a lover of most vegetables, but I am finding that when presented in certain ways, he will tolerate them. Neither if us ever really ate kale, but it has become a staple in our diets of late. Adding finely chopped kale to most soups, stews and lentil dishes really makes kale easy to eat and like. Plus, the health benefits are astounding! Kale is high in lutein. Kale, combined with lentils, makes a highly complementary nutritional balance, as each contains nutrients the other does not have. Kale is great for cardiovascular health and improved cholesterol levels. It is high in Vitamins K, A and C, as well as manganese and copper. All this, plus it helps with the body's detoxification system, as well.
Brown Mustard, Cumin seed, Coriander seeds

Cauliflower, which I love and he hates, can be grated finely and added into lentils (and sometimes soup), where it completely disappears and is consumed unnoticed. To date, I cannot get my husband to eat cauliflower in any state where it resembles the vegetable that it is! Again, cauliflower has many of the same benefits of kale (such as lutein, vitamin C and heart healthy), plus a few others of its own, so getting some of these vegetables into our diet, no matter the form, is healthier. Though it is advised to steam cauliflower, as boiling leaches many nutrients, since we are eating the cooking liquid, in the form of soup or the lentil dish, I feel we are getting most of the nutrient value. 

Amen. Off the soapbox!

Mixed Lentil Dal

Lentils, Dal, Indian recipe, spices
Mixed Lentil Dal
Serves about 4, as a meal with rice 

⅓ cup toor dal
⅓ cup masoor dal
⅓ cup moong dal
2 tablespoons urad dal
½ teaspoon turmeric
-----
1½ tablespoons cooking oil or pure mustard oil
½ teaspoon brown mustard seeds, whole
½ teaspoon cumin seeds, whole
¼ teaspoon asafetida, optional
1 onion, chopped
3 cloves garlic, minced
1½ tablespoons fresh ginger, minced
1 - 3 green chilies, minced, optional
1 cup fresh tomatoes, chopped

½ red bell pepper, chopped
1 cup grated, fresh cauliflower
1 teaspoon coriander seeds, ground
¾ teaspoon salt
1½ cups fresh kale, chopped finely

Set all the lentils into a bowl and wash repeatedly, until the water drains off mostly clear. Place the drained lentils into a saucepan and cover with about 6 cups of water and the turmeric. Bring to boil, skimming off the thick foam as it accumulates, reduce heat to low and cook for about 30 to 40 minutes, until the lentils are soft and beginning to fall apart.

Meanwhile, heat a skillet and add in the oil. If using mustard oil, allow the oil to come to smoking point before proceeding. Have the pot's lid at hand. Add in the mustard and cumin seeds and quickly cover with the lid. Allow all the snapping and crackling to subside, then remove the lid and add in the asafoetida, if using. Stir well, then add the onions. Over medium heat, cook the onions, stirring often until very soft. Add the garlic and ginger with chilies if using and cook for about 3 minutes more. Add in the tomatoes, red bell pepper, cauliflower and the coriander seeds and cook until most of the liquids from the tomatoes have cooked out.

Once the lentils are cooked through, add the mixture from the skillet into the lentils along with the salt and the kale. Cook for 5 minutes more to meld flavors. Taste for salt. Serve with rice.


My passion is teaching people how to create a harmony of flavors with their cooking, and passing along my love and joy of food, both simple or exotic, plain or fancy. I continue my journey in ethnic and domestic cuisines, continuing my journey to explore diverse culinary experiences and hopefully to start you on a journey of your own. Join me also at A Harmony of Flavors on Facebook, and Pinterest.

Disqus