Translate

Showing posts with label side dish. Show all posts

Thursday, July 21, 2022

Lentils Shine in a Dish Called Mujadara

I like lentils. Liking lentils in the first place, may - or may not - preclude some from liking this dish. 

I had heard of Mujadara. I just never researched it to find out what, exactly, it was. I am not at all sure how or why I missed out on this meal, but I surely do wish I'd found out sooner, because it is one amazingly flavored dish. 

Mujadara, rice, lentils, onions, thnic, Middle Eastern, Lebanese
Mujadara

Mujadara is a Lebanese / Middle Eastern concoction of lentils and rice. Rice can be substituted with bulghur. Lentils and rice are pretty bland fare, on their own. They need a lot of help in the flavor department. I believe what interested me the most when reading the recipes online - particularly the ones written by Lebanese or other Middle Eastern bloggers - is the near lack of any flavorings beyond a little cumin - and a whole boatload of onions. These onions are sauteed until very, very dark; far darker than the norm. These deeply caramelized, nigh on to burnt (but not quite) onions are what provide the absolutely heavenly flavor to the otherwise not too exciting lentils and rice. 

Every cook has their own way of making a thing. Every cook has their own reasoning as to why it should be that way. I have absolutely no argument on method, and depending on the outcome, I may change a method to suit my own lifestyle. And at my age, I look for the simplest way, the fewest steps, the least cleanup possible. I have ranted on that subject here before, so I won't go into it again. But, when it requires three or four different pots or skillets to make one meal, I look immediately  to how that can be simplified. 

cookbook, Lebanese, ethnic, Maureen Abood
Maureen's Cookbook
Maureen Abood, a Lebanese-American lady I have been following for years on her blog, Facebook and with her cookbook called "Rose Water and Orange Blossoms," has recipes amazingly easy to understand. When dealing with an unknown culture, it helps to have someone both knowledgeable in the foods themselves, but also articulate enough to translate that into descriptions that clarify to a person not of that culture. I have some go-to Indian blogs that have fantastic recipes. Some though, assume that one knows what one is doing and so the recipes require some trial and error. And errors happen way too easily, when one "assumes!"

Ultimately, Maureen's recipe is the one that gave me the clearest idea of the whys and the wherefores of making Mujadara, though I had read about 8 recipes online and had already scribbled down two versions of what I thought I would do. 

What is Mujadara?

As mentioned above, Mujadara is a dish of lentils and rice (or bulghur), made with a surfeit of deep, dark, caramelized onions. The onions completely make this dish. Do not stint on the onions. In fact, in one blog, this admonition was followed by the fact that her relatives used twice the amount used in her recipe!

Whenever I research a recipe from a culture that is not mine, I try and stick to recipes from people of that culture. They would certainly know better what it is that makes a dish. Reading recipes from other sources not of the culture, where a slew of additional flavors are added in, either as enhancement or compensation, well, this is, IMHO, trying to change the culture, and there I try instead to remain a purist. 

In all the recipes written by a Middle Eastern (by background and culture, no matter where they live), there were - besides salt and water - just 5 main ingredients: lentils, rice (or bulghur), lots of onions, oil for sauteeing the onions (usually olive oil) and cumin. Period. Amounts may vary. Methods may vary. Ingredients did not vary. 

👀I did opt to parboil the lentils in a separate pan, for the one simple reason that it is best not to salt the lentils while they cook, as this toughens their skins and makes a longer cooking time. 

Ultimately, my Mujadara, though it takes a little while to make, was so very worthwhile. The flavors were sublime. My husband will tolerate lentils, if in the right application. He loved this dish nearly as much as I. I heartily recommend it to anyone. Vegetarians will love it for its complete protein. It is great accompanied by a simple salad, or tomatoes, or a tomato and cucumber salad. Of course, meat to accompany is fine. A dollop of Greek yogurt, or as I used, tzatziki, is also a great flavor combo. 

Mujadara

Mujadara, lentils, rice, Lebanese, Middle Eastern, ethnic, vegetarian
Mujadara

Serves 8 as a side dish

1 cup brown lentils
1 cup long grain or basmati rice
4 cups water, divided
4 medium onions, divided (more, if desired)
2 - 4 tablespoons olive oil
1 teaspoon salt
1/2 teaspoon cumin seeds

Begin with the onions, as these take time. Chop three of the onions. Heat a goodly sized skillet over medium to medium low heat. Add in half the olive oil to heat and then the chopped onions. Stirring often, saute the onions until they are well past simple caramelization, and on into the realm of almost burnt. Sprinkle the salt over the onions while cooking as this helps draw moisture. The darker the onions, the better the flavors in the dish. Towards the end of cooking, add in the  cumin.

onions, saute, garnish, dark caramel
Dark Sauteed Onions for Garnish
Once the onions are almost ready, place 2 cups of the water and the lentils into a medium saucepan. Cover and cook for about 12 to 15 minutes. The lentils are just parboiled at this time. Add the contents of the pot, with any liquids remaining, to the onions in the large skillet. Add in the remaining 2 cups of water and the rice. Stir, bring to boil and lower to a simmer. Time for approximately 20 minutes. Leave the lid on and remove the skillet from the heat. Let steam for an additional 10 or 15 minutes if there is time. 

While the lentils and rice cook, heat another, smaller skillet and add the remaining olive oil. Cut the last onion into long slivers or rings and again, saute these until very deep dark in color. Once they are dark enough, pour them out onto paper toweling to absorb excess oil, and to crisp up a bit. Once the Mujadara is ready to serve, use these onions to garnish the dish.

Serve with a salad, a Shirazi salad (cucumber, tomato and onion), sliced tomatoes, a dollop of labneh, plain Greek yogurt, or tzatziki, some mint sprigs or cilantro, and this meal is fit for a king.


My passion is teaching people how to create a harmony of flavors with their cooking, and passing along my love and joy of food, both simple or exotic, plain or fancy. I continue my journey in ethnic and domestic cuisines, continuing my journey to explore diverse culinary experiences and hopefully to start you on a journey of your own. Join me also at A Harmony of Flavors on Facebook, and Pinterest.

Sunday, July 10, 2022

Veggie Kebabs as Main or Side Dish

If you love grilled vegetables, then this is a recipe for you. Whether you are vegetarian, or if you want these as a side dish, they have excellent flavor, both from the marinade and from the grill. 

grilling, kebabs, vegetables, main dish, side dish
Veggie Kebabs

When I made these, I used a mix of vegetables I had selected just for this application, but you can mix and match as you choose, keeping in mind that not all vegetables cook at the same rate. I used tiny potatoes whole, so I first boiled them and then marinated them to use on the skewer just for the added flavor of the grill. I used chunks of fresh pineapple, obviously not a vegetable but it does taste great on the grill! Bell peppers are an easy choice, and multi colored peppers make the kebabs look more visually appealing. I used hunks of portobello for the meatiness, but button mushrooms or cremini mushrooms would also work - or no mushrooms at all if they are not to your taste. Corn is best cut into small rounds across the cob, both for easy skewering and for quicker cooking, as more heat can reach the kernels. Sweet potato also needs a little cooking beforehand to make them soft enough to grill, just being careful not to over cook or they won't stay put on the skewer. I love grilled onion, so the more the merrier, whether white, yellow or red, and cut into wide enough squares to be comparable in width to the other vegetables on the skewer. 

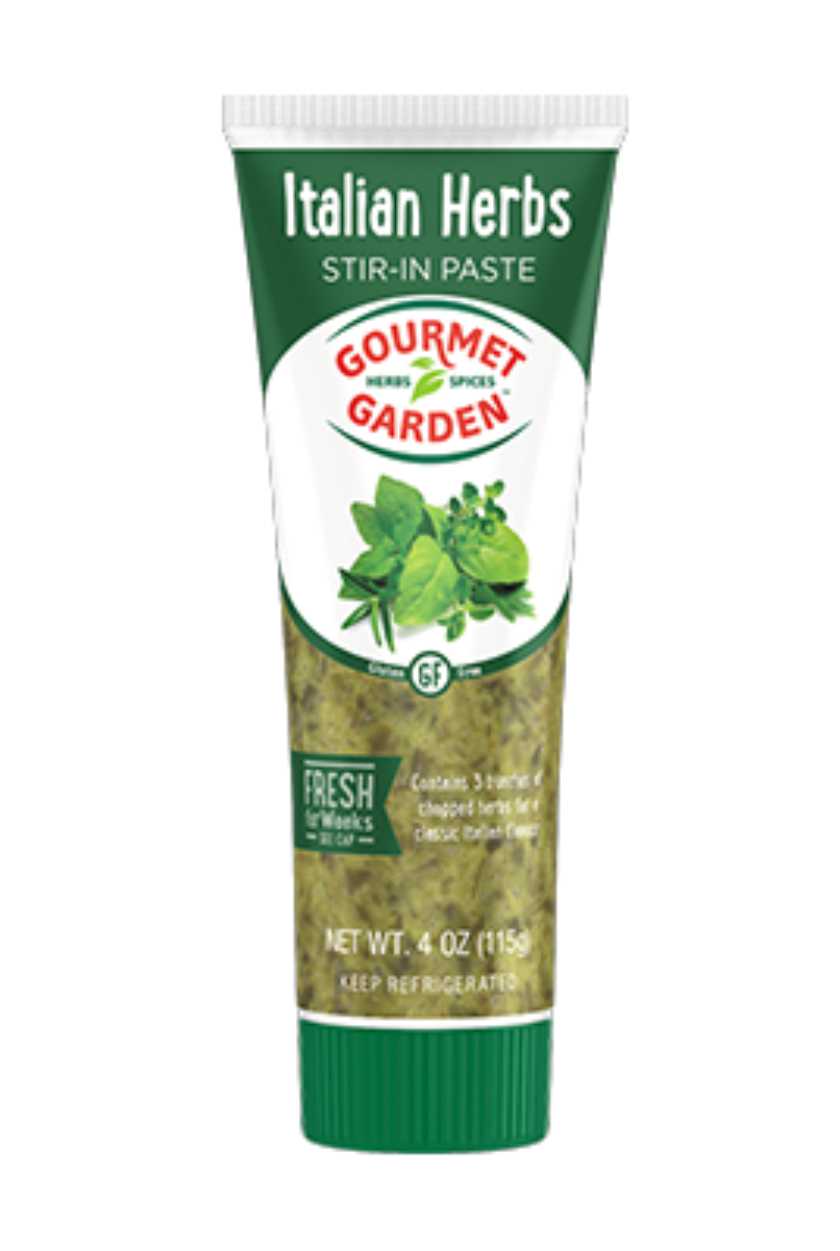
Gourmet Gardens Italian Herbs
I happened to have on hand at the time a tube of Gourmet Garden Italian Herbs. If you have not used this mixture, it is really great to give flavor to all sorts of foods, whether steaks, baked potatoes, mix into a dressing - just use your imagination. Once you've tasted it, you will think of all kinds of things it would enhance. Our friend Rich is a fanatic about this stuff and has it on hand at all times, for stirring into vegetables, adding to sauces, to spread on pizza, whatever strikes his fancy. 

I tried once to make an approximation of this stuff, and it was okay, but somehow fell just short of the mark, for flavor, despite using fresh herbs to create it. The only actual herbs in this mixture listed on the label are basil, oregano, parsley and rosemary, out of 10 total ingredients, so you may understand why I wanted to go that route of making my own. 

👀My suggestion, if you do not have this ingredient, or choose not to use it because of the many "other" ingredients, would be to substitute a tablespoon of minced fresh basil and rosemary with another dollop of olive oil to approximate - as my recipe already calls for oregano and thyme, garlic, balsamic vinegar and olive oil. 

Veggie Kebabs


Makes about 10 to 16 kebabs, depending on size of skewers
grilling, vegetables, kebabs, main dish, side dish, vegetarian
Veggie Kebabs


1 – 2 ears corn, cut into 1½ inch wheels
1 red bell pepper, in 1-inch squares
1 orange bell pepper, cut in 1-inch squares
1 red onion, separated and cut in 1-inch squares
1 zucchini, cut into 1-inch cubes
6 (3-inch) Portobello caps, quartered
15 – 20 tiny 1-inch potatoes, or others, in 1-inch chunks
1 sweet potato, peeled, in 1½-inch cubes
2 cups fresh pineapple, in 1½-inch wedges

MARINADE/SAUCE:
1 teaspoon Kosher salt
1 tablespoon fresh chopped oregano
2 teaspoons fresh thyme leaves
2 tablespoons olive oil
3 tablespoons balsamic vinegar
3 tablespoons Gourmet Garden Italian Herbs 
(or see above 👀)
3 cloves garlic, smashed and minced

Place the potatoes and sweet potato chunks into a small pot and cover with water. Bring to boil, adding 1 teaspoon salt to the water, and boil for about 10 minutes, or until they can just barely be pierced through. Drain and rinse under cold water and set aside to cool.

In a bowl, whisk together the Kosher salt, fresh oregano & thyme, olive oil, balsamic vinegar, Italian Herbs paste and garlic. Whisk together and pour over all the vegetables in a large bowl. Toss to coat. Thread the vegetables onto skewers, keeping in mind, if using wooden skewers, they must be soaked for at least 30 minutes before using. When threading the corn, skewer it through the center of the “wheel.” Reserve the marinade aside.

Grill the skewers over a hot grill until they are browned in spots and tender. Brush them with some remaining marinade to serve. Or, remove the vegetables to a bowl to serve, pouring some of the remaining marinade over top.

NOTE: As a party idea, use small wooden skewers, well soaked ahead of time, and thread on just a small few veggies per skewer, Make extra marinade to have for guests to use as a dip or a pouring sauce when serving. As these do not have to be hot for serving, they can be made just slightly in advance, but do not make them so far ahead they need refrigerating, as this significantly changes the flavors.


My passion is teaching people how to create a harmony of flavors with their cooking, and passing along my love and joy of food, both simple or exotic, plain or fancy. I continue my journey in ethnic and domestic cuisines, continuing my journey to explore diverse culinary experiences and hopefully to start you on a journey of your own. Join me also at A Harmony of Flavors on Facebook, and Pinterest.
Friday, July 8, 2022

Root Vegetables in all their Glory

I love root vegetables. From beets to yucca and everything in between. There hasn't been much in the root vegetable or tuber family that I don't like, so they feature in many of my favorite recipes. 

Mixing parsnips with potatoes for mashed potatoes has been a habit of very long standing. Oven fries and potato salads make my husband particularly happy. Sweet potatoes, whether used in a "salad" application (like Sweet Potato & Black Bean Salad), baked in a casserole or made into oven fries, make me particularly happy.

root vegetables, squash, side dish, Fall recipe
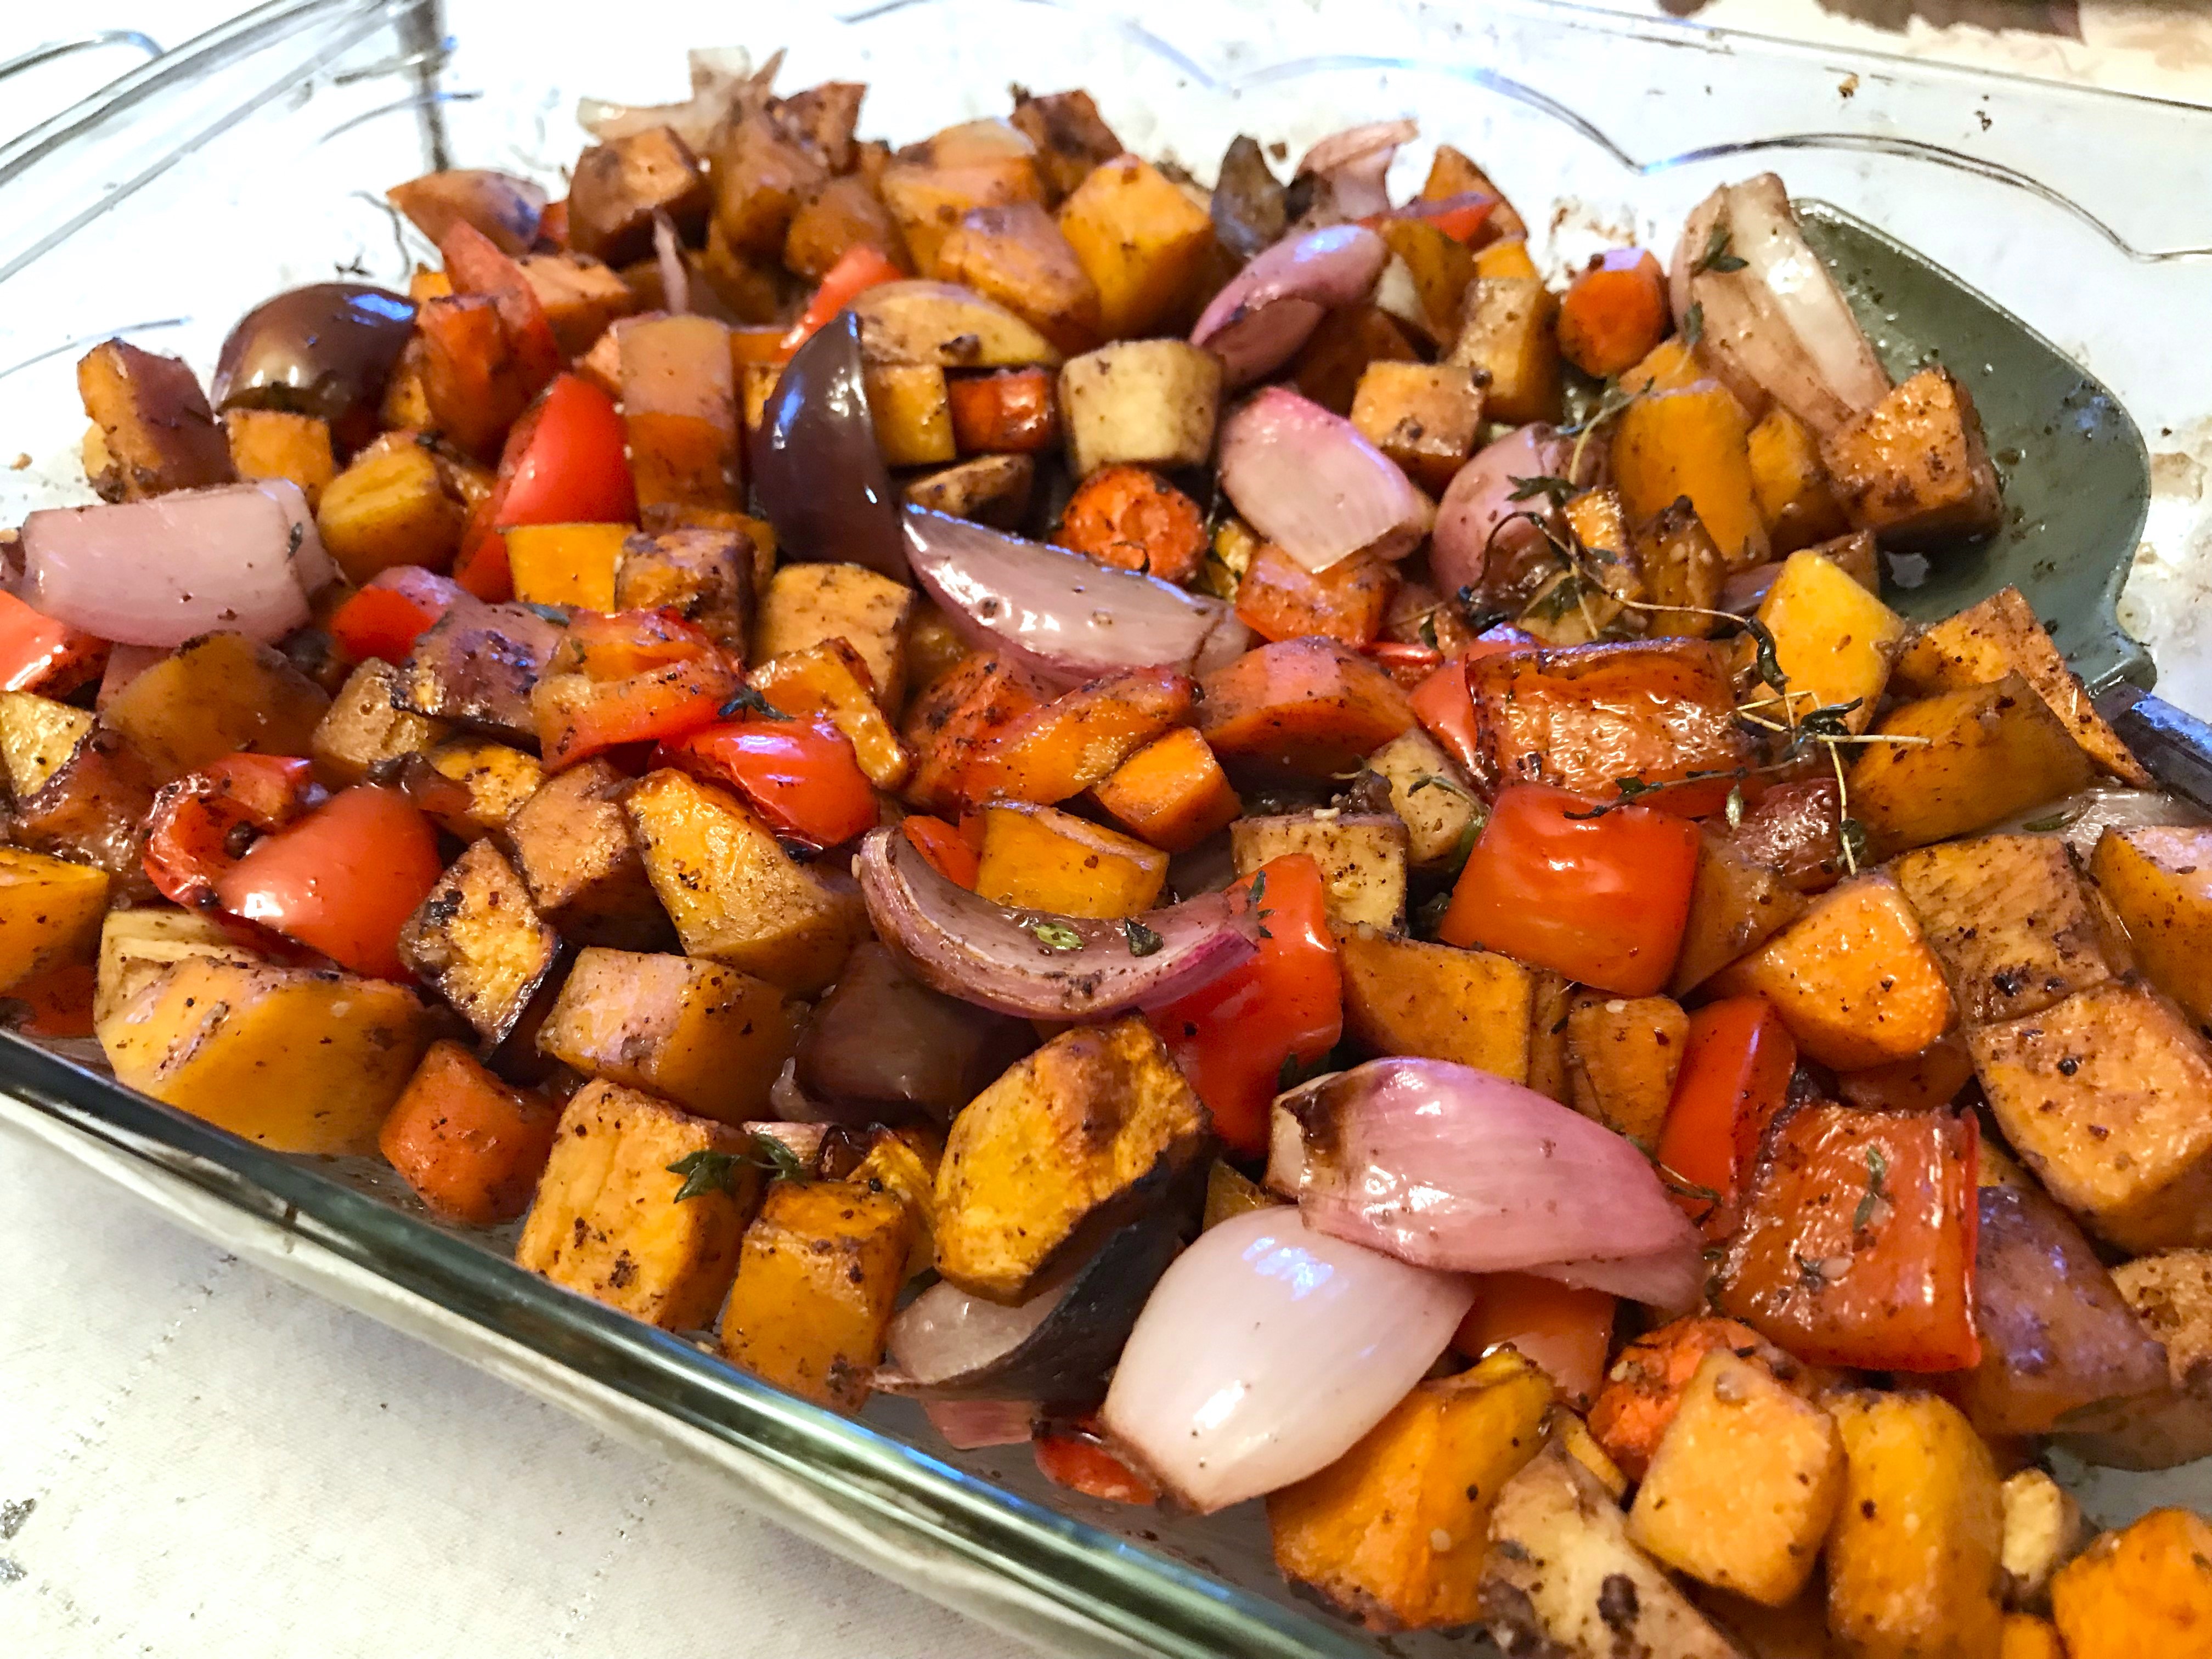
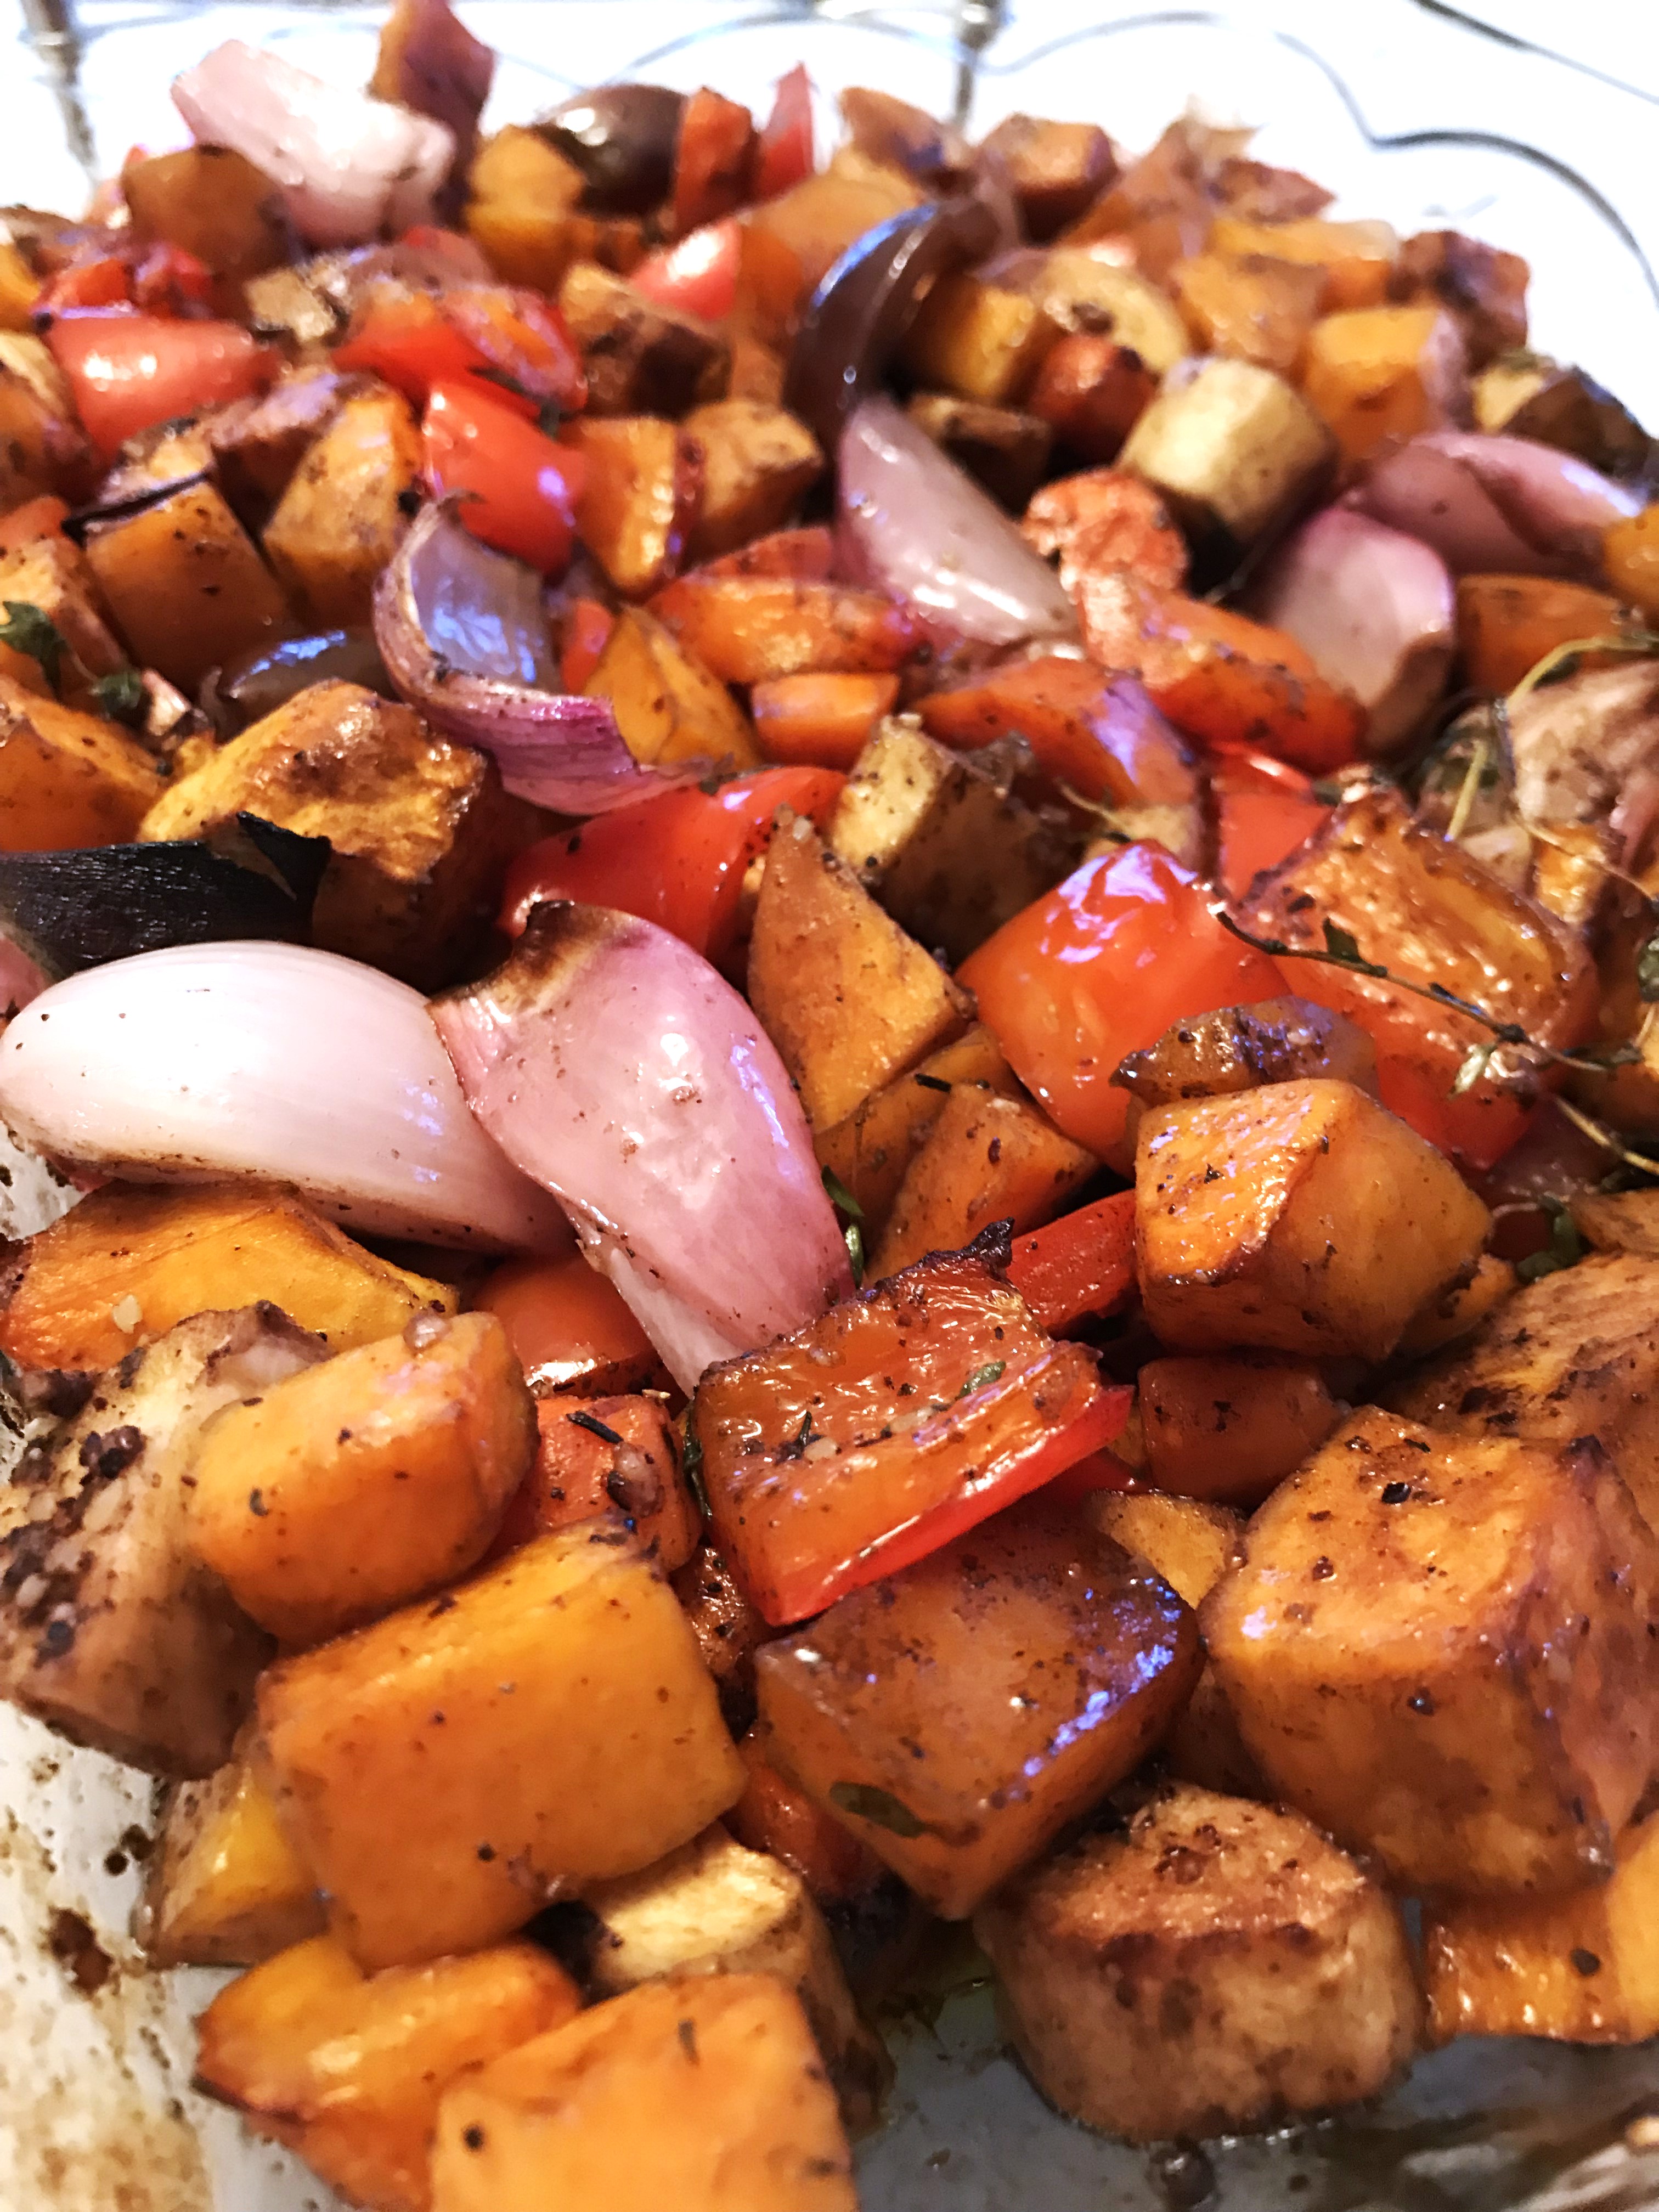
Oven Roasted Root Vegetables

While we are just now coming into the full heat of summer and many people avoid heating their ovens, this recipe for Oven Roasted Root Vegetables (plus a couple of others thrown in 😉) should stay in your files for when Fall and cooler temps start moving in, because this is one fabulous recipe. 

When Fall does hit, squash of all kinds abound, and I love squash as much as most root vegetables. I cannot begin to say I have tried all the countless varieties of squash out there, though I can say with certainty that butternut is normally in my fridge, but come Fall, I wander into other types, like the Australian blue varieties such as Jarrahdale or Jamboree, or Hubbard, though I am not always able to find them, or acorn. So, I normally add some kind of squash to my root vegetables, just because of their similar dense texture and cooking times.

Speaking of cooking times, this will depend entirely on the size you cut your vegetables in preparation for baking. You might cut them into 1 to 1 1/2-inch cubes, or you might go with a much smaller cut. I made an extra tiny cube size for the topping for an appetizer recipe I made for my son's birthday (Rosemary, Brie & Goat Cheese Tarts with Balsamic Roasted Root Vegetables), so being an appetizer portion, the veggies were cut to about 1/4-inch cubes. For some reason I have the time listed for those tiny cubes as nearly the same as for larger ones, though my recollection was that it took about 30 to 35 minutes. If you have much larger, say 1 1/4-inch sized, it can take an hour or even a little more. 

I like using shallots when making the vegetable mixture, but any kind of onion, red, white or yellow, will work just fine. Go with personal preference, or what is on hand. And another vegetable I use, again just because I like them, is green or red bell pepper - and which to use is up to the individual, or what is currently on hand. 

Mix root vegetables for this recipe as you choose, but keep in mind that red beets will stain everything a pretty red color. An alternative if you like beets is to look for either golden beets or Chioggia beets. Yucca root is particularly hard, so should be cut a bit smaller than the other veggies, if using. 


Oven Roasted Root Vegetables

Serves about 6

root vegetables, squash, side dish, Fall recipe
Oven Roasted Root Vegetables
VEGETABLES:
2 cups (10 ounces) kabocha squash, or butternut
2 cups (8.5 ounces) shallots
2 cups (8.3 ounces) red bell peppers
1¾ cups (8 ounces) sweet potato
1 cup (5.5 ounces) carrots
1 cup 4.5 ounces) parsnip

DRESSING:
½ cup Balsamic vinegar
¼ cup melted, unsalted butter
¼ cup olive oil
1 - 2 tablespoons fresh thyme leaves, or use a couple or three large whole sprigs 
1 teaspoon freshly ground black pepper
1 teaspoon salt
1½ teaspoons Zah’tar, optional
2 – 3 cloves garlic, minced

VEGETABLES: Preheat oven to 400 degrees. Grease or spray a 9 x 13-inch oven safe casserole and set aside. Peel and scoop out seeds from the squash and cut into ¾-inch cubes. Peel and cube the sweet potato, carrots and parsnip similarly. Cut ends from the shallots and slice into quarters, lengthwise. Clean seeds and membranes from the bell pepper and cut into squares. (Yes, the pepper is not a root vegetable, but it gives great flavor and color!)

DRESSING: Whisk together all the dressing ingredients and pour over the prepared vegetables in a bowl. Toss well to coat the vegetables evenly. Pour the vegetables with the dressing into the prepared casserole dish and bake for 40 to 50 minutes, or until the vegetables are easily pierced with the tip of a knife.


My passion is teaching people how to create a harmony of flavors with their cooking, and passing along my love and joy of food, both simple or exotic, plain or fancy. I continue my journey in ethnic and domestic cuisines, continuing my journey to explore diverse culinary experiences and hopefully to start you on a journey of your own. Join me also at A Harmony of Flavors on Facebook, and Pinterest.

Wednesday, July 15, 2020

Pork and Potatoes Make a Great Dinner

Some years ago, I created a spice mixture I called Sweet Smoky Cocoa Rub. It has the most divine flavors. Originally, I made it to use in a Sweet Cocoa Rubbed Pork Loin Roast, made for a special occasion. Still, more often than not, when I choose pork as a dinner option, I make pork tenderloins. They are usually smaller, far more tender, and just plain delicious. 

One day as I got out pork tenderloin for dinner, I pondered what I could do differently. I often grill it, particularly in my Grilled Pork with Indian Spices recipe, as it can just hardly be beat for flavor. But not that day. I thought of the Sweet Smoky Cocoa Rub, and wondered how that would be, used on the pork tenderloin. I proceeded to clean the tenderloin of any residual fat and silverskin, and then just poured some of the rub onto a longer tray. I rolled the tenderloin in the rub mixture, continuing to pat it on and coat completely. Set on a rack over a foil lined pan and baked? OMG! So good! It is really good with chutney, like a mango chutney, something fruity. It is also great with a nice aioli sauce

Since that day, I have made this recipe repeatedly, yet since my website is now defunct, I hadn't gotten around to re-posting this recipe - remedied here:


Sweet Smoky Pork Tenderloin


Serves 3 to 4
spice rub, Pork Tenderloin
Sweet Smoky Pork Tenderloin

1 (1.25 to 1.5-pound) pork tenderloin(s)
½ cup, more if needed, Sweet Smoky Cocoa Rub
½ - 1 teaspoon chipotle powder, optional, to taste
½ teaspoon salt

Preheat oven to 400 degrees. Line a rimmed baking sheet with foil. Set a rack in the pan. (The rack is not 100% needed, but the roast doesn't set swimming in its juices if up on a rack). Trim fat and silverskin from the tenderloin.

Combine the Sweet Smoky Cocoa Rub, Chipotle powder and salt, mixing well, then pour into a long tray. Set the meat onto the powder and begin turning to coat all sides. Pat the mixture firmly onto the meat, continuing to turn until most of it has adhered to the meat. Set the meat onto the rack and bake the tenderloin for 25 to 30 minutes, to an internal temperature of 145 degrees. Cover the meat with tented foil and let stand for at least 15 minutes. Slice and serve.


~~~~~~~~~~~~~~~~~~~~~~~~~

If you like potatoes, these roasted potatoes are fabulous. They can be baked along with the tenderloins, then when the tenderloins are done they can be taken out and tented for 15 minutes, while these potatoes finish baking. 


Rich Roasted Potatoes


Serves 4 to 6
Roasting, Potatoes, side dish
Rich Roasted Potatoes

3 pounds russet potatoes, peeled, cut into 1¼ to 1½-inch cubes
2 teaspoons salt
1 tablespoon dried onion flakes
½ teaspoon garlic powder
½ teaspoon turmeric
2 teaspoons fresh rosemary leaves, minced finely
few grinds of pepper
½ cup olive oil

Preheat oven to 400 degrees. Mix together all the ingredients except the potatoes in a small bowl. Place the potatoes into a gallon sized zip top bag or a plastic container with a lid. Pour the oil mixture over and seal the container. Toss well to coat all the potatoes. Pour the potatoes into a 13 x 9-inch oven safe casserole. Bake for a total of about 45 minutes, turning them once halfway through the baking time.


My passion is teaching people how to create a harmony of flavors with their cooking, and passing along my love and joy of food, both simple or exotic, plain or fancy. I continue my journey in ethnic and domestic cuisines, continuing my journey to explore diverse culinary experiences and hopefully to start you on a journey of your own. Join me also at A Harmony of Flavors on Facebook, and Pinterest.
Saturday, May 30, 2020

Overlooked Recipes

I put a stop to my website as of last September. I had been steadily working to add in to this blog all the recipes that had previously only been posted on the website, but inevitably, some get overlooked. I want to post three I discovered I had missed.

I have been horribly lax with working on my blog, or putting out a newsletter, or even cooking much of anything new. Why? I got into a project and it has occupied all my attention and interest for months, now. I periodically like to put together "books" with comb bindings for myself or for family. Often these are cookbooks of collected recipes for a family member, as well as being a quick reference for me. Sometimes I have dedicated myself to identifying flowers (as after a trip to California, with a slew of flowers I'd never seen before, living in the east) and making a small booklet, so I have them as a reference. I have done this with birds, using my own photos as well as photos my sisters had taken. We love birds. That book was immense, and it is in a large binder. Another was butterflies. Most often it has been recipes just because I love to cook.
Cactus Flower
Cactus Flower

The one that has occupied my time these past three months or so has been any and all plant photos taken in Arizona. I had visited AZ a fair bit in past, as one of my sisters lives here, but really never thought to live here myself. But, here I am, and now I am seeing cactus plants and wondering what kind they are, or other plants in general. While some seemed very straightforward, having been labeled, others not so much. And I have spent countless hours researching online. The last in a long line of plant types are succulents, and soon I will be wrapping up this project. I still have orphan plants I cannot identify, no matter how long I search. Alas. 

So back to these missed recipes. I just found that I had omitted them yesterday, and was horrified, because they are some favorites. So, without further ado:

Turkey or Chicken Tetrazzini


Serves 6
Turkey, Tetrazzini, pasta, casserole
Turkey Tetrazzini

6 ounces spaghetti
¼cup butter
½ cup flour
2¾ cups chicken broth
1 cup light cream or evaporated milk
¼ cup dry sherry
1 teaspoon salt
dash pepper

1 can sliced mushrooms, drained (6 oz. can)
½ cup green pepper, chopped
1 small jar chopped pimiento, drained
2 cups diced cooked turkey, or chicken
½ cup Parmesan cheese, shredded

Cook spaghetti in boiling salted water till just barely tender; drain. In a large skillet melt butter; blend in flour. Stir in broth, whisking so no lumps form. Add cream. Cook and stir till mixture thickens and bubbles. Add the wine, salt, pepper, spaghetti, mushrooms, green pepper, pimiento and cooked turkey. Turn into a 12 x 7½ x 2" baking dish. Sprinkle top with Parmesan. Bake @ 350 for about 30 minutes.

NOTES: I have on occasion tripled this recipe for a party. Divide the mixture into two 9 x 13 inch pans, and add on about 10 minutes of cooking time, or until it is bubbling all through.

~~~~~~~~~~~~~~~~~~~~~~~~~


Smoky Pork BBQ Ribs


1 (3½ pound) rack pork loin ribs
Pork, BBQ, barbecue, Ribs
Smoky Pork BBQ Ribs


6 - 8 tablespoons Sweet Smoky Cocoa Rub
2 teaspoons Kosher salt
3 cups mesquite wood for smoking
½ cup Sweet Tangy BBQ Sauce

Early in the day, soak the wood chips in water to cover, for at least 2 hours or more. Pat the Sweet Smoky Cocoa Rub onto both sides of the slab of pork ribs, plus 1 teaspoon of the salt per side, and allow to stand at room temperature, while the wood chips are soaking; 2 hours.

Once the wood chips have soaked long enough, cut two sheets of foil. Place half the wood chips onto each piece of foil and make a packet enclosing the wood and poke holes into the top.

At least 5 hours before you want the ribs done, start the grill, heating only one side. Once grill is ready, place the slab of ribs onto the hottest side and allow to sear well, about 10 minutes. Flip over and sear the other side for about 10 minutes. Move the ribs to the unheated side of the grill. Set one of the wood chip packets onto the hot side of the grill. Close the lid and monitor the temperature, keeping it relatively low; below 300 degrees if possible for at least 2 hours. Midway between, if the first wood chip packet has stopped smoking, place the second packet onto the hot side of the grill, to keep up the smoking. 

Preheat oven to 275 degrees. Once the ribs have spent at least 2 hours on the grill, prepare a sheet of foil large enough to completely enclose the slab of ribs and set it into a large baking sheet with sides. Remove the ribs from the grill and set onto the large foil sheet. Cover the top with ½ cup of Sweet Tangy BBQ Sauce and then fold the foil around the ribs, completely enclosing them. Place the baking sheet into the oven and allow to bake slowly for another 2 to 2½ hours, until completely tender.

~~~~~~~~~~~~~~~~~~~~~~~~~

Tzatziki Sauce


Makes about 1½ cups sauce
Tzatziki, Sauce, yogurt, dill
Tzatziki Sauce


1 cup plain Greek yogurt or 1½ cups other plain yogurt
½ cucumber, peeled, seeds removed, diced small (optional)
2 tablespoons good quality olive oil
1 tablespoon white vinegar
1 tablespoon fresh dill, minced finely
1 - 2 cloves garlic, minced
½ teaspoon salt, or to taste

If using a good quality Greek yogurt such as Fage brand, you may not have to drain the yogurt. If using other brands or the larger amount of just plain yogurt, set the yogurt into a fine-mesh strainer over a bowl. Place in the refrigerator and allow to drain for at least 1 hour or more.

If raw garlic upsets the stomach, set the minced garlic into a small bowl and just barely cover with vinegar. Allow to stand for at least 10 minutes, then drain. This removes the raw taste. Add to the recipe and continue.

Discard the yogurt liquid. Place the drained yogurt into a bowl. Add the 
olive oil. vinegar, garlic, dill and salt and stir to combine. Taste for seasoning. If using cucumber, stir in. 

Note: Cucumber, while true to the recipe, will add liquid if it sets for too long, making the mixture runny. If using cucumber, it may be best to stir in just before serving. Use this tzatziki when serving Falafel or Butternut Squash Falafel


My passion is teaching people how to create a harmony of flavors with their cooking, and passing along my love and joy of food, both simple or exotic, plain or fancy. I continue my journey in ethnic and domestic cuisines, continuing my journey to explore diverse culinary experiences and hopefully to start you on a journey of your own. Join me also at A Harmony of Flavors on Facebook, and Pinterest.
Wednesday, May 9, 2018

A Quinoa Side Dish Worth Trying

I apologize for having been absent a lot from my blog in these last few months, as it has been a particularly challenging time for my husband and me. I am hoping that life settles down a bit, so I can continue trying out recipes and posting them here.
 
Quinoa, Pilaf, Acorn Squash
Quinoa Pilaf in Acorn Squash

Quinoa, Pilaf, side dish, recipe
Quinoa Pilaf
A couple of weeks ago, I had an idea to make something with quinoa (KEEN-wah). Quinoa makes a great base to start with, because it doesn't have a whole lot of flavor on its own, so it lends itself to things like a pilaf, which, strictly speaking, is a rice dish, but this works the same way. I had bought an acorn squash with the intent of filling it with Smoky Beef & Currants mixture. However, since I had just made and served some Smoky Beef & Currant Empanadas, it seemed too much to use that same mixture again in so close proximity, despite how good it is. Which brought me back to what to do with the acorn squash. 

When I started thinking of what kind of mixture to use, I thought of quinoa, since I hadn't used it in a while. And once I started thinking of flavors and ingredients to add, I just kept going and the mixture turned out so delicious that it is perfectly acceptable as a side dish (I served it alongside small pan-fried, skinless, boneless chicken breasts) or even a main dish all on its own. It may (or not) have been overkill to fill the acorn squash with it, but it was truly delicious, either way. The quinoa mixture made just a little too much for filling the acorn squash halves, so I kept aside the remainder for a lunch snack the next day.

If making the quinoa to fill the acorn squash, the recipe would be for two people, but the quinoa pilaf on its own could easily be a sufficient side dish for 3 or 4 people.

Quinoa Pilaf in Acorn Squash


Serves 2 to 4
 
Quinoa, Pilaf, Acorn Squash, filling, side dish
Quinoa Pilaf in Acorn Squash

1 acorn squash
½ cup quinoa (I used red quinoa)
1 cup water
½ teaspoon salt
1 teaspoon olive oil
1 teaspoon butter
1 onion, chopped
½ teaspoon salt
2 cloves fresh garlic, minced
1½ teaspoons fresh thyme leaves
½ green bell pepper, chopped
1 Fresno chili, seeded, minced

ADDITIONS:
1 teaspoon capers, drained
½ cup dried cranberries (craisins)
½ teaspoon ground allspice
2 tablespoons fresh mint leaves, minced
2 tablespoons fresh cilantro leaves, minced
3 tablespoons pine nuts
2 teaspoons maple syrup 

Preheat oven to 350. Line a rimmed baking sheet with foil or parchment and spray the foil or parchment with cooking spray. Cut the squash in half lengthwise, then scoop out the seeds and discard. Set the squash halves, cut sides down, on the foil or parchment, place in the oven and bake for 40 to 45 minutes, or until the squash is tender when pierced with a fork. 

While the squash bakes, place the quinoa, water and first half teaspoon of salt in a saucepan. Bring to a boil, reduce heat to a simmer, cover and cook for about 15 minutes. Remove from heat and set aside to steam for 10 minutes, then fluff. If water remains in the saucepan, drain it off.

In a skillet over medium low heat, cook the onion in the teaspoon of oil and teaspoon of butter, adding in the second half teaspoon of salt. Stir occasionally until the onions are golden. Once the onions are done, add the garlic and thyme leaves and cook for a few minutes more. Add the bell pepper and Fresno pepper and cook for about 5 minutes more, until tender.

Off the heat, add the "additions" to the skillet, along with the steamed quinoa and mix thoroughly. At this point, the Quinoa Pilaf is ready.

Once the squash is baked, carefully turn the squash cut side upwards and with a sharp knife, score the squash in 1-inch intervals in a cross hatch pattern, being careful not to cut through the skin. Sprinkle the squash lightly with salt, then mound in the Quinoa Pilaf. Return the squash to the oven for about 15 minutes more, then serve.


My passion is teaching people how to create a harmony of flavors with their cooking, and passing along my love and joy of food, both simple or exotic, plain or fancy. I continue my journey in ethnic and domestic cuisines, continuing my journey to explore diverse culinary experiences and hopefully to start you on a journey of your own. Join me also at A Harmony of Flavors on Facebook, and Pinterest.

Friday, November 3, 2017

Interesting Middle Eastern Flavors

The Night Counter, book, Alia Yunis, author
The Night Counter
by Alia Yunis
In my last post, I wrote about making Baba Ghanoush for the first time. I was surprised to like it a whole lot, since eggplant is not necessarily the first vegetable I go for. Since that post, I happened to be reading a book (on my Kindle) called "The Night Counter," by Alia Yunis. The book was a fascinating journey through the life of an elderly Lebanese woman, Fatima, and told in "stories" to "Sheherezade" over 1,001 days. The book was absolutely fascinating on many levels. The characters were interesting and engaging and became very "real" over the course of the book. Another point of interest for me was Fatima's discussion of Lebanese foods.

I was telling my husband about the story as it progressed, and I made the comment that Middle Eastern cuisine is one I know very little about, but that some of the things Fatima described sounded interesting, such as Ma'amoul and Kibbe.
Cookbooks, Middle Eastern cooking
Cookbooks on the Middle East

Apparently this is all it took. My husband took this upon himself as a challenge, I guess, because a couple of days ago he brought home SEVEN different cookbooks. Six of them are on Middle Eastern cuisines. One is by Maureen Abood, a Michigan based Lebanese blogger I have been following for some time. Her blog "Rose Water and Orange Blossoms," is listed at right, below, in my list of blogs. Another book is about breads (Hot Bread Kitchen) and other foods made by immigrant women in New York, because I like making bread. And he claims he has yet a few more books on the way.

I told him it gets very confusing with all these books. One or two would have been a good start. But he only knows one way to do things, and that is big and over the top! So I have been poring over all these books, reading the stories, the recipes and the spice mixtures. The latest spice mixture to catch my attention is called Bahārāt. I have no recipe just yet, as I am still in the process of reading about it, the variances in the recipe in varying Middle Eastern countries. I've looked at at least 15 different recipes for this spice, so far. I will create one that sounds good to me very soon. But meanwhile, I found some variations on recipes for Baba Ghanoush.
 
Baba Ghanoush II, eggplant, dip, appetizer
Baba Ghanoush II

I love walnuts. They are, arguably, one of my most favorite nuts, along with almonds and pistachios. Oh! And cashews. My husband does not like walnuts. If they are very apparent in a dish, he will either pick them out, or just not eat the food. I can sometimes get away with grinding them very finely into a cake or cookie batter. But he claims they are very bitter, so if he tastes "bitter," that's the end of that food for him. I found a couple of recipes in this stack of books that mention using walnuts in Baba Ghanoush, instead of sesame tahini. Since my husband only took one tiny taste of my first attempt at Baba Ghanoush, I figured I may as well just go ahead and make this variation with walnuts, because the likelihood of him actually wanting to eat it is exceedingly slim. I roasted the eggplant yesterday. While I was roasting the eggplant, I took the opportunity to roast a head of garlic, as well. I wanted to try using roasted garlic in the Baba Ghanoush, instead of fresh garlic.

I made the new version, Baba Ghanoush II, this morning, and I love it. I actually love it using either recipe. So, I am sharing this new version here.

Baba Ghanoush II
Baba Ghanoush II, recipe, eggplant, walnuts, dip, appetizer
Baba Ghanoush II

Makes about 2 cups

1 medium eggplant (about 12 ounces)
3 cloves garlic, roasted or raw
1 cup shelled walnuts
½ cup coarsely chopped parsley
3 - 4 tablespoons lemon or lime juice
½ teaspoon salt
¼ teaspoon freshly ground black pepper
1 tablespoon good quality olive oil

Set oven to 400 degrees. Line a smaller baking sheet with foil. Set the eggplant on the foil and bake it for about 45 to 55 minutes, or until completely soft and skin is slightly charred. 

If you are roasting the garlic, cut off the top ¼ of the whole head of garlic. Set the head of garlic on a square of foil. If there are any larger garlic bits left in the parts cut off, take them out of their husks and set them on top of the head. Sprinkle a bit of olive oil over top of the garlic, then fold the foil up over the garlic, making a tight little packet. Set it into a small ramekin and place in the oven alongside the eggplant, for about 45 minutes.

Once roasted, remove the eggplant and let it cool. At this point, removing the skin is very easy. Discard skin. Remove excess sections of seeds inside, if preferred. Separately, squeeze out all the garlic cloves from the roasted head of garlic and store them in a small glass jar with tight fitting lid, refrigerated. If being kept for more than a few days, pour olive oil over the garlic to cover and maintain freshness.

Heat a skillet over medium heat until very hot and pour in the walnuts. Use a wooden spoon and toss and stir the nuts constantly. Do not turn away for even a second, as they can, and will, burn. It will take about 4 to 5 minutes for the nuts to toast gently, evidenced by both the color and the toasty nut aroma. Pour them immediately out onto a plate to cool.

To make the Baba Ghanoush II: Once cooled, place the walnuts into a food processor and process to a very fine texture, almost a paste. Add in the parsley and pulse until well broken down in the nut paste. Add the peeled eggplant, the garlic and about 3 tablespoons of the lemon or lime juice. Add in the salt and pepper and process briefly to blend. Taste and adjust salt or add more lemon or lime juice as needed. Pour out the Baba Ghanoush to a container and stir in the olive oil. To serve, swirl the top of the dip and drizzle on more olive oil and garnish with pine nuts, if desired.

-------------------------------------------------------------------------------------
I also made a couple of other dishes two nights ago, and one was a side dish. I wanted a vegetable to go with a lamb entree. I used asparagus, which I have not seen suggested in any of these books yet. But I did use other flavors to make the asparagus taste of the Middle East. Olive oil, garlic, saffron, pistachios, Feta cheese and Zah'tar. Zah'tar is a spice mixture (sumac, sesame, oregano, thyme & salt) I made a few years back, and while I have used it, I certainly haven't given it a really good go. In this particular application, the Zah'tar really perked up the flavors of the asparagus. Understand that this method can be used on many kinds of vegetables. I believe carrots, or squash or zucchini or various other veggies would benefit by using these flavors. Simply cook the vegetables, then drain and proceed with the recipe.

Asparagus with Feta, Pistachios & Zah'tar

Serves 2 or 3
Asparagus, Feta, Pistachios, Zahtar, side dish
Asparagus with Feta Pistachios & Zahtar


1 bunch asparagus
½ teaspoon salt
----------------------
1 - 2 tablespoons olive oil
1 large clove garlic, minced finely
small pinch saffron 
----------------------
1 ounce Feta cheese, crumbled
¼ cup shelled pistachios
½ to 1 teaspoon Zah'tar

Set the olive oil in a small pan over the lowest heat possible. Add in the garlic and the saffron, rubbed between the palms to break up. Stir, then allow this mixture to "steep", without ever boiling, for about 15 to 20 minutes, minimum.

Snap off the ends of the asparagus, then cut the spears on the bias, about 4 or 5 slices per spear. Set them into a saucepan with a small amount of water, about 1 inch deep in the bottom. Sprinkle with the salt and bring to boil. Reduce heat and cover. Cook for about 5 minutes, or until just tender but still bright green.  Drain the asparagus and return the pan to the heat to dry slightly. Pour in the garlic oil and stir. Add in the pistachios and stir. Pour into a serving bowl and add the Feta over top, then sprinkle with the Zah'tar, to taste. 


My passion is teaching people how to create a harmony of flavors with their cooking, and passing along my love and joy of food, both simple or exotic, plain or fancy. I continue my journey in ethnic and domestic cuisines, continuing my journey to explore diverse culinary experiences and hopefully to start you on a journey of your own. Join me also at A Harmony of Flavors on Facebook, and Pinterest.

Wednesday, July 5, 2017

Rice Can Make a Great Cold Side Sish

Since my husband and I have been eating more healthily, upping the vegetable quantity, dropping simple carbs and eating only small amounts of meat, I have tried to get a bit creative with these ingredients. Since yesterday was July 4th, our Independence Day, I wanted some really great flavors for dinner, since my sister-in-law was coming over. I started thinking about rice. I love brown rice, and there are so many other types of whole grain rices available these days.
 
Cold salad, Rice Salad, Blackberry Dressing
Cold Rice Salad with Blackberry Dressing

In particular, Lundberg (brand) has a wonderful mixture of rices all together in one package, and I have been buying this mix for many years. It tastes so great all on its own that (to my taste buds) it needs little enhancing. It is called "Wild Rice Blend," and is a mix of long grain brown rice, sweet brown rice, wild rice, whole grain Wehani rice, and whole grain black Japonica™ rice. Any one of these rices on its own would be great. All together? Fantastic! And I made it into a cold side dish (or "salad" if you will) with the most fantastic results. In the photo above, the pink color overall is due to the Blackberry Dressing I made and used in the salad.
rice, blend of rices
The rice blend I used

As with most things, when I discover something new, I like to try more and more varieties. So, too, it has been with rice. Aside from the regular white long grain, basmati, "tex-mati," or jasmine rices, I usually have at least three or more other types available at home in my pantry. Right now, I have brown rice, red rice, wehani rice, black rice (also called "forbidden rice") and purple sticky rice. Aside from Lundberg brand's wonderful single and combination rice blends, Lotus Foods also has some wonderful rice available. My black "Forbidden" rice, and red rice are from Lotus Foods. I also have gotten their Jade Pearl Rice and want to try their Madagascar pink rice. 

Okay, enough on all the rice. All I want to get across is that there are so very many good whole grain rice types available these days, it would be a shame not to take advantage. On Vitacost.com, for example, many of these packages of rice are only just over $3 apiece. I made this wonderful rice "salad" yesterday using the Lundberg Wild Rice Blend, but any of these whole grain rices individually would make an equally delightful substitute in my recipe. Granted, with the hot-pink color of the dressing, the color would be far less appetizing if using the Jade Pearl Rice, as it is a light green in color, due to it being infused with bamboo juice. Most other rice would be great. 

My sister-in-law buys fruits each year from a fruit club and convinced me to try something. I chose blackberries, hence the Blackberry Dressing I used in this dish. On its own, the dressing is really lovely and delicious. This is the recipe:

Blackberry Dressing, salad dressing, fruity dressing
Blackberry Dressing

Blackberry Dressing

Makes about 1½ cups.

½ cup extra virgin olive oil
6 tablespoons red wine vinegar
1 cup fresh blackberries
2 teaspoons honey or agave syrup
1½ teaspoons onion powder
1 teaspoon fresh thyme leaves, stems discarded
½ teaspoon dry mustard powder
16 drops liquid Stevia clear

Place all ingredients into a blender container and blend as finely as possible. Pour through a strainer, pressing to extract all liquids. Discard solids. Store the dressing in a tightly sealed container in the refrigerator for up to a week. Let stand for a few minutes at room temperature before using, to return the mixture to a more liquid state.

On to the Side Dish or Salad

When considering what to serve for our 4th of July feast, I chose Chicken with Indian Spices (recipe found here) and grilled asparagus. The chicken was a somewhat simplified version: I left out the black pepper and cardamom this time and used far less oil and red wine vinegar. It was still amazing. Thinking further, I thought of rice, and then thought about adding fresh vegetables into the rice, and opted to make it a cold, or at least cool dish. The main vegetables were onion, red bell pepper, spinach and carrot. Cilantro had to be added, because we love cilantro, but this can be replaced with parsley, if you happen to be one of those people (poor souls) who cannot abide cilantro. All of this went through my head when I received the many containers of blackberries. 

Amazing how the mind works sometimes!

Ultimately, the rice has to be cooked and cooled to room temperature, so this takes a little planning ahead. The Lundberg Wild Rice Blend needed to be cooked for 45 minutes. It took a further half hour or 45 minutes to cool down completely. I wanted the vegetables to remain crisp, so having the rice cooled completely was important. While the rice is cooking, it is easy to get the remainder of the ingredients assembled. Once the rice is cooled, just add it in and toss with the dressing.

If you have not made the Blackberry Dressing, another dressing of choice may be used, obviously with a slightly different flavor as the result. I would suggest something light and mildly sweet, such as Ken's Vidalia Onion Dressing or one of the many poppy seed dressings.


Cold Rice Salad with Blackberry Dressing
Cold salad, Rice Salad, Blackberry Dressing
Cold Rice Salad with Blackberry Dressing


Serves 4 to 6

¾ cup Lundberg Wild Rice Blend, or other whole grain rice of choice
2 cups water 
½ teaspoon salt
½ small red onion, about ½ cup thinly sliced, quartered
cider vinegar
1 cup finely sliced fresh baby spinach (chiffonade)
½ red bell pepper, chopped small, about ¾ cup
1 small carrot, shredded, about ½ cup
¼ cup chopped fresh cilantro
¼ cup raisins
2 tablespoons Blackberry Dressing (recipe above)

In advance, cook the rice with the water and salt: bring the pot to a boil, reduce to a simmer and cover tightly. Time the cooking for 45 minutes. If there is water remaining in the pan after 45 minutes, strain the water out, then fluff the rice and set aside to cool completely, to room temperature.

Set the half-onion on its side and cut lengthwise into 2 pieces. Cut across the onion into very fine slices. Separate all the strands and place them in a small bowl and cover with cider vinegar. This will remove the raw onion taste completely, leaving the onion sweet and flavorful with no harsh results later on. Leave to soak at least 10 minutes, then drain away the vinegar before using.

In a large mixing bowl, combine the soaked and drained onion, the spinach, bell pepper, carrot, cilantro and raisins. Mix in the dressing. Once the rice is cool, add it in and toss again to coat. Serve immediately or let set for up to 2 hours before serving if needed.


My passion is teaching people how to create a harmony of flavors with their cooking, and passing along my love and joy of food, both simple or exotic, plain or fancy. I continue my journey in ethnic and domestic cuisines, continuing my journey to explore diverse culinary experiences and hopefully to start you on a journey of your own. Join me also at A Harmony of Flavors on Facebook, and Pinterest.

Disqus