
 |
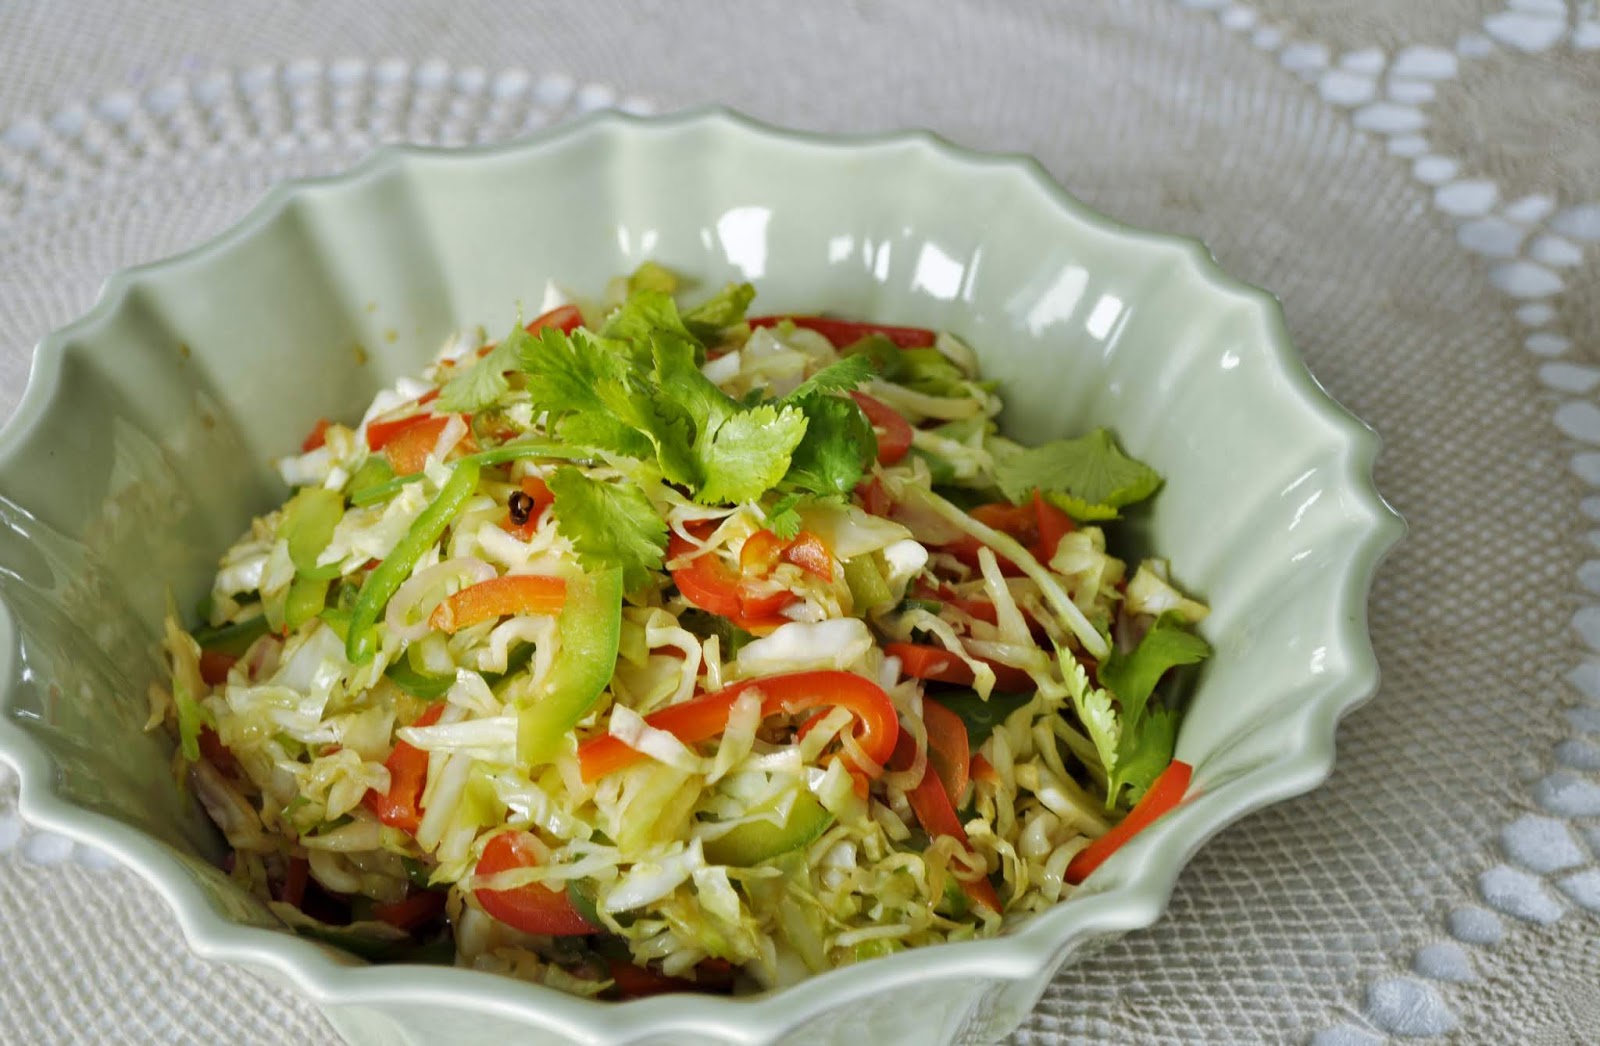
| Szechuan Hot Sour Cabbage |
It has worked well in sets of threes, with recipes in a single theme. Today, I am adding in three side dishes that have long been favorites. One of these is grilled, and I call it Grilled Portobellas 'Richard," after our friend Richard. Another is a truly delicious way to make green beans, especially for a special occasion. I made a slew of these for a birthday dinner, and the bowl was scraped clean at end of meal. The third recipe is a cabbage dish (above) that is one my husband will actually eat. It has enough great flavors that he will tolerate the fact that it is cabbage.
What to do With Huge Portobello Mushrooms?
Our friend Rich thought up this idea, and had some very definite ideas on how it should be made, ideas that I implemented with my own knowledge and expertise. I have to say, these turned out with absolutely exquisite flavors, and truly are satisfying enough as a main dish, should you be vegetarian (or even if you're not!). As a matter of fact, they can be used in place of a hamburger on a bun, which I did for a vegetarian friend who came to dinner.
His idea started out like this:
Rich: How about if we grill some big portobello mushrooms to top our burgers for supper?
Me: Sure, lets go get some at the store.
Rich: I think if we season them and let them set all afternoon before grilling, they will taste great on the grill.
Me: That would certainly make them tasty.
Rich: Let's grill some slices of onion to set on top!
Me: That sounds good, too!
Rich: Then we could set some smoked provolone to melt on top of them.
Me: Yep, sounding better and better.
Rich: So, I think if we mashed up a LOT of garlic with some olive oil and spread that all over the inside of the mushroom, that would taste really great.
Me: We can do that, plus, I think some smoked salt would add to the flavors. Maybe some minced rosemary? Or maybe some smoked paprika?
 |
| Grilled Portobellas Richard |
And thus went the day. We went and bought the foods we needed, and proceeded with the marinade and the grilling later on. And the recipe came out so far better than even expected. Don't be afraid of the garlic - these are great just as the recipe stands. Totally unbelievable.
Grilled Portobellos 'Richard'
 |
| Stacking Grilled Portobellas with Onion and Cheese |
Serves 4
4 very large Portobello mushrooms
1 large onion
3 tablespoons olive oil
3 tablespoons butter, melted
6 to 8 garlic cloves, minced (Richard loves garlic)
1 teaspoon salt, preferably Hickory Smoked
½ teaspoon smoked paprika, optional
½ teaspoon finely minced fresh rosemary leaves, optional
Black pepper, freshly ground, to taste
4 slices smoked Provolone cheese
Early in the day, or even the day before, mix together the olive oil, melted butter and garlic. Add in the smoked paprika and minced rosemary, if using. Remove the stems from the portobellas. Brush the oil and garlic mixture all over the mushroom, first on the outside of the cap, and then leaving the mushroom cupped upwards, make sure there is a lot of the garlic mixture inside. Sprinkle with some of the salt. The hickory smoked salt can be found in some specialty stores, but regular salt will do. Sprinkle on some pepper, as desired. Wrap in plastic wrap, or place in a sealed container until needed.
When ready to cook, light a grill. This works better if you have a grill pan, so the mushrooms and the onions don’t slip through the grate. Slice an onion into thick slices, about ¼-inch thick or more. Grill the onion slices on both sides, until well done and a little bit charred. Have the mushrooms grilling alongside; first grill the outside of the cap downwards and then turn them over. Be prepared! This will flare the flame, as the butter and oil will come running out. Once the mushrooms and the onion slices are cooked through, flip the mushroom cup side upwards and place one slice of the grilled onion onto the cup side of the mushroom. Top with a slice of Provolone cheese and allow the cheese to melt slightly.
Prepare for some of the best mushrooms, ever!
~~~~~~~~~~~~~~~~~~~~~~~
A Delicious Preparation for Green Beans
 |
| Creamed Green Beans with Bacon |
I love green beans now - the fresh kind. I make them "French-cut" all the time. I guess I like that they seem easier to eat, easier to chew than blunt cut green beans, less "squeaky" between the teeth. My husband also loves my green beans, so for one of his birthdays he was quite specific what he wanted for his birthday and green beans were part of the requested meal. Since it was his birthday, I opted to make them a bit fancier than normal. I made the roux, just like Mom made, but as I fried minced bacon to add to the dish, I used the resultant bacon grease in the pan for the roux, and water for the liquid - there were plenty of other flavors going on. These came out with such stellar flavor. At the table, it was close to a fight over the last bits of beans in the bowl.
Creamed Green Beans with Bacon
 |
| Creamed Green Beans with Bacon |
1 pound green beans, stem end removed, cut as desired
6 slices thick-sliced bacon (about 4 - 5 ounces)
2 tablespoons reserved bacon grease
1 tablespoon butter
2 cloves garlic, finely minced
2 tablespoons all-purpose flour
1 teaspoon fresh thyme leaves, stripped from stems
1 cup water
salt and pepper, to taste
Cut the bacon strips across the grain into ¼-inch pieces. Fry the bacon until almost crisp. Remove the bacon pieces to paper toweling to drain and set aside. Remove all but 2 tablespoons of the bacon grease for another use. Add the butter and garlic to the pan and saute the garlic gently for 2 minutes. Add the flour and thyme leaves and stir to combine. Add in the water and stir. Bring the mixture to a boil stirring for about 5 minutes until the mixture is like a gravy. Set aside and keep warm.
Prepare a steamer and set the green beans into the steamer basket. Sprinkle Kosher salt all over the green beans. Bring water to a boil and steam the green beans for about 8 to 12 minutes, or until the green beans are just barely tender. Drain well and add the green beans to the sauce in the skillet. Add in the bacon, reserving 1 tablespoon for garnish. Stir together and bring the mixture back to full heat. Taste for seasoning, adding salt and pepper as desired. Garnish with reserved bacon pieces. Serve immediately.
~~~~~~~~~~~~~~~~~~~
Taking Cabbage to New Heights
Cabbage is one of those love or hate type of vegetables. It can certainly be made badly and tasteless. This recipe is not one of those. While my recipe is quite similar to one I found in a book somewhere long ago, it is the first time I came across reference to Szechuan "peppercorns." And, after hunting them down and making the recipe, I found that while the peppercorns did have a particular flavor, there just aren't that many in the recipe to really gauge how the overall recipe tasted with or without them. While I would urge you to try and find some to try in this recipe, I believe there are enough other much more easy to find ingredients that make the recipe taste so great.What Are Szechuan "Peppercorns"?
 |
| Szechuan Peppercorns |
Szechuan Hot Sour Cabbage
 |
| Szechuan Hot Sour Cabbage |
Serves 6 - 8
1 pound cabbage
1 green bell pepper
1 red bell pepper
2 tablespoons soy sauce
2 tablespoons vinegar
2 tablespoons sugar
1 teaspoon salt
3 tablespoons vegetable oil, I use olive oil
4 dried hot chilies, optional
12 Szechuan peppercorns, or black peppercorns if preferred
1 tablespoon Asian dark sesame oil
Thinly shred cabbage and green and red peppers. For sauce, in a small bowl, combine soy, vinegar, sugar and salt; set aside.
Preheat a wok or a large skillet over high heat. Add vegetable oil. When oil is hot, add chilies and peppercorns and stir-fry a few seconds. Add shredded cabbage and bell peppers and stir-fry for 1 - 1½ minutes, or until slightly wilted. Add sauce mixture and stir until blended. Place cabbage mixture in a serving dish. Discard chilies and peppercorns if desired. Sprinkle cabbage mixture with sesame oil and serve either hot or cold.
My passion is teaching people how to create a harmony of flavors with their cooking, and passing along my love and joy of food, both simple or exotic, plain or fancy. I continue my journey in ethnic and domestic cuisines, continuing my journey to explore diverse culinary experiences and hopefully to start you on a journey of your own. Join me also at A Harmony of Flavors on Facebook, and Pinterest.


