Translate

Showing posts with label pineapple. Show all posts

Sunday, July 10, 2022

Veggie Kebabs as Main or Side Dish

If you love grilled vegetables, then this is a recipe for you. Whether you are vegetarian, or if you want these as a side dish, they have excellent flavor, both from the marinade and from the grill. 

grilling, kebabs, vegetables, main dish, side dish
Veggie Kebabs

When I made these, I used a mix of vegetables I had selected just for this application, but you can mix and match as you choose, keeping in mind that not all vegetables cook at the same rate. I used tiny potatoes whole, so I first boiled them and then marinated them to use on the skewer just for the added flavor of the grill. I used chunks of fresh pineapple, obviously not a vegetable but it does taste great on the grill! Bell peppers are an easy choice, and multi colored peppers make the kebabs look more visually appealing. I used hunks of portobello for the meatiness, but button mushrooms or cremini mushrooms would also work - or no mushrooms at all if they are not to your taste. Corn is best cut into small rounds across the cob, both for easy skewering and for quicker cooking, as more heat can reach the kernels. Sweet potato also needs a little cooking beforehand to make them soft enough to grill, just being careful not to over cook or they won't stay put on the skewer. I love grilled onion, so the more the merrier, whether white, yellow or red, and cut into wide enough squares to be comparable in width to the other vegetables on the skewer. 
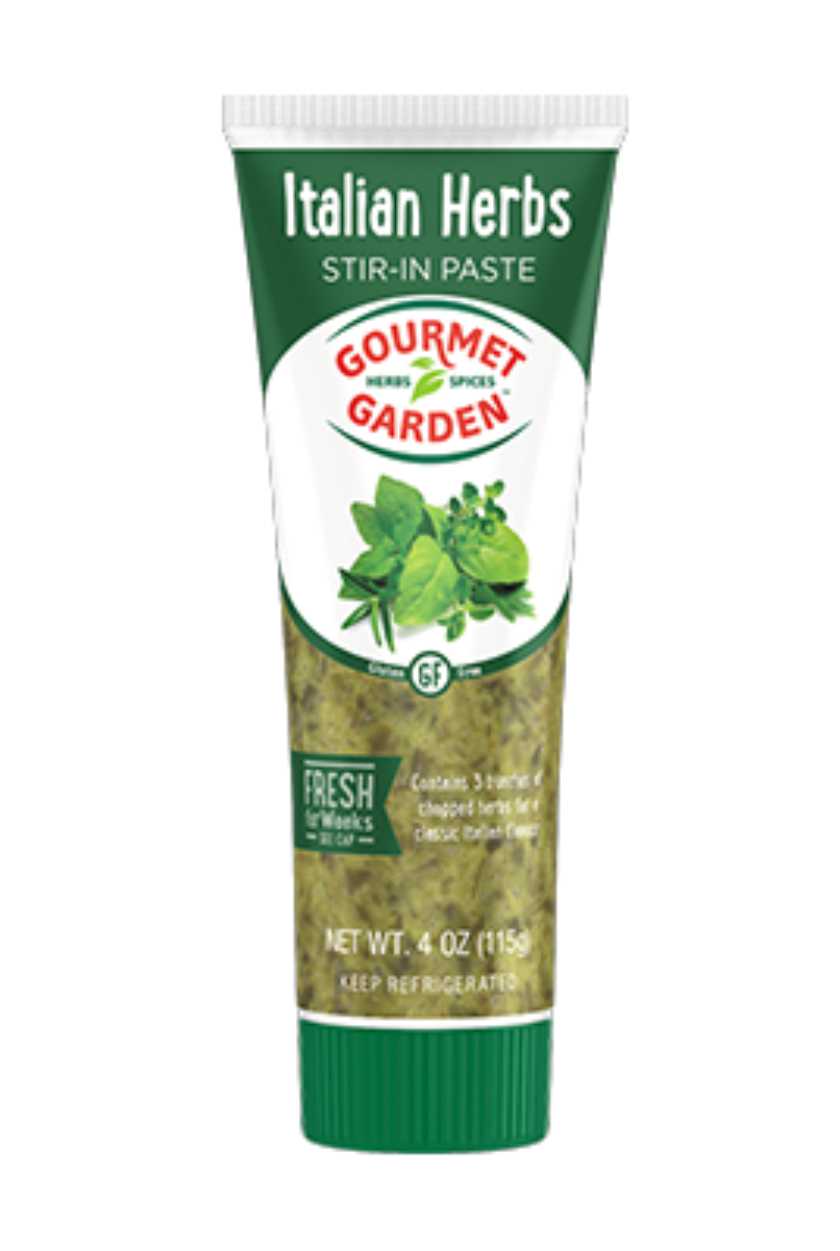
Gourmet Gardens Italian Herbs
I happened to have on hand at the time a tube of Gourmet Garden Italian Herbs. If you have not used this mixture, it is really great to give flavor to all sorts of foods, whether steaks, baked potatoes, mix into a dressing - just use your imagination. Once you've tasted it, you will think of all kinds of things it would enhance. Our friend Rich is a fanatic about this stuff and has it on hand at all times, for stirring into vegetables, adding to sauces, to spread on pizza, whatever strikes his fancy. 

I tried once to make an approximation of this stuff, and it was okay, but somehow fell just short of the mark, for flavor, despite using fresh herbs to create it. The only actual herbs in this mixture listed on the label are basil, oregano, parsley and rosemary, out of 10 total ingredients, so you may understand why I wanted to go that route of making my own. 

👀My suggestion, if you do not have this ingredient, or choose not to use it because of the many "other" ingredients, would be to substitute a tablespoon of minced fresh basil and rosemary with another dollop of olive oil to approximate - as my recipe already calls for oregano and thyme, garlic, balsamic vinegar and olive oil. 

Veggie Kebabs


Makes about 10 to 16 kebabs, depending on size of skewers
grilling, vegetables, kebabs, main dish, side dish, vegetarian
Veggie Kebabs


1 – 2 ears corn, cut into 1½ inch wheels
1 red bell pepper, in 1-inch squares
1 orange bell pepper, cut in 1-inch squares
1 red onion, separated and cut in 1-inch squares
1 zucchini, cut into 1-inch cubes
6 (3-inch) Portobello caps, quartered
15 – 20 tiny 1-inch potatoes, or others, in 1-inch chunks
1 sweet potato, peeled, in 1½-inch cubes
2 cups fresh pineapple, in 1½-inch wedges

MARINADE/SAUCE:
1 teaspoon Kosher salt
1 tablespoon fresh chopped oregano
2 teaspoons fresh thyme leaves
2 tablespoons olive oil
3 tablespoons balsamic vinegar
3 tablespoons Gourmet Garden Italian Herbs 
(or see above ðŸ‘€)
3 cloves garlic, smashed and minced

Place the potatoes and sweet potato chunks into a small pot and cover with water. Bring to boil, adding 1 teaspoon salt to the water, and boil for about 10 minutes, or until they can just barely be pierced through. Drain and rinse under cold water and set aside to cool.

In a bowl, whisk together the Kosher salt, fresh oregano & thyme, olive oil, balsamic vinegar, Italian Herbs paste and garlic. Whisk together and pour over all the vegetables in a large bowl. Toss to coat. Thread the vegetables onto skewers, keeping in mind, if using wooden skewers, they must be soaked for at least 30 minutes before using. When threading the corn, skewer it through the center of the “wheel.” Reserve the marinade aside.

Grill the skewers over a hot grill until they are browned in spots and tender. Brush them with some remaining marinade to serve. Or, remove the vegetables to a bowl to serve, pouring some of the remaining marinade over top.

NOTE: As a party idea, use small wooden skewers, well soaked ahead of time, and thread on just a small few veggies per skewer, Make extra marinade to have for guests to use as a dip or a pouring sauce when serving. As these do not have to be hot for serving, they can be made just slightly in advance, but do not make them so far ahead they need refrigerating, as this significantly changes the flavors.


My passion is teaching people how to create a harmony of flavors with their cooking, and passing along my love and joy of food, both simple or exotic, plain or fancy. I continue my journey in ethnic and domestic cuisines, continuing my journey to explore diverse culinary experiences and hopefully to start you on a journey of your own. Join me also at A Harmony of Flavors on Facebook, and Pinterest.

Saturday, July 18, 2020

Side Dishes for Any Night

I love great flavors. I have actively searched out great recipes from the age of 16, though I never actually cooked back then. I cut out things that sounded interesting and saved them, for that "someday," when I would cook. This happened around age 20, when I got married. However, I married a Guatemalan man and moved to Guatemala, where the food situation was vastly different from my upper midwest upbringing. 

No complaints. Truly. I learned a whole new world of flavors and cooking styles, and these have carried me through all the years since that time. I am grateful for what life handed me. I am grateful for my upbringing (from Mom) that stressed:
"Whenever you visit someone's house and are invited to eat, you must at the very least try each food on the table, whether you like it or not. This is polite."
Boy, did I ever run into a lot of things I had NO inclination to try when I first moved to Guatemala! But I held on to Mom's teaching, determined not to disgrace myself in front of my new family. I am so glad I did, because my palate would not be what it is today. I found out I really did like a lot of things I would have assumed otherwise, had I not tasted them. And that holds true no matter where I have been.

Black Beans, Salsa, side dish, salad
Black Bean Salsa

One of the things I learned to love, truly love, was black beans. Yum, yum, yummy! And my husband of 30 years has finally learned that he loves them as well. With that in mind, many years back, when my husband was still extremely iffy on the eating of black beans, I had made a recipe that I loved, called Black Bean Salsa. It has black beans, which I love, and corn which my husband loves. One can each. I figured we were getting a 50/50 chance of him liking this salad. As it happened, it was a sort of "it's okay, but nothing to write home about" situation with him. Oh well. 

Yesterday I ran into that recipe again, so opted to try it out once more, now that he loves black beans. It was fabulous, flavor wise, and both of us were very happy with the dish as a side to grilled chicken. 

But, you know how sometimes you revisit an old recipe and something just makes no sense? Well, the vast amount of liquids in the mix seemed ridiculous to us both. It is a waste of lime juice and olive oil to put so much into a recipe. The flavors are perfect, but the amounts are off. So this time I am going to post the recipe here, with my updates. It is well worth it. It could also be used as a dip, similarly to "Texas Caviar."


Black Beans, Salsa, salad, side dish, dip
Black Bean Salsa

Black Bean Salsa


Serves 4 to 6

1 (15-ounce) can black beans, rinsed and drained

1 (15-ounce) can corn, drained
1 - 2 medium tomatoes, small cubes
1 (4-ounce) jar diced pimentos
1 (4-ounce) can diced green chilies
1 Poblano pepper, optional
½ cup diced red onion or shallot
1 small clove garlic, finely minced
(½ cup vinegar, optional)
3 tablespoons fresh lime juice
2 tablespoons olive oil
½ cup chopped cilantro, or to taste
½ teaspoon ground cumin
½ teaspoon salt
dried chili flakes, optional, to taste

If using the Poblano, I opted to blister the pepper under the broiler, peel and de-seed, then chop. It makes a nice addition but is not essential.

My husband and I do not handle raw onion well, so I opt to prepare the onion and the garlic, place in a small bowl and cover with the vinegar (listed as optional) for about 10 minutes while prepping the rest of the ingredients. After this time, drain the vinegar well and add into the rest of the ingredients.

Place the drained and rinsed beans, the corn and all the remaining ingredients into a bowl and toss well. Allow to stand for about 20 minutes to meld flavors and serve.


~~~~~~~~~~~~~~~~~~~

This next recipe I wanted to feature is one that some may not like because of the texture. If you love bread pudding or flan, with the soft texture, then you may enjoy this. My family certainly did. It is a recipe given me by a co-worker long, long ago, and it is absolutely excellent with ham. It would also be good with Polish sausage or Brats, or anything you would serve a sweetened sweet potato casserole.  My friend called it Scalloped Pineapple. Not sure of this terminology. Truly Pineapple Bread Pudding would be closer to how this dish comes out. It could certainly be used as dessert. Back in the 1980s, when I first ate this dish, it was made with plain white store-bought bread. If you get creative, it could likely be made better with some other bread, but I am presenting here recipe as it was given.

An old, old recipe I hadn't made in ages, so I have only photos of it made with a loaf of whole grain bread. 


Scalloped Pineapple

pineapple, bread pudding, side dish
Scalloped Pineapple


Serves 4 to 6

3/4 cups sugar
1 stick unsalted butter, room temperature
2 eggs
8 slices white bread (or whole grain)
1 can (20 ounces) crushed pineapple with juice
- more butter for the bread

Preheat oven to 350 degrees. Butter each slice of the bread, stack then and cut into cubes. Place the bread cubes into a 9 x 9-inch casserole dish.

Cream together the stick of room temperature butter with the sugar. Add in the eggs, one at a time and beat well. Dump in the whole can of pineapple with juice. At this point the mixture will look completely curdled and unappetizing. Have faith and carry on. Once the pineapple is well mixed in, pour this mixture over top of the bread cubes in the casserole and bake for about 45 minutes, or however long it takes to turn a nice golden brown on top.


~~~~~~~~~~~~~~~~~~~

Another oldie but goodie of a recipe is one I found back in the 1980s in a Southern Living Annual Cookbook. At that time I was still young enough not to suffer from too much sodium (from too many canned veggies), and this was an easy salad, it made plenty, so having family over for dinner was a snap. These days I might do some things differently, like cook my own green beans, keeping them bright green, using fresh herbs. I am presenting my own methods here.

This oldie of a recipe was made so long ago that I have no photos.


Marinated Vegetable Salad


Serves 8

2 good handfuls of fresh green beans
1 can (15-ounce) kidney beans, drained and rinsed well
1 can (7-ounce) pitted ripe olives, drained
1 jar/can (6 - 8 ounce) sliced mushrooms, drained
1 can (14-ounce) artichoke hearts, drained, quartered
1 jar (4 ounces) sliced pimentos
1 large shallot, thinly sliced
1½ cups celery, sliced thinly
1 tablespoon capers
-----
DRESSING:
¼ cup tarragon vinegar
¼ cup olive oil
1 teaspoon sugar
1 tablespoon parsley, finely minced
2 teaspoons chives, finely minced
2 teaspoons fresh thyme leaves, stems discarded
½ teaspoon freshly cracked black pepper

Snap off ends of green beans, cut into 1-inch lengths and steam just until crisp-tender and still bright green, 5 to 8 minutes. To stop cooking and keep bright green color, plunge them into ice water for a few minutes, then drain well.

Place the green beans and the next 8 ingredients into a mixing bowl. Separately, whisk together the vinegar, olive oil, sugar, herbs and pepper, then pour over the vegetables in the bowl and toss well. The salad is best if allowed to marinate overnight.


My passion is teaching people how to create a harmony of flavors with their cooking, and passing along my love and joy of food, both simple or exotic, plain or fancy. I continue my journey in ethnic and domestic cuisines, continuing my journey to explore diverse culinary experiences and hopefully to start you on a journey of your own. Join me also at A Harmony of Flavors on Facebook, and Pinterest.

Wednesday, September 20, 2017

Remembering Mom with a Pie

When I was 4 years old, we moved to the house where my family would live until I was 17 years old. When I look back to that house and its fantastic yard, I can only marvel, because it was a little piece of paradise. Someone, prior to our family, took the time to really plant the yard with an eye to beauty and bounty. Some plants I grew up with are ones I have never seen again, anywhere I have been. Some, I am still discovering what they were, or might have been. The lot was large, and sloped dramatically down to a huge back yard (huge, to me). My Dad grew up on a farm, and had farming blood, so he took fully half that big back yard and turned it into a garden. He planted vegetables, and tried all sorts of things, but we always had corn, spring onions, tomatoes, green beans, beets and other of the usual veggies. And he would try out things we'd never had. He had a huge strawberry patch. But that is only the merest beginning of all that yard had to offer. 
Dad, Tilling, Garden, 1955
Dad Tilling his Garden 1955

Aside from the amazing array of flowers and flowering bushes, the back yard had fruit. Lots of it. There was a Rainier cherry tree and a Montmorency cherry tree, two Bartlett pear trees that ripened just as school started and a plum tree with green plums that were so sweet it was amazing. Dad would store baskets and baskets of them, carefully packed, to last into Fall and Winter. There was a peach tree and three different apple trees, a quince tree, elderberry bushes, concord grapes and some green grapes, blackberries, black raspberries and an absolutely huge red raspberry stand. And there was rhubarb.

My Mom was kept busy all summer long canning, making jams and jellies, preserving fruits and vegetables. Quince and elderberry jams were common, among all the others: raspberry, black raspberry, strawberry, cherry. When my parents finally bought a large standing freezer, Mom started freezing some of the fruits and vegetables, too. And yet with all the activity around all the fruits and vegetables, the one and only thing I recall my Mom using the rhubarb for was a Rhubarb Pineapple Pie (with raisins). Since the rhubarb stand was sizeable, this is rather surprising, but I was certainly old enough to recall another kind of use for rhubarb, had there been one.
 
Rhubarb, Pineapple, Pie, recipe
Rhubarb Pineapple Pie

But regardless, this pie was always a hit at our house. Of course, Mom used canned pineapple back in those days, when having every kind of fruit or vegetable from anywhere in the world was not always the case. I do not believe my Mom ever bought or used a fresh pineapple in her life. But, when I moved to Guatemala, I had the exact opposite experience. Fresh pineapples abounded. Canned pineapple was terribly, prohibitively, expensive. I had one "Fresh Pineapple Pie" recipe, and at age 20 I really was barely starting out on my cooking and baking journey. 

Rhubarb, Pineapple, Pie, baked, recipe
Rhubarb Pineapple Pie, just baked
I was asked to make a couple of pies to donate to the Dacotah Prairie Museum's Fall Festival this coming Saturday, for their "Pie Social." I will be out of town, visiting my son that day, so they said to just freeze them. I have never, in all my years, frozen a pie, so I have no idea how they will be once thawed, but I decided to make a Rhubarb Pineapple Pie as one of my pies. Looking back through my blog and website, I realized that despite having made this pie myself, many times, somehow I had never gotten it into blog or website, so I am rectifying that right now! 

I had plenty of pineapple, after cutting up a whole, fresh pineapple, and I had plenty of rhubarb, so I made two Rhubarb Pineapple Pies; one to donate and one to take photos of and eat. It really is the most amazingly good pie, and canned pineapple is perfectly fine to use. Just drain a can of pineapple chunks; you will need 2 cups worth.

I don't know why some pies are generally made with flour or cornstarch as the thickener, and some are made using tapioca as the thickener, but this Rhubarb Pineapple Pie was one of the tapioca thickened variety, always. The colors are so pretty with the bright yellow pineapple and pink rhubarb, and then punctuated with a dot of a raisin here and there. I am not generally a fan of raisins cooked in things (I like them fine straight from the box or bag), but this pie just seems great with the addition of raisins. You can leave them out, if preferred. 

Most everyone I talk to about rhubarb pies will say that they have always made or eaten Rhubarb Strawberry Pie. I had never heard of this phenomenon before, and to this day I have yet to try it! Plus, I am not overly keen on strawberries. I know, call me weird and strange! But still, somehow that combination has never crossed my path.

Rhubarb Pineapple Pie
Rhubarb, Pineapple, Pie, recipe, dessert
Rhubarb Pineapple Pie


Makes one 9-inch pie

2 cups pineapple (fresh or canned, drained), diced
2 cups rhubarb, sliced ¼ to ½-inch
¾ cup raisins
3 tablespoons quick-cooking tapioca
1¼ cups sugar
Dash of salt
2 tablespoons butter to dot top of pie
2 crust pie pastry for 9-inch pie
Milk or cream, for brushing
Sugar, for sprinkling

Combine the cut fruits in a large bowl and add in the tapioca, sugar and salt. Stir well and set aside to rest for 15 to 30 minutes.

Roll out half the pie pastry ⅛-inch thick and fit it into a 9-inch pie plate, easing the pastry well down into the plate, and leaving at least ½-inch of overhang. Preheat oven to 400 degrees.

Roll out the second pastry to ⅛-inch thick and begin cutting long strips (width is optional - I cut one-inch wide strips for the rhubarb pineapple pie) from the rolled dough. Pour the fruit filling and all the juices accumulated into the pie shell. Cut the 2 tablespoons of butter into small chunks or slivers and dot the top of the filling.

Begin making the lattice top by setting the strips in one direction across the filling, leaving enough overhang to set to the outer rim of the pie plate, as shown below.
Making a lattice top pie crust
Lift back past halfway every other of the strips, then set one long strip perpendicular to the others, right across the center. Pull back into place the strips that were lifted, then pull back all the strips that were not lifted initially, and lay a second strip parallel to the last one. Return the lifted strips into place and repeat until strips reach the end, then begin again on the opposite side, to fill in the lattice. See this blog to view the remainder of the instructional photos on lattice top pie.
Filling, Lattice Top, Baked Pie
Filling - Lattice Top in place - Baked Pie
Once all the strips are in place, have a small bowl of water handy and using fingers or a pastry brush, dampen underneath each of the strip's edges, so they adhere to the bottom pastry around the rim. Now flip up the bottom pastry's overhang, to cover the strip edges. Flute the edges, pressing firmly so the fluting holds all the edges securely.

Optional: Brush all the lattice strips with the milk or cream, then sprinkle sugar over the lattices. Bake the pie in the center of the oven for 45 to 50 minutes, until browned and bubbling.


My passion is teaching people how to create a harmony of flavors with their cooking, and passing along my love and joy of food, both simple or exotic, plain or fancy. I continue my journey in ethnic and domestic cuisines, continuing my journey to explore diverse culinary experiences and hopefully to start you on a journey of your own. Join me also at A Harmony of Flavors on Facebook, and Pinterest.

Saturday, October 24, 2015

Fruity Sides for Jerk Chicken Meal

I have no background anywhere near the Caribbean, but it is hard to think Jerk Chicken (or pork or lamb) without the thought of tropical fruits coming to mind. When I made up my Jerk Marinade recipe recently, I also wanted something appropriately Caribbean to accompany the meat.

Grilling, Pineapple, Mango, Salsa, side dish
Grilled Pineapple Mango Salsa

My first thought was some sort of fruity salsa; maybe something with mango, green pepper, some chilies and lime juice. The more thought I put to this, the more I recalled seeing pineapple grilled and with the char marks from the grill, and my mind went in that direction. In the end, I grilled both some sliced pineapple and some mango slices and both went just perfectly together with the other salsa additions. 

Keep in mind that to grill mango, the fruit must be just a little firm. Too soft and it is difficult to keep the fruit together just to eat, and far less so if placed on the grill. For this salsa, try and select a mango that is still quite firm; not too green and not too ripe. While I wanted this salsa to accompany the grilled Jerk Chicken, it would also be quite at home at a party with some tortilla chips alongside. In the end, this is what I concocted as my salsa. 

Grilled Pineapple Mango Salsa

Grilling, Pineapple, Mango, Salsa, side dish
Grilled Pineapple Mango Salsa
Makes about 2 cups

1 good-sized mango, slightly under-ripe
½ fresh pineapple, peeled, sliced 
1/2 cup pickled or fresh red onion, chopped
1 red bell pepper, chopped (about ¾ cup)
1 hot pepper of choice, minced
1 small tomato, seeded, chopped (about ½ cup)
½ cup fresh cilantro, chopped
juice of 1 lime (about 1½ to 2 tablespoons) 
1 jalapeno, minced (more, if desired) 
½ teaspoon salt, or to taste

Heat a grill to high and quickly grill the mango slices and pineapple slices until they acquire nice char lines on either side. The goal is to sear them, but not necessarily cook through.

Once grilled, cut the pineapple and mango into small cubes and place them in a mixing bowl with the remaining ingredients. Toss all ingredients well and taste for seasoning.

Now that I had a salsa I was pleased with, I gave thought to another side dish, and of course rice seemed the most appropriate. To give another nod to the Caribbean flavors I was looking for, I used more of the pineapple I had grilled and added this to the rice as it cooked, along with other similar ingredients to the fruit salsa. 

Caribbean flavors, Rice, side dish
Caribbean Rice


I have never, ever had difficulty with making rice, though I hear and read often that others have lots of difficulties with making it. I don't have any idea why I have never had problems making rice, but this is the recipe I created, and it came out beautifully light and fluffy and full of flavor.

Caribbean Rice

Serves 4 to 6

1 cup white rice (I used Basmati)
1 cup fresh pineapple, grilled
¾ cup chopped red bell pepper
½ cup scallions, chopped
1 teaspoon salt
1 tablespoon cooking oil or coconut oil
2 cups water
1 cup frozen peas
¼ cup fresh cilantro, minced

In a medium saucepan, combine the rice, pineapple (cut into small cubes), red bell pepper, scallions, salt, cooking oil and the water. Bring to a boil, reduce heat to low and cover tightly. Time for 15 minutes, at  which point the rice should be cooked and fluffy. Add in the frozen peas, give the whole mixture a quick toss with a fork, then cover and turn the burner off, allowing the peas to heat through while keeping their bright green color. Before serving, add in the cilantro and stir. Serve immediately.

About Plantains

To round out the fruity flavors of this meal, I also opted to fry a plantain and serve alongside. To those who might know nothing of plantains and be afraid to use them, here is a little guidance:

Plantains are related to bananas, but are far more starchy and need to be cooked to be edible. They may be eaten while still quite green, in which case they have no particular sweetness and can be used as a vegetable. Partially ripe plantains will be yellow, but they are still quire firm. There is more sweetness developed in the fruit at this point and these plantains may be cooked and used as a slightly sweeter side dish, as with sweet potatoes, or they may be sliced and fried. As they cool from cooking, these partially ripe plantains will become rather unpalatably firm, so eat them while warm. Very ripe plantains will have turned nearly completely black. At this point in ripeness, the plantain is very sweet, cooks quickly and easily, and is wonderful used in more of a dessert category.


Green Plantains
Green Plantains
"Green" plantains can be green, or already turning slightly yellow, but still quite hard. Green, they are harder and dryer and look much like a very large green banana. Look for plantains that have slightly rounded ridges. Too sharp ridges indicate the plantains were picked far too green. They may be cooked in plain water, until tender enough to pierce with a fork, as for potatoes. Serve them cooked this way or try a recipe for "Tostones", a Puerto Rican (and many other Caribbean countries) dish that makes great use of the green plantain. For Tostones, the green plantain is peeled and then sliced across into about 1-inch thick slices. The slices are fried in oil until golden on each side, then removed from the pan, blotted dry and smashed flat. These flattened discs are returned to the pan and fried once more until golden and cooked through.

Medium Ripe Plantains
Medium ripe plantains are nicely uniform yellow. At this point they will look like very large ripe bananas, but are still harder than a fully ripened plantain and while sweeter, they will not yet have full sweetness. These plantains can be used either as a part of a meal or as a dessert. They can be grilled while still in their skins, until they are soft completely through, then skins are removed and they can be eaten this way. 

Fully Ripe Plantains
Fully ripened plantains are nearly or all blackened. They should be quite soft to the touch, though nothing at all like a blackened banana. They retain enough firmness to easily peel, slice and cook them, but now the full sweetness comes through and they will retain the cooked softness more easily once cooled. They may still be cooked in water and used as a side dish, only now with more natural sweetness. These ripened plantains are wonderful as a simple dessert. Peel them and fry them whole, or slice lengthwise and fry, sprinkling them with a little cinnamon and sugar towards the end of cooking. Serve with sour cream. A Guatemalan dessert of Rellenitos de Platano is a perennial favorite at our house. 


My passion is teaching people how to create a harmony of flavors with their cooking, and passing along my love and joy of food, both simple or exotic, plain or fancy. I continue my journey in ethnic and domestic cuisines, continuing my journey to explore diverse culinary experiences and hopefully to start you on a journey of your own. Join me also at A Harmony of Flavors on Facebook, and Pinterest.

Wednesday, July 15, 2015

Fermented Beverages are Added to the Growing List

Lately I am all about fermenting, and finding out more and more, daily. It appears there is almost nothing that cannot be fermented, adding amazing probiotics to the system. A couple of weeks ago, when cutting up a pineapple to use in a fruit salad, I kept aside all the outer peels and the core of the pineapple (without the green top). I saved them in the fridge for a couple of days, until I had time, and then placed these leavings into a large jar. I added in a cinnamon stick and then dissolved ½ cup of honey into about 6½ cups of water and poured this over the pineapple leavings. I screwed the cap on, loosely, and set the jar in a dark corner of the kitchen.

When fermenting something sweet like this, it is highly important to stir the mixture very often, (I stirred about 4 times a day), in order to keep any molds from forming (as the fruit floats and is exposed to air). The liquid is very sweet, and the fruit is sweet, so the ferment can go on to creating wine, if left unchecked, but for an amazing lightly effervescent beverage, it is ready in about 2 to 5 days, depending on how warm it is in the house.

Since I cannot get my husband to eat either my wonderful fermented sauerkraut or the fermented piccalilli I am loving so much, I figured one sure way to get some probiotics into his diet is with a beverage. When stirring the mixture daily, check it from the time it starts to exhibit myriad tiny bubbles at the edges of the jar. The ferment has begin at this time, and where to stop it will depend on your taste buds. I waited until I could actually feel that tiny bit of effervescence going on - not much, as I didn't want it alcoholic - but just enough to make it interesting. This happened at about 5 days in my kitchen. I strained off the liquid and put it into a container with a pour spout and gave it to my picky man. He loved it! 

For my next magic trick, I decided to use strawberry tops. If you are one of those who still uses a strawberry huller to pull out just the green calyx and core of the strawberry, then this will not suffice. However, if you, like me, just cut right across the top of the berry, to save time, then keep those strawberry tops with that little bit of fruit still attached! My second fermented beverage for my husband was a Strawberry Ginger Spritzer. Pretty much any fruits and peelings can be used this same way, changing out spices or other flavors as desired.

Strawberry, Ginger, Spritzer, ferment
Strawberry Ginger Spritzer

Strawberry Ginger Spritzer

Makes 7 cups
Takes about 2 to 5 days, depending on temperatures

1 pound strawberries: tops cut off (use the berries for something else)
4 or 5 strawberries, sliced
5 slices fresh ginger, with skin on
pinch salt
6½ cups filtered water
½ cup sugar or raw honey

Place the strawberry tops, sliced berries and ginger slices into a large glass jar, capable of holding at least 7 - 8 cups liquid. Stir together the water and honey or sugar until dissolved, and pour this over the fruit in the jar. Cover loosely with a lid (gases will build as the mixture ferments), or cover with a cloth, towel or cheesecloth, held on with a rubber band to discourage flies, fruit flies or other insects. Allow this mixture to ferment, stirring well 3 or 4 times a day with a wooden spoon or silicone spatula. 

Keep an eye out for tiny bubbles forming around the top of the liquid. Using a clean spoon, taste once this fermentation begins. If it is not at all fizzy, wait another day or two or until it begins to have a tiny bit of fizz happening on the tongue. Once it is fermented to taste, strain the liquid into a glass or plastic jar and refrigerate. Keep in mind that the fermenting may still continue in the fridge. Keep the lid loose.

Then, as I was reading about Beet Kvass everywhere lately, and I just happened to have 2½ beets in the fridge (having used 2 slices in the making of the Fermented Pink Onions a few days prior), I thought I had best find out what all the to-do was about. Beet Kvass is an Eastern European beverage, obviously made with beets, very popular in Russia and the Ukraine, among other places. It is fermented to taste and then the beverage is either drunk as is, for its tonic qualities (a VERY long list!), or added to soups or stews. The beets, once fermented, may be used for a secondary ferment. After that, they are either discarded, composted, or added to soups or stews. Waste not...

I love beets, when they are cooked. Raw, I have found, I am not fond of them at all, plus they make my throat feel raw and scratchy. So, I avoid raw beets! So with this Beet Kvass, I was very, very leery of how the taste might be, as the beets are not cooked, but only fermented. I needn't have worried. I guess I should know better by now that once a food is fermented the flavor profile is so different it is hard to believe. This tonic has salt added, making it a brined beverage. After tasting it at 3 days, I find I am eager to leave it fermenting for longer, to see where it goes. It can become very sour. When to stop is up to individual taste. It can be fermented for up to a month, if the flavor is acceptable. Sally Fallon, in Nourishing Traditions, says:

“This drink is valuable for its medicinal qualities and as a digestive aid. Beets are just loaded with nutrients. One 4-ounce glass, morning and night, is an excellent blood tonic, cleanses the liver and is a good treatment for kidney stones and other ailments.”
The recipe for Beet Kvass is just about identical wherever you find it, with the main difference falling in the amount of time to ferment. Some people say two days. Sandor Katz talks of up to a month. As I say, taste and see where you prefer the flavor.

The other main controversial topic is to use whey or not to use whey. Whey (obtained from placing plain, unflavored yogurt into a coffee filter lined sieve and drained until reaching the amount needed, usually 1/4 cup) is used as a "starter" much as a sourdough starter gets fermentation rolling in bread. It will jump start the fermentation process and the time it takes will be less, if you are in a hurry. The flip side is that slower fermentation allows the formation of many more strains of lacto-ferments to form, making a more potent and healthful tonic. I chose not to use whey in this ferment. When eliminating the whey, more salt is needed. Salt is used to keep bad bacteria at bay until the ferment begins. Once fermentation begins, then any unwanted bacteria will be killed off in the fermentation process. I basically used the recipe from Wellness Mama, http://wellnessmama.com/9087/beet-kvass-recipe/, but here it is, without whey and with more salt.

Beet Kvass

Beet Kvass, ferment, beverage
Beet Kvass
Serving size 3 - 4 ounces, twice daily
Makes about 2 quarts

2 - 4 beets, scrubbed well, cut in ½-inch cubes
4½ teaspoons coarse sea salt or Himalayan Pink Salt
7 cups filtered water

In a jar large enough to hold at least 2 quarts, place the beets and salt. Cover these with the filtered water and stir to dissolve the salt. Cover the jar loosely with a lid, or top with a cloth held in place with a rubber band. Keep out of direct sunlight. Stir daily 1 - 2 times. The beets will float, and molds might form if not moved enough.

Once the flavor is to taste, strain off the liquid, leaving at least ¼ cup of the already fermented liquid in the container. Add salt and water again for a second batch and stir well. The fermented liquid acts as a starter, already having the strains of good bacteria in it to help things along. Refrigerate the finished Kvass.  

Some additions, if desired: carrots, fresh ginger. 


My passion is teaching people how to create a harmony of flavors with their cooking, and passing along my love and joy of food, both simple or exotic, plain or fancy. I continue my journey in ethnic and domestic cuisines, continuing my journey to explore diverse culinary experiences and hopefully to start you on a journey of your own. Join me also at A Harmony of Flavors on Facebook, and Pinterest.

Friday, May 9, 2014

Recipe Revision and a Great Fruit Salad

I have been asked to do a cooking demonstration for the local museum in late June. The title of the class is "Summer Patio Brunch". I looked up brunch recipes a couple of months back when I was first approached about this and came up with some things I felt at the time were good ideas. And - they probably are good ideas, but things happened and ideas changed.
Ham, Blue Cheese, Bread Pudding
My Original Ham & Blue Cheese Bread Pudding


First, I had created a Ham and Blue Cheese Bread Pudding one day recently and it came out so good that I decided this would also be a very suitable brunch (or even breakfast) dish. Much can be done ahead, making it wonderful if you have friends or family coming over. Any time things can be made or partially prepped ahead makes entertaining so much more fun. Thinking about the Ham & Blue Cheese Bread Pudding, I decided to make it a simpler recipe, using more common ingredients that might please more people. I substituted regular black pepper for the pink peppercorns, I used Feta cheese instead of Blue, and I used white raisins instead of currants, though regular raisins would also work perfectly. Otherwise the recipe is the same as the one from April 29th.
Ham, Feta, Bread Pudding, White Raisins
Ham & Feta Bread Pudding with White Raisins

I had thought about cheeses that would substitute well in that recipe and my first thought was Gruyere. Unfortunately, the only Gruyere available locally now costs over $13, so I scratched that idea, though I still think it may have been the very best flavor pairing. Of course, cheddar would work perfectly, and who doesn't like a nice cheesy casserole with cheddar cheese all melty inside? It just occurred to me that a nice Hollandaise Sauce drizzled over the bread pudding would really make it a classy brunch.

Then I got thinking about something to serve along with the Bread Pudding. I had found a recipe I wanted to toy around with, but it just happened that evening Bobby Flay did a fruit and vegetable salad in his Brunch @ Bobby's program. I did not pay attention to the "recipe", nor did I look it up. But I did really like the sound of the combination. He used Cantaloupe, Mango, Pineapple, Jicama, Cucumber and Strawberries. I kept that combination in mind when I made a salad of these ingredients. I need to have exact measurements to give the class, so I decided to make things really easy and use 1 cup of each fruit or vegetable. I dressed the fruit and veggies with a little salt and lime juice and a chiffonade of mint. I invited my sister-in-law over and we taste tested. It was good, so i will be using these recipes for the class. These ingredients are guidelines. Other things could be added or substituted. I think Green peas would be great in here, as well as fresh, raw asparagus. Switch a few things out. Blueberries would be great. Just run with it! As for the portions, I counted 1 cup as a portion. If you need more servings, or larger servings, just multiply accordingly.

Fruit and Vegetable Salad


Makes six 1-cup portions
salad, pineapple, mango, cantaloupe, strawberries, cucumber, jicama
Fruit and Vegetable Salad


1 cup fresh pineapple chunks
1 cup fresh mango slices
1 cup cantaloupe balls
1 cup strawberries, halved
1 cup cucumber, sliced
1 cup jicama, in matchsticks
¾ teaspoon salt
3 tablespoons lemon or lime juice
1 - 2 tablespoons fresh mint chiffonade

Combine all the fruits and vegetables and toss with the salt, lemon or lime juice and the mint. Serve immediately.

DO AHEAD: If you are having a summer brunch and need to plan things ahead so you are not up at the crack of dawn prepping, consider cutting the pineapple the day before and storing in a lidded container or zip-top baggie in the refrigerator. Likewise prep the cantaloupe balls, mango slices and jicama and refrigerate each separately. On the morning of serving, prep the cucumber and strawberries, juice the lemon or lime and chiffonade the mint. Set all these aside and combine the ingredients no more than 30 minutes ahead for best freshness. 
 
fresh pineapple, how to cut
Cut off top and bottom - slice off outer skin - peeled pineapple - slice off fruit on either side of core - core in the center

When I was creating hand-out recipe sheets for these recipes, I was also thinking about many people's unfamiliarity with cutting up a jicama, pineapple or mango. Many people still have never done these things, so I was taking quick shots with my phone while I prepped, to demonstrate how it is done. Above is a sequence showing the cutting of a pineapple. I will be demonstrating this in person at the Summer Patio Brunch event, but  even when it is seen, having photos at hand help for a novice. I certainly appreciated photos when I was first learning to cook.
mango fruit, peeling, cutting
A Mango - peeling - cutting along seed - the narrow seed - the component parts

Mangoes have become more common these days, but if one has never had one in hand, it is good to know that there is a rather large and flat seed inside. When cutting the fruit, this seed needs to be kept in mind. And then there is the jicama. 
 
how-to, cutting, peeling, jicama vegetable
Jicama - cut in half - peeling the skin off

If you have never had jicama, it can be as small as an orange or as large as a small melon. It is a vegetable with a thick skin that must be removed. If it cooperates, a small cut at one end will allow the skin to be pulled off. Use a potato peeler for any stubborn spots. The jicama flesh is somewhat juicy and very crisp. To me, the flavor is reminiscent of fresh green peas, though I have heard many descriptors for its flavor. It makes a wonderful addition to a veggie tray with a dip alongside. It also is wonderful as a scoop for hummus.

Try out these recipes together; they make a most lovely meal, whether breakfast, brunch or dinner.


My passion is teaching people how to create a harmony of flavors with their cooking, and passing along my love and joy of food, both simple or exotic, plain or fancy. I continue my journey in ethnic and domestic cuisines, continuing my journey to explore diverse culinary experiences and hopefully to start you on a journey of your own. Join me also at A Harmony of Flavors on Facebook, and Pinterest.

Disqus