Translate

Showing posts with label chicken recipe. Show all posts

Friday, November 6, 2020

Another Great Dinner with Chicken and Hummus

I started this blog yesterday, and somehow it vanished overnight, so here it goes again! 

I had decided to cook a pound of chickpeas with the intent of making hummus. It took about 2.5 to 3 hours to cook them. It seems it shouldn't have taken that long for them to get soft after being soaked overnight, but maybe they were older than they should have been. Who knows? Eventually they did get soft, and I made hummus with all but a cup of them. 

To Make Hummus with freshly cooked Chickpeas

Hummus (click for my original recipe)! Yum! With a whole pound of cooked chickpeas, it takes more of the other hummus ingredients than what is stated in my recipe, which uses just one can of chickpeas. While a whole pound of dried chickpeas cooks up to a lot more than two cans worth (double the original recipe), I have gotten by with using double the amount of the tahini, lime/lemon juice, garlic and olive oil from my recipe. I do not cook my chickpeas with any salt at all, as salt is said to toughen the beans, making them harder to get cooked through properly. More salt will be needed, but as an individual preference, it's best to add a teaspoon, taste and adjust as needed.

Hummus from Scratch

hummus, scratch recipe, garbanzo beans, cooking garbanzo beans, chickpeas
Freshly Made Hummus


Makes a large amount, possibly 8 cups!

1 pound dried chickpeas, soaked overnight
-----
drained cooked chickpeas, cooking water reserved
4 cloves garlic, minced
6 tablespoons tahini
1/2 cup freshly squeezed lime or lemon juice
1/2 to 2/3 cup good quality olive oil
1 teaspoon salt, more if needed

To cook the chickpeas: Drain off the soaking water
, place the chickpeas in a large pot, cover with water by about 1 inch and bring to boil. Reduce to a simmer, cover and cook them until soft, anywhere from 2 to 3 hours, depending. This time they took a full three hours, possibly the chickpeas were old  Once cooked through, pour the chickpeas into a colander set over a bowl to catch the cooking water. Keep this water aside.

Pour the cooked, drained, cooled chickpeas into a food processor. Add in the tahini, lime juice, garlic and a cup of the cooking water and process until very smooth. Add in the olive oil in a thin stream, while processor is running, to incorporate. If the mixture seems soft, you may not need all the olive oil. If you've used all the olive oil and the mixture is too stiff, add more of the cooking water, until you have a good consistency. Check for salt, adding more if needed. Will keep in the fridge, well-covered, for a couple of weeks.

~~~~~~~~~~~~~~~~~~

Okay, I had the hummus made, and it was delicious! Then I started thinking about dinner, and had absolutely nothing planned. Nothing was coming to mind. I started thinking about chicken, mainly as it cooks quickly. And that was as far as I got. So I wondered if there was anything to do for dinner that would incorporate hummus and chicken? I went online.

parsnip, carrot, beet, marinade, roasted veg
Veggies to Roast
What came up that interested me was hummus bowls. The first site I came across was one from No Spoon Necessary, and the recipe is called Easy Chicken Hummus Bowls. I was enchanted by the photos, with everything arranged so prettily and all the things in there that I love: tomatoes, cucumber, Feta, olives. Mmmmm-mmmm! However, two problems: 1) I was at the tail end of my groceries. Almost no fresh anything left in the house, though by some fluke I still had some Feta!! 2) My husband wouldn't touch, fresh tomatoes, cucumbers or olives with a 10-foot pole anyway. 

Okay, so how to get around that issue? I thought I would oven roast some veggies that I did still have: yellow beet, shallots, green pepper, parsnip and carrot. Hubby's not keen on parsnips or carrots, and "hates" beets. This beet was yellow, so he didn't realize it was in there, and he does seem to eat mixtures like this if they are well flavored. Okay. Check.

That recipe idea in No Spoon Necessary called for cooked chicken and then a dressing is poured onto it for flavor. I was more of a mind to either pan saute or roast the chicken breasts I had gotten out. So, I went on searching to see what else was out there, so the next place I came to was called Plays Well with Butter, and her recipe is called Grilled Chicken Shawarma Hummus Bowls. I loved the idea of all the spices on the chicken marinade, and the chicken is grilled in that recipe. It was still in the high 90s outside and I just had no desire to stand out in that heat over the grill. I opted to roast the chicken and the veggies. 

chicken, hummus, Feta cheese, roasted vegetables
Shawarma Chicken and Vegetables with Hummus

All I can say is, tail end of groceries notwithstanding, this dinner was just fabulous! I did add olives to my bowl. My husband ate his without. But it was a dinner full of sighs and moans of pleasure. So, thanks to those out there with great ideas.

Shawarma Chicken & Vegetables with Hummus


Serves 4
chicken, roasted vegetables, Feta cheese, hummus
Shawarma Chicken & Vegetables with Hummus

2 large boneless, skinless chicken breasts

MARINADE:
3 tablespoons olive oil
3 - 4 cloves fresh garlic, minces
2 teaspoons honey, optional
1+ tablespoons lime juice
1/2 teaspoon crushed cumin seeds
1 1/2 teaspoons smoked paprika
1 1/4 teaspoon ground cinnamon
1/2 teaspoon dried oregano leaves, crushed
1/2 teaspoon turmeric powder
1 teaspoon salt
1/2 teaspoon freshly ground black pepper
1 teaspoon sumac, optional
1 teaspoon zah'tar, optional
1 tablespoon grated fresh ginger
------
VEGETABLES: (or substitute others - root vegetables are great)
1 medium yellow beet (or red if preferred), peeled, 1/2" cubes
2 large shallots, in 1/2" chunks
1 green pepper, cut in 1/2" pieces
1 large parsnip, peeled, cut in small cubes
1 large carrot, peeled, cut in small chunks
-----
For SERVING:
  • hummus, whatever kind preferred
  • Feta cheese
  • olives of choice, optional
  • Fresh tomato and cucumber, if desired
  • Shawarma Chicken and Vegetables

Preheat oven to 400 degrees. Spray a 9 x 13-inch baking dish with cooking spray and set aside.

Make the marinade by whisking together all the marinade ingredients. Set aside. Slice the chicken breasts in half across the width, so you have two, much thinner, filets. Slice across the thin pieces, making 1/2-inch-wide strips. Place the chicken strips in a bowl and pour on half the marinade mixture and mix well. Cover and let stand.

Set the prepared vegetables into the remaining marinade and toss well. Pour the vegetables into the prepared baking dish and bake the vegetables for 30 minutes, stirring once halfway through. At the end of 30 minutes, remove the baking dish from the oven, pour on the chicken pieces with the marinade, arranging the pieces into a single layer over top. Return to oven and bake for about 20 minutes more, until vegetables are tender and chicken is cooked through.

To serve - per bowl: Place a good-sized dollop of hummus into a bowl, smearing to one side. Spoon on 1/4 of the chicken and vegetables per bowl. Sprinkle on Feta cheese, crumbled. Optionally, add in olives, fresh chopped tomatoes, cucumber slices, to taste.


My passion is teaching people how to create a harmony of flavors with their cooking, and passing along my love and joy of food, both simple or exotic, plain or fancy. I continue my journey in ethnic and domestic cuisines, continuing my journey to explore diverse culinary experiences and hopefully to start you on a journey of your own. Join me also at A Harmony of Flavors on Facebook, and Pinterest.

Saturday, May 30, 2020

Overlooked Recipes

I put a stop to my website as of last September. I had been steadily working to add in to this blog all the recipes that had previously only been posted on the website, but inevitably, some get overlooked. I want to post three I discovered I had missed.

I have been horribly lax with working on my blog, or putting out a newsletter, or even cooking much of anything new. Why? I got into a project and it has occupied all my attention and interest for months, now. I periodically like to put together "books" with comb bindings for myself or for family. Often these are cookbooks of collected recipes for a family member, as well as being a quick reference for me. Sometimes I have dedicated myself to identifying flowers (as after a trip to California, with a slew of flowers I'd never seen before, living in the east) and making a small booklet, so I have them as a reference. I have done this with birds, using my own photos as well as photos my sisters had taken. We love birds. That book was immense, and it is in a large binder. Another was butterflies. Most often it has been recipes just because I love to cook.
Cactus Flower
Cactus Flower

The one that has occupied my time these past three months or so has been any and all plant photos taken in Arizona. I had visited AZ a fair bit in past, as one of my sisters lives here, but really never thought to live here myself. But, here I am, and now I am seeing cactus plants and wondering what kind they are, or other plants in general. While some seemed very straightforward, having been labeled, others not so much. And I have spent countless hours researching online. The last in a long line of plant types are succulents, and soon I will be wrapping up this project. I still have orphan plants I cannot identify, no matter how long I search. Alas. 

So back to these missed recipes. I just found that I had omitted them yesterday, and was horrified, because they are some favorites. So, without further ado:

Turkey or Chicken Tetrazzini


Serves 6
Turkey, Tetrazzini, pasta, casserole
Turkey Tetrazzini

6 ounces spaghetti
¼cup butter
½ cup flour
2¾ cups chicken broth
1 cup light cream or evaporated milk
¼ cup dry sherry
1 teaspoon salt
dash pepper

1 can sliced mushrooms, drained (6 oz. can)
½ cup green pepper, chopped
1 small jar chopped pimiento, drained
2 cups diced cooked turkey, or chicken
½ cup Parmesan cheese, shredded

Cook spaghetti in boiling salted water till just barely tender; drain. In a large skillet melt butter; blend in flour. Stir in broth, whisking so no lumps form. Add cream. Cook and stir till mixture thickens and bubbles. Add the wine, salt, pepper, spaghetti, mushrooms, green pepper, pimiento and cooked turkey. Turn into a 12 x 7½ x 2" baking dish. Sprinkle top with Parmesan. Bake @ 350 for about 30 minutes.

NOTES: I have on occasion tripled this recipe for a party. Divide the mixture into two 9 x 13 inch pans, and add on about 10 minutes of cooking time, or until it is bubbling all through.

~~~~~~~~~~~~~~~~~~~~~~~~~


Smoky Pork BBQ Ribs


1 (3½ pound) rack pork loin ribs
Pork, BBQ, barbecue, Ribs
Smoky Pork BBQ Ribs


6 - 8 tablespoons Sweet Smoky Cocoa Rub
2 teaspoons Kosher salt
3 cups mesquite wood for smoking
½ cup Sweet Tangy BBQ Sauce

Early in the day, soak the wood chips in water to cover, for at least 2 hours or more. Pat the Sweet Smoky Cocoa Rub onto both sides of the slab of pork ribs, plus 1 teaspoon of the salt per side, and allow to stand at room temperature, while the wood chips are soaking; 2 hours.

Once the wood chips have soaked long enough, cut two sheets of foil. Place half the wood chips onto each piece of foil and make a packet enclosing the wood and poke holes into the top.

At least 5 hours before you want the ribs done, start the grill, heating only one side. Once grill is ready, place the slab of ribs onto the hottest side and allow to sear well, about 10 minutes. Flip over and sear the other side for about 10 minutes. Move the ribs to the unheated side of the grill. Set one of the wood chip packets onto the hot side of the grill. Close the lid and monitor the temperature, keeping it relatively low; below 300 degrees if possible for at least 2 hours. Midway between, if the first wood chip packet has stopped smoking, place the second packet onto the hot side of the grill, to keep up the smoking. 

Preheat oven to 275 degrees. Once the ribs have spent at least 2 hours on the grill, prepare a sheet of foil large enough to completely enclose the slab of ribs and set it into a large baking sheet with sides. Remove the ribs from the grill and set onto the large foil sheet. Cover the top with ½ cup of Sweet Tangy BBQ Sauce and then fold the foil around the ribs, completely enclosing them. Place the baking sheet into the oven and allow to bake slowly for another 2 to 2½ hours, until completely tender.

~~~~~~~~~~~~~~~~~~~~~~~~~

Tzatziki Sauce


Makes about 1½ cups sauce
Tzatziki, Sauce, yogurt, dill
Tzatziki Sauce


1 cup plain Greek yogurt or 1½ cups other plain yogurt
½ cucumber, peeled, seeds removed, diced small (optional)
2 tablespoons good quality olive oil
1 tablespoon white vinegar
1 tablespoon fresh dill, minced finely
1 - 2 cloves garlic, minced
½ teaspoon salt, or to taste

If using a good quality Greek yogurt such as Fage brand, you may not have to drain the yogurt. If using other brands or the larger amount of just plain yogurt, set the yogurt into a fine-mesh strainer over a bowl. Place in the refrigerator and allow to drain for at least 1 hour or more.

If raw garlic upsets the stomach, set the minced garlic into a small bowl and just barely cover with vinegar. Allow to stand for at least 10 minutes, then drain. This removes the raw taste. Add to the recipe and continue.

Discard the yogurt liquid. Place the drained yogurt into a bowl. Add the 
olive oil. vinegar, garlic, dill and salt and stir to combine. Taste for seasoning. If using cucumber, stir in. 

Note: Cucumber, while true to the recipe, will add liquid if it sets for too long, making the mixture runny. If using cucumber, it may be best to stir in just before serving. Use this tzatziki when serving Falafel or Butternut Squash Falafel


My passion is teaching people how to create a harmony of flavors with their cooking, and passing along my love and joy of food, both simple or exotic, plain or fancy. I continue my journey in ethnic and domestic cuisines, continuing my journey to explore diverse culinary experiences and hopefully to start you on a journey of your own. Join me also at A Harmony of Flavors on Facebook, and Pinterest.

Saturday, April 4, 2020

A Really Good Curry

Just want to say . . . I am not a huge fan of Thai food. 

WHAT?!?!?!? You may exclaim.

It's true. While I have eaten some things that are tasty, it seems that no two restaurants even come close, for flavor and style, and the inconsistency makes it difficult (for me, anyway) to figure out what I like. I am not fond of peanuts. At all. And many Thai dishes call for peanuts or peanut sauces. I like a little spice, but not overwhelming spice. That is less of an issue for me, but if something is spicy, that leaves my husband out. I am allergic to shellfish, so anything with shrimp or dried shrimp or the like means I swell up like a toad. 

Get my drift?

Thai foor, Red Curry, Ethnic
Thai Red Curry

Okay, so the thing is, I have been making my own version of a Thai Red Curry Paste for years and years and years. And the reason I make it is to use in ONE recipe - one that we dearly love - called Red Curried Chicken Kebabs. I have never ventured out farther than that with my curry paste. I think my curry paste tastes great - at least by the standards of the chicken kebabs, which have excellent flavors. Back in February, my son and his lady came to visit and brought Thai food, from a restaurant they like. I have to admit, most of it was certainly delicious. The one single problem? too much salt. Holy moly, the salt made my mouth and tongue hurt. And that is why I like making my own things from scratch, even the curry paste.

Thai food, ethnic, Red Curry, chicken, vegetables
Thai Red Curry
Granted, my curry paste recipe makes a fair amount. That said, it is not at all hot spicy, so it can really be used as much as wanted in a recipe. And I got thinking, not long after the kids left here and I was eating some leftovers from their largesse that I though about the fact that I really had never used my excellently flavored curry paste for anything else. And so I set about trying to see what I could come up with. I found recipes all over the internet for Thai Red Curry. Most of them called for similar ingredients, like coconut milk. Many called for chicken with little vegetables, some for vegetables and no meat, and some were somewhere in between. I opted for in between, using one huge chicken breast and a lot of vegetables. 

First though, I had to make a batch of my curry paste. When we moved to Arizona, I had my little frozen packets of my curry paste in my cooler with all the other cold foods, but with the extreme heat in the southwest in late June, the curry paste leaked out everywhere, staining my cooler forevermore. So a new batch was the first priority. Then, since it was just made and not frozen, I went ahead and created my own recipe for Thai Red Curry, and ended up using fully half of the curry paste in one recipe. It was so delicious, and my husband said this recipe was a real "keeper" (his way of saying, "Please make this often!"), so I went ahead a few days later and used up the remaining curry paste in a second round of Thai Red Curry. I don't have any idea how authentic this may be, but it certainly bears repeating. Yum!


Thai Red Curry

Thai food, ethnic flavors, Red Curry, chicken
Thai Red Curry

Serves 4

¾ - 1 lb boneless, skinless chicken (dark or white as preferred)
oil for frying
4 - 6 dried shiitake mushrooms (or fresh if available)
1 - 2 shallots, sliced lengthwise
2 tablespoons fresh ginger, grated
2 cloves garlic, finely minced
1 - 3 green Thai chilies, or Serrano, minced (seeds left in or out as preferred)
1 can (14-ounces, approximately)
2 - 4 tablespoons Thai Red Curry Paste (if store bought, use discretion with the amount, if heat is an issue)
1 tablespoon Fish Sauce, optional
2 tablespoons palm sugar or brown sugar
1 cup snow peas (or snap peas, sliced across diagonally)
1 cup red bell pepper, in thin strips
1 cup butternut squash, small cubes
1 - 2 teaspoons tamarind concentrate
------
½ cup cilantro, chopped
¼ cup scallions, sliced thinly

If using dried shiitake mushrooms, set them into boiled water and top with a bowl to keep them submerged for at least 20 minutes.

Cut the chicken into smaller cubes and brown them in the oil, then set them aside. 

In the same pan the chicken was browned in, adding more oil if needed, lightly saute the shallot, then add in the ginger and garlic with the green chilies. Saute for another 3 minutes. (If a lot of heat is preferred, simply slice the chilies across and toss them in. I prefer to keep the heat low, so I remove seeds and mince the chilies.) Pour in the can of coconut milk and stir in the Thai Red Curry Paste to combine. Add the brown sugar and fish sauce and all the veggies. Cook until the vegetables are tender, then add in the chicken and cook for just a few minutes longer. Sprinkle on the cilantro and scallions and serve over rice.


My passion is teaching people how to create a harmony of flavors with their cooking, and passing along my love and joy of food, both simple or exotic, plain or fancy. I continue my journey in ethnic and domestic cuisines, continuing my journey to explore diverse culinary experiences and hopefully to start you on a journey of your own. Join me also at A Harmony of Flavors on Facebook, and Pinterest.

Monday, September 23, 2019

Mouthwatering Chicken Dinner

My son's birthday is in a few days, but the only time he could visit was this past week, so I made him a birthday dinner a week early. Within reason, I ask what he'd like for dinner and then I make it - my birthday gift. So this time, he asked for Chicken Madeira and risotto and Bread Pudding.

The Bread Pudding recipe is one I've made many times over the years, although it has been truly years now since the last time I made it, so that was a welcome recipe to revisit! 
Chicken, Madeira, wine, dinner, entree, recipe
Chicken Madeira

As for risotto, I have made a few of them over the years, also. Nothing I have made real note of, though, so I had no place to fall back on for that recipe. And as for Chicken Madeira - I was stumped. I had heard of Chicken Marsala, though I never made that, but Chicken Madeira? So at first, I wondered if he just named the wrong alcohol? Nope, apparently not, as I looked it up online. 

What was mainly available online were recipes that were "Copycat Cheesecake Factory Chicken Madeira recipes." I've only ever eaten at Cheesecake Factory once maybe, many years ago, and this was not what I ate! I looked the recipes over, but they just didn't do it for me. While I don't care to drink Madeira on its own, I do like to cook with it. It is a special style of fortified wine that comes from the Portuguese island of Madeira. I have not used anything US domestic, nor would I. There are very nice Madeiras from Madeira that are inexpensive enough and more authentic. Generally, I have a Rainwater Madeira on hand, and as it is a lighter style, it is wonderful for cooking. 

So on with perusing recipes I went, and after reading what was available, I realized that essentially, this dish is made almost identically to the way I make my sauteed mushrooms. The main difference (besides the addition of chicken, of course) is that some of the alcohol liquid is left in the pan (and generally I use dry Sherry) rather than evaporating off all of the alcohol, and then the addition of some stock to further use for gravy. All the rest of the recipe is my own preferred method, despite finding others who did it basically the same way. I opted to do some things in advance, such as making my own stock. 

For the chicken, instead of buying whole chicken breasts, then slicing them into two flat pieces, pounding them to ¼-inch thickness - I bought chicken cutlets, already sliced thinly. This saved some time. Even so, it probably would have been better to pound a couple of them that were still cut a bit too thick. Oh well.

The Stock

For the stock, I bought some beef marrow bones at the grocery, and a couple of days in advance, set them on a baking sheet in a 400 degree oven for about an hour, until they were browned a bit. This gives great flavor to a stock. Then I placed the bones into a large pot with about 8 quarts of water, 1 onion with skins on (these give great color to the stock), 1 bay leaf and a teaspoon of black peppercorns, whole. I cooked this on a very low temperature, barely simmering, for two hours. At this point, I removed the 4 cups of stock that would be needed for the risotto. The stock had nice flavors at this point, but not overwhelming. I do not salt my stock, opting to salt the dish as needed when that time comes.

The rest of the stock, I allowed to slow-simmer for the remainder of the afternoon, planning to reduce the liquid by evaporation from 3 quarts to 1½ cups (just under one quart). By nearly dinner time, I removed the bones, onion and bay leaf and allowed the stock to further reduce to the 1½ cups I wanted. I strained this through a fine mesh strainer and stored this to use for the liquid in the chicken recipe. 


Chicken Madeira

Chicken, cutlets, Madeira, wine, mushrooms, recipe
Chicken Madeira

Makes 8 pieces of chicken

8 chicken cutlets, OR 4 large boneless, skinless chicken breasts halved into two flat pieces each and pounded to ¼-inch thickness
--------
1 tablespoon butter
1 tablespoon olive oil
1½ pounds baby bella mushrooms, or white button mushrooms, sliced
½ teaspoon salt
2 large shallots, sliced thinly
2 - 3 cloves fresh garlic, minced finely
1 tablespoon fresh thyme leaves
½ teaspoon finely ground black pepper
1¾ cups Madeira wine
2 - 3 quarts unsalted stock (chicken or beef)
oil, as needed for frying chicken cutlets
½ cup all purpose flour
salt, for sprinkling on chicken
--------
¼ cup water
2 tablespoons cornstarch

A day or two ahead, slowly simmer the 2 - 3 quarts of stock down to just 1½ cups, cool, cover and refrigerate until needed.

Earlier in the day (if time will be an issue) heat a large skillet and add in the tablespoon each of olive oil and butter and add in the mushrooms and the half-teaspoon salt. Stirring often, saute the mushrooms. First, they will begin to release a huge amount of water. Cook past this, allowing all the liquid to evaporate and the mushrooms to begin browning. Now add in the shallots and continue to cook, stirring often, until the mushrooms are nicely browned and the shallots are very soft. Add in the garlic, pepper and the thyme leaves and toss well, until the garlic is fragrant. Add in the Madeira wine and raise the heat, then cook, stirring, until the wine has reduced to a thick, glossy paste in the pan. Remove from heat and set aside.

When ready to proceed with the recipe, heat another large skillet with some of the extra oil. Sprinkle all the chicken cutlets with a little salt on each side, then lightly dredge each cutlet in the flour. Fry the cutlets until they are done to 165 degrees internal temperature at the thickest parts of the meat, and remove them to an oven safe tray and keep warm, at the lowest oven setting.

Add the reduced stock to the pan with the mushrooms and set back on the heat. Cook the stock down slightly more. Stir together the water and cornstarch and pour into the pan and stirring quickly, cook until the mixture thickens just slightly. Taste for seasoning and adjust if needed. [If you choose to do the chef-like finish, you can also whisk in a couple of tablespoons of butter, just before adding the chicken. I had planned to do this and completely forgot!]

To serve, set each of the chicken cutlets into the mushroom sauce, turning to coat with sauce, then set on a platter. Serve extra mushroom sauce on the side.

~~~~~~~~~~~~~~~~~~~~~~~

Roasted Garlic, Parmesan, Risotto, recipe
Roasted Garlic & Parmesan Risotto

As for the risotto, 

I sort of followed a recipe from Kylee Cooks, but made some of my own adjustments. I made my own stock, and it was from beef bones, not chicken or vegetable stock. I used large shallots rather then onion. I also roasted a head of garlic to nicely tender and light brown, then extracted all the garlic and passed it through a garlic press to remove anything hard or clumpy, then used it all in the dish. If I made this recipe again, I believe an added cup of the stock would have been better. The rice just was a little more "al dente" than I was truly comfortable with, while eating. Flavors were wonderful.


Roasted Garlic & Parmesan Risotto


Serves 6 - 8

Roasted Garlic, Parmesan, Risotto, recipe
Roasted Garlic & Parmesan Risotto

1 head garlic
1 pinch fresh thyme leaves
1 teaspoon olive oil
--------
1 tablespoon olive oil
1 tablespoon unsalted butter
2 large shallots, chopped finely
1½ cups arborio rice
⅓ cup dry vermouth, dry Sherry or other dry white wine
4 - 5 cups hot beef, chicken or vegetable stock
1 cup freshly grated Parmesan cheese
¼ cup parsley, finely minced

Earlier in the day (or up to three days in advance), preheat the oven to 400 degrees. Clean a head of garlic, slicing a bit of the root end off so it will set straight. Cut off about a quarter-inch from the top of the head. Any little tips of the garlic that were cut off, remove from their papery skin and set atop the cut top of the head. Place the head of garlic onto a piece of aluminum foil and wrap foil up around the head, leaving the top open. Set the pinch of fresh thyme leaves on top, then the teaspoon of olive oil, then pinch the top closed. Set the garlic in its little packet into an oven-safe ramekin and bake for 40 to 45 minutes. Once done, cool, then press out all the garlic into a small bowl. Either mash or pass through a garlic press. Cover and refrigerate if not using that day.

To Make Risotto: Heat a saucepan with the 4 - 5 cups of stock and have nearby. Heat a 4 - 6 quart saucepan and add in the tablespoon of oil and butter. Saute the chopped shallots until very soft. Add in the roasted, pressed garlic, and stir well, then add in the rice. Stir well to coat all the rice grains with the oil and butter. Pour in the dry vermouth and cook quickly until the vermouth (or other wine) is completely evaporated. Begin adding in the hot stock, one ladle full at a time, stirring the rice until each ladle of stock is absorbed. To use all the stock should take about 20 to 25 minutes. Be sure to leave a little bit of the liquid in the rice after the last ladle full of stock has been added.

When ready to serve, stir in the Parmesan cheese and the parsley, reserving a bit of parsley as garnish on top.


My passion is teaching people how to create a harmony of flavors with their cooking, and passing along my love and joy of food, both simple or exotic, plain or fancy. I continue my journey in ethnic and domestic cuisines, continuing my journey to explore diverse culinary experiences and hopefully to start you on a journey of your own. Join me also at A Harmony of Flavors on Facebook, and Pinterest.

Saturday, August 24, 2019

Still Time to Get Out That Grill

Depending on where one lives, grilling time may be all year 'round or it may be confined to a few, all too short months. I know some who say they grill even when there is snow on the ground, though I find it gets harder to get things cooked through with too much cold to combat the heat of the grill. But unless you are in the Southern states, grilling season is starting to wind down. For me, in the American southwest, it has been too hot to even want to grill, so my grilling may only just be starting sometime in the next couple of months. 

However your grill season works out for you, I hope these recipes will give some impetus to getting out there. I have to imagine, though I have never done it, that these recipes can be made in the oven. I have not done it, but it is possible. Flavors will be different, assuredly. 

For the first of these recipes, I am taking one my husband came up with. It is simple as can be. And of course it is a beef roast, because my husband will not touch something like shellfish. This has become a matter of pride at this late age, to say he has never, nor will he ever, eat shellfish. I, on the other hand, love shellfish, but developed an allergy, so now it is off my menu also. The second recipe below, is one I used very often before finding out why I was so swollen so often. 😧  The third recipe is a chicken recipe I have made repeatedly through the years and is also unfailingly good. I make my own Red Curry Paste also, so I will give you that recipe as well, though you can assuredly buy it at the store. Making it at home means I can control the heat, getting all the flavor without killing off taste buds in the process. ;)

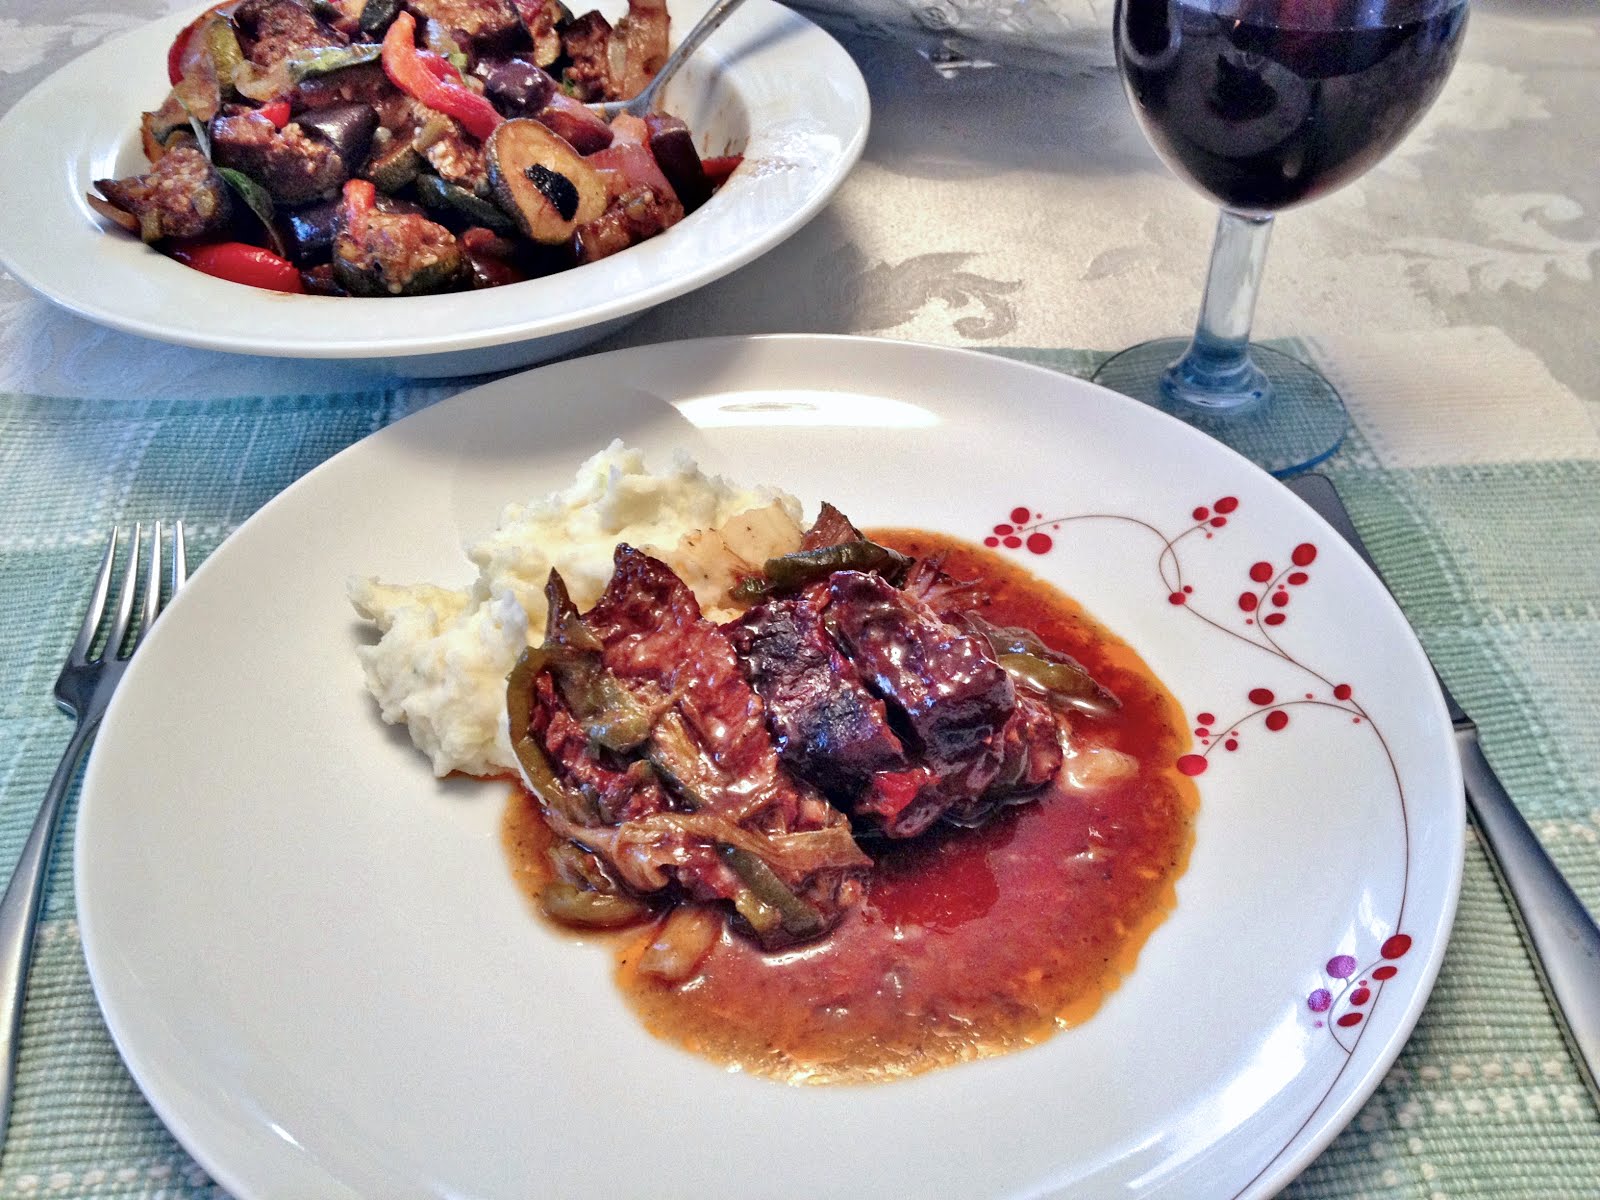
Back to the beef roast. It is started on the grill and seared over high heat for about 15 to 20 minutes per side before removing it to a cutting board and preparing the rest of the recipe. It requires little in the way of prep. It uses only basic ingredients. Nothing fancy. I have yet to even get a photo that is truly worth showing. It looks rather homely. But the flavor? Oh, great heavens, it is magnificent. Serve with some mashed potatoes and you will be happy campers.

BBQ sauce, Roast beef, chuck roast, green peppers, scallions,
Terry's BBQ Roast
BBQ sauce, chuck roast, grill, bake, green peppers, scallions
Terry's BBQ Roast

Terry's BBQ Roast


Serves 6 to 8

1 boneless chuck roast, about 3½ pounds
6 - 8 scallions, as needed
1 green bell pepper, more if needed
1 cup barbecue sauce of choice, more if desired

Heat a grill to high. Set the chuck roast onto the grill until it has a really good sear on one side, about 15 or so minutes. Flip the roast and sear the other side the same way. This gives a nice smoky "grilled" flavor, even though not finished on the grill. Remove the roast from the grill and place on a cutting board. Slice into the roast, not quite all the way through, about every half to ¾-inch apart.

Prepping, how to, BBQ sauce, chuck roast
Prepping Terry's BBQ Roast

Preheat the oven to about 275 degrees. While the roast is grilling, prepare the scallions and green pepper. You will need a good handful of scallions. Some are larger than others so the amount is non-specific. If they are tiny, use an entire bunch; if they are large you might use 6 or so. Cut the scallions into lengths that will fit along the width of the width of the roast, then cut the scallion lengths in halves, lengthwise. Cut the bell pepper into very thin strips along their lengths.

Prepare a piece of foil large enough to fit into a 9 x 13-inch baking dish, ensuring it is long enough to fold and wrap the roast. Use two thicknesses if thin foil, or one if using heavy duty foil. Press the foil into the dish, leaving the rest as overhang until needed. Place the roast carefully into the foil-lined casserole. Stuff lengths of scallion and bell pepper into the cuts in the meat, pressing the vegetables in as much as possible.
Cover the roast with at least 1 cup of barbecue sauce. Close the foil around the roast, completely closing it into a packet. Set the pan into the oven and allow to roast for about 2½ hours. Take care when opening the packet, as there will be copious amounts of steam. The roast will be fork-tender and have plenty of "gravy" around it. Great served with mashed potatoes or rice.

~~~~~~~~~~~~~~~~~~~~

For these shrimp - or scallops - not much time is needed, either for the marinating time or the grilling time. Over-grilled shrimp or scallops become rubbery. This marinade is so easy and delicious and requires so little time to flavor the seafood.

The photo below is of little individually skewered shrimp, along with some red onion and one chunk of pineapple per tiny skewer. These were for a party and I used a half red cabbage as the vehicle to hold all the little skewers, poked into the cabbage "dome" evenly.


Grilled, Marinated Shrimp or Scallops


Individual, skewers, shrimp, pineapple
Individually skewered shrimp and pineapple
Scallops, skewersShrimp, skewerRecipe amount is up to you! The marinade is plenty for a goodly amount.

MARINADE:
1 can (6-ounce) unsweetened pineapple juice
¼ cup (2 ounces) soy sauce
¼ cup (2 ounces) olive oil

Shrimp, or scallops as needed

Mix the marinade ingredients together in a zip top bag. Use individual bags or bowls with tight fitting lids, keeping shrimp and scallops separate.
Either mix marinade and divide between bags or bowls, or if amounts of shrimp and or scallops is large, made 2 recipes of the marinade, placing each amount into a separate bag/bowl.

Allow either shrimp or scallops to marinate up to an hour or so, maximum, then have a preheated grill ready. The shrimp can be skewered onto long skewers. The scallops do better on a grill pan. They tend to fall off individual skewers. If you prefer to have them skewered, use two skewers about ¼ inch apart and skewer them double to keep them in place.

Grill time is short. The shrimp are done as they turn pink, about 3 to 5 minutes per side. The scallops may take just a little longer, depending on their size. Watch for when they begin to show little cracks in the surface. The shrimp are also great if skewered alternately with pieces of onion and chunks of unsweetened pineapple before grilling. 


~~~~~~~~~~~~~~~~~~~~~~~~~

Coming to the third recipe, below, for Thai Red Curry Paste, this is the precursor of the Red Curried Chicken Kebabs recipe. Do not feel you must adhere strictly to this recipe. I realize not everyone has kaffir lime leaves or galangal, and the amount of dried red chilies is totally up to the individual. Use what you have. This makes a delightfully flavored sauce. It is unsalted, so salt must be added into the individual recipe.
 

Thai Red Curry Paste

Thai, Red Curry Paste, condiment
Thai Red Curry Paste
Thai Red Curry Paste, individual packets, freezing
Makes about 8 tablespoons

2 - 6 dried red chilles
2 shallots, cut in small chunks
1 teaspoon black peppercorns
2 teaspoons cumin seeds
1 tablespoon coriander seeds
1 teaspoon salt
2 teaspoons lemon or lime rind, chopped
1 teaspoon galangal powder (or use 1-inch fresh ginger)
3 - 4 cloves garlic
6 - 8 tablespoons oil, as needed
1 teaspoon turmeric
2 teaspoons paprika
1 - 2 Kaffir lime leaves, if available

Blend all ingredients together. This may take a while and a lot of scraping down the blender container, and require more oil (or water) to get it to blend properly. If you want a smoother paste, grind all the dry spices first, then add in the wet ingredients to finish off the process. 


Use what is needed for the recipe, then place individual recipe portions into small sandwich bags with the flap. Tie off the top and freeze until needed, as shown here.


~~~~~~~~~~~~~~~~~~~~~

Red Curried Chicken Kebabs are just flat-out delicious. I have been making these for years and they are a hit each time. I hope they give you the same pleasure!

Red Curried Chicken Kebabs


Red Thai Curry, Chicken, Kebabs, grilling
Red Curried Chicken Kebabs
Serves 8 - 10

2½ tablespoons Thai Red Curry Paste (recipe above, or use store-bought)
½ cup vegetable oil (I use olive oil or coconut oil)
2 teaspoons Kosher salt, or to taste
2½ pounds skinless, boneless chicken breasts, cut into 1-inch cubes
½ each of red and green bell peppers, cut into 1-inch squares

1 red onion, cut into 1 inch single squares

Minty Yogurt Sauce
¾ cup plain low-fat yogurt
¼ cup mayonnaise, or low-fat mayonnaise
1 tablespoon honey
1 tablespoon fresh lime juice
1 tablespoon fresh mint, finely chopped

In a large bowl, mix the curry paste with the oil and 2 teaspoons of salt. Add the chicken cubes and toss to coat. Let stand at room temperature for up to 2 hours or cover and

refrigerate overnight.

Light a grill. In a medium bowl, whisk the yogurt with the mayonnaise, honey, lime juice and mint and season with salt. Set aside or refrigerate until needed.

Thread the chicken onto 10 skewers, threading a chunk of red or green bell pepper and/or red onion squares between the cubes. Grill over moderately high heat, turning frequently, until lightly charred and cooked through, about 8 minutes. Serve the kebabs with the minty yogurt sauce on the side. 

 
NOTES: If you like pineapple, this could be another addition to your skewers.

These could be made as whole boneless skinless chicken breast or thigh sections. As the recipe states the chunks should be about 1-inch cubes, it might also be good to cut the chicken breasts in half lengthwise, so they are not so thick, and will get more marinade onto the surface area. The timing for grilling bone-in chicken will be much longer - about 25 minutes, or until an instant thermometer reads 165 degrees in the thickest part of the meat.

Anything that can be grilled, can also be broiled. If the weather is not cooperating, or it's the wrong season, try broiling.


The meal is delicious with a nice white wine, Chardonnay, Pinot Gris or Torrontes would be my first choices. 


My passion is teaching people how to create a harmony of flavors with their cooking, and passing along my love and joy of food, both simple or exotic, plain or fancy. I continue my journey in ethnic and domestic cuisines, continuing my journey to explore diverse culinary experiences and hopefully to start you on a journey of your own. Join me also at A Harmony of Flavors on Facebook, and Pinterest.

Wednesday, March 27, 2019

Not Just Any Chicken and Rice

I keep posting Indian recipes, just because I love the flavors so very much. I do make other things in between, but often, if I have spent an inordinate amount of time researching a recipe, then setting about making it, getting all the "moving parts" moving as they should, executing the recipe, by the time I sit down to eat it, and gush over what great flavors . . .well, I just don't have it in me to do that all over again in a day or so. And, I just fall back on something regular that is tried and true.

I can't count the amount of times I have made one of my long-running best recipes, One-Skillet Hamburger Meal, just because it's easy and delicious. Or some pan-fried pork chops and Red Cabbage with Apples & Bacon. I have a lot of favorites.

So, if it appears that all I do is make Indian meals, that would be an incorrect assumption. 
 
Dinner, Chicken, Korma, Barley, Khichdi, Chutneys
Dinner of Chicken Korma, Barley Khichdi and Chutneys

I do, however, have a fascination for Indian flavors, and I do spend a lot of time researching them. India is a pretty big place. It is about a third of the size of the United States, yet has more people! Netflix has a show called "Raja, Rasoi Aur Anya Kahaniyaan" that while subtitled (a problem for some), is a fascinating journey through India and how and why the foods are distinct in some regions, how they came to be there, the influences of differing ruling systems, etc. India has a lot of different food regions. Similarly to the U.S. with southern cooking, northeastern cooking, midwest styles and so on. Here in the U.S., we have mainly been introduced to northern Indian styles of cuisines in the restaurants, at least in buffets I have sampled. This style is delicious, no doubt about it, but recently I have been delving into other areas and searching for what other styles of cooking exist there, and what other foods or food combinations exist. 

Yesterday however, I fell back on north Indian style foods, and made a Chicken Korma. Korma, whether made with lamb beef may be substituted) or chicken, is made with a "gravy" thickened with ground nuts, usually blanched, peeled almonds, but sometimes with cashews. I have a Lamb Korma recipe that is truly exceptional, and this chicken recipe is not too far different - only just a little bit. Whole, cut up chicken could be used, though the cooking time would need to be far longer. I chose skinless, boneless chicken breasts, but skinless, boneless chicken thighs would work as well. And, I used cashews for this dish. It tasted so wonderful that my husband and I just kept commenting over it. Here is my recipe:

Chicken, Korma, curry, sauce, almonds, cashews
Chicken Korma

Chicken Korma


Serves 4 to 6 

2 pounds skinless, boneless chicken, cut in cubes
¾ cup Greek yogurt
2 tablespoons water
1 tablespoon rosewater
1 teaspoon salt
1 teaspoon white pepper
¼ to ½ teaspoon saffron threads, crushed
¼ teaspoon ground turmeric
----------
2 to 3 tablespoons oil or ghee, plus a bit more for cooking chicken
1 onion, chopped
3 to 4 cloves fresh garlic, minced
2 tablespoons fresh ginger, minced
1 - 3 green chilies, minced (remove seeds for less heat)
¾ cup raw cashews
¾ cup water or chicken stock
3 to 4 teaspoons Garam Masala 
¼ cup heavy cream, optional

At least 2 hours before beginning the meal, combine in a large bowl the yogurt, 2 tablespoons water, rosewater, salt, white pepper, saffron and turmeric. Stir to mix well, then add the cubed chicken and stir to coat all the chicken pieces. Cover and set in the refrigerator for 2 or more hours.

Heat a skillet and add in the ghee or oil of choice. Add the onions and saute them over medium low heat until lightly golden, then add in the garlic, ginger and green chilies. Continue to cook, stirring, until the onions are nicely golden but not browned. Pour the contents of the skillet into a blender container and add in the cashews, water or stock and Garam Masala. Blend the mixture to a fine puree. This sauce can be made ahead, even a day ahead, then refrigerated until needed.

Heat a large skillet and add in more oil or ghee and pour in the blender contents, then the chicken with all its marinade. Stir well and bring the mixture to just boiling. Lower heat to just a simmer, cover the pan and cook, slowly for about 25 minutes, or until the chicken has cooked through. If desired, add the heavy cream and stir in. Goes well with Chapatis, Parathas, Naan or rice.

~~~~~~~~~~~~~~~~~~~~~~

moong dal, mung beans, split peeled mung,
moong dal
My normal accompaniment to a dish with this much sauce is rice, whether brown rice or other. This time, I wondered what I could make different from just rice, and got thinking of barley. I hadn't come across barley in any Indian recipe I had seen, to date, yet when I looked it up, it appears barley (called "jau" or "jao") has been in or around India since prehistoric times, and was once a main staple. It has mostly been replaced with rice and millet, but is still around, most often as soup or cooked into a sort of khichdi or grain and lentil dish. I opted to use hulled barley. Most often the kind of barley found in the supermarket is "pearled" barley, and most commonly the "quick cooking" kind. "Pearled" means that the outer, inedible grain case, the inner hull and the bran have all been polished off or "pearled," so there is little fiber left to the grain. I look for ways to incorporate more fiber in our diets, so I found "hulled" barley, which has not had the bran or inner hull removed, but only the outer inedible hull or shell. It takes a little longer to cook, but since I always looked for the long-cooking pearled barley anyway, the time to cook is not much different. 

So, in creating a grain and lentil dish, I used hulled barley, moong dal (mung beans that have been peeled and split) and added in some cabbage. I look for ways to get cabbage and other cruciferous vegetables into my husband's diet without him really being able to pick it out (in the case of cauliflower, for example, which I shred) or truly taste it. In this instance, I got rave reviews from him on both the Korma dish and this Barley Khichdi. High praise, indeed!


Barley, Khichdi, lentils, grain, beans, Indian, side dish, cabbage
Barley Khichdi


Barley Khichdi


Barley, Khichdi, side dish, lentils, beans, grain, cabbage
Barley Khichdi
Serves 3 to 4

½ cup hulled barley
¼ teaspoon turmeric powder
½ cup moong dal
1 tablespoon oil or ghee
½ teaspoon cumin seeds, whole
½ teaspoon asafetida
1 - 2 shallots, minced
1 - 2 cloves fresh garlic, minced
1½ cups finely shredded cabbage
1 teaspoon salt
½ teaspoon freshly ground black pepper
pinch Kashmiri red chili powder, or more if you like heat

Place the barley into a large saucepan with 2 cups water and bring to boil. Add the turmeric and cook over low heat for 20 minutes. Rinse the moong dal in water repeatedly until the water drains off mostly clear. Drain well and add to the barley, with a little more water only if needed. Cook for about 10 more minutes, until both the barley and dal are tender, not mushy. If there is still water in the pan, either drain it, or if it is very little, simply turn off the heat and leave the pan on the burner to dry out.

In a skillet, heat the oil or ghee and once hot, add the cumin seeds and asafetida and let them sizzle for a bit. Add in the shallot and saute until the shallots are well softened. Add the garlic and saute for a minute or two, until fragrant, then add in the cabbage, salt, pepper and chili powder. Saute, stirring until the cabbage is tender, about 5 minutes, then add the contents of the skillet to the saucepan of barley mixture and stir well. Garnish with cilantro or curry leaves, if desired. 


My passion is teaching people how to create a harmony of flavors with their cooking, and passing along my love and joy of food, both simple or exotic, plain or fancy. I continue my journey in ethnic and domestic cuisines, continuing my journey to explore diverse culinary experiences and hopefully to start you on a journey of your own. Join me also at A Harmony of Flavors on Facebook, and Pinterest.

Disqus