Translate

Showing posts with label blue cheese. Show all posts

Friday, January 25, 2019

Salad Dressings are Quick and Easy

There are so many salad dressings on the market. And so many unnecessary ingredients add in. It is scary to read labels these days. The lists are endless. MSG in in most of them. Another staple of commercial dressings is Xanthan Gum. And then there is that nicely vague ingredient: modified food starch! For me, if the ingredient has been "modified" enough to be able to withstand temperatures that it would not normally be able to withstand, or thicken in a way that it would not normally thicken - well then, to me, that is no longer a "food," nor healthy. And really, when half, or more than half of the ingredients in a store bought salad dressing are things you have no idea what they are, or even how to pronounce them, then I don't buy them.

When homemade salad dressings are easy enough to make, and generally with ingredients already on hand, well, why not make them? I have quite a few salad dressings that I really like and make often. One is my Chris's Oriental Dressing, one I usually have on hand, as everyone seems to like it. With all this in mind then, I am going to set a few of my usual salad dressing recipes here to choose from. 

Honey Dijon Dressing
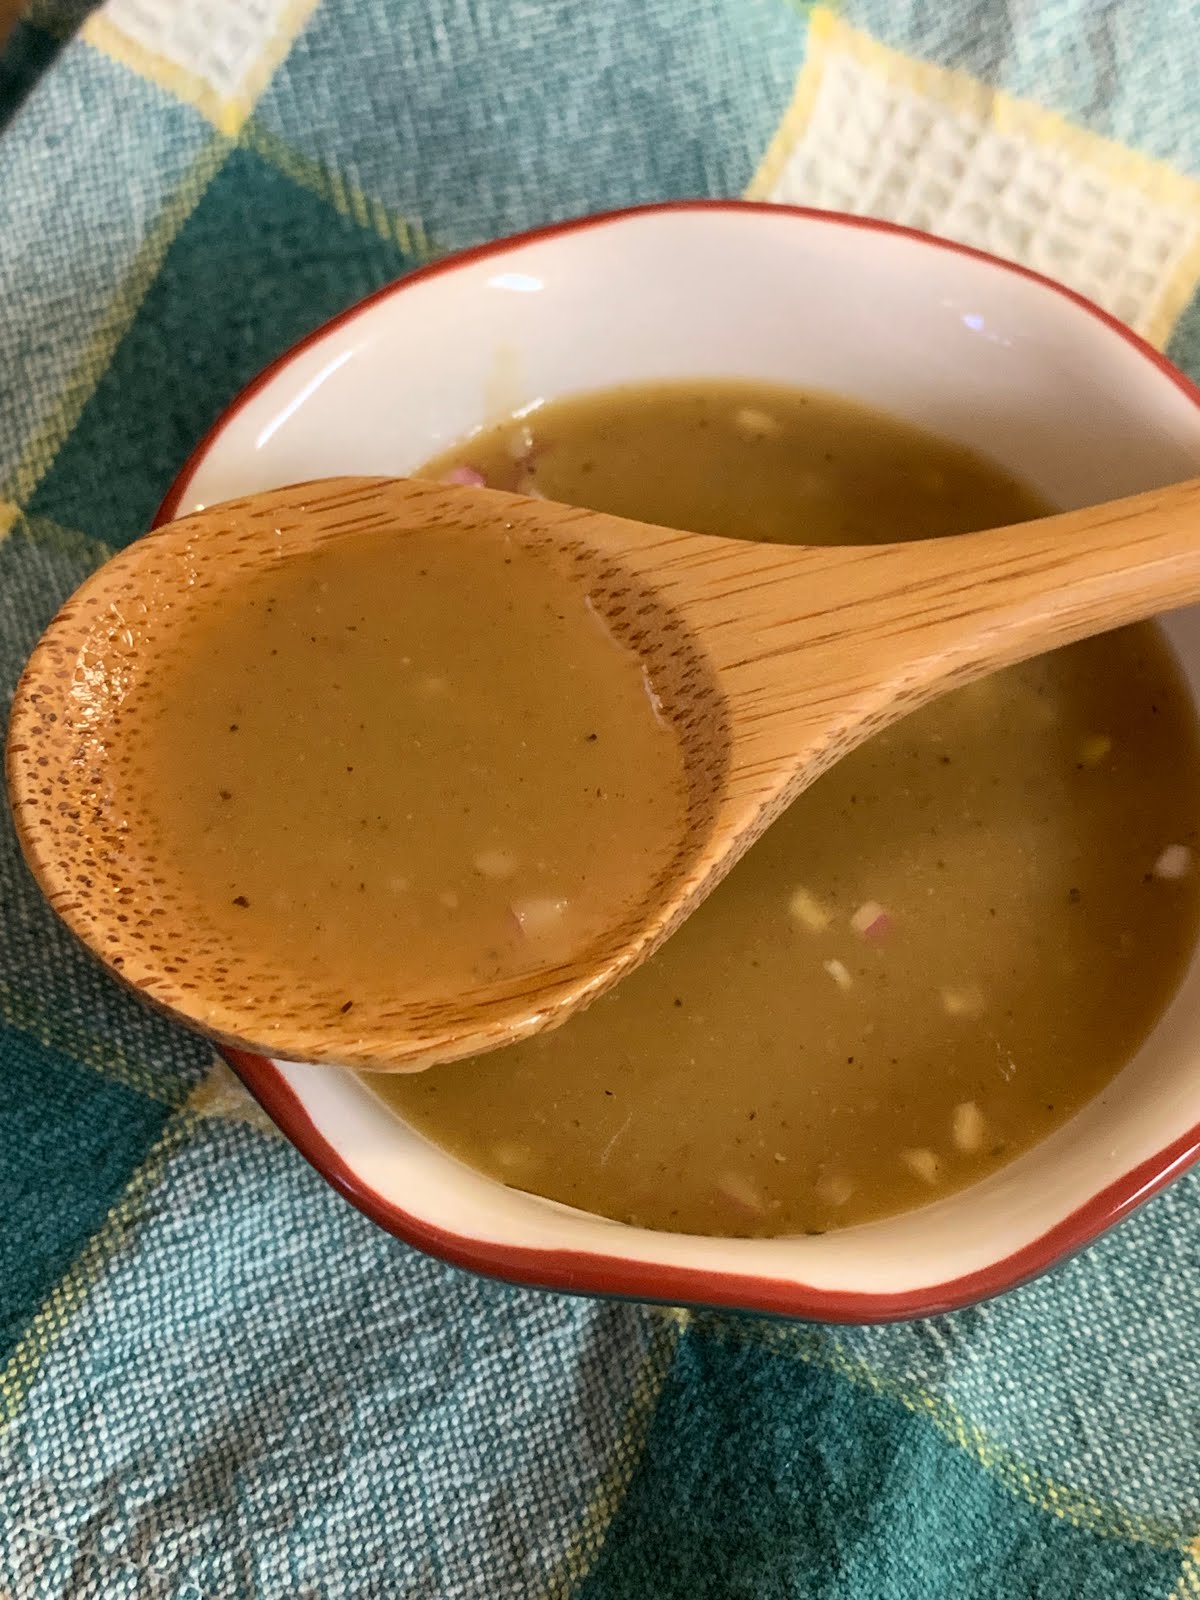
Honey, Dijon, salad dressing, dipping sauce, recipe
Good for more than just a salad, this can be poured over baked chicken or pork for a really wonderful sauce or used as a dipping sauce.

Makes about ¾ cup
 

¼ cup honey
3 tablespoons Dijon mustard

2 tablespoons olive oil
1 tablespoons minced shallot
1 tablespoon apple cider vinegar
1 tablespoon lime juice
salt and pepper, to taste

Place all ingredients into a bowl and whisk briskly until the dressing emulsifies. Or, place ingredients in a jar with tight fitting lid and shake until the dressing emulsifies. Refrigerated in a tightly sealed container, this dressing should keep for up to a month.

~~~~~~~~~~~~~~~~~~~~~~

Blue Cheese Dressing

Blue Cheese, salad dressing, dipping sauce, sandwich spread
Good on a salad, of course, but try it as a sandwich spread or dipping sauce for chicken or pork. Use your favorite Blue Cheese. I use Maytag or Saga Blue.
 

Makes about 2½ cups
 

¾ cup mayonnaise
½ cup plain yogurt
½ cup good quality olive oil
6 ounces Blue Cheese
1 - 2 tablespoons red wine vinegar
a few grinds of black pepper

In a mixing bowl, stir together the mayonnaise and yogurt, then whisk in the olive oil until well combined. Crumble in the blue cheese and mix with one tablespoon of the red wine vinegar. Season with pepper, to taste, and check for flavor. Add int he second tablespoon of red wine vinegar if needed to round out the flavors. Refrigerated in a tightly sealed container, this dressing should keep for up to 3 weeks.

~~~~~~~~~~~~~~~~~~~~~~~

Sherry Balsamic Vinaigrette

Sherry Balsamic Vinaigrette

A wonderful balsamic vinaigrette dressing for any salad. Sherry vinegar and walnut oil may not be available, but if not, and you have the ability to seek them out, it makes for a most excellent flavor. If using hazelnuts in a salad, switch the walnut oil to hazelnut oil.
 

Makes about ¾ cup
 

2 tablespoons sherry vinegar
2 tablespoons balsamic vinegar
1 tablespoon honey
1 teaspoon Dijon vinegar
3 tablespoons walnut oil
3 tablespoons olive oil
a pinch each of salt, pepper, cayenne
 

Whist all ingredients briskly to emulsify, or mix all ingredients in a jar with tight fitting lid and shake to emulsify. Refrigerated in a tightly sealed container, this dressing should keep for up to a month.

~~~~~~~~~~~~~~~~~~~~~~~~~~

Lemony Vinaigrette


This lovely dressing is great on most salads, and can also be used basted over things like vegetable kebabs, or used as a veggie dip.
 

Makes about 1 cup
 

2 tablespoons butter
⅓ cup shallot, minced
⅓ cup olive oil
3 tablespoons Dijon mustard
2 tablespoons fresh-squeezed lemon juice
2 teaspoons fresh thyme leaves, minced
1 tablespoon lemon zest
 

Melt butter and olive oil in a small skillet and saute the shallot until softened. Off the heat, add in the remaining ingredients, whisking until emulsified. Set aside to cool completely before storing in a tightly sealed container. Will keep for 2 to 3 weeks in the refrigerator.

~~~~~~~~~~~~~~~~~~~~~~~~

Cilantro Sauce / Dressing

Cilantro Sauce, salad dressing, dipping sauce
Cilantro Sauce or Dressing

While this recipe turns out a thicker sauce, making it a perfect dip for chips, it can very easily be used as a salad dressing or as a sauce over chicken or pork, or to mix with rice. Many do not like cilantro and may be put off by this recipe, although when I served this over chicken at a wine tasting I heard many comment that they didn't like cilantro, "but this sauce is delicious!"

Makes about 3 cups
 

1 large bunch cilantro
1 cup Salsa Verde (Tomatillo based Green Sauce)
1 teaspoon salt
2 jalapeno peppers, seeds & membranes removed for less heat
2 large cloves fresh garlic, minced
1 tablespoon lime juice
½ cup sour cream
¼ cup olive oil
 

Place all ingredients into a blender container and puree until smooth. Store in a tightly sealed container in the refrigerator for up to 2 weeks.

~~~~~~~~~~~~~~~~~~~~~~~~~~~~

Orange Sesame Dressing


With oriental type flavors of dark sesame oil, ginger, soy sauce and tahini, mixed with orange juice and a bit of marmalade for sweetness, this is a delicious salad dressing. Don't be put off by the ingredients list. This is well worth a try.

Makes nearly 1½ cups
Orange, Sesame, salad dressing
Orange Sesame Dressing

2 teaspoons sesame tahini
⅓ cup orange juice
3 tablespoons orange marmalade
3 tablespoons soy sauce
1 tablespoon fresh grated ginger
1 tablespoon lime juice
1 large clove garlic, minced
2 shakes cayenne pepper
½ teaspoon fresh ground black pepper
2 tablespoons finely minced scallion
6 tablespoons neutral oil, such as grapeseed
2 tablespoons dark Asian sesame oil
 

Whisk the tahini into the orange juice to soften and disperse, then add all the remaining ingredients and whisk briskly to combine. Store in a tightly sealed jar, refrigerated for up to 3 weeks.


My passion is teaching people how to create a harmony of flavors with their cooking, and passing along my love and joy of food, both simple or exotic, plain or fancy. I continue my journey in ethnic and domestic cuisines, continuing my journey to explore diverse culinary experiences and hopefully to start you on a journey of your own. Join me also at A Harmony of Flavors on Facebook, and Pinterest.

Monday, October 13, 2014

Buffalo Chicken Pizza is a Hit

Buffalo Wings can conjure up mental images of excruciatingly hot flavors, inspiring a fear of trying them out. Or, such is the way my husband has imagined, to date. In all the many years since these wings have taken over the appetizer menu everywhere, my husband has yet to even taste them.


Buffalo Chicken Pizza, buffalo sauce, pizza, blue cheese
Buffalo Chicken Pizza, fresh from the oven
Now, I can understand that, up to a point. I mean, if you cannot tolerate almost any heat in a food, then this fear would keep one from trying something out. But really, when I asked him yesterday if he had EVER tried Buffalo Wings, he said no. Absolutely. 

As for myself, I think I only ever once ordered Buffalo Wings as an appetizer somewhere, and I really loved them, flavor-wise. I am not overly keen on messing with bones and eating too much of the skin. Not because of health purposes. Too much of that rubbery skin in my mouth just gives me the willies, a little hang-up of my own. I have, in some distant past, even bought frozen Buffalo Wings when I craved them. I also love the flavors, done up in a sandwich or wrap. In Florida we ate often at Beef O'Brady's, a sports bar with exceptionally good food. I ate their "Buffalo Chicken Wrap" more times than any other thing on their menu. It was delightfully good. I also have made a version of the Buffalo Chicken Dip for parties a couple of times, and which my husband also never tried.
 
Buffalo Chicken Pizza, buffalo wing sauce, blue cheese
One beautiful slice of Buffalo Chicken Pizza

So I was thinking of those flavors last week, and trying to think of a way to present them. I had used Sweet Baby Ray's Buffalo Wing Sauce and Marinade in the past for the dip, and really like the flavor. I haven't used any other brand, since I know that while this one has a little heat, it is not fiery. I thought about trying a version of the Buffalo Chicken Lasagna I am seeing around the internet recently. That was my plan, but the more I thought about it, the more I started leaning toward pizza instead. So yesterday was pizza day.

First off, I wanted to make just one pizza. I know I could freeze the remainder of a recipe for pizza dough, or just keep it refrigerated till needed, but decided to make a small recipe and just make one large pizza. The recipe I created will make one 15 inch pizza with a nicely puffy crust. Doubling the recipe will make (obviously) 2 large pizzas, or three smaller ones. 

Pizza Dough for One Large Pizza


Start about 4+ hours prior to serving
pizza dough, makiing dough, yeast dough
dough still sticking to bottom of bowl


SPONGE:
1 cup all-purpose flour
¾ teaspoon instant yeast
¾ cup lukewarm water, 80 - 90 degrees
1 tablespoon olive oil

DOUGH:
1 to 1¼ cup flour
1 to 1½ teaspoons salt
1 - 2 tablespoons water, only if needed
the Sponge (above)

Sponge: In a heavy duty mixer bowl, or in another large bowl, combine the flour and yeast and mix together. Add the lukewarm water and oil and stir well. Cover with plastic wrap and set in a warm place (80 degrees) for 1 1/2 hours, until bubbly. (When in a cooler climate, setting the bowl in the oven with just the oven light on creates a nice warm environment. Some oven lights are too hot and will begin to cook the dough. In this case, leave the oven door ajar so some of the heat escapes.)

pizza dough, Buffalo Wing Sauce
Dough drizzled with Buffalo Wing Sauce

DOUGH: Once bubbly, if the sponge was made in a heavy duty mixer bowl, add in one cup of flour and salt to taste. Set the dough hook in place and begin kneading on low speed until combined, 2 - 3 minutes. If making by hand, add the flour and salt to the sponge and mix by hand. Once well mixed, determine if more flour is needed. If the climate is very dry, you may even have to add a tablespoon of water or two. Once the flour and salt are mostly incorporated, knead for 4 to 5 minutes more with the dough hook, or 5 to 7 minutes by hand, until the dough is smoothly elastic and not too sticky. In the mixer, the dough should clear the sides of the bowl but still stick to the bottom. Grease a bowl and set the dough in, turning once to grease all sides and set in a warm place to rise for another 1 1/2 hours, or until doubled in size.


The dough can be patted out and placed on a cornmeal coated piece of parchment (to later slide on to a pizza stone) or on a greased 15 inch pizza pan. If the dough wants to spring back too much, allow it to rest for 10 minutes and try again, stretching to desired diameter. Top with your choice of flavorings and bake at 475 degrees (450 on Convection Bake) for 13 to 15 minutes.

My husband and I both love blue cheese, so I went ahead and used blue cheese dressing and blue cheese crumbles for my Buffalo Chicken Pizza. If you are not a fan of blue cheese, use Ranch dressing and another cheese crumbled over top, such as Feta or even goat cheese crumbles.

Pizza, Buffalo Wing Sauce, Chicken, Blue Cheese
All toppings in place, ready for baking

Buffalo Chicken Pizza


Makes one 15-inch pizza

pizza dough (above)
1/3 cup Buffalo Wing Sauce (not plain hot sauce)
2 cups cooked chicken, diced (rotisserie chicken is great)
1 cup celery, thinly sliced
1 cup green pepper, diced
1/2 cup Blue cheese dressing
4 ounces Blue cheese crumbles

Drizzle the Buffalo Wing Sauce over the pizza dough. Top with the chicken, celery and green pepper. Dot with the Blue cheese dressing and then the Blue cheese crumbles. Bake in a preheated 475 degree oven (450 degrees on Convection Bake) for 13 to 15 minutes, or until golden and bubbly.


I am going to be making this again, and soon. My husband LOVED it, though it stretched his spice/heat tolerance to its limits. The flavors were sublime. But.... 

A couple of notes. I coated the pizza dough with olive oil. I used ½ cup of Buffalo Wing Sauce. The center of the finished pizza was a bit soggy. Next time I am not using the olive oil and I am using the ⅓ cup of sauce as listed in the recipe above. My hope is that the sauce can soak into the crust a little bit this way. The center of the pizza was too wet, so the other thought is to use the lowest oven rack to bake the pizza rather then the second level up, in hope it will better brown the bottom. I baked the pizza on a pan, so possibly setting it on a parchment and pizza stone would have yielded better crust-baking results. Despite this, the recipe is well worth making again. 

October 18, 2014 Pizza Repeat with Changes
Calphalon, pizza pan, 15-inch, Perforated Pan
Calphalon 15-inch Perforated Pizza Pan

To amend the recipe above, I made this pizza a second time and followed my idea, using ⅓ cup of the buffalo wing sauce, over a pizza dough with no olive oil. I did use my large, 15-inch perforated pizza pan. I lined the pan with parchment, though this would not be strictly necessary. I used the bottom oven rack to bake the pizza, for the full 15 minutes. The crust came out perfectly crispy, with a most satisfying crunch, despite the sauce and Blue Cheese Dressings. The flavors were equally great the second time, but the crust came out as it should be. I truly recommend this perforated pizza pan!


My passion is teaching people how to create a harmony of flavors with their cooking, and passing along my love and joy of food, both simple or exotic, plain or fancy. I continue my journey in ethnic and domestic cuisines, continuing my journey to explore diverse culinary experiences and hopefully to start you on a journey of your own. Join me also at A Harmony of Flavors on Facebook, and Pinterest.

Tuesday, April 29, 2014

Easter Ham Makover

Before delving into what I have been cooking lately, I want to take time to note that I added a new tab above. I created a page for a Recipe Index to give very easy access to all the recipes I have on my blog, as I have been blogging since October of 2012. They just would not be found unless reading through all the 1½ years of blogging. I would not want to subject anyone to that much slogging through my adventures. I will add a list of article links also. Some blogs have been very 1-subject oriented and could have interest on their own merit. So, please peruse my list of recipes under Recipe Index!
Cheese, Scalloped Potatoes, Ham, casserole, side dish
Cheesy Scalloped Potatoes with Ham

A few days ago I created a recipe out of desperation for something different to do with leftover ham. Every single time we have ham in the house I make my Cheesy Scalloped Potatoes with Ham. My husband absolutely loves this as it has his main food groups in it: meat, potatoes and cheese. To be honest, I absolutely love this casserole also, so I cannot in truthfulness place all the credit on my husband. His sister also loves this casserole, so almost every time I make it she is over for dinner. It's a great casserole. And I will likely be making it very soon. Again.

But meanwhile, I was just casting about in my head, trying to think of some other application for leftover ham, and I thought, "how about a savory bread pudding? My husband will eat a dessert bread pudding, but he is in no way as excited about the whole bread pudding concept as I. I love bread pudding. It sits far higher in my list of dessert loves than anything chocolate ever could. When my husband and I lived in Mandeville, Louisiana, just a mile up from the Lake Ponchartrain bridge, he was still out entertaining prospective doctors for the current practice he was managing and so we ate out often in this capacity. We also ate out with some really fantastic friends quite often in many different venues. And we sometimes went down to New Orleans and ate there. I had never been in Louisiana, or in New Orleans, and was not sure what kind of food they ate there, the blanket of Creole or Cajun just covered everything. And then I discovered Gumbo. OMG! Love at first bite. Later I found that there are two kinds of Gumbo, either okra gumbo, or file gumbo. I prefer the file gumbo by a long shot. Okra has never caught my foodie attention. 

Anyway, to get to the point, the other thing I discovered in Louisiana is that bread pudding is on almost every, single dessert menu. I was in heaven! I love bread pudding. I really, really love bread pudding. I ate it everywhere while living there. 

Bread Pudding


Bread Pudding, leftover bread, using bread, dessert, recipe
Bread Pudding
Makes about 6 servings

½ cup golden raisins
3 tablespoons bourbon, rum or brandy
5 eggs
¾ cup sugar
2 teaspoons vanilla extract
½ teaspoon ground cinnamon

⅛ teaspoon ground nutmeg
pinch salt
3 cups heavy cream
8 ounces stale bread, in 1-inch pieces, with crusts
Bourbon (or Rum or Brandy) Sauce, recipe below

In a small saucepan over medium-low heat, combine the raisins and bourbon and heat gently until the liquid is evaporated and the raisins are plump, about 7 minutes.

In a medium mixing bowl, whisk together the eggs, sugar, vanilla, spices and salt. Stir in the cream until well blended. Toss in the torn bread and plumped raisins and stir together. Let the mixture set for 15 minutes, stirring occasionally, to allow the bread to soak up the liquid. The pudding may be made ahead until this point and refrigerated for 4 hours until you are ready to bake.

Heat the oven to 350ºF. Butter eight 6-oz. custard cups or ramekins or one larger baking dish. Divide the bread mixture among the cups and pour any remaining custard over the top of each. Set the cups in a baking pan and add enough water to the pan to come halfway up the sides of the cups. This is more easily accomplished if the larger pan is placed in the oven first. Trying to move a large pan full of boiling water is unsafe! Bake until the puddings are browned on top and a knife inserted between the center and the edge of the pan comes out clean, about 50 minutes, or 60 for the larger casserole.

BOURBON (or Rum or Brandy) SAUCE
1½ cups heavy cream
½ cup sugar
3 tablespoons bourbon
⅛ teaspoon ground cinnamon

In a wide saucepan, combine the cream and sugar. Dissolve the sugar over medium heat and let the mixture come slowly to a boil. Cook, boiling gently, until the sauce is thick enough to coat the back of a spoon, (235º on a candy thermometer). Remove from heat and stir in the bourbon and cinnamon. Serve warm, poured over the individual puddings, or servings. 


NOTES: I have found that the extra work of the hot water bath seems not to matter! I totally forgot to do it once, and it still turned out perfect! Just watch for doneness by inserting a knife between center and edge of pan; the knife should come out clean.

If you don't like raisins - omit them. If fat-conscious this can be made with plain milk, half & half or some of both. Still great!

VARIATION: I have added in a cup of grated good quality white chocolate (with actual cocoa butter content) to the mixture, with heavenly results. If you love bread pudding, and white chocolate, this is a match made in heaven.


And that brings me back to the ham dilemma. I had never made a savory bread pudding, though I  have seen them in magazines or on TV. So I started to think about this. What would I like to taste in a savory - ham - bread pudding? Obviously there would be bread, eggs and milk with the ham. I had some blue cheese crumbles in the fridge, so I added that to the list. Some nutmeg. I thought I would try using pink peppercorns, for their very different flavor. And then I tossed in some currants. I originally was thinking of sultanas, or white raisins, but switched to currants. Now I think I might have liked the raisins more, but I will try that next time. The bread I used is some of the artisanal style bread I had made, and it gives a nice chewy bite to the casserole. I would really not recommend a plain white sandwich bread, as it would be pasty. 

Thinking about this particular casserole I realize it would also be a wonderful brunch or a breakfast casserole with a side of fruit. Here is what I did:

Ham, Blue Cheese, Bread Pudding, dinner meal, brunch
Ham & Blue Cheese Bread Pudding with a side salad
 

Ham & Blue Cheese Bread Pudding

Ham, Blue Cheese, Bread Pudding, entree, brunch dish
Ham & Blue Cheese Bread Pudding

Serves 6

2½ cups cubed day-old bread, preferably artisanal style
2 cups milk
2 eggs
½ teaspoon salt
½ teaspoon nutmeg, freshly grated
½ teaspoon pink peppercorns, crushed
1½ cups cubed ham
¾ - 1 cup blue cheese, crumbled
3 scallions, chopped
¼ cup currants
½ cup freshly grated Parmesan
½ cup panko bread crumbs
1 tablespoon melted butter

Heat oven to 350 degrees. Grease or spray an oven safe casserole either 9 x 1 1/2-inches round or 8 x 8-inches square.

In a large mixing bowl, whisk the eggs and milk together. Add the bread cubes, salt, pink peppercorns, nutmeg and ham to combine. Mix in the blue cheese, scallions and currants and then pour this mixture into the prepared casserole. In another mixing bowl, combine the fresh grated Parmesan with the panko crumbs. Add in the melted butter and toss well with fork or fingers to combine and moisten. Pour crumbs over the bread pudding and bake the casserole until a knife inserted between the center and the edge comes out clean. This could take 45 minutes or much longer. I set my casserole onto a pizza pan and I believe this may have inhibited the oven's heat from properly heating the bottom of the casserole. It took mine just a little over ah hour to bake.

To make this for breakfast, to save time, prepare the milk, bread, eggs, salt, nutmeg, peppercorns and currants or raisins the night before. Combine and cover tightly and keep refrigerated. In the morning, add in the ham and blue cheese, with the scallions, combine and pour into the casserole. The crumb topping could also be made the night before. Allow enough time for baking when getting it into the oven.


The reason I set my casserole onto a pizza pan was because recently I have had to clean my oven three times due to spills from baking foods. I was playing it safe, but am pretty sure this altered the timing needed to bake the Ham Bread Pudding. Be careful to check between the center of the casserole and the edge, because this is a custard. If you over bake the casserole, the eggs will become mealy. The consistency should be smooth and creamy. The center of a custard should still be a little wet when it is done. Allow the casserole to set at room temperature for about 10 or 15 minutes before cutting and serving, to allow the temperature to come up and set the center. I really loved this casserole. My husband said he did also, though I am sure he is still waiting for me to get around to the Cheesy Scalloped Potatoes and Ham.


My passion is teaching people how to create a harmony of flavors with their cooking, and passing along my love and joy of food, both simple or exotic, plain or fancy. I continue my journey in ethnic and domestic cuisines, continuing my journey to explore diverse culinary experiences and hopefully to start you on a journey of your own. Join me also at A Harmony of Flavors on Facebook, and Pinterest.

Tuesday, April 8, 2014

More Savory Little Appetizers

Porcini Rubbed Steak on Gorgonzola Spread
The creation of the little appetizers for the upcoming Winefest Renaissance continues. Time is now getting short and I am trying to accomplish as much ahead of time as possible. Regardless, there will be a huge rush to the finish once Saturday rolls around. Besides the 6 appetizer pairings of my own, I was asked to make a couple of appetizers to pair with the "special wine tasting", open to only 25 select people. These wines will all be rated 90 or above. Most of them are red wines (and mostly Italian), so the flavors should require nice hearty flavors in a food pairing. In my blog of March 19th I already wrote about the trial run of the Porcini & Coffee Rubbed Flank Steak, which was to be topped with garlic mashed potatoes. The way I tried these the first time just flat-out didn't work. I tried stacking the layers differently and this was better, as seen at right. However, the subject of the Garlic Mashed Potatoes still had been bugging me.

The reason being that the first time I made the potatoes they were far too runny. Using russets the second time, I did everything possible to ensure that the mixture stayed dry enough. The only problem was it was so dry it would barely go through the piping bag. Making a fair lot of these, this could be very tiring on the hands, and these are not the only part of the overall food pairings that require piping. The more I thought about it, the more I went with the idea that maybe tried and true would be best in this instance. So, instead of the mashed potatoes I made my Gorgonzola Walnut Spread that was such a hit with the flank steak last year. The flavors are bold and it should work well.

Using pestle to form the tart shells
Anyway, the other appetizer I am making for that special wine tasting section of the event is Hazelnut Blue Cheese Tartlets with Savory Bean Filling. I had made a really delicious bean filling some years back, but made it on the fly. I never wrote down what I did, and had tried to make it again - twice now - and it just was not what my palate remembered. The Hazelnut Blue Cheese Tartlets are a variation of my Savory Blue Cheese Coins, but switching out the cheese and nuts. Making these as little coins and topping them with the Bean Spread would probably also work well, but the little tartlet shells are too cute a presentation to resist. Anyway, for whatever reason, I tried the Bean Filling again and it turned out just perfect, and just as I remembered. It is not an identical recipe, but close enough, and maybe even more tasty.

For the tart shells, if you make the recipe for the savory coins and slice the little chilled log of dough, you just set one little slice into each tart cup and I find a perfect instrument to form the shell is the little marble pestle from my mortar and pestle set. The thick end presses the dough into the well, then the narrow end can be used to press it into the corners. Fingers could be used also! Here is my recipe.

Hazelnut Blue Cheese Tart Shells


Tartlet Shells, baked
Makes about 85 mini-tart shells

½ cup hazelnuts
1½ cups all-purpose flour
½ cup shredded sharp cheddar cheese
¾ cup blue cheese crumbles
1 teaspoon salt
1 stick unsalted butter, cold, in small cubes
1 egg yolk
2 tablespoons water

In this recipe, first toast the hazelnuts. Preheat the oven to 350 degrees. Set the hazelnuts on a small baking sheet with rim. Roast them for about 10 to 12 minutes. Remove from oven, pour them onto a kitchen towel and fold the towel around the nuts for a few minutes to cool slightly. Rub the nuts inside the towel very vigorously to remove as much of the dark skin as possible. Once cooled, place the toasted nuts into the food processor and process until well broken. Add in the flour, the two cheeses and the salt and process to combine. Add in the cubes of butter and process in short bursts until the mixture makes crumbs. In a small cup, combine the egg yolk and water, then add this to the food processor and pulse again, until the mixture starts to stick together. Turn out onto a surface (no extra flour is needed) and with the palm of the hand, smear the dough mixture in one long movement. Use a bench scraper to gather the dough and fold it onto itself then smear again. Fold the dough and turn and repeat this process until the dough has come together completely. Divide into 2 or 3 long, thin rolls about 1-inch in diameter. Wrap the rolls in plastic wrap and chill for at least 3 hours or up to 3 days.

When ready to work with the dough, preheat oven to 375 degrees. If forming simple "coin" shapes, slice the cold log into thin (⅜ or ¼-inch thick) slices. Set them on a baking sheet to bake. If making tartlet shells, slice the discs into slightly thicker slices. Set one slice into each well of the mini-tart pan and press into a tart shell shape. Bake the little shells for about 15 minutes, until golden. Cool. These can be made ahead and frozen for up to a month. 

Hazelnut, Blue Cheese, Tarts, Bean Filling
Hazelnut Blue Cheese Tartlets with Savory Bean Filling


I erred on the high side when making the bean filling. Since everything used can easily be cut in half, feel free to halve the recipe if desired. It is highly tasty and equally good used as a dip for sturdy chips or crackers, or spread or piped onto crackers.

Savory Bean Filling / Dip / Spread


Makes about 3½ cups of bean filling - halve recipe if desired

2 (15.5 ounce) cans white beans
Hazelnut, Blue Cheese, Tarts, bean filling
Hazelnut Blue Cheese Tartlets
with Savory Bean Filling
8 ounces cream cheese, room temperature
1 cup Parmesan cheese, freshly grated
1 (4 ounce) jar diced pimiento, drained well
2 cloves roasted garlic, or fresh if desired
1 tablespoon finely minced fresh rosemary leaves
4 scallions, minced (about 1/4 cup)
1 teaspoon coarse salt
¼ teaspoon white pepper
4 teaspoons olive oil

Drain the cans of beans in a colander and run copious quantities of cold water over them until any foaming has stopped. Place them in a food processor with all the rest of the ingredients except the olive oil. Process for 2 - 3 minutes, adding in the olive oil 1 teaspoon at a time if needed for a good consistency, or if the processor is straining.

The Savory Bean Filling/Dip/Spread can be made up to three days in advance, if time is pressing. It is best if the filling is piped into the tartlet shells. If you are not proficient with a piping bag and tips, use a heavier "freezer" type zip-top bag and cut a hole in one corner, making a diameter of about 1/2-inch. If you know your way around a piping bag and tips, use a large open star tip to fill the tarts.  Anything small will clog with the bits of rosemary, scallion or anything else that hasn't gotten completely pureed smooth.  


My passion is teaching people how to create a harmony of flavors with their cooking, and passing along my love and joy of food, both simple or exotic, plain or fancy. I continue my journey in ethnic and domestic cuisines, continuing my journey to explore diverse culinary experiences and hopefully to start you on a journey of your own. Join me also at A Harmony of Flavors on Facebook, and Pinterest.

Wednesday, April 2, 2014

A Great Pasta Salad as a Side or a Meal

I have been making variations of this pasta salad for a long time now; probably close to 20 years. It uses pasta of some kind that will have enough little nooks and crannies that will pick up and hold the little lentils, bits of vegetables or cheese. I have most often used bowtie pasta, but medium shells will work, or even something like penne. 

I made it again a couple of days ago, and it always strikes me how much I love this combination.  The cheese used can be varied. Feta makes a wonderful combination if you don't care for blue cheese, which is what I used in the recipe this time. The herbs could be cilantro or basil or parsley. I think dill would also be tasty, depending on what cheese is used. I tossed in a jar of mushrooms this time, but in summer, fresh chopped heirloom tomatoes would be an exquisite addition. Try using different lentils if you have them. I am going to try this again with little green DePuy lentils one of these days.
Pasta, salad, side dish, Lentils, Blue Cheese
Pasta with Lentils and Blue Cheese

I love this salad. Most times that I make it, I eat it as my meal. It has pasta, vegetables, lentils and cheese. More than enough for a meal. If you are a die-hard carnivore, it can certainly be a side dish. I made it the evening I grilled steaks (when we had a break in the cold weather and I could get out the grill), so we ate it as a side dish. Tonight I will have it for dinner on its own. I think the salad tastes best just off-warm. Personal preference. It can be eaten hot, cold, or anywhere in between.


Pasta and Lentils with Blue Cheese


Serves 6 - 8
pasta, lentils, feta cheese
Pasta and Lentils with Feta Alternate Recipe

½ cup brown lentils
½ pound pasta (shells, bowties, fusilli, etc) 
1 tablespoon salt for cooking pasta
1 cup pasta cooking water1 tablespoon olive oil
1 cup chopped onion
1 carrot, grated or julienned
1 large or 2 small stalks celery, sliced thinly
1 large clove garlic, minced
1 roasted red bell pepper, peeled, seeded, chopped (or use a small jar, drained)
1 jar (6 ounces dry weight) mushroom slices
salt and pepper, to taste
¼ pound (about 1/2 cup) blue cheese crumbles or Feta
¼ cup chopped cilantro (or basil, or parsley)

Set the lentils into a saucepan and add water to just cover. Bring to a boil, reduce to a simmer, cover and cook until tender, about 30 to 35 minutes.

While lentils are cooking, bring a medium pot of water to boil. Once boiling, add the tablespoon of salt to the water and then the pasta. Cook the pasta for the time given on the packaging. Once done, scoop out 1 cup of the pasta water; set aside. Drain the pasta and set in a large bowl.

While those two things are cooking, heat a large skillet, then add the olive oil. Add in the onion, carrot, celery and garlic and cook until just tender. Pour the vegetables into the bowl with the pasta, along with the cooked lentils, the red bell pepper and mushrooms. Add in the cheese and herb of choice and toss well to combine. Taste for salt. This dish is wonderful with lots of freshly cracked black pepper.


My passion is teaching people how to create a harmony of flavors with their cooking, and passing along my love and joy of food, both simple or exotic, plain or fancy. I continue my journey in ethnic and domestic cuisines, continuing my journey to explore diverse culinary experiences and hopefully to start you on a journey of your own. Join me also at A Harmony of Flavors on Facebook, and Pinterest.

Disqus