Translate

Showing posts with label grilling. Show all posts

Sunday, July 10, 2022

Veggie Kebabs as Main or Side Dish

If you love grilled vegetables, then this is a recipe for you. Whether you are vegetarian, or if you want these as a side dish, they have excellent flavor, both from the marinade and from the grill. 

grilling, kebabs, vegetables, main dish, side dish
Veggie Kebabs

When I made these, I used a mix of vegetables I had selected just for this application, but you can mix and match as you choose, keeping in mind that not all vegetables cook at the same rate. I used tiny potatoes whole, so I first boiled them and then marinated them to use on the skewer just for the added flavor of the grill. I used chunks of fresh pineapple, obviously not a vegetable but it does taste great on the grill! Bell peppers are an easy choice, and multi colored peppers make the kebabs look more visually appealing. I used hunks of portobello for the meatiness, but button mushrooms or cremini mushrooms would also work - or no mushrooms at all if they are not to your taste. Corn is best cut into small rounds across the cob, both for easy skewering and for quicker cooking, as more heat can reach the kernels. Sweet potato also needs a little cooking beforehand to make them soft enough to grill, just being careful not to over cook or they won't stay put on the skewer. I love grilled onion, so the more the merrier, whether white, yellow or red, and cut into wide enough squares to be comparable in width to the other vegetables on the skewer. 
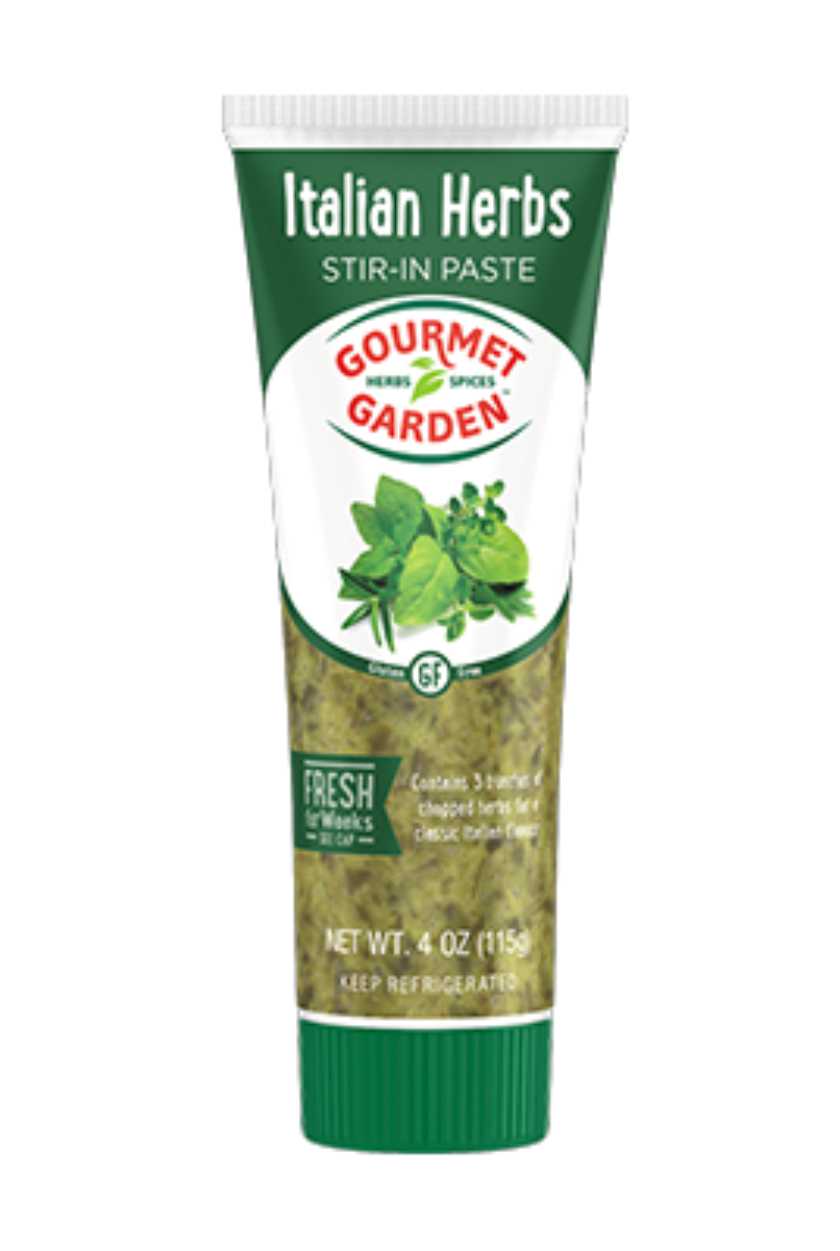
Gourmet Gardens Italian Herbs
I happened to have on hand at the time a tube of Gourmet Garden Italian Herbs. If you have not used this mixture, it is really great to give flavor to all sorts of foods, whether steaks, baked potatoes, mix into a dressing - just use your imagination. Once you've tasted it, you will think of all kinds of things it would enhance. Our friend Rich is a fanatic about this stuff and has it on hand at all times, for stirring into vegetables, adding to sauces, to spread on pizza, whatever strikes his fancy. 

I tried once to make an approximation of this stuff, and it was okay, but somehow fell just short of the mark, for flavor, despite using fresh herbs to create it. The only actual herbs in this mixture listed on the label are basil, oregano, parsley and rosemary, out of 10 total ingredients, so you may understand why I wanted to go that route of making my own. 

👀My suggestion, if you do not have this ingredient, or choose not to use it because of the many "other" ingredients, would be to substitute a tablespoon of minced fresh basil and rosemary with another dollop of olive oil to approximate - as my recipe already calls for oregano and thyme, garlic, balsamic vinegar and olive oil. 

Veggie Kebabs


Makes about 10 to 16 kebabs, depending on size of skewers
grilling, vegetables, kebabs, main dish, side dish, vegetarian
Veggie Kebabs


1 – 2 ears corn, cut into 1½ inch wheels
1 red bell pepper, in 1-inch squares
1 orange bell pepper, cut in 1-inch squares
1 red onion, separated and cut in 1-inch squares
1 zucchini, cut into 1-inch cubes
6 (3-inch) Portobello caps, quartered
15 – 20 tiny 1-inch potatoes, or others, in 1-inch chunks
1 sweet potato, peeled, in 1½-inch cubes
2 cups fresh pineapple, in 1½-inch wedges

MARINADE/SAUCE:
1 teaspoon Kosher salt
1 tablespoon fresh chopped oregano
2 teaspoons fresh thyme leaves
2 tablespoons olive oil
3 tablespoons balsamic vinegar
3 tablespoons Gourmet Garden Italian Herbs 
(or see above ðŸ‘€)
3 cloves garlic, smashed and minced

Place the potatoes and sweet potato chunks into a small pot and cover with water. Bring to boil, adding 1 teaspoon salt to the water, and boil for about 10 minutes, or until they can just barely be pierced through. Drain and rinse under cold water and set aside to cool.

In a bowl, whisk together the Kosher salt, fresh oregano & thyme, olive oil, balsamic vinegar, Italian Herbs paste and garlic. Whisk together and pour over all the vegetables in a large bowl. Toss to coat. Thread the vegetables onto skewers, keeping in mind, if using wooden skewers, they must be soaked for at least 30 minutes before using. When threading the corn, skewer it through the center of the “wheel.” Reserve the marinade aside.

Grill the skewers over a hot grill until they are browned in spots and tender. Brush them with some remaining marinade to serve. Or, remove the vegetables to a bowl to serve, pouring some of the remaining marinade over top.
NOTE: As a party idea, use small wooden skewers, well soaked ahead of time, and thread on just a small few veggies per skewer, Make extra marinade to have for guests to use as a dip or a pouring sauce when serving. As these do not have to be hot for serving, they can be made just slightly in advance, but do not make them so far ahead they need refrigerating, as this significantly changes the flavors.


My passion is teaching people how to create a harmony of flavors with their cooking, and passing along my love and joy of food, both simple or exotic, plain or fancy. I continue my journey in ethnic and domestic cuisines, continuing my journey to explore diverse culinary experiences and hopefully to start you on a journey of your own. Join me also at A Harmony of Flavors on Facebook, and Pinterest.

Saturday, August 24, 2019

Still Time to Get Out That Grill

Depending on where one lives, grilling time may be all year 'round or it may be confined to a few, all too short months. I know some who say they grill even when there is snow on the ground, though I find it gets harder to get things cooked through with too much cold to combat the heat of the grill. But unless you are in the Southern states, grilling season is starting to wind down. For me, in the American southwest, it has been too hot to even want to grill, so my grilling may only just be starting sometime in the next couple of months. 

However your grill season works out for you, I hope these recipes will give some impetus to getting out there. I have to imagine, though I have never done it, that these recipes can be made in the oven. I have not done it, but it is possible. Flavors will be different, assuredly. 

For the first of these recipes, I am taking one my husband came up with. It is simple as can be. And of course it is a beef roast, because my husband will not touch something like shellfish. This has become a matter of pride at this late age, to say he has never, nor will he ever, eat shellfish. I, on the other hand, love shellfish, but developed an allergy, so now it is off my menu also. The second recipe below, is one I used very often before finding out why I was so swollen so often. 😧  The third recipe is a chicken recipe I have made repeatedly through the years and is also unfailingly good. I make my own Red Curry Paste also, so I will give you that recipe as well, though you can assuredly buy it at the store. Making it at home means I can control the heat, getting all the flavor without killing off taste buds in the process. ;)

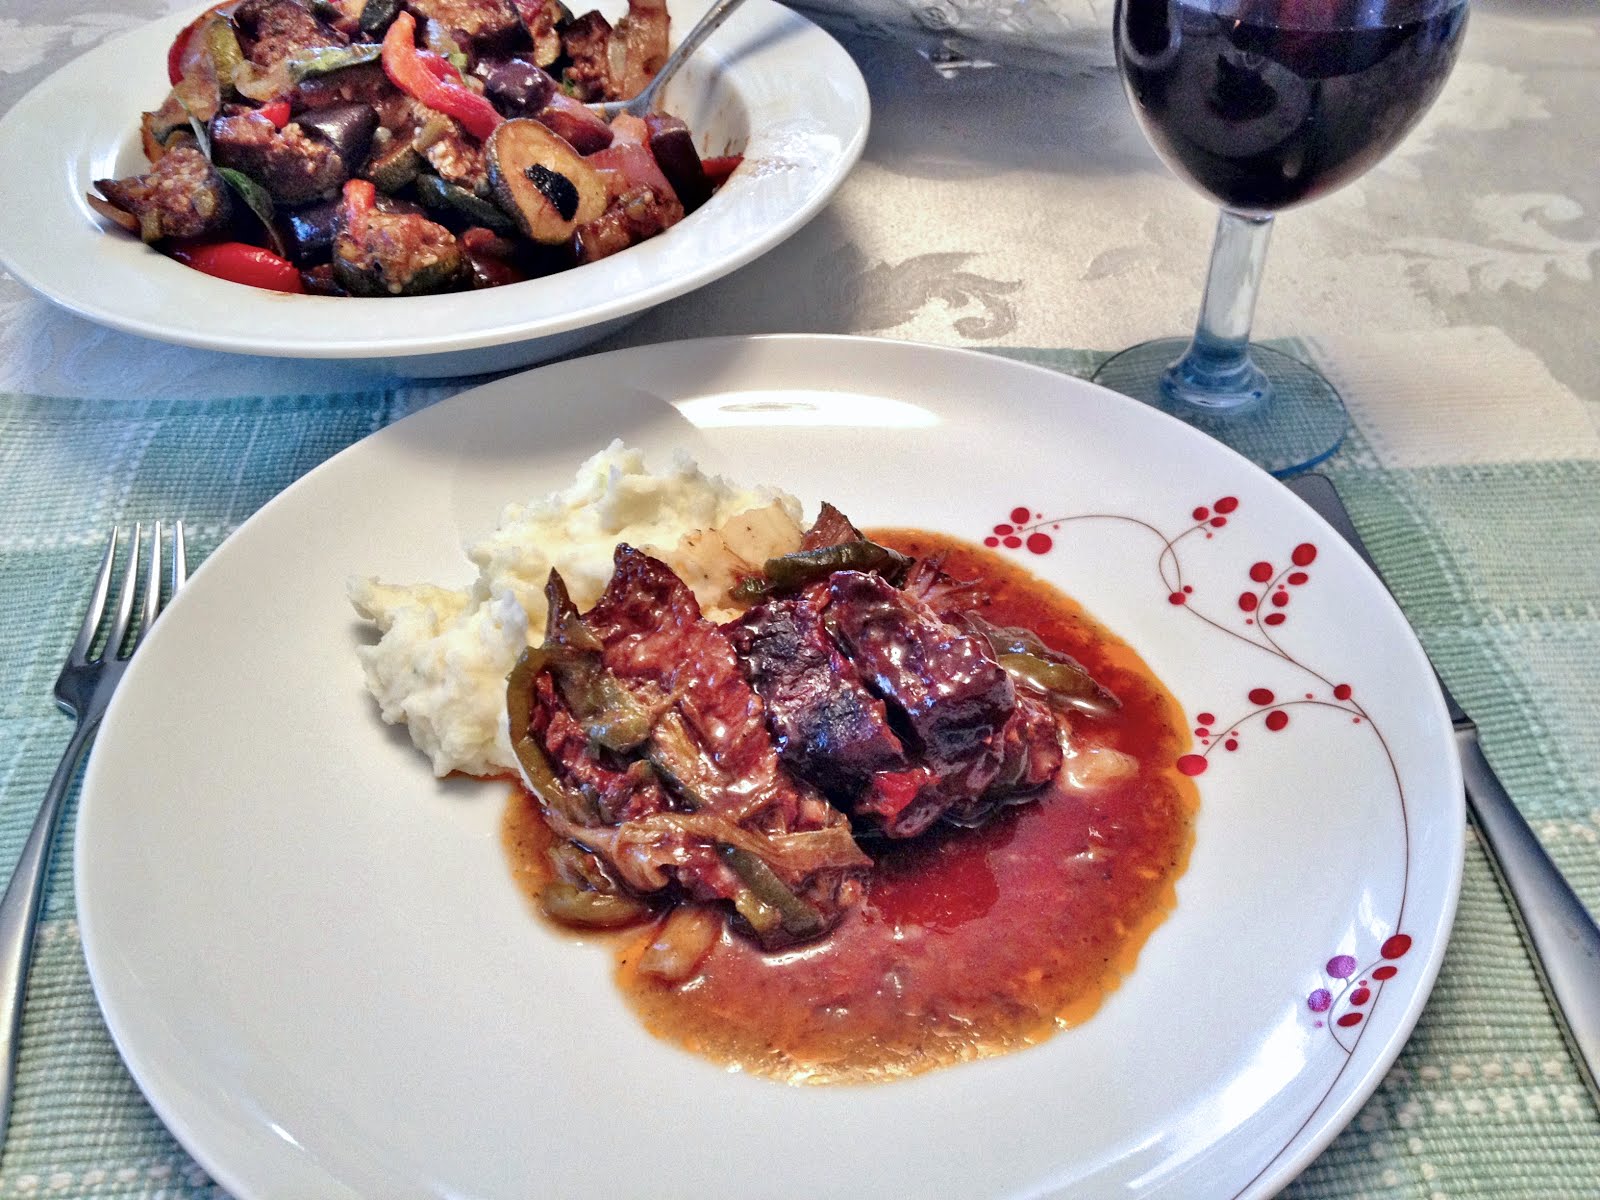
Back to the beef roast. It is started on the grill and seared over high heat for about 15 to 20 minutes per side before removing it to a cutting board and preparing the rest of the recipe. It requires little in the way of prep. It uses only basic ingredients. Nothing fancy. I have yet to even get a photo that is truly worth showing. It looks rather homely. But the flavor? Oh, great heavens, it is magnificent. Serve with some mashed potatoes and you will be happy campers.

BBQ sauce, Roast beef, chuck roast, green peppers, scallions,
Terry's BBQ Roast
BBQ sauce, chuck roast, grill, bake, green peppers, scallions
Terry's BBQ Roast

Terry's BBQ Roast


Serves 6 to 8

1 boneless chuck roast, about 3½ pounds
6 - 8 scallions, as needed
1 green bell pepper, more if needed
1 cup barbecue sauce of choice, more if desired

Heat a grill to high. Set the chuck roast onto the grill until it has a really good sear on one side, about 15 or so minutes. Flip the roast and sear the other side the same way. This gives a nice smoky "grilled" flavor, even though not finished on the grill. Remove the roast from the grill and place on a cutting board. Slice into the roast, not quite all the way through, about every half to ¾-inch apart.

Prepping, how to, BBQ sauce, chuck roast
Prepping Terry's BBQ Roast

Preheat the oven to about 275 degrees. While the roast is grilling, prepare the scallions and green pepper. You will need a good handful of scallions. Some are larger than others so the amount is non-specific. If they are tiny, use an entire bunch; if they are large you might use 6 or so. Cut the scallions into lengths that will fit along the width of the width of the roast, then cut the scallion lengths in halves, lengthwise. Cut the bell pepper into very thin strips along their lengths.

Prepare a piece of foil large enough to fit into a 9 x 13-inch baking dish, ensuring it is long enough to fold and wrap the roast. Use two thicknesses if thin foil, or one if using heavy duty foil. Press the foil into the dish, leaving the rest as overhang until needed. Place the roast carefully into the foil-lined casserole. Stuff lengths of scallion and bell pepper into the cuts in the meat, pressing the vegetables in as much as possible.
Cover the roast with at least 1 cup of barbecue sauce. Close the foil around the roast, completely closing it into a packet. Set the pan into the oven and allow to roast for about 2½ hours. Take care when opening the packet, as there will be copious amounts of steam. The roast will be fork-tender and have plenty of "gravy" around it. Great served with mashed potatoes or rice.

~~~~~~~~~~~~~~~~~~~~

For these shrimp - or scallops - not much time is needed, either for the marinating time or the grilling time. Over-grilled shrimp or scallops become rubbery. This marinade is so easy and delicious and requires so little time to flavor the seafood.

The photo below is of little individually skewered shrimp, along with some red onion and one chunk of pineapple per tiny skewer. These were for a party and I used a half red cabbage as the vehicle to hold all the little skewers, poked into the cabbage "dome" evenly.


Grilled, Marinated Shrimp or Scallops


Individual, skewers, shrimp, pineapple
Individually skewered shrimp and pineapple
Scallops, skewersShrimp, skewerRecipe amount is up to you! The marinade is plenty for a goodly amount.

MARINADE:
1 can (6-ounce) unsweetened pineapple juice
¼ cup (2 ounces) soy sauce
¼ cup (2 ounces) olive oil

Shrimp, or scallops as needed

Mix the marinade ingredients together in a zip top bag. Use individual bags or bowls with tight fitting lids, keeping shrimp and scallops separate.
Either mix marinade and divide between bags or bowls, or if amounts of shrimp and or scallops is large, made 2 recipes of the marinade, placing each amount into a separate bag/bowl.

Allow either shrimp or scallops to marinate up to an hour or so, maximum, then have a preheated grill ready. The shrimp can be skewered onto long skewers. The scallops do better on a grill pan. They tend to fall off individual skewers. If you prefer to have them skewered, use two skewers about ¼ inch apart and skewer them double to keep them in place.

Grill time is short. The shrimp are done as they turn pink, about 3 to 5 minutes per side. The scallops may take just a little longer, depending on their size. Watch for when they begin to show little cracks in the surface. The shrimp are also great if skewered alternately with pieces of onion and chunks of unsweetened pineapple before grilling. 


~~~~~~~~~~~~~~~~~~~~~~~~~

Coming to the third recipe, below, for Thai Red Curry Paste, this is the precursor of the Red Curried Chicken Kebabs recipe. Do not feel you must adhere strictly to this recipe. I realize not everyone has kaffir lime leaves or galangal, and the amount of dried red chilies is totally up to the individual. Use what you have. This makes a delightfully flavored sauce. It is unsalted, so salt must be added into the individual recipe.
 

Thai Red Curry Paste

Thai, Red Curry Paste, condiment
Thai Red Curry Paste
Thai Red Curry Paste, individual packets, freezing
Makes about 8 tablespoons

2 - 6 dried red chilles
2 shallots, cut in small chunks
1 teaspoon black peppercorns
2 teaspoons cumin seeds
1 tablespoon coriander seeds
1 teaspoon salt
2 teaspoons lemon or lime rind, chopped
1 teaspoon galangal powder (or use 1-inch fresh ginger)
3 - 4 cloves garlic
6 - 8 tablespoons oil, as needed
1 teaspoon turmeric
2 teaspoons paprika
1 - 2 Kaffir lime leaves, if available

Blend all ingredients together. This may take a while and a lot of scraping down the blender container, and require more oil (or water) to get it to blend properly. If you want a smoother paste, grind all the dry spices first, then add in the wet ingredients to finish off the process. 


Use what is needed for the recipe, then place individual recipe portions into small sandwich bags with the flap. Tie off the top and freeze until needed, as shown here.


~~~~~~~~~~~~~~~~~~~~~

Red Curried Chicken Kebabs are just flat-out delicious. I have been making these for years and they are a hit each time. I hope they give you the same pleasure!

Red Curried Chicken Kebabs


Red Thai Curry, Chicken, Kebabs, grilling
Red Curried Chicken Kebabs
Serves 8 - 10

2½ tablespoons Thai Red Curry Paste (recipe above, or use store-bought)
½ cup vegetable oil (I use olive oil or coconut oil)
2 teaspoons Kosher salt, or to taste
2½ pounds skinless, boneless chicken breasts, cut into 1-inch cubes
½ each of red and green bell peppers, cut into 1-inch squares

1 red onion, cut into 1 inch single squares

Minty Yogurt Sauce
¾ cup plain low-fat yogurt
¼ cup mayonnaise, or low-fat mayonnaise
1 tablespoon honey
1 tablespoon fresh lime juice
1 tablespoon fresh mint, finely chopped

In a large bowl, mix the curry paste with the oil and 2 teaspoons of salt. Add the chicken cubes and toss to coat. Let stand at room temperature for up to 2 hours or cover and

refrigerate overnight.

Light a grill. In a medium bowl, whisk the yogurt with the mayonnaise, honey, lime juice and mint and season with salt. Set aside or refrigerate until needed.

Thread the chicken onto 10 skewers, threading a chunk of red or green bell pepper and/or red onion squares between the cubes. Grill over moderately high heat, turning frequently, until lightly charred and cooked through, about 8 minutes. Serve the kebabs with the minty yogurt sauce on the side. 

 
NOTES: If you like pineapple, this could be another addition to your skewers.

These could be made as whole boneless skinless chicken breast or thigh sections. As the recipe states the chunks should be about 1-inch cubes, it might also be good to cut the chicken breasts in half lengthwise, so they are not so thick, and will get more marinade onto the surface area. The timing for grilling bone-in chicken will be much longer - about 25 minutes, or until an instant thermometer reads 165 degrees in the thickest part of the meat.

Anything that can be grilled, can also be broiled. If the weather is not cooperating, or it's the wrong season, try broiling.


The meal is delicious with a nice white wine, Chardonnay, Pinot Gris or Torrontes would be my first choices. 


My passion is teaching people how to create a harmony of flavors with their cooking, and passing along my love and joy of food, both simple or exotic, plain or fancy. I continue my journey in ethnic and domestic cuisines, continuing my journey to explore diverse culinary experiences and hopefully to start you on a journey of your own. Join me also at A Harmony of Flavors on Facebook, and Pinterest.

Tuesday, July 15, 2014

Making Stuffed Hamburgers for a Birthday Meal

Last summer I made stuffed hamburgers a few times. My sister-in-law, Sherri, most particularly loved them. So much in fact, that she requested them for her birthday dinner this past Sunday. I couldn't even recall what I used to stuff the burgers last year, but she reminded me: caramelized onions, Gorgonzola cheese, mushrooms. I don't think I ever used all three at the same time, but we decided these should be a little more hearty, and I christened them Stuffed Hamburger "Steaks". 
Onion, Gorgonzola, Mushrooms, Burger Steaks
Onion, Gorgonzola and Mushroom Stuffed Burger Steaks


The one thing I simply do not have down is the part where the burgers do not get over cooked. I must admit, most particularly when there is only a thin layer of meat encasing already cooked fillings, it has been difficult for me to gauge when the meat is done and the insides are warm. I over did these also, though neither Sherri nor my husband had any trouble eating them. At least I didn't blacken them. While most people find a little char on their grilled foods enticing, my husband finds it intolerable. 

Another thing I find confusing is how to fill the burger meat and keep the whole thing together on the grill - without really compacting the meat. I watch Mario Batali and Michael Symon on The Chew stressing how burger meat should not be overworked or compacted. For me, if it isn't well compacted, they just want to crumble. Oh well. Again, it could be just a matter of "to each, his own." I still find my burgers tasty in the extreme, so for me, this works.

Do Ahead

It is really best to make the caramelized onions and the sauteed mushrooms the day before. They are time consuming at the best of times and require attention. Two medium-large onions sauteed down to just about ½ cup once deep golden brown. An entire pound of mushrooms sauteed down to a little over a cup. The onions are best cooked over very low heat, stirring occasionally at first; more and more often as they begin to color. It takes about 45 minutes to an hour to accomplish this task. The mushrooms took about 20 minutes to cook down. If you have never cooked mushrooms, expect them to release a LOT of liquid, quickly. I prefer to saute mushrooms over a medium heat, or even higher because this helps evaporate all the excess liquid more quickly. Once the liquid is gone, they will brown well. I used a combination of 1 tablespoon of butter and 1 - 2 tablespoons of olive oil for each application.


mushrooms, frying, sauteeing, cooking mushrooms
1 pound sliced mushrooms in pan  |  after about 5 minutes lots of liquid  |  now golden  |  compare cooked amount!

How to Make Stuffed Burgers

For starters, I divide up the meat for each burger, then take out about 1/4 to 1/3 of the meat and set it aside to make the "lid." The larger portion I pat out and create high ridges to hold the filling(s). I create what sort of looks like a tart shell, patting, shaping, pressing into the corners to make a high rim. If using things like caramelized onions or sauteed mushrooms, these need to be made in advance. The onions can take nearly an hour to make and the mushrooms at least 20 minutes. In this particular instance I used about 1 tablespoon (½ ounce) of the caramelized onions, then about ½+ ounces of the Gorgonzola crumbles and about 2 tablespoons (¾ ounce) of the sauteed mushrooms for each burger. This used up all of the 2 onions I had caramelized, nearly all of a 5 ounce tub of Gorgonzola Crumbles and at least ⅔ of the pound of sauteed mushrooms I had prepared. These burgers can be made smaller by using 4 ounce portions of meat. I was aiming for an entree, using no bun.

Once the fillings are in place in the well of the patty, I thinly pat out the "lid" portion of the burger. Carefully lifting it, it is set atop the fillings, and I begin to pinch closed the edges all around. Re-shaping a bit and pressing to keep the burgers relatively flat for even cooking, I set them onto a rimmed baking sheet that was sprayed with cooking spray for easy release. In an effort to keep the meat from coming apart later, I set the sheet, uncovered, into the fridge for a few hours to dry before grilling.
Stuffed, Burger Steaks, gorgonzola, onion, mushroom
Divide meat and make well  |  layer with onion  |  add Gorgonzola  |  top with mushrooms  |  set meat lid over top and seal

Onion, Gorgonzola and Mushroom Stuffed Burger Steaks


Makes six (6 ounces before stuffing) burgers
Onion, Gorgonzola, Mushroom, Stuffed Burger,
Onion Gorgonzola Mushroom Stuffed Burger Steaks


2 pounds hamburger meat
6 ounces bacon, minced finely.
2 medium/large onions, caramelized
1 pound Baby Bella mushrooms, sliced and sauteed
3 - 4 ounces Gorgonzola crumbles
Salt and pepper, to taste

In a large bowl, combine the minced bacon with the burger meat. Divide the meat into 6 equal portions of 6 ounces each. Separate out about 1/3 of each portion to pat into the "lid" for the burger. It helps to use cooking spray or oil on the counter while forming the burgers, for easier lifting later. Using the 2/3 portion of the meat, pat out a round and press up the sides to make a good sized well. The patty should be about 5 1/2 inches in diameter. Begin layering in the fillings: onion, cheese and mushrooms. Set the lid portion atop and pinch the edges all around to seal. Pat into a flat burger with smooth edges. They will be about 1 inch high.

Gently lift and set the burgers onto a baking sheet sprayed with cooking spray or brushed with oil. Refrigerate the burgers for at least an hour; more if time permits. Before grilling, sprinkle the burgers with salt and pepper. Grill to desired doneness.


The thing to (try to) remember is that the meat is very thin on each side of the fillings. The fillings do not need to be cooked; only reheated. Once the cheese is oozing out, the meat is officially overcooked. I believe the smarter thing would be to use an instant read thermometer and make sure the inside is not much more than 110 degrees. That is my next goal!


My passion is teaching people how to create a harmony of flavors with their cooking, and passing along my love and joy of food, both simple or exotic, plain or fancy. I continue my journey in ethnic and domestic cuisines, continuing my journey to explore diverse culinary experiences and hopefully to start you on a journey of your own. Join me also at A Harmony of Flavors on Facebook, and Pinterest.

Thursday, June 19, 2014

Green Masala as a Marinade

I have been sort of laying low these last few days. Getting caught up on other things around the house. Going to the dentist - again. We had leftovers so I hadn't cooked anything new. Yesterday though, I had to think of something for dinner. I had a package of boneless, skinless chicken breasts in the freezer so I got those out in the morning with no real thought of what to do with them. In the back of my mind I did have the thought that if nothing else occurred to me, I would use the marinade I used for the Grilled Pork with Indian Spices, as it is great with pork, chicken or turkey. It is such an easy marinade, using things I almost always have on hand and it is invariably fantastically flavored.
Green Masala, Grilling, Chicken, recipe, main dish
Green Masala Grilled Chicken


So, after spending my day working on the computer doing graphics work for my husband's place of business, I came downstairs still not having made any decision on what to do with the chicken. I opened the fridge and the first thing I saw was the jar of Green Masala I had made just a few days back. While I was sitting in the dentist office the other day, while waiting for the dentist I was talking about food to the dental assistant. I described this Green Masala and how good it is, and all the things it can be used for. I was telling her about how it can be used as a marinade or a sauce, or both, for chicken, fish, pork, beef or just vegetables, as I had done with the cauliflower last weekend. It can be spread into sandwiches. It can be used for flavoring already cooked vegetables too, and not only as a marinade to grill them. It would really brighten up plain cooked cauliflower, though it was marvelous as a marinade on the Grilled Cauliflower. The light bulb went on and ta-da! I had a recipe idea for the chicken.
Pasta Salad
Pasta Salad

When I have a recipe with such great flavors as the Grilled Pork (Chicken/Turkey) with Indian Spices, I usually cut the meat into thinner strips so there is more marinade per square inch of meat. I want it to get all the flavor it possibly can. I did this same thing last night. I cut the chicken breasts into two pieces, sort of across the grain but still more lengthwise. My goal was to have long, but narrower strips. I think this would be excellent for making skewers also, either using the chicken breast meat cut into thick chunks or slicing the chicken into thin strips and "weaving" them back and forth onto soaked bamboo skewers as for Satay and grilling. 


I had less than half of the Green Masala left from the recipe, as I have been putting it on everything! So, using it for the chicken marinade I thought it would be good to use a little less, adding in more oil, vinegar, turmeric and garam masala. This would leave enough of the Green Masala to use for sauce at the table as well as the marinade. This would have been wonderful served with rice as a side dish, but I had a little Pasta Salad leftover and my husband ate that as his side. I also had some of my Tropical Slaw leftover and I had that with mine. All I can say is that the chicken was wonderful. If you take the time to make the Green Masala, do try making the chicken this way. Boneless chicken thighs could be used if that is your preference. Whole chicken on the bone can be made as well, though I prefer to make things more quickly when possible.


Green Masala Grilled Chicken

Green Masala, Grilling, Chicken, recipe, main dish
Green Masala Grilled Chicken

Serves 3 or 4

3 boneless, skinless chicken breasts
1/2 cup Green Masala
2 tablespoons olive oil
3 tablespoons red wine vinegar
1/2 teaspoon turmeric
1 teaspoon Garam Masala
1 teaspoon salt

Cut the chicken breasts lengthwise, making 2 longer, narrower strips. In a zip-top baggie, combine the remaining ingredients and place the chicken into the marinade. Seal the bag and move the chicken pieces around so all are well coated with the marinade. Allow the chicken to marinate for at least 1 hour; 2 hours is preferable. If the chicken is still partially frozen (as was mine) leave it to marinate on the counter; otherwise, in the fridge.

Heat a grill. Remove the chicken from the marinade and set them onto the grill over not too high a heat. Allow the chicken to cook to an internal temperature of 165 degrees. Timing will depend on the thickness of the meat. Pass more Green Masala for serving.

NOTE: If desired, cut the chicken into 1 1/2 inch cubes and lace them onto skewers, alternating with squares of red or green bell pepper. Alternatively, while the chicken is still mostly frozen, slice into thin strips and lace them onto soaked wooden skewers.


https://aharmonyofflavors.blogspot.com/2014/03/a-conundrum-with-samosas.html

Tuesday, June 3, 2014

Tropical Slaw is Coleslaw at its Best


Recently I saw a recipe for a coleslaw using mango and radicchio added to the cabbage. It listed other ingredients, and then there were things I thought would be great, or better. I wrote my list of ingredients to use, bought all the ingredients. . . .and then I had to have a tooth pulled and it all got put on hold. Today I was trying to decide what to have for lunch and decided it was time to make that slaw. I got a bag of slaw mix, but used only 8 cups of it (it all condenses down so much after a few minutes). 

radicchio, chickory, salad, vegetable
Treviso Radicchio
I did use the radicchio and mango. The mango needs to be a little under ripe, hard enough that it can be sliced and julienned. Even an under ripe mango will have sweetness, though the harder it is, the more residual tartness that will remain. This is all great for a slaw, because even if it has a little tartness, it is still sweeter than the other ingredients and will blend in perfectly. I added in a jalapeno, which gave a lovely hint of spice, but can be omitted or increased as desired. I love fresh ginger so I added a fair amount - more than some people might like, as fresh ginger also has a spicy bite to it.  Radicchio is a red-leaved member of the chicory family. The redness of the leaves is accomplished by placing the heads in darkness to stop the chlorophyll and promote the bright red and white of the leaves. It is thinner leaved than cabbage and more bitter. Cutting open a radicchio and a red cabbage side by side, though the heads look similar, the thin leaves and the more maroon color of the radicchio (vs the purple of "red" cabbage) is immediately noticeable.
Slaw, cabbage, radicchio, salad, recipe, cilantro
Tropical Slaw

This salad has elements of sweet, sour, salt and bitter, making it a nicely rounded and balanced mix of flavors. For me, this salad is one of the most bright and interesting mixes I have tried in a long while. The flavors were just that great together. I could easily see this paired with any summer barbecue, but particularly barbecued ribs or my grilled chicken or pork with Indian spices. It would be lovely to accompany a brunch also.

Tropical Slaw


Makes about 6 - 8 servings
Slaw, salad, cabbage, radicchio, cilantro, recipe
Tropical Slaw


SLAW MIX:
8 cups of shredded cabbage or cole slaw mix
1 small radicchio, about 2 cups shredded
1 under ripe mango, peeled, sliced, julienned
½ - 1 cup cilantro, lightly chopped
1 jalapeno, seeds and membranes removed for less spice, julienned
1 - 3 tablespoons thin slices fresh ginger, julienned

DRESSING:
¾ cup mayonnaise
¼ cup fresh lime juice
¼ cup of sugar or 4 packets Stevia
1 teaspoon salt
few grinds pepper

Place all the slaw mic ingredients into a large bowl. In a smaller bowl, combine the dressing ingredients and stir to combine. Pour the dressing over the slaw and toss well to combine.


The pork or chicken grilled with Indian spices is another of my most favored go-to dishes for summer grilling time. It is a hit no matter which meat is used, and I have also made it with turkey tenderloins. If using chicken breasts, it is best to cut them lengthwise into two portions each, so the flavor is best distributed. The flavors are well worth it! If using a pork tenderloin, cut each tenderloin on a diagonal into about 3 or 4 pieces. If using turkey, use the breast portions and try to cut them along the silver-skin that bisects the breast meat. Remove the silver-skin totally. The mixture of spices is easy and so flavorful that this meat is hard to resist. I have had people eating the turkey done this way, exclaiming over how wonderful it was - only to find that it is turkey and they really dislike turkey, generally. The marinade will work for at least 2 pounds of meat. Do try this.

Grilled Pork (Turkey or Chicken) in Indian Spices


Serves 6 to 8

(up to) 2 pounds meat of choice
Grilled meat, Pork, Indian Spices, Indian flavors, recipe
Grilled Pork with Indian Spices


MARINADE:
3 cloves garlic, minced
3 tablespoons dried onion flakes
2 tablespoons fresh ginger, grated
2 teaspoons coriander seed
1 teaspoon cumin seed
1 teaspoon salt
½ teaspoon freshly ground black pepper
½ teaspoon cardamom seeds ½ cup red wine vinegar½ cup olive oil

Prepare the meat of choice as described above. If at all possible, use whole spices (coriander, cumin, cardamom seed and black peppercorns) and grind them in a small coffee grinder used only for spices. In a gallon sized zip top bag, place the red wine vinegar and olive oil and then add in the ground spices along with the salt, pepper, garlic, ginger and onion flakes. Seal the bag and swish the ingredients around to mix. Add in the meat of choice and allow to marinate at least 2 hours and up to overnight. Remove the meat from the marinade and grill to desired doneness.


My passion is teaching people how to create a harmony of flavors with their cooking, and passing along my love and joy of food, both simple or exotic, plain or fancy. I continue my journey in ethnic and domestic cuisines, continuing my journey to explore diverse culinary experiences and hopefully to start you on a journey of your own. Join me also at A Harmony of Flavors on Facebook, and Pinterest.

Disqus