Translate

Showing posts with label coconut. Show all posts

Friday, May 9, 2025

No Bake Cookies for Any Time

 . . . but especially for Christmas! I know it is already into May. And I just haven't been blogging, so this never got posted. 

Near Christmas last year I had bought two boxes of Vanilla Wafers. I always make Bourbon Balls for Christmas, partly because they are invariably requested, and partly that I love them. But most importantly, they are no bake. Mix, form and store. What a great invention, no-bake cookies!

rum balls, no bake, dark rum, coconut, apricot
Apricot Coconut Rum Balls (Bourbon Balls top right)

Why I bought two boxes of Vanilla Wafers is beyond me. The recipe for Bourbon Balls calls for one box. That recipe makes plenty. Since Bourbon Balls use cocoa and bourbon, I wanted to find another no-bake recipe that would use the extra box of cookies without using cocoa. Do you know how difficult it was to find one, single recipe that did not use cocoa? Heavens!

I searched. I specifically wrote no cocoa, or no chocolate in my search. All that came up were recipes using cocoa. I searched for no bake cookies with no mention of cocoa or chocolate. Still, all the recipes had cocoa or chocolate in them. 

And then finally, a little Christmas miracle happened. I found this post from Chips and Pepper. Their recipe is, I am sure, perfect. I told my sister about it, noting that the original had no alcohol. She said she would make it that way for her grandkids. It didn't fit all of my criteria, but it was a usable recipe to start. My criteria were:

  • No cocoa or chocolate
  • Use Vanilla Wafers as the base
  • Use dark rum (as opposed to bourbon in the Bourbon Balls) as I have no more small grandchildren ;)
I sat and compared amounts in this recipe to the recipe for Bourbon Balls, to try and formulate a recipe that would accommodate my criteria. I didn't have any orange marmalade or orange juice. Instead I used apricot jam and dark rum. I added cardamom, simply because we all love cardamom in my house. I am sure ginger would be great as a substitute or possibly cinnamon, if one of those spices suit. Or they can be left out entirely. I used dark rum. Other rum can be used interchangeably. Coconut flavor rum would go well with the coconut in the recipe. Spiced rum would enhance the spice aspect. These can be rolled in granulated sugar. I used powdered sugar to distinguish from the Bourbon Balls that I roll in granulated sugar.

I must report that I loved them, as did everyone else who tried them. My husband and I both have loved the Bourbon Balls all through our 35 years together, but we conceded that these might just be a new favorite! So I give all my thanks to Chips and Pepper for the great idea I used!

Apricot Coconut Rum Balls

1  (12-ounce) box Vanilla Wafers, crushed to fine crumbs
3/4  cup powdered sugar
1/2  cup finely ground pecans or walnuts
3/4  cup fine shredded unsweetened coconut
1/2  teaspoon ground cardamom
1/2  cup apricot jam
6  tablespoons dark rum
Powdered sugar, for rolling

Place the first five ingredients into a large bowl and stir to combine all ingredients.

Separately in a small bowl or a large measuring cup, combine the apricot jam and dark rum. If any pieces of apricot are large, cut them very small, else it makes for difficult rolling later.

Pour the wet ingredients into the dry and thoroughly mix until all ingredients are well moistened. Form small balls, rolling them tightly, then roll in the powdered sugar. Store in a container. At room temperature, they will be very soft. They are best kept either refrigerated or frozen. This makes having them done way ahead of time a snap. They that in no time once set out at room temperature. 

NOTES:
  • Nuts used are interchangeable
  • Cardamom can be switched out for another spice, or left out
  • Apricot jam may be substituted with orange marmalade or peach jam
  • Dark rum may be substituted with other flavors of rum or another dry liquor of choice. It may be left out and substituted with orange juice, if preferred.

Saturday, June 17, 2023

Black Eyed Peas Indian Style

I cannot believe I'm heading on a year of no posts. Still, hoping this will be of interest. 

In all of my life, despite trying all sorts of foods from all over, I have never once tried to make black-eyed peas. I believe i tasted them once, as part of "Texas Caviar" served at a function I was attending. In that mixture, the whole thing was stellar, but I could not pick out one flavor on its own. 

Alsande Tonak, Black-Eyed Peas, Curry
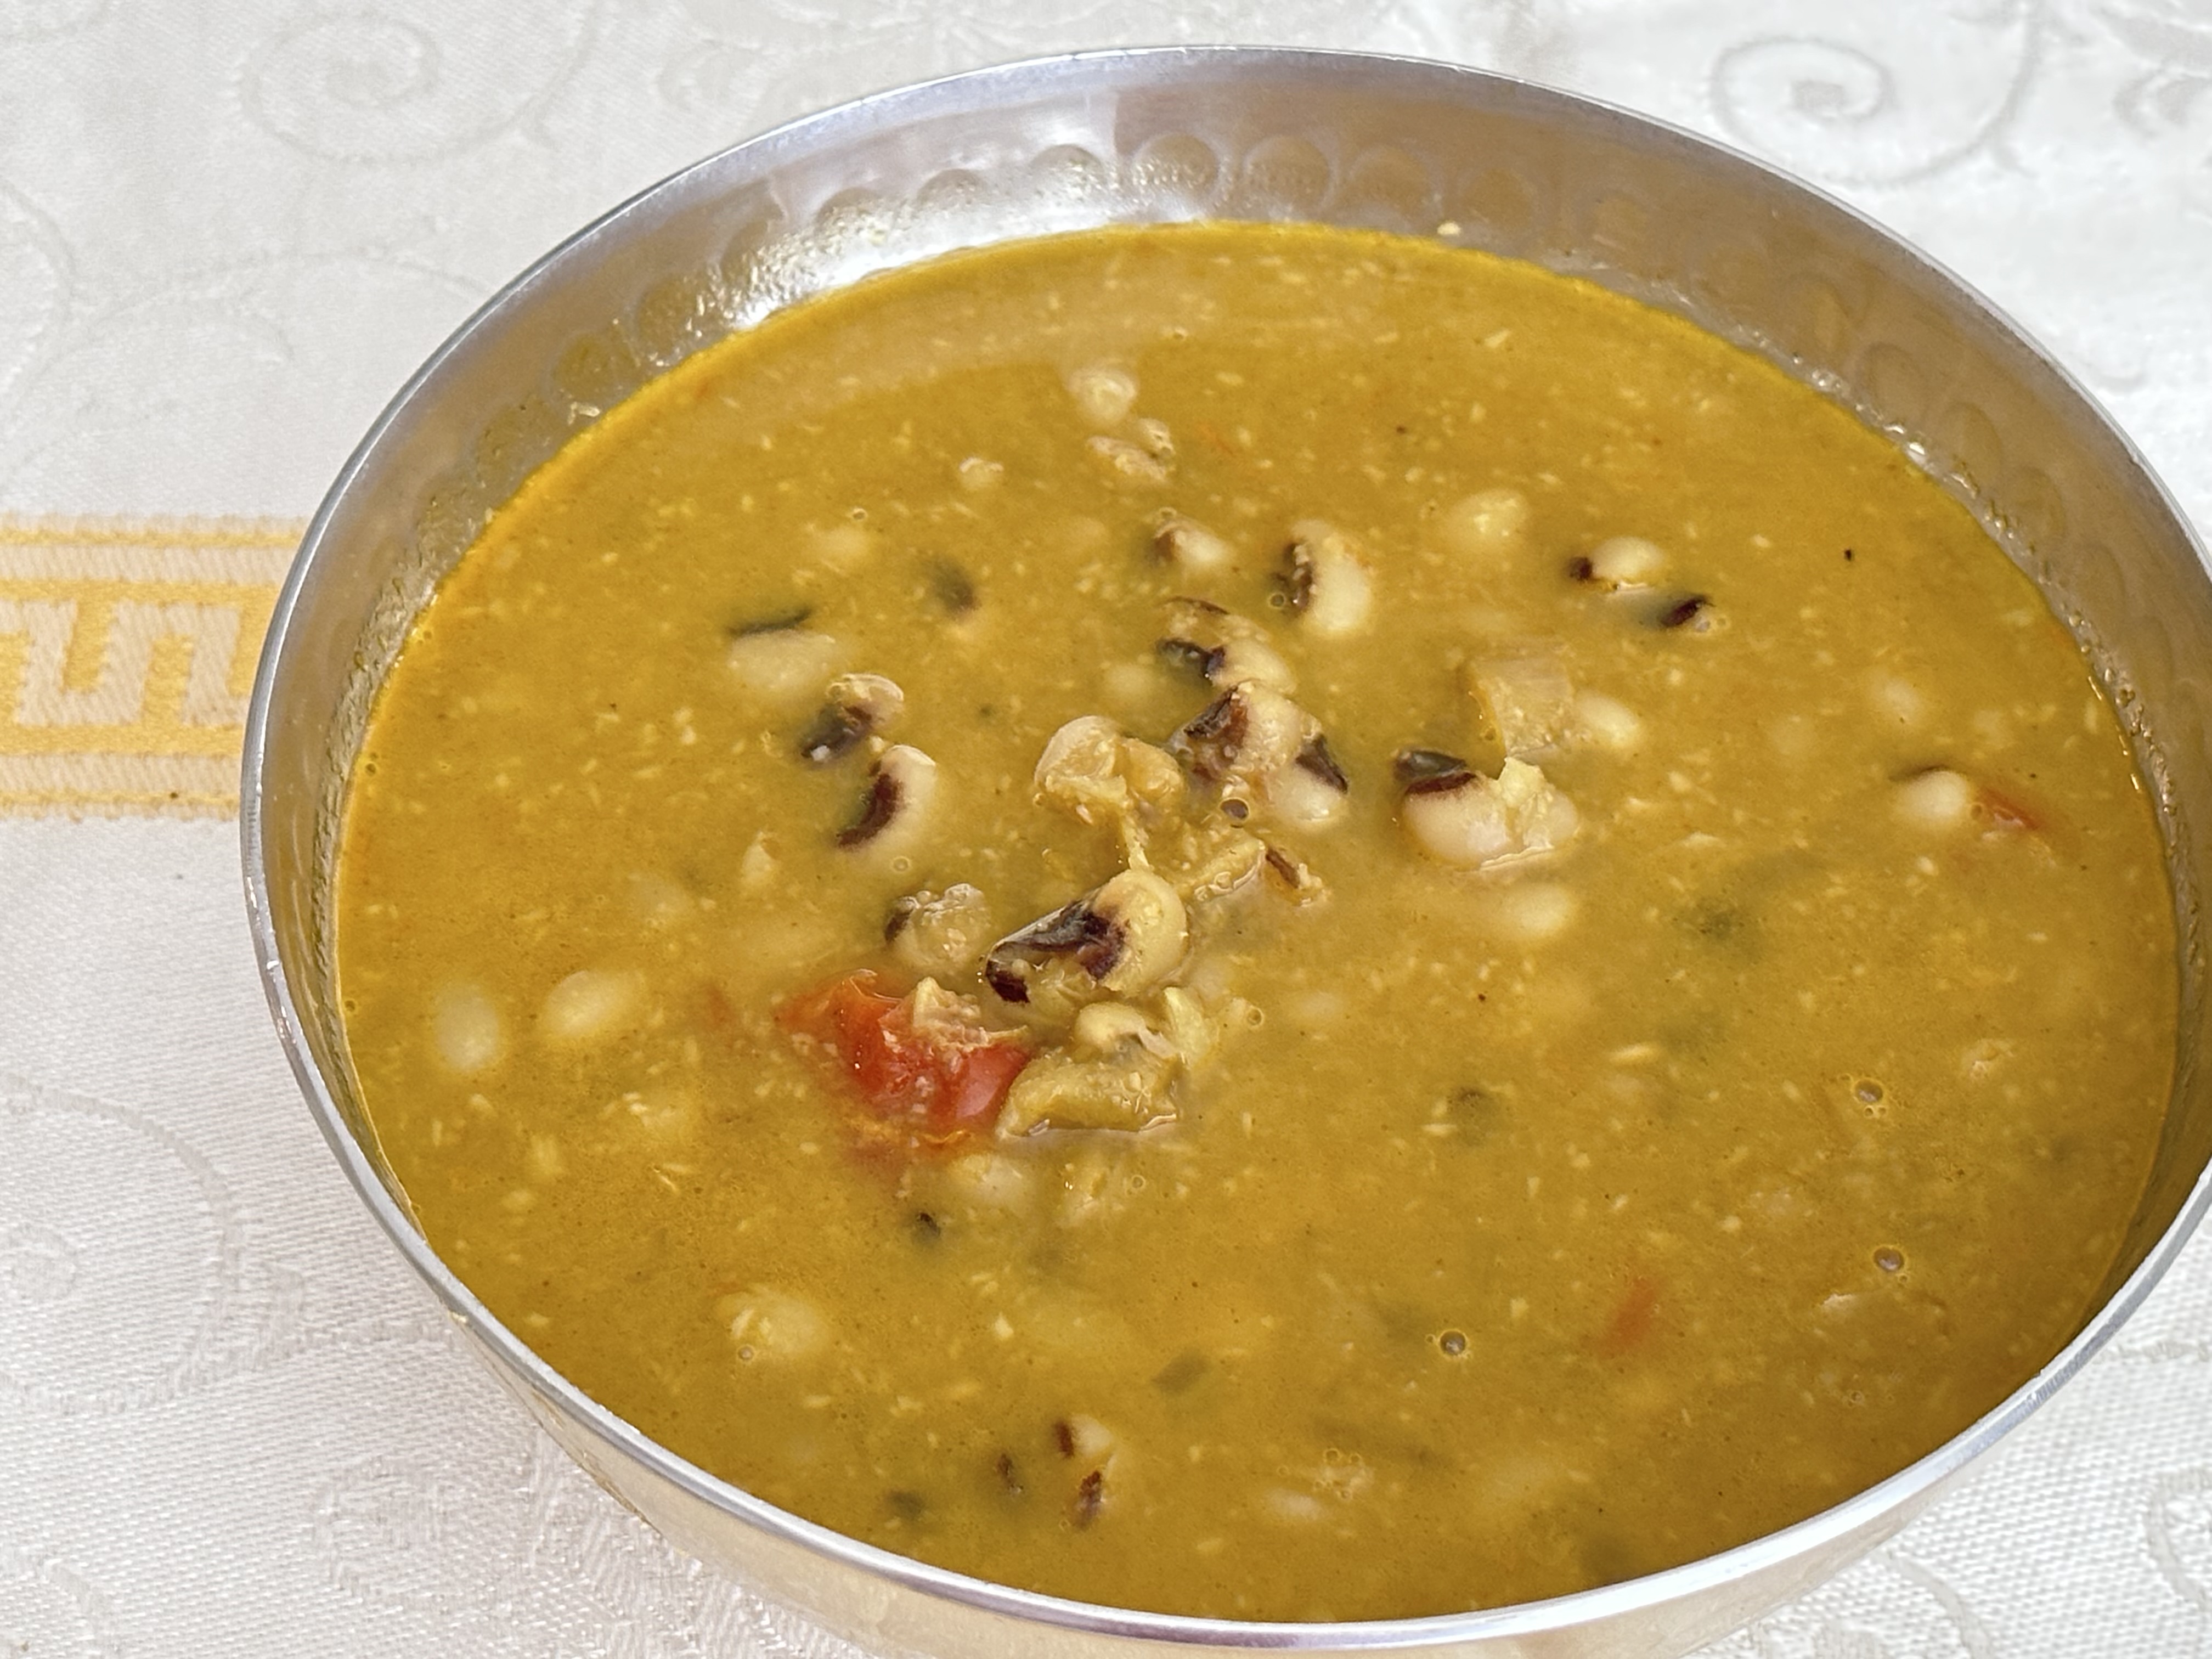
Alsande Tonak or Black-Eyed Pea Curry


Then, rooting around the internet for Indian recipes, I cam upon one called Alsande Tonak, a recipe from Goa. I cannot now place where I found this recipe, yet there are many of them out there to peruse, should you be a "comparison cook," like me. 

I promptly went out and bought some black-eyed peas to try out this recipe, and it was a hit with both my husband and I.

Caveat: 

So many Indian recipes call for using (as in the recipe I used to create my own) 12 or 13 dry red chilies in making the masala, then another teaspoon of hot red chili powder later on. If this is your thing, more power to you! 

While I do like some heat, I would never tolerate that over abundance of a good thing. My poor husband would likely perish at the first taste. He's not one for chili heat at all. So, under this restriction, I scaled back the whole red chilies to 1 and eliminated the chili powder later. 

About the Masala**

Most masalas require toasting each spice separately first, and setting them to cool, then grinding. This masala is going to be toasted later, so the first part can be avoided. Secondly, the masala is more than is needed for the recipe, so you will have some left for another time. Or, double the remainder of the recipe and use all this amount of masala.

About the Coconut***

The very best is having fresh coconut in this recipe. Many supermarkets these days do carry it in the freezer section. Those in my area do not, so I get frozen bags of it when I go to the Indian grocery.

But if you have no access to fresh coconut, use unsweetened dry coconut, about 1/4 cup, and add it to the spices to grind for the masala, then use it as directed for the masala.


Alsande Tonak

(or Black-Eyed Pea Curry) 

Alsande Tonak, Black-Eyed Peas, Curry
Alsande Tonak
Black-Eyed Pea Curry


1/2 pound black eyed peas, soaked overnight
2 fresh tomatoes, chopped
1 small onion or shallot, chopped
2 cups water

TONAK MASALA:
3 whole cloves
1-inch cinnamon stick
3 tablespoons coriander seeds
1/2 teaspoon black peppercorns
1 dried red chili, de-seeded, broken, for less heat
1 1/2 teaspoons fennel seeds
2 - 3 petals of a star anise
2 teaspoons white poppy seeds, optional
----------
1/2 teaspoon turmeric
1/4 teaspoon nutmeg

1 tablespoon cooking oil
1 small onion or shallot, chopped
3 - 5 garlic cloves, minced
3/4 cup frozen grated fresh coconut*** (see above)
3 - 4 teaspoons of the Tonak Masala** (see above)
1 teaspoon of salt, or to taste

Drain the soaking water from the black-eyed peas. Put them in a pot with  the tomatoes, onion / shallot and water and bring to boil. Lower heat, cover and cook for 20 to 30 minutes. They should be quite soft. If not, cook a little longer. 

Meanwhile, make the masala: Take all of the whole spices and grind them to a powder, then add to the powder the turmeric and nutmeg. Set aside.

In a skillet, heat the cooking oil and cook the onion until just golden. Add in the garlic for a minute or so and stir. Add in the grated fresh or frozen coconut and continue to cook, stirring until the coconut is golden. Add in the 3 or 4 teaspoons of the reserved masala and cook, stirring until the masala is well heated through. Add the contents of the pan to the cooked black-eyed peas along with the salt and mix well. If they need more liquid, add more water, then cook until heated through, and serve with roti or rice.


My passion is teaching people how to create a harmony of flavors with their cooking, and passing along my love and joy of food, both simple or exotic, plain or fancy. I continue my journey in ethnic and domestic cuisines, continuing my journey to explore diverse culinary experiences and hopefully to start you on a journey of your own. Join me also at A Harmony of Flavors on Facebook, and Pinterest.

Sunday, September 4, 2022

Muffins so Very Delicious and Low Fat

Muffins are really good. Still, I generally prefer biscuits or scones. Once in a while, I see a recipe and think I might try it, then somehow, it just doesn't happen. 

A few nights back, I was looking through Facebook, and came on a recipe for Turmeric Carrot Muffins with Chia & Coconut, from VeganRicha. Just the title alone had me riveted, right there, because each ingredient in the title is one I use regularly, and love. If you are vegan, or must be gluten free, please check out her recipe by clicking on the link to her recipe, above.

muffins, breakfast, bread, carrot, turmeric, ginger, chia, coconut
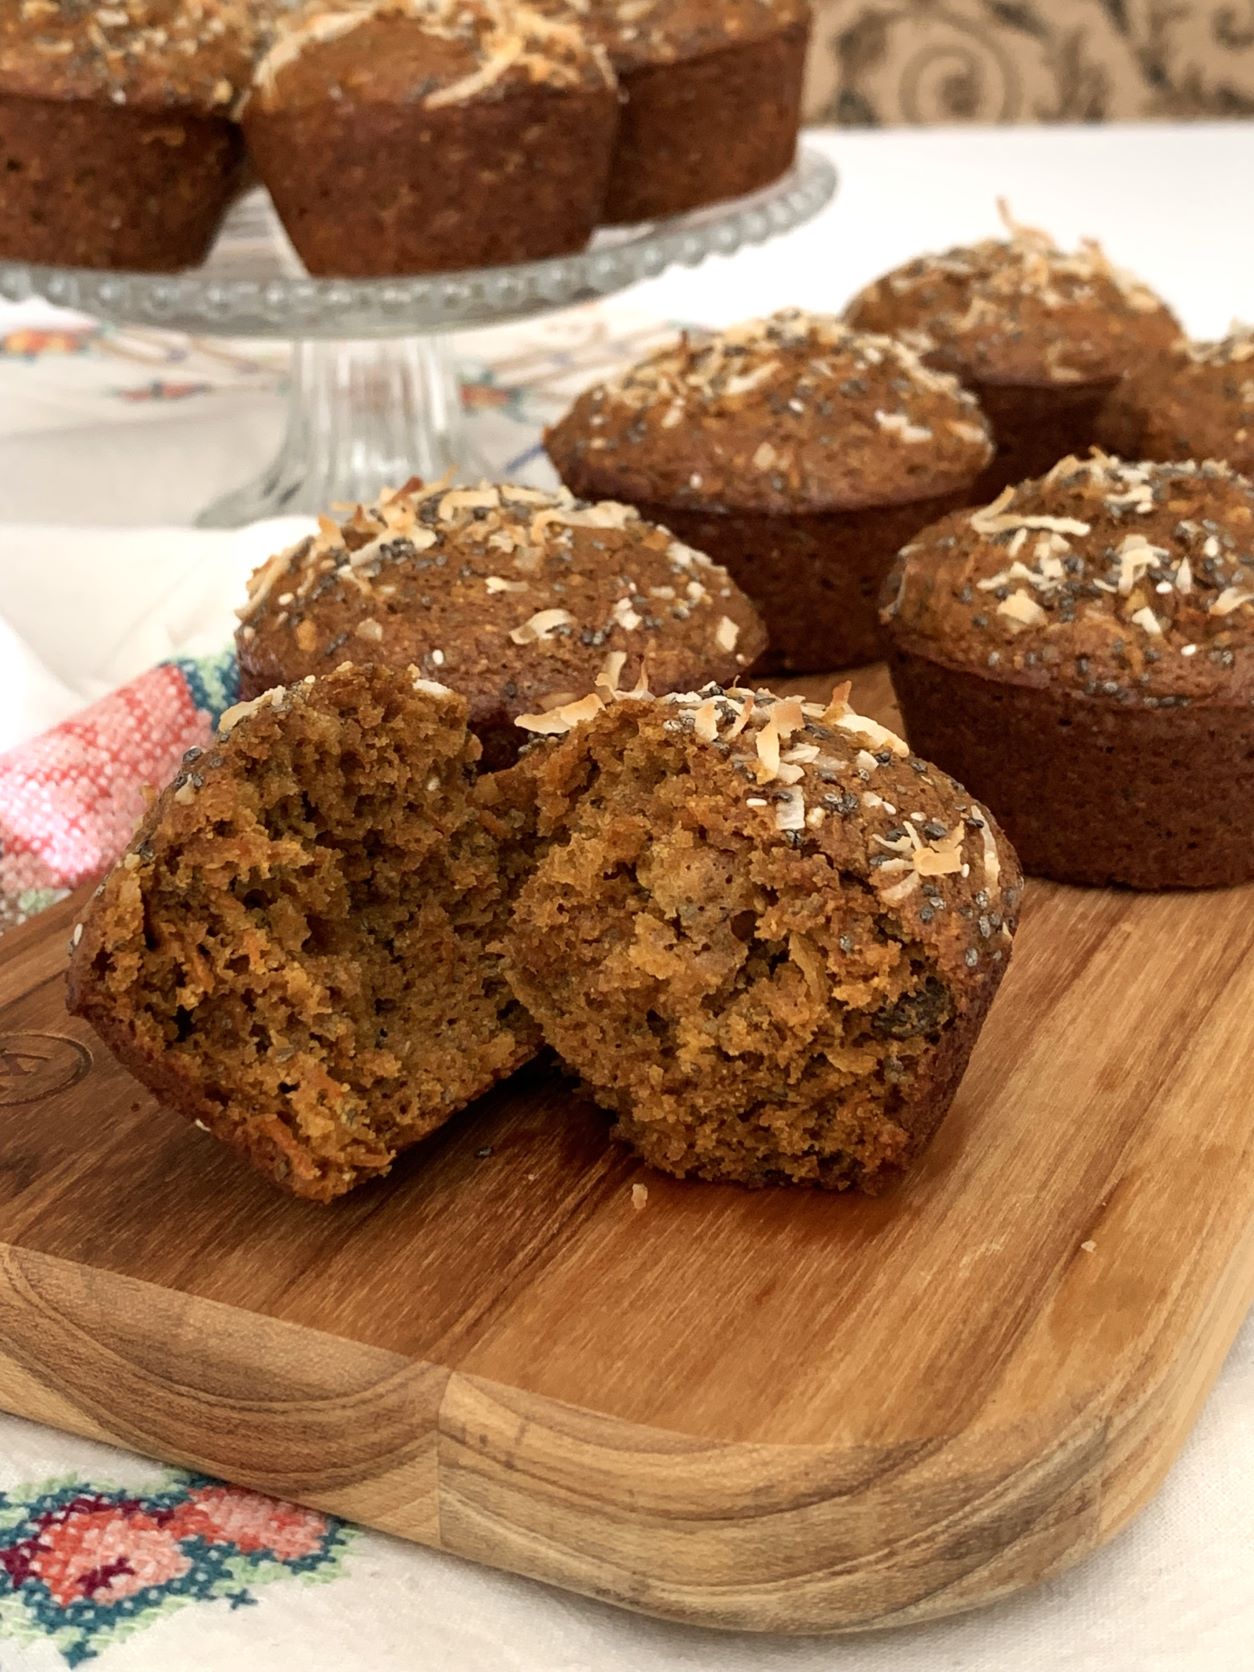
Turmeric Carrot Gingerbread Muffins

Okay, I looked up the recipe and saved it, and apparently my subconscious mind percolated and filtered through the recipe all night and into next day and finally I sat to think it through with my conscious mind. First off, I am not vegan, or vegetarian. Secondly, I don't have to be gluten free. So, I could make the recipe without those strictures, making it more a regular muffin recipe. I opted to use eggs. If milk was needed I would use it instead of a nut milk or coconut milk (I absolutely love coconut milk, but didn't want to open a can to use only a half cup!).

As it all turned out, I changed a lot of things. I truly didn't deviate much from the spirit of the recipe. I used almost everything in the recipe as stated, but changed amounts. 

  • I used a tiny bit more oil, but added a little snack cup of applesauce. 
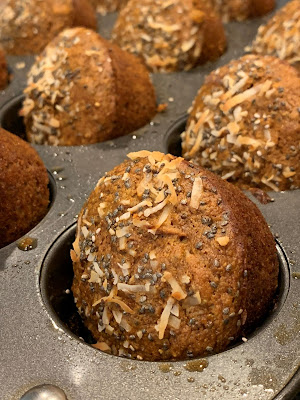
    muffins, breakfast,  bread, ginger, turmeric, coconut, carrot, chia
    Turmeric Carrot Gingerbread Muffins


  • I opted to not use maple syrup, as it is expensive and I can never tell by taste that it is even in a recipe like this. I waffled between using honey or agave syrup, then switched to molasses. 
  • Mixed spices were in the original recipe, and cardamom, cinnamon and nutmeg mentioned as possibilities. I changed this to cardamom and ground ginger. 
  • I used a fair bit more fresh ginger than called for as well, as I truly love ginger. 
  • As the recipe called for coconut milk and lemon juice, I changed that to buttermilk, thereby eliminating the lemon. Lemon would bring acidity up to work with the baking soda, but buttermilk will as well.
  • I used more flour, as I was adding both eggs and applesauce, so it was 2 cups of flour total. I used 1 cup of a mixture of barley and buckwheat flour, and the other cup plain all-purpose flour. If preferred, use all purpose flour for the whole 2-cup amount, or substitute whole wheat or other whole grain flour for part of the whole amount. In another attempt, I may use a bit of wheat bran as a part of the two cups of "flour."
I will caution that this recipe needs initial prep work, in that there are so very many little amounts of things to be measured out. I got out all my little cups I use for measuring out sets of spices and things (I save the little 1/2-cup applesauce snack containers for this type of use) and set out all the individual dry ingredients (mixed spices, raisins, coconut, chia, sugar, and the freshly grated ginger). I set the finely grated carrots in a bowl (Richa's recipe calls for blending carrots and other wet ingredients together, but I see no need for extra dirty utensils).

Ultimately, having used extra fresh ginger as well as adding dry ground ginger, along with the molasses, made these smell like the most heavenly gingerbread as they baked. All the extra textures and flavors, while not eclipsed completely, do give great texture. Carrots always make cakes moist, and that works here as well. These are exceptional muffins, and exceptionally good. Thank you Richa, for such an amazing combination!

Turmeric Carrot Gingerbread Muffins


Makes 12 muffins
muffins, breakfast, recipe, carrot, turmeric, coconut, chia, ginger
Turmeric Carrot Gingerbread Muffins


DRY INGREDIENTS:
1 cup all purpose flour (130 grams / 4.6 ounces)
1 cup whole grain or other flour, or simply use all purpose flour
1/2 teaspoon salt
2 teaspoons baking powder
1/2 teaspoon baking soda
3 tablespoons chia seed (32 grams / 1.15 ounce)
1/4 cup sugar or palm sugar (41 grams / 1.4 ounce)
1/4 cup raisins or chopped dates (34 grams / 1.2 ounce)
1/4 cup dry, unsweetened coconut shreds (18 grams / 0.65 ounce)

SPICES:
1 teaspoon ground cardamom seeds
1 teaspoon turmeric powder
1/2 teaspoon dry, ground ginger

WET INGREDIENTS:
2 carrots (155 grams / 5.25 ounces), finely grated
1/3 cup molasses
1/2 cup buttermilk
1/2 cup plain applesauce
2 tablespoons sunflower oil or coconut oil
1-inch fresh ginger, finely grated (15 grams / 0.55 ounce)
2 large eggs
--------
1 1/2 teaspoons each chia seed and shredded coconut for topping, optional
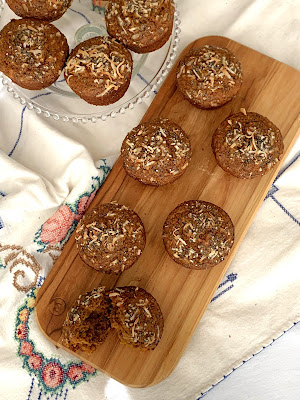
muffins, recipe, breakfast, carrots, chia seed, coconut, turmeric
Turmeric Carrot Gingerbread Muffins


Preheat oven to 400 degrees. Grease, or spray with cooking spray, the wells of a 12-well muffin tin. Set aside.

This is easiest to first measure out all the little ingredients and have at hand, "mise en place." A personal choice, but recommended.

In a medium mixing bowl, place all the dry ingredients together, plus the spices and stir together.

In another bowl, combine all the wet ingredients and stir well to combine, then pour all the wet into the dry ingredients and mix with a spoon or silicone spatula until no dry ingredients remain. Fill the muffin tin wells equally - the mixture is very generous. Separately, sprinkle some of the coconut for topping over each portion of batter, then repeat with chia seed.

Bake the muffins for 12 to 15 minutes. Test with a toothpick, as for cakes, at about 12 minutes. Remove from oven and set aside to cool for 10 minutes before trying to remove from the tins. (Muffin papers may be used, if preferred.) After 10 minutes, the muffins will release from the tins with very little coaxing. Set them aslant in the wells to continue cooling. Store at room temperature for up to 2 days, or freeze some in zip-top freezer bags for another time.


My passion is teaching people how to create a harmony of flavors with their cooking, and passing along my love and joy of food, both simple or exotic, plain or fancy. I continue my journey in ethnic and domestic cuisines, continuing my journey to explore diverse culinary experiences and hopefully to start you on a journey of your own. Join me also at A Harmony of Flavors on Facebook, and Pinterest.

Tuesday, January 28, 2020

And Yet Another Chutney to Add to the List

Nariyal Chutney, Coconut Chutney
Nariyal Chutney or Coconut Chutney
Okay, technically this one isn't new in the sense that I already have one called Nariyal Chutney or Coconut Chutney. There is never only one way to make a dish!

At the time I first attempted making a coconut chutney, I was living in South Dakota. Having an Indian Grocery store (or even an Indian restaurant) was only a fond wish, the closest being in Sioux Falls, 3½ hours away. Yes, the local grocery did have "fresh" coconuts. Heaven only knew how fresh that may have been. I also had no desire to make a huge mess trying to open up a coconut and work at scraping the "meat" out. And so it happened that when I finally decided to give Coconut Chutney a try, I opted to use grated, dry, unsweetened coconut. 

To be clear, to date, I had not ever even LIKED coconut chutney. No matter where I had tried it, no matter how many times, it was always just bland and blah. And this is just ridiculous, because I LOVE coconut! 

I plowed ahead with making a chutney from the dry coconut, soaking it first in an effort to bring it back to some semblance of fresh. Not. Didn't happen. I read countless coconut chutney recipes before even starting to cobble together my own recipe, and while most said to use fresh coconut for best results, they also stated that dried could be used. 

My resulting chutney was okay. Maybe better than the ones I'd eaten in Indian restaurants, but still not something great. I figured that since at least it tasted better than anything I had eaten to date, that it was good enough to post in my blog. But. I hadn't gone back to try it again. It was uninspiring. I think, if ever I did go back and use dried coconut, I might alter a couple of things. For example, I only had a jalapeno pepper in the fridge at the time so that went in. And the chutney was greenish. Not an awful thing, for sure, though not at all like all the pretty photos of pristine white chutney I had seen online. Later on I read that using a thinner fleshed green chili pepper is wiser, as it adds less green color.

Nariyal Chutney II, recipe, fresh coconut
Nariyal (Coconut) Chutney II

Altogether, while that chutney was okay in a pinch, now, with an Indian grocery far more accessible, and with fresh grated coconut in the frozen section, I figured I might just have to rethink the whole idea.

Not too many changes . . .

Truly, once I got down to looking at the recipe I had originally created, and despite re-reading probably 15 or more different blogs on coconut chutney, I couldn't come up with much to change. The biggest change was fresh (albeit frozen) coconut. That alone would make a huge difference. The use of a small Serrano chili instead of a big, fleshy Jalapeno  also made a huge difference. Other changes were small, such as using a little more tamarind concentrate than previously. 

The one, possibly biggest difference was the use of shallot. While most coconut chutney recipes online use no onion or garlic, apparently the Keralan people generally do use onion, and sometimes garlic as well. They do use it raw, however, and raw onion is generally not so good for my stomach. I opted to saute the onion only until softened, about 5 minutes. This was just enough. 

These small changes, along with the main one of using frozen fresh coconut, made such a huge difference in the outcome of this coconut chutney. It was magnificent. Here were the flavors I was wishing for. This one is finally worth making. If you have access to fresh, or frozen fresh coconut, I highly suggest this recipe!

A Note on Tamarind

I do use tamarind in this chutney. Some recipes call for it, and some do not. Some prefer to use lemon or lime juice as a souring agent instead, but I am a big tamarind fan! I am finding that with store bought tamarind, the viscosity of each brand varies widely. I had been using "Swad" brand Tamarind concentrate, with a viscosity similar to what I make if starting out with fresh tamarind pods, soaking and working from there. Recently I bought a different brand at this huge Patel's grocery, and upon opening this "Ashoka" brand, it was very markedly thicker. Not as thick as the "Tamicon" brand paste (that is difficult to even dissolve, it is so pasty), but possibly double the thickness of the "Swad" brand. I used two teaspoons of this thicker "Ashoka" brand in this recipe. All three of these brands term the product to be "Tamarind Concentrate." 

Nariyal Chutney II

(Using Frozen Fresh Grated Coconut)
Nariyal, Coconut Chutney II, recipe
Nariyal or Coconut Chutney II


Makes about 1¼ cups

¾ cup fresh grated coconut, or frozen (thawed) fresh grated coconut
⅔ to ¾ cup warm water
1 Serrano or Thai chili (remove seeds for less heat)
2 - 3 thin slices fresh, peeled ginger
2 teaspoons tamarind puree/concentrate
¾ teaspoon salt
1 tablespoon neutral cooking oil
2 teaspoons chana dal/Desi Chickpeas
1 very small shallot, or about 1 tablespoon, chopped

TEMPERING:
1 tablespoon neutral cooking oil
1 teaspoon brown mustard seeds
⅛ teaspoon asafetida
2 dried red chilies, whole
8 - 10 fresh (or frozen fresh) curry leaves

Measure out the fresh grated coconut or the frozen and thawed fresh grated coconut and place in a blender container. Add in the warm water, starting with the smaller amount first, only adding more once your preferred consistency is determined, at end of mixing. Add in the chili, lightly chopped, whether without seeds, ginger slices, tamarind puree/concentrate and salt. Set aside.

Heat a small skillet and add in the oil to heat, then add the chana dal. Stirring constantly, toast the dal to a golden color, then add these to the blender container. In the same pan (adding more oil only if needed) saute the shallot for about 5 minutes, stirring, so as not to brown, and cook only until translucent and softened. Add the shallot to the blender and blend the mixture smooth. Pour into a bowl for serving.

For the Tempering, use the same small skillet and the tablespoon of neutral oil. Add in the mustard seeds and, stirring, once these begin to pop and splutter, add in the asafetida and stir for a few seconds until the lovely onion-like aroma is present. Add the dried whole red chilies and toss until they begin to puff and change color, then add the curry leaves and toss until their lovely aroma is apparent. Immediately pour this mixture over top of the chutney and serve. This chutney is great with any south Indian dish, and an absolute must with Idli or Dosa.


My passion is teaching people how to create a harmony of flavors with their cooking, and passing along my love and joy of food, both simple or exotic, plain or fancy. I continue my journey in ethnic and domestic cuisines, continuing my journey to explore diverse culinary experiences and hopefully to start you on a journey of your own. Join me also at A Harmony of Flavors on Facebook, and Pinterest.

Tuesday, September 24, 2019

A Keralan Breakfast

If you are new to this blog of mine, I must mention that I am way, way into Indian cooking. I love the flavors, the spices, the smells while cooking. I have yet to visit India, but I study regions and foods continuously. And I am always trying something new. Indian food has been a passion of mine, growing exponentially over the past 20 years. I try to stay as authentic as possible to recipes, including searching out new and/or unknown spices to try.

For those who have read this blog, I apologize for repeating myself. I just cannot help myself when it comes to Indian food!

For the past couple of years, I have had a couple of recipes setting on the back burner, so to speak. Most definitely of interest, but somehow I just never got down to refining a recipe of my own. These recipes are from Kerala, a state that runs down the southwest coast of India (similar to Chile, in South America). Apparently coconut trees are ubiquitous to the area, and Kerala is sometimes called Land of the Coconuts. Rice is another food found everywhere and at most meals. Not surprising then, that coconut and rice together play a huge part in the cuisine of this state. 
Vegetable soup, Ishtu, Indian food, Kerala, breakfast
Vegetable Ishtu

And so, we come to the point of this rambling monologue. The recipes I had been eyeing for a good couple of years were a Coconut Vegetable Stew, called Vegetable Ishtu (or Ishtoo), the locals' pronunciation of the British term of "stew." The stew looked so pretty with its white base and colorful vegetables. Plus, I just love coconut and coconut milk. The other recipe I was eying was one of the many, many possible accompaniments to this stew, called Appam, a bowl-shaped rice and coconut crepe. 

Vegetable Ishtu


Vegetable soup, Ishtu, Indian food, breakfast
Vegetable Ishtu
Serves 4 to 5 as an accompaniment

½ cup peeled, ¼-inch diced potato
½ cup peeled, ¼-inch diced carrots
½ cup frozen baby peas
½ cup cauliflower, in tiny florets, optional

GROUND MIXTURE:
1 tablespoon channa dal/desi channa dal
3 tablespoons raw cashews
1 tablespoon white poppy seed, optional
1 - 3 green chili peppers, seeds removed for less heat
1½-inch piece true cinnamon quill
2 whole green cardamom pods
2 whole cloves

TEMPERING:
1 - 2 tablespoons coconut oil
20 curry leaves
1 onion, chopped finely
1-inch piece fresh ginger, minced

1 can (14.5 ounce) coconut milk
½ -1 teaspoon salt, as needed

Heat a dry skillet over medium to medium high heat and toast the channa dal, stirring constantly, until deep golden. Set in a plate to cool. Toast the cashews briefly, stirring constantly, until they get some browned spots. Place into the plate to cool. Once cooled, put these and the remaining Ground Mixture ingredients into a blender container with ½-cup water and blend to a smooth paste. Set aside.

In a saucepan combine the cubed vegetables and just barely cover with water. Bring to boil, reduce to simmer and cook the vegetables until tender, about 15 to 20 minutes. While the vegetables cook, heat the skillet again and add in the coconut oil. Once hot, drop in the curry leaves to crackle a bit and add in the onion. Saute the onion until nice and soft, but not golden. Add in the ginger and stir, cooking just until fragrant. Add the reserved ground past mixture along with the vegetables with their water and the coconut milk. Add in the salt and taste for seasoning. Stir well and cover over very low simmer, to meld flavors.

~~~~~~~~~~~

Appam, huh?

Appam seems to be a generic term for a whole variety of possible iterations of the basic rice and coconut based bread-like accompaniments that run from thin and crepe-like to pancake thick and all sorts of variations. The terms are very confusing, because many places seem to term Appam and Palappam as the same thing. Then there is Vallayappam, which seems to be the same batter, except instead of thinning to crepe-consistency, this batter is left like pancake batter and made like pancakes, although without flipping them. There are also Idiyappam, where the batter is pressed through a device that results in strings that are bunched into an idli mold and steamed, as for idli. There are some variations that call for the addition of some vegetables and or onion. It seems, truly, that the variations are almost endless, when it comes to Appam.
Appam, Palappam, Indian food, breakfast, bread
Appam / Palappam

What all of this comes down to is the use of rice and coconut in a fermented batter. The batter is fermented, similarly to idli, whether by natural fermentation, the use of yeast or the use of a local fermented alcoholic beverage. In the making of idli, I have yet to have the batter actually ferment, so I end up using a bit of baking soda at the last minute. In the recipe I cobbled together for my Appam, I did use yeast, and the batter fermented beautifully, all bubbly and aromatic in the morning. My Appam (or Palappam) are a bowl-shaped crepe-like creation, and often are cooked until the underside is truly browned. I cooked mine to a bit less done: they were golden underneath, though nowhere approaching browned. They are delicate and soft and white and lacy. 

To make these, a rounded pan, like a small wok (called an appachatti), is used. The batter is poured into the center and quickly swirled, as for crepes, but with the batter going up the rounded edges, then pooling back down to the center. The center remains thicker and soft, while the outer edges become very lacy and a little crisp. As I do not own an appachatti, I used my smallest pan, an old All-Clad "non-stick" 8-inch pan. When I rotated the pan to allow the batter access to the sides, I had to be careful not to get the batter onto the inner rivets, as it would stick. So, my appams were a little lower on one side, but it made no difference at all.

The true recipe for Appam (of any variety) calls for the use of raw rice and fresh coconut. It can also call for additions of Poha rice (a flattened, dried, parboiled rice) or some previously cooked and cooled rice. Some recipes call for a cooked rice flour paste to be added also. As the batter should ferment, and I have no local Indian alcoholic beverage on hand (in the U.S. southwest), I used a yeast version and made a shortcut method that worked wonderfully well.


Appam / Palappam

Appam, Palappam, bread, Indian, breakfast, Kerala
Appam / Palappam

Makes about 20 (10-inch) Appam

2 cups plain white rice flour
1 can (14.5 ounce) unsweetened coconut milk
1½ cups water, plus more for adjusting
¼ cup pre-cooked, cooled white rice
3 tablespoons sugar
½ teaspoon instant yeast
¾ teaspoon salt

Eight hours before using the batter: Mix the coconut milk and water in a blender with the cooked rice, sugar and yeast, blend briefly, then add in the rice flour and starting slowly, blend the mixture to a fine batter. If it is too thick, add in water, ½ cup at a time, until just shy of crepe batter consistency. Pour into a large mixing bowl and cover with plastic film. Allow this to stand on the counter 8 hours, or overnight.

After 8 hours, the batter should be bubbly and yeasty smelling. Stir and add in the salt. If the mixture is still too thick (which is easy to determine once you make one or two), add more water, a little at a time.

Preheat a small, round-sided pan. I used an 8-inch (bottom diameter) skillet. Whatever pan is used, it should have rounded, flared sides. Once very hot, brush with a film of ghee or coconut whatever is needed to be able to very quickly roll the pan so the batter goes up the sides of the pan. Once done swirling, the remaining batter should pool in the center of the pan, while the edges become very lacy. It takes a few minutes at medium heat or higher until the edges begin to loosen. Once the appam is browned on the bottom, remove to a plate. Amount of browning is totally subjective.

Serve these appam with the Vegetable Ishtu recipe above, or (less authentically) with Sambar. It is also great with any chutney, or any meat or fish stew leftover from dinner. 


My passion is teaching people how to create a harmony of flavors with their cooking, and passing along my love and joy of food, both simple or exotic, plain or fancy. I continue my journey in ethnic and domestic cuisines, continuing my journey to explore diverse culinary experiences and hopefully to start you on a journey of your own. Join me also at A Harmony of Flavors on Facebook, and Pinterest.
Disqus