Translate

Tuesday, February 10, 2015

Ladyfingers - A Rose by any Other Name

I have been writing a lot lately about Guatemala. My time there was well-spent, learning all sorts of new recipes, trying all sorts of new delights. When I created a Cookbook and Memoir for my oldest daughter when she turned 40, I took a trip down memory lane and tried to recall everything I could. She was born in Guatemala, as were all my children. I hoped to keep the heritage alive for her. She was the oldest, at age 10, when we moved back to the US. The other children were 8, 7 and just turning 3, respectively. The youngest has very little memory of Guatemala, except through the foods I have made.
Ladyfingers, Chiqueadores, Round shapes, Biscoff Spread
Round shapes, filled with Biscoff Spread


When I asked my second daughter if she wanted a copy of this book, she said absolutely! I was thrilled. She was only 7 when we left there, after all. I don't know how much she can recall of the food. Certainly nothing of the cooking of it, except what she learned from me. As I went back over the original book, making changes here and there, I went and dug a bit deeper into my memories, and came up with a lot more recipes, or at least memories of foods eaten. There came a point where I had some questions, so I called my ex-(Guatemalan) husband to consult. He was not too big a help. We all recall things differently, after all. He was not the cook, so his cooking vocabulary in Spanish is perhaps less developed than mine in some cases.

Ladyfingers, Chiqueadores, Biscoff Spread
Ladyfinger Shaped, filled with Biscoff Spread
He offered to loan me a very old Guatemalan cookbook he was given. While perusing this book, I came on a word that positively rang bells in my head, yet I had absolutely no clue what this thing was. I knew, from the ingredients that it was something sweet. It had to be a dessert or cookie of some sort. But what? The word was "Chiqueadores." I phoned my ex again. Again, while he knew what these things were, he was at a loss to describe them. We came up with "wafers" and that was the best he could do. But, the word kept sitting there making nanny-faces in my mind.

Drumroll.....

Finally I spent quite a long while one day online. What I finally found out is that this recipe was for  . . . . .

LADYFINGERS! For goodness sake!

Ladyfingers, called Savoiardi in Italian, and Chiqueadores in Guatemala, are light and airy little puffs. They are most often used in recent years in the making of Tiramisu. They are also used in making a Charlotte. I have not made a Charlotte yet. But now that I knew what Chiqueadores were, I felt it was time to make them; always a first time. I had only ever bought Ladyfingers before. They are easy to make really. Piping them with a piping bag is perhaps the most "difficult" part of the recipe, if making them in classic ladyfinger shapes, though there was really nothing difficult in making them. If making them into little round cookies, they can be piped or just dropped with a spoon and flattened slightly. Either way, they are good. They can be made as little tea cookies and eaten plain or sandwiched and filled. Fillings could be as simple as whipped cream, or something like a buttercream or other icing. I used Biscoff Spread, a Speculoos type mixture. They were just divine this way!

Open Star Tip #172,  piping bag, piping batter
Open Star Tip #172 worked perfectly     piping bag opening cut to 3/4-inch wide
The recipe makes quite a lot of smaller ladyfingers. Quite certainly enough to use in an application such as a tiramisu. I piped them into about 3- or 3½-inch long little bars. I also made some into little rounds, about 1½-inches in diameter. They do grow and expand in the oven. Space them accordingly, with at least an inch between, if not a little more.

Ladyfingers, Savoiardi or Chiqueadores


Ladyfingers, Chiqueadores, cookies
Ladyfingers or Chiqueadores
1 whole egg
3 egg yolks
½ cup confectioners' sugar
1 teaspoon vanilla extract
⅔ cup all-purpose flour
2 tablespoons cornstarch
3 egg whites, at room temperature
¼ teaspoon cream of tartar
2 tablespoons granulated sugar

Preheat oven to 375 degrees. Line two (or more) baking sheets with parchment. To keep the parchment in place while piping, first lightly grease the baking sheet, then set the ungreased parchment on top.

In a large bowl, beat together the first 3 ingredients until very light and lemon colored, then continue to beat until the mixture falls like ribbons back into the bowl, taking a few seconds to disappear on the surface. This took about 6 minutes with a small hand mixer. Add the vanilla to combine.

Sift together the flour and cornstarch, then return the mixture to the sifter (or sieve) and set aside.

Beat the egg whites and cream of tartar until they are at soft peaks. Add the granulated sugar in gradually while beating, until the mixture holds stiff peaks.

making batter, step by step, how to
yolk mixture at point; whites beaten stiff; folding in whites; folding in flour; batter ready to pipe

Scoop about a third of the egg white mixture into the egg yolk mixture and fold in. Add in the remaining whites and fold in gently. Sift the flour mixture over this folded mixture in three parts, each time gently folding the flour in until none remains.

piping ladyfingers, baking ladyfingers
before baking, sprinkled with confectioners' sugar  |  straight our of the oven, right, lightly golden

If using a disposable piping bag or a zip top bag, cut off the tip or a corner until the width of the cut is about 3/4 inch wide, as shown in the photo above the recipe. This will ensure a hole about ½-inch in diameter. If using an icing top, it should have a hole at least ½-inch in diameter. I used the only one I had with a half-inch diameter hole, a #172 Open Star Tip. Fill the bag and pipe straight lengths about 1 inch wide by 3 to 3½-inches long. Dust the tops with confectioners' sugar and let them set for a few minutes, until the sugar has nearly dissolved. Sift a little more sugar over top and bake the ladyfingers for about 10 minutes, rotating the pan once during baking, to ensure even browning. The cookies should come out light golden and puffed.


My passion is teaching people how to create a harmony of flavors with their cooking, and passing along my love and joy of food, both simple or exotic, plain or fancy. I continue my journey in ethnic and domestic cuisines, continuing my journey to explore diverse culinary experiences and hopefully to start you on a journey of your own. Join me also at A Harmony of Flavors on Facebook, and Pinterest.

Monday, February 9, 2015

That Wine Tasting Time of Year

Lemon, Thyme, Chicken, Fillo Cups
Lemon Thyme Chicken Fillo Cups
Up here where I live, this seems to be the time for wine tasting events. The larger wine tasting event that will come in late March this year hasn't even started its planning yet, but I was asked to make a few appetizers for a smaller event on the 18th of this month. Less formal, this get-together takes place in someone's home, for about 25 people. I have not much information on what all will be taking place there, though I was given a list of the 9 wines to be served. The wines range from very light white to deep, dark and bold. Trying to pair 3 appetizers to cover all these wines (all but two are reds), well, I have been poring over my wine and food pairing charts to try and make my appetizers pair with the most wines possible. 

Yesterday I made 2 new appetizers, which I served as our dinner last evening, to get opinions on flavors and how things could be improved. I was the only wine drinker at the dinner table and I was not drinking any of the wines to be paired, though I believe for all intents these appetizers were great as is and will work well with the wines they were created to pair with. One little change will be made on the meat roll-ups. It will not change flavor, but only make it easier to roll and skewer. But I will get to that recipe when I finalize them with the changes I am making. 

Lemon, Thyme, Chicken, Fillo Cups, appetizer, finger food
Lemon Thyme Chicken Fillo Cups

When I am asked to make appetizers to pair advantageously with particular wines, I spend a lot of time in research before ever beginning the creation of the food. I want the food to taste good with the wine, and hopefully also enhance how the wine tastes. For example, some things I research:
  • What flavors are associated with the particular wine? Some possible adjectives: smoky, fruity, dark berry, strawberry, citrus, herbal, pepper, earth, leather, and the list is nearly endless. I use these to gear the foods towards these flavors or aromas.
  • What does the vintner suggest as a food to pair with the wine? The vintner knows best how his wine was made, and what flavors are involved, so he has the best idea. Many others also will comment on food pairings for particular wines also.
  • Are there particular herbs or cheeses that are recommended to pair with the wine? Not every site will get this involved, but there are many places that even have full recipes attached. I do not use these recipes, but I read them to become familiar with the thought process behind the pairing.
The next step in my process is to make a list of the flavors and foods to incorporate in the appetizer, things that will play well with the wine involved. To that end, in the last couple of years I have spent innumerable hours compiling lists of the particular foods
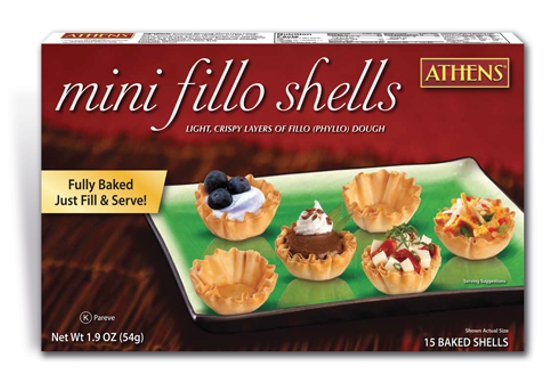
mini fillo shells, filo, phyllo, appetizer, finger food
mini fillo shells
(meat/fish, nuts, cheese, herbs, sauces and even desserts), that will pair with particular grape varieties. I add to these lists as I find new information. At this point in time I have lists for these white wine varietals:  Albarino, Chardonnay, Chenin Blanc, Gewurztraminer, Gruner Veltliner, Pinot Gris, Riesling, Sauvignon Blanc, Torrontes and Viognier. I have lists for these reds: Bordeaux type blends, Cabernet Sauvignon, Carmenere, Chianti blends, Gamay, Grenache, Malbec, Merlot, Mourvedre, Nebbiolo, Pinot Noir, Sangiovese, Shiraz, Tempranillo and Zinfandel.
Chicken, cheese, made as a cheese ball
Made into a cheese ball

For possible pairing with a full flavored Chardonnay and also for the Pinot Noirs to be served, the appetizer I created would use bacon and well flavored chicken. Some of the online suggested food pairings for these wines included things like curried dishes. Thyme was specifically mentioned as an herb to use. I prefer to make appetizers that need no utensils, so I chose to use Mini Fillo Shells to hold the mixture. While creating this recipe, I had very fixed ideas of how these would taste, and I geared my process to use flavors that would coincide with my mind's "taste-buds". I wanted a sort of lemon and pepper chicken concept as a base. I included bacon in the mixture to boost flavor and bring in a smoky note. Cream cheese and Chevre would bind the mixture. Thyme added that herbal note I was looking for. 
small bites, almond meal, thyme finger foods
Individual bites rolled in almond meal & thyme

I am extremely happy to report that the flavors came out tasting precisely as I imagined they should. I have no changes to make to this recipe. It is simple to make and can be made in advance. The actual filling of the mini fillo shells should take place last minute, but this part takes little time at all. I used a pastry bag with a large open star tip, but filling the little shells can be easily accomplished with a couple of small spoons. If refrigerated, the mixture could also be rolled into small balls - these little balls could be placed in the mini fillo shells (shown above), or on a cracker, or rolled in herbs or nuts and set out as individual bites, or even made into one large "cheese ball" to be served with crackers or pita chips. 

I used my own Pickled Red Onion as a garnish for these. I liked the pop of color and the pieces give just that tiny piquant bite. It takes about half an hour to make the pickled onions but requires at least 3 days for them to come to best flavor. If using these, plan ahead. They are a wonderful accent to most any dish and great to have around at any time. If not using the pickled red onion, other options might be slivers of scallion, thin slices of gherkins or just some more tiny thyme leaves sprinkled over the whole plate. The Tandoor Spice called for is my own mixture (find recipe here) and the flavors are great. You might easily substitute 1/2 teaspoon turmeric, or the full teaspoon of your favorite Curry Powder or Garam Masala (find one recipe here).

Making the mixture up to 3 days in advance helps with do-ahead planning.

Lemon, Thyme, Chicken, Fillo Cups, finger foods, appetizer
Lemon Thyme Chicken Fillo Cups

Lemon Thyme Chicken Cups


50 - 60 appetizer bites

6 ounces meaty bacon, fried
6 ounces cream cheese, softened
6 ounces Chevre (goat cheese), softened
2 teaspoons fresh lemon zest
2 teaspoons fresh thyme leaves
1 pound boneless, skinless chicken breasts (2 large)
1 teaspoon Tandoor Spice
1 teaspoon salt
2 cloves garlic, finely minced
fresh ground pepper, to taste
1 - 2 tablespoons olive oil
2 tablespoons lemon juice
4 boxes (15 each) mini fillo shells

Finely chop the fried, drained bacon. You should have at least a half cup. Set this into a large bowl. Add in the 2 cheeses with the lemon zest and thyme leaves and set aside.

Cut the chicken into approximately ¾-inch cubes. Place them in a bowl and sprinkle on top the Tandoor Spice, salt, garlic and pepper. Toss well to coat and let set for about 20 minutes.


Making the Chicken Filling
cheeses, thyme, bacon & zest in bowl  |   chicken browned   | cooked through with lemon juice  |        chopped chicken   
Heat a large non-stick skillet on high or medium high heat. Add in the olive oil and then the chicken pieces. Toss the chicken quickly and constantly to brown completely on all sides, about 4 - 5 minutes (You will need an extractor fan going for this!). Lower heat to medium low and add in the lemon juice, stirring often for another 4 - 5 minutes, until the chicken is cooked through. Set aside to cool to lukewarm.

Once you are able to handle the chicken, either chop it by hand into very small bits, or pulse in the food processor. Do not pulse too finely. Add the chicken to the bowl with the bacon and cheeses and with a mixer, beat until all ingredients are well combined. At this point the mixture can be refrigerated for up to 3 days if needed.

No need to thaw or bake the fillo cups before using. They are delicate, so do not apply pressure to the cup itself while filling. If using a pastry bag, the chicken mixture will have to come to room temperature first, or it will not pass through the piping bag. You will need a large tip with a wide opening for the mixture to pass through. Pipe mixture into shells. Conversely, use two teaspoons to drop bits of the mixture into the shells. Or, form balls and press the balls gently into the shells. Top with your preferred garnish. Even a small cilantro leaf would be lovely. Do not fill the cups too far in advance or they will lose their crispness and become soggy. 


My passion is teaching people how to create a harmony of flavors with their cooking, and passing along my love and joy of food, both simple or exotic, plain or fancy. I continue my journey in ethnic and domestic cuisines, continuing my journey to explore diverse culinary experiences and hopefully to start you on a journey of your own. Join me also at A Harmony of Flavors on Facebook, and Pinterest.

Wednesday, February 4, 2015

Shortbread Type Cookies Bursting with Flavor

Continuing with my effort to make as many Guatemalan foods possible while I am printing a copy of my cookbook / memoir for my daughter, today I made Polvorones. 

polvorones, cookies, Guatemalan cookie
Polvorones

Polvorones?

Polvorones (4 syllables: pohl-voh-ROAN-ehs) are small cookies, a sort of shortbread, covered in powdered sugar. They just "poof" apart when you eat them. They are so delicious, it makes little difference that you end up with crumbs and powdered sugar everywhere! These little cookies are very similar to Polvorosas. In some cases, it is very difficult to tell the difference. When looking through myriad recipes online, and including some I had copied down in Guatemala long years ago, in trying to define the difference, the only thing I could come up with to distinguish is that Polvorones more often have ground nuts added to them, where the Polvorosas are mostly a straight shortbread.

Shortbread?

If anyone is unfamiliar with what, precisely, constitutes shortbread, it is a kind of cookie or pastry that generally has three main ingredients: flour, sugar and butter. There is no egg to bind these ingredients, so shortbread is quite crumbly. Sometimes nuts are added, and a little salt, but shortbread is a simple matter. Sometimes part of the flour is substituted with things like cornstarch. 

If anyone is familiar with Russian Tea Cakes or "Snowball", cookies often made for Christmas, then you already have some idea of what these little cookies are like. In the recipe for Russian Tea Cakes that my family has been making since I was a little child, the nuts used are walnuts. I do not believe any deviation was ever made. In more recent years, I have played a bit with the recipe, using ground pistachios and Matcha green tea powder. I called these Pistachio Tea Cookies

polvorones, cookies, Guatemalan cookies, recipe
Polvorones, sliced to show inside

Perusing different recipes for Polvorones and Polvorosas (note that both these cookie titles have the root word "polvo" in them, meaning "dust" or "powder", referring to what you end up with when biting into them), there was a serious amount of crossover between them, making me wonder if there ever was a true difference. When I made the Polvorosas, I made them without egg to bind and I used part cornstarch to lighten the mixture a bit; more of a true shortbread cookie. In my recipe for Polvorones, made today, I decided to use ground almonds in the dough, with a tiny amount of true cinnamon, and one egg yolk, to assist in binding the mixture. This makes these cookies not quite "true" shortbread. The Russian Tea Cake cookies we always made were notoriously hard to form. The dough tends to crumble easily. Once you actually get them formed and baked, they are out-of-this-world. Getting them there is the trick. The egg yolk added to this recipe today made the forming just a little bit easier. They are still just wonderfully tender and lightly crisp. The little bit of cinnamon is just enough of a hint that it takes a moment to recognize. They still burst as you bite into them. To me, these are perfect. 
Polvorones, cookies, Guatemalan cookies,
Polvorones

Polvorones


Makes about 3 dozen 1½-inch cookies

2¼ cups (4 oz. / 312 g.) all-purpose flour
¾ cup (3 oz. / 85 g.) almond meal
1/2 cup (1.75 oz. / 50 g.) confectioners' sugar
½ teaspoon (.04 oz. / 1g.) ground true cinnamon
¼ teaspoon (.04 oz. / 1g.) salt
1 cup butter (8 oz. / 2 sticks), room temperature
1 egg yolk (.74 oz. / 21 g.)
1 teaspoon vanilla (.21 oz. / 26 g.)
extra confectioners' sugar for rolling

Preheat oven to 400 degrees (375 on Convection). Place the first 5 ingredients into a large bowl. Add in the butter and use a pastry blender to cut the butter into the dry ingredients. The mixture should look like coarse crumbs, and it should clump a bit when squeezed, but fall apart easily. Separately, mix together the egg yolk and vanilla. Drizzle this over the mixture in the bowl and again, using the pastry cutter, cut in these liquid ingredients well. The amount of liquid ingredients is very small. It is important to have them well incorporated.

polvorones, forming cookies, Guatemalan cookies
           scoop of dough; squeeze dough; form between finger & thumb; set on baking sheet

Using a cookie scoop makes it easy to form equal sized cookies. If using, pack the scoop, then turn out into the hand. Squeeze the dough to form one mass. Place this ball between the circle formed by placing the tip of first finger and thumb together. With the fingers of the opposite hand, begin pressing from both sides of the dough, flattening and forming into about 1/2-inch thickness. It will have the imprint of the hand: once the dough holds form, begin rotating it and flattening it simultaneously, to make a round cookie about 1 1/2 inches wide x 1/2 inch thick. Set the cookies on an ungreased baking sheet, about 1 1/2 inches apart.

Bake the cookies for about 10 to 12 minutes. They should be barely golden on the edges. Rotate the pan once during baking time, to ensure even browning. Once baked, have ready a bowl with about a cup of confectioners' sugar. Roll the hot cookies in the sugar and set them to cool. Once cooled, and before storing, roll them in the sugar once more.


My passion is teaching people how to create a harmony of flavors with their cooking, and passing along my love and joy of food, both simple or exotic, plain or fancy. I continue my journey in ethnic and domestic cuisines, continuing my journey to explore diverse culinary experiences and hopefully to start you on a journey of your own. Join me also at A Harmony of Flavors on Facebook, and Pinterest.
Friday, January 30, 2015

Things to do with Leftover Roast Meat

A few days back I made the Fruity Moroccan Style Lamb that was the topic of my last blog post. Unless you've had a good sized dinner party, making a larger roast will leave you with some significant leftovers. My husband has lately been of the mind that two days in a row of the same thing is enough. Then, it's either make something new, and still have the old leftovers - or make something new with those leftovers. 

Lamb, Quesadilla, Pepperjack, cheese, cilantro
Lamb Quesadilla with
Pepperjack cheese and cilantro
As a dinner, quesadillas are not my husband's cup of tea, so to speak. I do love the ease of slapping two tortillas together with some cheese and or meat and calling it a meal. This is what I did with some of the leftover lamb. I took a couple of chunks of meat, sliced them and set the meat it between tortillas with some pepper jack cheese slices and cilantro. This was easily heated / melted through in a dry, nonstick skillet and was absolutely delicious and more than enough as a meal for myself. 

Yesterday, amidst many projects, including mixing up the new version of Ras el Hanout spice and getting photos, I was also running through my mind on what to make for dinner. The leftover lamb was still in the fridge. What to do? And then I thought - pot pie! The roast, or more appropriately "braise," had a fairly thick mixture from the pot, in which the onions, dates, apricots all melted into a very flavorful sauce. I thought if a few vegetables were added and made a bit more sauce, I could easily whip up a pie crust and make a pot pie. That is one thing my husband absolutely loves. Nearly anything in a pie crust is sure to please. To start, I made a pie pastry very simply:

Simple Two-Crust Pie Pastry


For one 9 or 10-inch pie

2 cups all-purpose flour
⅔ cup shortening, lard or butter
1 teaspoon salt
5 to 7 tablespoons of water

Cut the fat into the flour and salt with a pastry cutter or forks, or even fingers. Once the mixture looks like large crumbs, add in about 4 or 5 tablespoons of the water, tossing the mixture quickly with a fork. Do not over-work the mixture, but bring it together into one mass. If it does not come together, add in another tablespoon of water and try again. You should not need more than 7 tablespoons of water. Once the mixture comes together, form it into two flat pieces, wrap well and refrigerate for an hour.

Lamb, Pot Pie, pie pastry, top crust, entree, supper
Beautiful New Meal: Lamb Pot Pie


Next, I started creating the filling for the pie. I cut all the remaining meat into small cubes and set that aside. I set aside the remaining mixture from the braise (which contained some tomatoes, dissolved fruits and even some of the rice that was served with it) for later. I chopped onion and started sauteing that, added in garlic and then flour to thicken with some water. Adding in veggies in small cubes to cook with this mixture, it was done in about 20 minutes. The meat and leftover pot mixture went in and the whole was checked for seasoning. All in all it went together quickly. Here is what I did:

Lamb, Pot Pie, pie pastry, double crust, supper,
Perfect slice of Lamb Pot Pie

Lamb Pot Pie


Makes one 9-inch pie

2 tablespoons olive oil
1 small onion, diced
2 - 3 cloves garlic, minced
1½ tablespoons flour
1½ cups water or stock
1 small potato, peeled and diced
1 carrot, peeled, cubed
15 fresh green beans (½ - ¾ cup), small slices
½ teaspoon salt
a few grinds of pepper
2 tablespoons Worcestershire sauce
1 teaspoon fresh rosemary leaves, minced
1½ to 2 cups leftover lamb (or other meat), cubed
1 cup any leftover braise-bits from original roast
6 dried apricots, diced, optional

In a large skillet, over medium heat, saute the onion in the olive oil until beginning to brown, about 15 minutes. Add the garlic and continue to cook about 1 - 2 minutes more. Sprinkle the flour over the mixture in the pan and stir until it has disappeared into the oils in the pan. Off heat, stir in the water or stock until smooth. On the heat again, add in the carrots, green beans and potato with the rosemary, salt and pepper. Bring to boil, reduce to a simmer, cover and cook for about 15 to 20 minutes, or until the vegetables are tender. Add in the remaining ingredients, stir and allow the mixture to cool somewhat.

Preheat oven to 400 degrees (375 on Convection). Roll out one of the two pieces of pastry and fit to a 9-inch pie pan. Trim the edge evenly with the edge of the pan. Once the filling has cooled a bit, pour it into the pie shell. Roll out the second piece of pastry and cover the pie. Trim the edges so they overhand the bottom crust by about 1 inch. Tuck the edge of the top pastry under the edges of the bottom pastry. Crimp all the way around. Poke a few vent holes in the top crust with a sharp knife. Bake the pie for about 45 minutes, until the crust is golden and the filling has begun to bubble out just a bit.


My passion is teaching people how to create a harmony of flavors with their cooking, and passing along my love and joy of food, both simple or exotic, plain or fancy. I continue my journey in ethnic and domestic cuisines, continuing my journey to explore diverse culinary experiences and hopefully to start you on a journey of your own. Join me also at A Harmony of Flavors on Facebook, and Pinterest.

Thursday, January 29, 2015

Fruity Moroccan Style Lamb

I have no Moroccan background on which to base a "Moroccan" style recipe. I have never been there. I did see Morocco as a distant land mass when visiting Gibraltar. Still, I suppose we might all have some sort of preconceived notion of things "Moroccan." For me, these notions are of souks with all manner of goods, most interesting to me would be spices, foods, and only after these would come clothing, pots, containers and anything else to be had. Mint tea, piles of spices, lots of noise and bustle, vendors shouting; this is what seems like a souk, to me. 

Moroccan Style, Lamb, Ras el Hanout
Fruity Moroccan Style Lamb, with Ras el Hanout


tajine, clay, cooking vessel, cone shape vessel
Tagine
I easily fall in love with a concept, particularly if it comes in relation to food. I fell in love with the cooking pots called tagines, long before I knew what constituted a "tagine". I still do not own one. The Moroccan culture has not been something I have delved deeply into, though Moroccan spices hold a fascination for me. Some years back, I read about a spice mixture called Ras el Hanout. At that time, I had absolutely no concept of what this might be. I looked it up, discovering it is a spice mixture that can contain up to 30 spices. The name, Ras el Hanout, means top of the shop, or best of the shop, and different vendors of spices may have their own idea of what should go into this mixture. Whenever I find a spice mixture that calls for ingredients I do not have, have not used, and possibly no notion of what they might taste like - well, I just have to find them and try them out. When looking up Ras el Hanout online, back then, I took note of every single, differing spice that was listed in about 20 different "recipes." I took from these some of the most exotic, out of curiosity, and created my own mix. I have had this Ras el Hanout mixture for years now, though unless there is someone like me, who cannot resist a new and exotic spice, I suppose few would make that mixture. 

Ras el Hanout I


Ras el Hanout, unusual spices, spice mix
Ras el Hanout I
Makes about ⅔ cup

3 whole nutmegs
10 rosebuds
1 tablespoon ground ginger
1 tablespoon Grains of Paradise
1 tablespoon allspice berries
1 tablespoon lavender flowers
2 teaspoons black peppercorns
2 teaspoons cardamom seeds
2 teaspoons ground galangal
1 teaspoon ajwain seeds
1 teaspoon black cumin (kala jeera)
1 teaspoon mace blades
1 teaspoon turmeric powder
2 six-inch sticks true cinnamon
6 cloves
½ teaspoon Spanish Saffron

In a dry skillet, separately heat until fragrant the Grains of Paradise, allspice berries, black peppercorns, cardamom seeds, ajwain seeds, black cumin, cinnamon and cloves. Remove each to a plate to cool. Crush or grate the nutmeg. Place all ingredients into a spice grinder or blender and grind to a fine powder.


~~~~~~~~~~~~~~~~~~~~~~~~~~~~~~~~~~~

With this in mind, when I decided to use my Ras el Hanout mixture to make a lamb dish that is vaguely Moroccan style (in my mind), I considered that I might also recreate my Ras el Hanout mixture using less exotic spices (galangal, ajwain, black cumin, rosebuds, grains of paradise, lavender). All of these in my new mix are more readily available to the average person.

Ras el Hanout II

Ras el Hanout, Spices, readily available spices
Ras el Hanout II Spices

Makes about ½ cup

4 teaspoons coriander seed
4 teaspoons cumin seed
2 teaspoons black peppercorns
2 teaspoons fennel seed
2 teaspoons yellow mustard seed
2 teaspoons allspice berries
2 teaspoons dried oregano (in leaf form)
3-inches true cinnamon stick, crumbled
16 green cardamom pods, seeds removed, hulls discarded (or a scant teaspoon of cardamom seeds)
8 whole cloves
2 teaspoons ground ginger
2 teaspoons ground turmeric
2 teaspoons paprika
½ (whole) nutmeg, ground

Combine the first 10 ingredients in a spice grinder and grind to powder. In a bowl, combine this mixture with the remaining ingredients and mix well. Store in a tightly sealed container in a cool, dark place.

Meanwhile, I had decided to use one of the legs of lamb I had in the freezer, and wanted to make it in a somewhat Moroccan style; mainly that I use some of the Ras el Hanout, that it have some fruits in the mix, I would use saffron, and I would garnish with pistachios, pomegranate arils and a drizzle of honey. Ultimately, it was a very tasty "tagine" style braised lamb. If Moroccan, it might have chilies in the mixture. If spicy hot is your thing, add in chiles to taste. I used some Aleppo pepper, which gave a nice gentle heat. The apricots and dates in the braise dissolve completely, making a slightly thickened sauce. The figs stayed recognizable. Here is what I did:

Moroccan Style, Lamb, dried fruits, stew, entree

Fruity Moroccan Style Lamb

Fruity Moroccan Style Lamb


Makes one 5 - 6 lb leg of lamb

1 (5 - 6 pound) leg of lamb
6 - 8 cloves garlic
2 teaspoons salt
1 teaspoon Aleppo pepper, optional
a few saffron threads
3 tablespoons Ras el Hanout
2 tablespoons olive oil
1 large onion, roughly chopped
2 - 4 carrots, peeled, cut in a few pieces
½ cup whole, pitted dates
½ cup whole dried apricots
½ cup dried figs, cut in half
1 (2-inch) strip of lemon peel
1 sprig fresh thyme
1 can (14.5 ounces) petite diced tomatoes

½ cup stuffed olives
½ cup pomegranate arils
½ cup shelled pistachios (can substitute almonds)
2 - 3 tablespoons honey, for drizzling

Using a mortar and pestle or other implement, pound / smash together the garlic, salt, saffron and Aleppo pepper until garlic is in very small bits. Add in the Ras el Hanout and olive oil and continue to pound the mixture to a paste. Smear this paste all over the lamb leg.

prepwork, spices, garlic, lamb, dinner, stew
veggies in pot; pounding garlic & salt mixture, pounded even finer;
added spice & oil; rubbed onto lamb
Place the onion and carrots in the bottom of a large heavy duty pot with tight fitting lid (must be able to hold the whole piece of lamb). Set the lamb onto this bed of vegetables. Add in the fruits, lemon peel, thyme and can of tomatoes. Cover the pot and set into a low, preheated 275 degree oven and allow the lamb to braise for about 5 hours, until very tender. check periodically to make sure there is some braising liquid in the pot. The lamb on the bed of veggies should just be setting in a little liquid. Add water if needed so the pot does not burn.

Once done, use 2 forks to pull the meat off the bone in chunks. Using paper toweling, lightly set the towels onto the surface of the liquids in the pot to remove excess fat. Discard paper towels. Return the meat to the pot and stir. Serve over a bed of rice and strew the olives, pomegranate arils, and pistachios over. Drizzle the honey over all. Garnish with cilantro sprigs if desired.

I made saffron rice to serve with the braise. I used 2 cups basmati rice, 2 teaspoons olive oil, a little saffron rubbed to fine bits, 2 teaspoons salt and 4 cups water. Bring to a boil, lower to a simmer, cover and cook for 15 minutes.


My passion is teaching people how to create a harmony of flavors with their cooking, and passing along my love and joy of food, both simple or exotic, plain or fancy. I continue my journey in ethnic and domestic cuisines, continuing my journey to explore diverse culinary experiences and hopefully to start you on a journey of your own. Join me also at A Harmony of Flavors on Facebook, and Pinterest.

Disqus