Translate

Showing posts with label do ahead. Show all posts

Monday, February 13, 2017

Appetizers and an Open House

I wrote last week about creating some new appetizers, with the intent to make them for an upcoming Open House here in town. 

The recipes for two of the four appetizers I made were posted in this blog. The recipes not posted yet were the Cheese & Bacon Stuffed Mini Sweet Peppers, (oh my, they were so delicious), and the little Spanakopita Cups. All four of these appetizers were wonderful, if I do say so myself. All four are cheese-filled, so if cheese is not your thing, then these wouldn't be for you. Cheese just tastes so good. From the little mini strawberry cheesecakes to the Spanakopita Cups, they were all delightful.

The Four Appetizers Served
The Four Appetizers Served, clockwise from top left: Spanakopita Cups, Cheese & Bacon Stuffed Mini Sweet Peppers, Strawberry Mini Cheesecake Tarts in Chocolate Shell and Buffalo Chicken Rolls

When the realtors hold an open house at one of the realty's high end homes, she occasionally asks me to make appetizers and she will bring an assortment of wines. One of the wines this time was an Australian red blend called "19 Crimes." I can attest that this lighter red went well with all the appetizers, even the cheesecakes! Other wines were Pinot Grigio, Sauvignon Blanc and Pinot Noir. She tries to have something available for most tastes. 


Filled Mini Sweet Peppers just before baking
Filled Mini Sweet Peppers, just before baking
MAKE AHEAD IDEAS: The Cheese and Bacon Stuffed Mini Sweet Peppers are a wonderfully easy appetizer to make ahead and bake just before serving. If pressed for time, make the filling up to 3 days ahead. For freshness, it is probably best not to cut, remove seeds and stuff the peppers until the day before the event. I did this last part and set the peppers on the baking sheet I would use to bake them, then covered them with foil before refrigerating the whole pan. Just on the off chance that the foil might stick to the cheese filling, I lightly sprayed the foil with non-stick spray before covering them. Once baked, while they are lovely warm or at room temperature, and yet they are still just as good once chilled.

Of the four appetizers, the ones that hold up best once baked are these Mini Stuffed Peppers and the Mini Strawberry Cheesecakes. The Buffalo Chicken Rolls are best if rolled and chilled the day of the event, as the tortillas begin to get soggy. The filling can be made a day or two ahead. It doesn't affect the taste, but only the texture. Similarly, with the Spanakopita Cups, the filling can be made and refrigerated a day or two in advance, but the fillo cups begin to get soggy after a day if filled or baked ahead, though the flavor is fine. It takes no time at all to fill the fillo cups if you own a little 2-teaspoon cookie scoop to fill them. It took less time to fill the 30 fillo cups than it took to heat the oven!


Cheese & Bacon Stuffed Mini Sweet Peppers


Cheese & Bacon Stuffed Mini Sweet Peppers

Makes 40 - 50 half-peppers (from a 1-pound bag) 

4 slices thick-sliced bacon, or 6 - 7 slices regular bacon
1 large shallot, minced
2 cloves garlic, minced
6 ounces soft goat cheese, Chevre or Montrachet
6 ounces cream cheese, softened
1 ounce freshly grated Parmesan cheese (about ⅓ cup)
2 teaspoons Worcestershire sauce
1 egg
1½ teaspoons finely minced fresh rosemary
freshly ground black pepper, to taste
1 (1-pound) bag mini sweet peppers

In a nonstick skillet, fry the bacon until just almost crisp. Remove the bacon to drain on paper toweling. Pour off most of the bacon grease, leaving about 2 teaspoons in the pan. Return the pan to the heat, and on low, cook the shallot and garlic until they begin to caramelize slightly, stirring often, for about 15 to 20 minutes.

While the shallots are cooking, place the three cheeses in a mixing bowl and beat well with a hand mixer until well combined and mostly smooth. Add in the Worcestershire, egg, rosemary and black pepper and mix again to combine. Mince the drained bacon until quite fine (some of the peppers are very small, so no large chunks), then add the bacon to the mixing bowl. Once the shallot/garlic mixture is beginning to caramelize, add these to the cheese mixture and mix again to combine all the ingredients. * Do Ahead: This mixture can be made up to two days in advance and refrigerated. When ready to fill the peppers, remove the filling from the refrigerator and allow to come to room temperature for ease in filling the peppers.

Cut all the mini sweet peppers in half, lengthwise. Endeavor to keep the stem end on, even cutting down the center of the stem if possible. This makes for a very pretty presentation. There are few seeds in most of the little peppers, but there are some. A small knife works well to make a tiny cut just inside the pepper's stem end, to remove the seed section and pull out any larger membranes. *Do Ahead: If time is pressing, this can be done the day before the event. Fill the peppers and smooth the top with a table knife or a spoon. Set them onto a baking sheet, then cover with foil and refrigerate. 

When ready to bake, preheat oven to 425 degrees, then bake the peppers for 12 to 15 minutes, or until they just start to brown on top. The goal is to "set" the filling without totally cooking the peppers. Serve warm or at room temperature.

Spanakopita, finger food, spinach, Feta , fillo cups
Spanakopita Cups

Spanakopita, Greek, spinach, feta cheese, fillo cups
Spanakopita Cups

Spanakopita Cups


Makes about 30

1 egg
1 medium shallot, finely chopped
¼ pound feta cheese, crumbled
4 ounces cream cheese
1 package frozen chopped spinach, thawed, drained
1 tablespoon chopped parsley
1 tablespoon fresh dill weed, chopped
½ teaspoon garlic powder 2 packages frozen filo cups (30 in all)

You will need only about 5 ounces of the frozen spinach. Thaw, then squeeze all the liquid from the spinach. Re-chop, to ensure very small bits. In a mixing bowl, combine all the ingredients except the filo cups, mixing well. Set aside.

Preheat oven to 375 degrees. Set the filo cups on a baking sheet. Using two teaspoons or a small “cookie scoop,” fill each of the cups. Once oven is hot, set the tray in the middle of the oven and bake for about 10 to 12 minutes, or until the filling is set and the filo cups are browning slightly at the edges. Serve warm or at room temperature.

NOTES: The filling can be made up to three days in advance and refrigerated, covered tightly until needed. If using filo dough strips, set two (2-inch wide) strips together, brush with melted butter, set a teaspoon of filling into the edge of filo dough, as shown in figure a. Begin folding, flag-style, lifting a corner to cover the filling diagonally left, figure b. Lift the triangle and flip upwards, figure c. Flip the triangle diagonally to the right, figure d. Continue, repeating the pattern to the end of the filo strip. Brush the outsides of the packet with melted butter and set on baking sheet. Bake at 375 for 20 minutes, until golden. The packets can be frozen before baking, then baked when needed


My passion is teaching people how to create a harmony of flavors with their cooking, and passing along my love and joy of food, both simple or exotic, plain or fancy. I continue my journey in ethnic and domestic cuisines, continuing my journey to explore diverse culinary experiences and hopefully to start you on a journey of your own. Join me also at A Harmony of Flavors on Facebook, and Pinterest.

Monday, February 9, 2015

That Wine Tasting Time of Year

Lemon, Thyme, Chicken, Fillo Cups
Lemon Thyme Chicken Fillo Cups
Up here where I live, this seems to be the time for wine tasting events. The larger wine tasting event that will come in late March this year hasn't even started its planning yet, but I was asked to make a few appetizers for a smaller event on the 18th of this month. Less formal, this get-together takes place in someone's home, for about 25 people. I have not much information on what all will be taking place there, though I was given a list of the 9 wines to be served. The wines range from very light white to deep, dark and bold. Trying to pair 3 appetizers to cover all these wines (all but two are reds), well, I have been poring over my wine and food pairing charts to try and make my appetizers pair with the most wines possible. 

Yesterday I made 2 new appetizers, which I served as our dinner last evening, to get opinions on flavors and how things could be improved. I was the only wine drinker at the dinner table and I was not drinking any of the wines to be paired, though I believe for all intents these appetizers were great as is and will work well with the wines they were created to pair with. One little change will be made on the meat roll-ups. It will not change flavor, but only make it easier to roll and skewer. But I will get to that recipe when I finalize them with the changes I am making. 

Lemon, Thyme, Chicken, Fillo Cups, appetizer, finger food
Lemon Thyme Chicken Fillo Cups

When I am asked to make appetizers to pair advantageously with particular wines, I spend a lot of time in research before ever beginning the creation of the food. I want the food to taste good with the wine, and hopefully also enhance how the wine tastes. For example, some things I research:
  • What flavors are associated with the particular wine? Some possible adjectives: smoky, fruity, dark berry, strawberry, citrus, herbal, pepper, earth, leather, and the list is nearly endless. I use these to gear the foods towards these flavors or aromas.
  • What does the vintner suggest as a food to pair with the wine? The vintner knows best how his wine was made, and what flavors are involved, so he has the best idea. Many others also will comment on food pairings for particular wines also.
  • Are there particular herbs or cheeses that are recommended to pair with the wine? Not every site will get this involved, but there are many places that even have full recipes attached. I do not use these recipes, but I read them to become familiar with the thought process behind the pairing.
The next step in my process is to make a list of the flavors and foods to incorporate in the appetizer, things that will play well with the wine involved. To that end, in the last couple of years I have spent innumerable hours compiling lists of the particular foods
mini fillo shells, filo, phyllo, appetizer, finger food
mini fillo shells
(meat/fish, nuts, cheese, herbs, sauces and even desserts), that will pair with particular grape varieties. I add to these lists as I find new information. At this point in time I have lists for these white wine varietals:  Albarino, Chardonnay, Chenin Blanc, Gewurztraminer, Gruner Veltliner, Pinot Gris, Riesling, Sauvignon Blanc, Torrontes and Viognier. I have lists for these reds: Bordeaux type blends, Cabernet Sauvignon, Carmenere, Chianti blends, Gamay, Grenache, Malbec, Merlot, Mourvedre, Nebbiolo, Pinot Noir, Sangiovese, Shiraz, Tempranillo and Zinfandel.
Chicken, cheese, made as a cheese ball
Made into a cheese ball

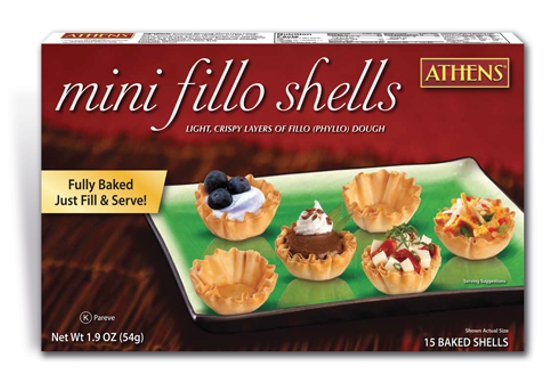
For possible pairing with a full flavored Chardonnay and also for the Pinot Noirs to be served, the appetizer I created would use bacon and well flavored chicken. Some of the online suggested food pairings for these wines included things like curried dishes. Thyme was specifically mentioned as an herb to use. I prefer to make appetizers that need no utensils, so I chose to use Mini Fillo Shells to hold the mixture. While creating this recipe, I had very fixed ideas of how these would taste, and I geared my process to use flavors that would coincide with my mind's "taste-buds". I wanted a sort of lemon and pepper chicken concept as a base. I included bacon in the mixture to boost flavor and bring in a smoky note. Cream cheese and Chevre would bind the mixture. Thyme added that herbal note I was looking for. 
small bites, almond meal, thyme finger foods
Individual bites rolled in almond meal & thyme

I am extremely happy to report that the flavors came out tasting precisely as I imagined they should. I have no changes to make to this recipe. It is simple to make and can be made in advance. The actual filling of the mini fillo shells should take place last minute, but this part takes little time at all. I used a pastry bag with a large open star tip, but filling the little shells can be easily accomplished with a couple of small spoons. If refrigerated, the mixture could also be rolled into small balls - these little balls could be placed in the mini fillo shells (shown above), or on a cracker, or rolled in herbs or nuts and set out as individual bites, or even made into one large "cheese ball" to be served with crackers or pita chips. 

I used my own Pickled Red Onion as a garnish for these. I liked the pop of color and the pieces give just that tiny piquant bite. It takes about half an hour to make the pickled onions but requires at least 3 days for them to come to best flavor. If using these, plan ahead. They are a wonderful accent to most any dish and great to have around at any time. If not using the pickled red onion, other options might be slivers of scallion, thin slices of gherkins or just some more tiny thyme leaves sprinkled over the whole plate. The Tandoor Spice called for is my own mixture (find recipe here) and the flavors are great. You might easily substitute 1/2 teaspoon turmeric, or the full teaspoon of your favorite Curry Powder or Garam Masala (find one recipe here).

Making the mixture up to 3 days in advance helps with do-ahead planning.

Lemon, Thyme, Chicken, Fillo Cups, finger foods, appetizer
Lemon Thyme Chicken Fillo Cups

Lemon Thyme Chicken Cups


50 - 60 appetizer bites

6 ounces meaty bacon, fried
6 ounces cream cheese, softened
6 ounces Chevre (goat cheese), softened
2 teaspoons fresh lemon zest
2 teaspoons fresh thyme leaves
1 pound boneless, skinless chicken breasts (2 large)
1 teaspoon Tandoor Spice
1 teaspoon salt
2 cloves garlic, finely minced
fresh ground pepper, to taste
1 - 2 tablespoons olive oil
2 tablespoons lemon juice
4 boxes (15 each) mini fillo shells

Finely chop the fried, drained bacon. You should have at least a half cup. Set this into a large bowl. Add in the 2 cheeses with the lemon zest and thyme leaves and set aside.

Cut the chicken into approximately ¾-inch cubes. Place them in a bowl and sprinkle on top the Tandoor Spice, salt, garlic and pepper. Toss well to coat and let set for about 20 minutes.


Making the Chicken Filling
cheeses, thyme, bacon & zest in bowl  |   chicken browned   | cooked through with lemon juice  |        chopped chicken   
Heat a large non-stick skillet on high or medium high heat. Add in the olive oil and then the chicken pieces. Toss the chicken quickly and constantly to brown completely on all sides, about 4 - 5 minutes (You will need an extractor fan going for this!). Lower heat to medium low and add in the lemon juice, stirring often for another 4 - 5 minutes, until the chicken is cooked through. Set aside to cool to lukewarm.

Once you are able to handle the chicken, either chop it by hand into very small bits, or pulse in the food processor. Do not pulse too finely. Add the chicken to the bowl with the bacon and cheeses and with a mixer, beat until all ingredients are well combined. At this point the mixture can be refrigerated for up to 3 days if needed.

No need to thaw or bake the fillo cups before using. They are delicate, so do not apply pressure to the cup itself while filling. If using a pastry bag, the chicken mixture will have to come to room temperature first, or it will not pass through the piping bag. You will need a large tip with a wide opening for the mixture to pass through. Pipe mixture into shells. Conversely, use two teaspoons to drop bits of the mixture into the shells. Or, form balls and press the balls gently into the shells. Top with your preferred garnish. Even a small cilantro leaf would be lovely. Do not fill the cups too far in advance or they will lose their crispness and become soggy. 


My passion is teaching people how to create a harmony of flavors with their cooking, and passing along my love and joy of food, both simple or exotic, plain or fancy. I continue my journey in ethnic and domestic cuisines, continuing my journey to explore diverse culinary experiences and hopefully to start you on a journey of your own. Join me also at A Harmony of Flavors on Facebook, and Pinterest.

Tuesday, July 15, 2014

Making Stuffed Hamburgers for a Birthday Meal

Last summer I made stuffed hamburgers a few times. My sister-in-law, Sherri, most particularly loved them. So much in fact, that she requested them for her birthday dinner this past Sunday. I couldn't even recall what I used to stuff the burgers last year, but she reminded me: caramelized onions, Gorgonzola cheese, mushrooms. I don't think I ever used all three at the same time, but we decided these should be a little more hearty, and I christened them Stuffed Hamburger "Steaks". 
Onion, Gorgonzola, Mushrooms, Burger Steaks
Onion, Gorgonzola and Mushroom Stuffed Burger Steaks


The one thing I simply do not have down is the part where the burgers do not get over cooked. I must admit, most particularly when there is only a thin layer of meat encasing already cooked fillings, it has been difficult for me to gauge when the meat is done and the insides are warm. I over did these also, though neither Sherri nor my husband had any trouble eating them. At least I didn't blacken them. While most people find a little char on their grilled foods enticing, my husband finds it intolerable. 

Another thing I find confusing is how to fill the burger meat and keep the whole thing together on the grill - without really compacting the meat. I watch Mario Batali and Michael Symon on The Chew stressing how burger meat should not be overworked or compacted. For me, if it isn't well compacted, they just want to crumble. Oh well. Again, it could be just a matter of "to each, his own." I still find my burgers tasty in the extreme, so for me, this works.

Do Ahead

It is really best to make the caramelized onions and the sauteed mushrooms the day before. They are time consuming at the best of times and require attention. Two medium-large onions sauteed down to just about ½ cup once deep golden brown. An entire pound of mushrooms sauteed down to a little over a cup. The onions are best cooked over very low heat, stirring occasionally at first; more and more often as they begin to color. It takes about 45 minutes to an hour to accomplish this task. The mushrooms took about 20 minutes to cook down. If you have never cooked mushrooms, expect them to release a LOT of liquid, quickly. I prefer to saute mushrooms over a medium heat, or even higher because this helps evaporate all the excess liquid more quickly. Once the liquid is gone, they will brown well. I used a combination of 1 tablespoon of butter and 1 - 2 tablespoons of olive oil for each application.


mushrooms, frying, sauteeing, cooking mushrooms
1 pound sliced mushrooms in pan  |  after about 5 minutes lots of liquid  |  now golden  |  compare cooked amount!

How to Make Stuffed Burgers

For starters, I divide up the meat for each burger, then take out about 1/4 to 1/3 of the meat and set it aside to make the "lid." The larger portion I pat out and create high ridges to hold the filling(s). I create what sort of looks like a tart shell, patting, shaping, pressing into the corners to make a high rim. If using things like caramelized onions or sauteed mushrooms, these need to be made in advance. The onions can take nearly an hour to make and the mushrooms at least 20 minutes. In this particular instance I used about 1 tablespoon (½ ounce) of the caramelized onions, then about ½+ ounces of the Gorgonzola crumbles and about 2 tablespoons (¾ ounce) of the sauteed mushrooms for each burger. This used up all of the 2 onions I had caramelized, nearly all of a 5 ounce tub of Gorgonzola Crumbles and at least ⅔ of the pound of sauteed mushrooms I had prepared. These burgers can be made smaller by using 4 ounce portions of meat. I was aiming for an entree, using no bun.

Once the fillings are in place in the well of the patty, I thinly pat out the "lid" portion of the burger. Carefully lifting it, it is set atop the fillings, and I begin to pinch closed the edges all around. Re-shaping a bit and pressing to keep the burgers relatively flat for even cooking, I set them onto a rimmed baking sheet that was sprayed with cooking spray for easy release. In an effort to keep the meat from coming apart later, I set the sheet, uncovered, into the fridge for a few hours to dry before grilling.
Stuffed, Burger Steaks, gorgonzola, onion, mushroom
Divide meat and make well  |  layer with onion  |  add Gorgonzola  |  top with mushrooms  |  set meat lid over top and seal

Onion, Gorgonzola and Mushroom Stuffed Burger Steaks


Makes six (6 ounces before stuffing) burgers
Onion, Gorgonzola, Mushroom, Stuffed Burger,
Onion Gorgonzola Mushroom Stuffed Burger Steaks


2 pounds hamburger meat
6 ounces bacon, minced finely.
2 medium/large onions, caramelized
1 pound Baby Bella mushrooms, sliced and sauteed
3 - 4 ounces Gorgonzola crumbles
Salt and pepper, to taste

In a large bowl, combine the minced bacon with the burger meat. Divide the meat into 6 equal portions of 6 ounces each. Separate out about 1/3 of each portion to pat into the "lid" for the burger. It helps to use cooking spray or oil on the counter while forming the burgers, for easier lifting later. Using the 2/3 portion of the meat, pat out a round and press up the sides to make a good sized well. The patty should be about 5 1/2 inches in diameter. Begin layering in the fillings: onion, cheese and mushrooms. Set the lid portion atop and pinch the edges all around to seal. Pat into a flat burger with smooth edges. They will be about 1 inch high.

Gently lift and set the burgers onto a baking sheet sprayed with cooking spray or brushed with oil. Refrigerate the burgers for at least an hour; more if time permits. Before grilling, sprinkle the burgers with salt and pepper. Grill to desired doneness.


The thing to (try to) remember is that the meat is very thin on each side of the fillings. The fillings do not need to be cooked; only reheated. Once the cheese is oozing out, the meat is officially overcooked. I believe the smarter thing would be to use an instant read thermometer and make sure the inside is not much more than 110 degrees. That is my next goal!


My passion is teaching people how to create a harmony of flavors with their cooking, and passing along my love and joy of food, both simple or exotic, plain or fancy. I continue my journey in ethnic and domestic cuisines, continuing my journey to explore diverse culinary experiences and hopefully to start you on a journey of your own. Join me also at A Harmony of Flavors on Facebook, and Pinterest.
Monday, May 12, 2014

Easy, Versatile Crepes

If anyone out there has never made crepes, all I can ask is, "WHY?" 

You have all probably made pancakes. Crepes are just thin pancakes. There is no horrible science. They are not at all scary to make. Just a little time investment is all they need. The great thing about crepes is they can be made up to a week in advance of using them, so they are great to make ahead when there is going to be a time crunch. 

Crepes, for all their simplicity, can elevate a meal or a dessert to new heights, just by their very nature. They look pretty. They look inviting. And, if you thought they were hard to make or too scary - chances are, your guests will think the same and you have just won yourself more culinary points in their eyes! Only you will know how easy they are.
Crepes, sweet chestnut paste, elegant dessert, easy dessert
Crepes folded in quarters with a sweet chestnut paste filling

I was scanning blogs and other sites to see what people thought about crepes. Lots of complaints, but then lots of people just like to complain about something. A recipe I saw with similar amounts to mine had one woman say she was busy for "hours" making these and what a pain it was. It took me just 2 minutes per crepe. My turnout was 17 crepes, so approximately 35 - 40 minutes in total. The nice thing is, once the batter is made, it has to be refrigerated before use, so that step can be done up to a few days ahead. When ready to make the crepes, they do not have to be made all at once. Heat the skillet and give yourself 15 minutes. Make as many in that time as you can. Stack them between waxed paper and store them in a zip-top bag in the refrigerator. Next day, make a few more and stack them with the ones made previously, and so on. Crepes are the ultimate in do ahead ease.

Crepes, Ricotta, Cream Cheese, Blueberries
Crepes with Ricotta Cream Cheese Filling and Blueberries

Once you have your crepes, and have decided whether they will be for a sweet or savory application, you will have to decide on fillings. The little bit of sugar in the crepe batter can be eliminated completely if desired, even for a sweet filling; it's just a matter of choice. I made a ricotta and cream cheese filling, flavored with orange zest and vanilla and topped this with fresh blueberries. Any fresh fruit will be good in crepes. Mixtures such as Nutella and banana seem to be a strong contender for a prized filling, particularly for breakfast or a snack. Remember, once the crepes are in the fridge, it is easy to grab one for something quick. Crepes can be rolled, folded in quarters or folded up like a burrito. They can be used to hold blintz filling and fried or baked. They can hold savory foods. Try using shredded meat and gravy for a perky use for leftovers. Use them to hold a breakfast egg mixture of choice. The applications are endless and only limited by your imagination.

I had not made crepes for quite some time and was unsure how many the recipe would make, so I started out using about 3 tablespoons of batter per crepe. This turned out making crepes that were far larger than needed, so I scaled back to 2 tablespoons of batter per crepe. I got 17 crepes out of the recipe, having started with more batter per crepe, so I am not totally sure of the yield for this recipe. I would estimate at least 20. If you want to make tiny crepes for a party appetizer, try using just 1 tablespoon. My crepes were about 7 inches at first, using 3 tablespoons of batter, and were about 6 inches when I scaled back to 2 tablespoons of batter.

Crepes, Ricotta, Cream Cheese, easy recipe, dessert
Crepes with Ricotta Cream Cheese Filling

Crepes

Makes about 20 (6-inch) crepes


1¼ cups milk
3 large eggs
2 tablespoons unsalted butter, melted
¾ cup all-purpose flour
1 tablespoon sugar, optional
¼ teaspoon salt 

Nonstick Spray 

These are easiest made in a nonstick skillet measuring about 10-inches at the bottom. Heat the pan over medium heat to start. Once heated, spray lightly with the cooking spray and have ready a spoon, ladle or other measure that will hold approximately 2 tablespoons of batter at a time. Spoon one (2 tablespoon) portion of the batter into the hot pan and immediately lift the pan, tilting and swirling to spread the batter as thinly as possible. Once the batter no longer spreads, set back on heat and wait for 1 – 1½ minutes, or until the top looks dry and it is easy to insert a spatula underneath. Flip the crepe and cook for about ½ minute longer. If the crepes take longer than this to cook, turn the heat up slightly. If they want to burn, turn the heat down slightly.

Stack the crepes on waxed paper when done. If using immediately, set aside on a plate. If making ahead, cool the stack of crepes and store in a sealed container or zip-top bag in the refrigerator until needed.


Ricotta Cream Cheese Filling


Enough to fill the above amount of crepes
 
¾ cup ricotta cheese
6 ounces cream cheese, room temperature
½ cup confectioners’ sugar
2 tablespoons fresh orange zest
1 teaspoon vanilla 

Using a hand mixer, combine the ricotta and cream cheese. Add the confectioners’ sugar and beat until incorporated. Add the orange zest and vanilla and beat to combine. Cover and refrigerate until needed.

Use about 1½ to 2 tablespoons of filling per 6-inch crepe, smearing quickly over the surface. Top with blueberries as shown, or other fruit of choice and roll up into a tube shape to serve. Top with confectioners' sugar and more berries.


My passion is teaching people how to create a harmony of flavors with their cooking, and passing along my love and joy of food, both simple or exotic, plain or fancy. I continue my journey in ethnic and domestic cuisines, continuing my journey to explore diverse culinary experiences and hopefully to start you on a journey of your own. Join me also at A Harmony of Flavors on Facebook, and Pinterest.

Friday, May 9, 2014

Recipe Revision and a Great Fruit Salad

I have been asked to do a cooking demonstration for the local museum in late June. The title of the class is "Summer Patio Brunch". I looked up brunch recipes a couple of months back when I was first approached about this and came up with some things I felt at the time were good ideas. And - they probably are good ideas, but things happened and ideas changed.
Ham, Blue Cheese, Bread Pudding
My Original Ham & Blue Cheese Bread Pudding


First, I had created a Ham and Blue Cheese Bread Pudding one day recently and it came out so good that I decided this would also be a very suitable brunch (or even breakfast) dish. Much can be done ahead, making it wonderful if you have friends or family coming over. Any time things can be made or partially prepped ahead makes entertaining so much more fun. Thinking about the Ham & Blue Cheese Bread Pudding, I decided to make it a simpler recipe, using more common ingredients that might please more people. I substituted regular black pepper for the pink peppercorns, I used Feta cheese instead of Blue, and I used white raisins instead of currants, though regular raisins would also work perfectly. Otherwise the recipe is the same as the one from April 29th.
Ham, Feta, Bread Pudding, White Raisins
Ham & Feta Bread Pudding with White Raisins

I had thought about cheeses that would substitute well in that recipe and my first thought was Gruyere. Unfortunately, the only Gruyere available locally now costs over $13, so I scratched that idea, though I still think it may have been the very best flavor pairing. Of course, cheddar would work perfectly, and who doesn't like a nice cheesy casserole with cheddar cheese all melty inside? It just occurred to me that a nice Hollandaise Sauce drizzled over the bread pudding would really make it a classy brunch.

Then I got thinking about something to serve along with the Bread Pudding. I had found a recipe I wanted to toy around with, but it just happened that evening Bobby Flay did a fruit and vegetable salad in his Brunch @ Bobby's program. I did not pay attention to the "recipe", nor did I look it up. But I did really like the sound of the combination. He used Cantaloupe, Mango, Pineapple, Jicama, Cucumber and Strawberries. I kept that combination in mind when I made a salad of these ingredients. I need to have exact measurements to give the class, so I decided to make things really easy and use 1 cup of each fruit or vegetable. I dressed the fruit and veggies with a little salt and lime juice and a chiffonade of mint. I invited my sister-in-law over and we taste tested. It was good, so i will be using these recipes for the class. These ingredients are guidelines. Other things could be added or substituted. I think Green peas would be great in here, as well as fresh, raw asparagus. Switch a few things out. Blueberries would be great. Just run with it! As for the portions, I counted 1 cup as a portion. If you need more servings, or larger servings, just multiply accordingly.

Fruit and Vegetable Salad


Makes six 1-cup portions
salad, pineapple, mango, cantaloupe, strawberries, cucumber, jicama
Fruit and Vegetable Salad


1 cup fresh pineapple chunks
1 cup fresh mango slices
1 cup cantaloupe balls
1 cup strawberries, halved
1 cup cucumber, sliced
1 cup jicama, in matchsticks
¾ teaspoon salt
3 tablespoons lemon or lime juice
1 - 2 tablespoons fresh mint chiffonade

Combine all the fruits and vegetables and toss with the salt, lemon or lime juice and the mint. Serve immediately.

DO AHEAD: If you are having a summer brunch and need to plan things ahead so you are not up at the crack of dawn prepping, consider cutting the pineapple the day before and storing in a lidded container or zip-top baggie in the refrigerator. Likewise prep the cantaloupe balls, mango slices and jicama and refrigerate each separately. On the morning of serving, prep the cucumber and strawberries, juice the lemon or lime and chiffonade the mint. Set all these aside and combine the ingredients no more than 30 minutes ahead for best freshness. 
 
fresh pineapple, how to cut
Cut off top and bottom - slice off outer skin - peeled pineapple - slice off fruit on either side of core - core in the center

When I was creating hand-out recipe sheets for these recipes, I was also thinking about many people's unfamiliarity with cutting up a jicama, pineapple or mango. Many people still have never done these things, so I was taking quick shots with my phone while I prepped, to demonstrate how it is done. Above is a sequence showing the cutting of a pineapple. I will be demonstrating this in person at the Summer Patio Brunch event, but  even when it is seen, having photos at hand help for a novice. I certainly appreciated photos when I was first learning to cook.
mango fruit, peeling, cutting
A Mango - peeling - cutting along seed - the narrow seed - the component parts

Mangoes have become more common these days, but if one has never had one in hand, it is good to know that there is a rather large and flat seed inside. When cutting the fruit, this seed needs to be kept in mind. And then there is the jicama. 
 
how-to, cutting, peeling, jicama vegetable
Jicama - cut in half - peeling the skin off

If you have never had jicama, it can be as small as an orange or as large as a small melon. It is a vegetable with a thick skin that must be removed. If it cooperates, a small cut at one end will allow the skin to be pulled off. Use a potato peeler for any stubborn spots. The jicama flesh is somewhat juicy and very crisp. To me, the flavor is reminiscent of fresh green peas, though I have heard many descriptors for its flavor. It makes a wonderful addition to a veggie tray with a dip alongside. It also is wonderful as a scoop for hummus.

Try out these recipes together; they make a most lovely meal, whether breakfast, brunch or dinner.


My passion is teaching people how to create a harmony of flavors with their cooking, and passing along my love and joy of food, both simple or exotic, plain or fancy. I continue my journey in ethnic and domestic cuisines, continuing my journey to explore diverse culinary experiences and hopefully to start you on a journey of your own. Join me also at A Harmony of Flavors on Facebook, and Pinterest.

Disqus