Translate

Showing posts with label lemon zest. Show all posts

Monday, March 21, 2016

It's that Wine Time of Year

This year marks the 4th Annual Winefest Renaissance, held for the benefit of the Boys and Girls Club of Aberdeen. This year the Winefest will be held on April 9th, at the Ward Hotel. And, once again, I will be creating foods to pair with wines of my choosing.
Parmigiano, Stuffed dates, Prosciutto, Medjool Dates
Parmigiano Stuffed Prosciutto Wrapped Medjool Dates

After a brief scan of the list of wines to be available, I opted for an Italian theme, selecting a Roscato Prosecco, a Barone Fini Pinot Grigio, a Chianti and a Secco-Bertani (a mix of Corvina and Merlot). I had never tasted any of these particular wines before, though I have had other Proseccos, Pino Grigios, and Chiantis. The Secco-Bertani was new to me. I had to quickly make a decision on what foods to pair with these wines, so I followed my normal route of first going online to find all the information I could about each particular wine, vintner, flavors, pairings and such. Then I looked through my own lists compiled over the last few years, with a table of the wine varietal and what foods pair well with each. 

I sent in my wine choices and the pairings I had decided on, only to find out that after all, the two reds would not be available. Drat! Meanwhile, I went ahead with my planning for the foods to pair with the two white wines.

Parmigiano-Reggiano, Stuffed dates, Prosciutto, Medjool Dates
Parmigiano Stuffed,
Prosciutto Wrapped Medjool Dates
For the Roscato Prosecco, which is described as "sparkling, fruity with a hint of sweetness," I went through my table list. I felt that dates would provide sweetness, though too much sweetness and the wine will taste sour. A fine balancing act is required. I know that antipasti platters are said to pair well with Prosecco, so I though of wrapping the date with prosciutto. To add balance to those sweet dates, I also combined enough chevre goat cheese with shredded Parmigiano Reggiano to hold it together and stuffed the dates with this mixture. After tasting one made up in this way, I felt that they still needed another component. I happened to have some Blue Diamond BOLD Habanero Spiced Almonds on hand, so I pressed two of them into the cheese stuffed date before wrapping with the prosciutto. This seemed a bit better. I am planning to open a bottle of Prosecco to taste with them, later. Meanwhile, I took a few down to my husband's office for the people there to taste and critique.

Parmigiano Stuffed, Prosciutto Wrapped Medjool Dates

Makes 22 - 24
making stuffed dates, Prosciutto wrapping
Making Parmigiano Stuffed Prosciutto Wrapped Dates


12 ounces Medjool dates (about 22 to 24 dates), pitted
2.25 ounces Parmigiano Reggiano, finely grated
4 ounces Chevre or Montrachet goat cheese
45 - 50 Bold and Spicy Almonds (Habanero or Sriracha spiced)
6 - 8 ounces Prosciutto
 

Mix together the Parmigiano Reggiano with the goat cheese, to form a thick paste. Divide the mixture into about 3/4-inch diameter balls (weighing approximately 0.25 ounce each). There should be at least enough balls to fill the amount of dates. Be sure your dates are pitted. If not, slice into one side of them down the length to reach the pit and remove. Lengthen each of the cheese balls into logs and stuff them inside the dates. Press in two of the spiced almonds.

Most prosciutto comes in about 4 x 8-inch thin slices. I sliced down the length, making two thinner lengths out of each slice. Roll each of the filled dates with one of these halves of the prosciutto slice and secure with a toothpick, if needed. These may be made ahead a couple of days, if needed.


~~~~~~~~~~~~~~~~~~~~~

For the next wine, a Pinot Grigio, I went with the flavors of lemon, artichoke, parsley and chicken. I made a Lemon Artichoke "pesto," which was absolutely fantastic on its own, and then cooked up a chicken breast, cooled and finely minced the chicken, adding it to the pesto mixture. I set this atop a toasted baguette slice, and Oh My! These are so good - all I can hope is that they do well with the Barone Fini Pinot Grigio at the event. Unfortunately, though these wines are on a list to be available for the event, they are not currently available for sale in the local stores. 

Lemon, Artichoke, Pesto, Chicken, Toasted Baguette Slice
Lemon Artichoke Pesto with Chicken atop Toasted Baguette Slice

Lemon Artichoke Pesto with Chicken atop Toasted Baguette

Lemon, Artichoke, Pesto, Chicken, Toasted Baguette
Lemon Artichoke Pesto
with Chicken atop Toasted Baguette
Makes about 50

1 large boneless, skinless chicken breast
1 tablespoon olive oil
salt, white pepper and dill for sprinkling
-------------------------
1 packed cup parsley
zest of 1 lemon (save lemon for juice later)
2 - 4 cloves garlic + white vinegar
3 ounces Pecorino Romano cheese, in cubes
½ cup chopped walnuts
½ teaspoon each: salt and pepper
1 (14-ounce) can artichoke hearts, drained
1 teaspoon capers, drained
3 tablespoons lemon juice
¼ cup olive oil

A baguette, sliced about ¼ inch
olive oil for brushing

First, set the artichokes to drain in a colander and set aside. Butterfly the chicken breast so it lays flat and about ½ inch thick. Season both sides well with salt, white pepper and dill, and place in a very hot skillet with the tablespoon of olive oil. Fry to a deep brown, then turn and brown the opposite side. The browning provides wonderful flavor, so do not eliminate this step. Lower the heat to low or medium low and allow the chicken to cook through, about 10 minutes, total. Allow the chicken to cool while making the pesto.


Lemon Artichoke Pesto before adding chicken
Lemon Artichoke Pesto
before adding chicken
Finely mince the garlic into a small bowl. Cover with the vinegar and allow to set for a few minutes. This helps eliminate the strong raw-garlic taste. When ready to use, drain off the vinegar.

In the bowl of a food processor, combine the parsley, lemon zest, the drained garlic, the Pecorino Romano cubes, walnuts and salt and pepper. Run the processor to finely chop. Stop to scrape down sides, then process until very fine. Add in the drained artichokes with the capers and lemon juice and process to a paste. Add in the olive oil to combine. Pout out into a bowl, replacing the processor bowl.


Cut the cooled chicken into cubes and place in the vacated processor bowl and pulse until the chicken is fine, but not pureed. Fold into the pesto.

To serve, brush the baguette slices with olive oil and set them on a sheet pan. Preheat the broiler with the rack in the highest position and broil the breads until nicely toasted, about 1½ minutes. Watch closely! Scoop a small amount of the Lemon Artichoke Pesto with Chicken onto each slice.


My passion is teaching people how to create a harmony of flavors with their cooking, and passing along my love and joy of food, both simple or exotic, plain or fancy. I continue my journey in ethnic and domestic cuisines, continuing my journey to explore diverse culinary experiences and hopefully to start you on a journey of your own. Join me also at A Harmony of Flavors on Facebook, and Pinterest.

Monday, March 2, 2015

Reprise of my Valentine Cake

Almond, Pistachio, Torte, Baklava Flavors
Almond Pistachio Torte with Baklava Flavors
Ever since Valentine's Day, when I made an Almond Pistachio Torte with Baklava Flavors, I have been itching to remake the torte, with some changes. Don't get me wrong - there was absolutely nothing wrong with the flavors. There was nothing wrong with the cake at all, except that if someone with less experience tries that recipe, it will yield a lot of frustration and possibly some heartbreak along with it. 

My Reasons for Making Changes

For starters, when I get going on the creation of a recipe, I am of the "more is better" school. It is really hard for me to scale back on ingredients. I also usually look for what will be the most rich, unless I am absolutely working on a recipe for paring back in some way, due to someone's dietary restrictions. Going on that theme, I used 5 eggs, 1 2/3 cup sugar, 2 sticks of butter and a half cup of heavy cream, on top of the 3+ cups of ground nuts. As I said; rich. My goal was to have the flavors of Baklava, in a cake. That much was pretty good. The actual layers of the torte were too fragile, too wet, too sunken in the middle. 

I used possibly more glaze than needed, but oh my, was that cake moist. I think part of the sinking-in-the-middle problem was too much meringue in the batter and way too much butter mixed in. When attempting to trim the very high edges, the pieces were wet enough to pack into the middle, where the layer was sunken. All this was okay, ultimately. The cake held together, but trying to move the layers onto the cake to ice them was a real trick. The flavors were wonderful. Still, I wanted something less friable. 
Nuts, Torte, Baklava Flavors
"New and Improved": Nut Torte with Baklava Flavors

Creating a New Version

I got thinking it has been a while since I made a dessert. Desserts are generally my specialty. And my mind once again turned to that Almond Pistachio Torte. I got out my Grandma's recipe for a Nut Torta, alongside my recipe for the Almond Pistachio Torte. The vast differences were almost funny. Grandma's cake was mostly eggs with a little sugar and 1 cup of nuts. I wanted to keep the 3 cups of ground nuts I used originally, but felt that I needed more eggs in the mix. Less as meringue, perhaps, but more overall. I thought I needed less sugar, so I lowered that quantity. I eliminated both the 2 sticks of butter (Grandma's cake has no oil or butter at all), keeping only the 1/4 cup of olive oil, which I absolutely had intended using from the get-go. 

The flavors in the original Almond Pistachio Torte were of Baklava: cinnamon, cloves, cardamom, rose water. I kept these, but used slightly more: a teaspoon apiece of cinnamon and cardamom, and I kept the rosewater at 1 teaspoon. The glaze I used on the original cake was upwards of 8 tablespoons of liquid. The cake layers were too moist to begin with. Not knowing how this second attempt would fare, I chose to lower the liquids to 4 tablespoons. As it turned out, this cake could easily have taken the amount I used in the first one. While the torte layers were in no way dry, the extra glaze would not have hurt at all.
Nuts, Torte, Baklava Flavors, soft crumb, cake
Nice soft crumb when fresh

In the first cake, I wanted pistachios, as my husband loves pistachios. I was going for the love, being Valentine's Day! This time I used 1 cup each of ground almonds, pecans and walnuts. Any nuts preferred will work. It can be made with all of one particular kind of nut meal, or half and half of two kinds. 

The Results

Freshly made, the torte was lovely. The layers  came out of the pans easily and were exceptionally easy to handle. Immediately sliced, the torte was nowhere near the "wet" consistency of the first torte. Obviously I could have used more of the glaze this time, rather than cutting the mixture in half. Once the cake set for a while, cut, it started to dry very quickly. Inside, it was still nice and moist as a cake should be, but the outside was not holding up. If it is meant to go quickly, this should be no problem. Another option to help it stay more moist: put less icing between the layers and stretch it to cover the sides also. I have not tasted it yet this second day, but if it was drying that quickly on the day it was made, I think I need more of something to keep it moist. More olive oil in the batter, and more glaze after baking, probably. Also this time I used all purpose flour in the batter, rather than the rice flour in the first mixture. I may go back to the rice flour concept. I have a feeling I am going to have a round 3 on this recipe before too long!

Nuts, Torte, Baklava Flavors, cake, moist cake
Nut Torte with Baklava Flavors

Nut Torte with Baklava Flavors


Makes one 4-layer 8-inch torte

8 eggs, divided, room temperature
1¼ cups sugar
¼ cup olive oil
1 teaspoon vanilla extract
1 teaspoon rosewater, optional
1 tablespoon fresh lemon zest
3 cups finely ground nuts of choice
1 cup all-purpose flour
1 teaspoon ground true cinnamon, (sometimes called Ceylon cinnamon)
1 teaspoon ground cardamom seeds
½ teaspoon salt
½ teaspoon baking powder
¼ teaspoon ground cloves
1 tablespoon sugar

 
Preheat oven to 350 degrees. Grease four 8-inch round pans. Cut parchment to fit the bottoms of the pans and set the parchment inside, then grease the parchment. Grind the nuts, measure out three cups worth and set aside. Sift or whisk together the flour, cinnamon, cardamom, salt, baking powder and cloves and set aside. Mix together the olive oil, vanilla extract and rosewater and set aside.

In a mixer bowl, crack in 5 of the eggs. Separate the remaining 3 eggs and put the yolks with the 5 eggs and the 3 whites in another clean bowl. Set the whole egg mixture in a stand mixer with the 1¼ cups sugar and beat on medium or medium high speed until the mixture is very light and fluffy and will drop slowly, ribbon-like, dissolving back into the mixture, taking a few seconds to disappear. Mix in the olive oil mixture and the lemon zest, then stir in the nuts.

With a mixer and very clean beaters, beat the 3 egg whites until they hold soft peaks. Slowly add in the tablespoon of sugar and beat to stiff peaks. Fold this mixture into the batter until no white remains. Divide the mixture evenly between the 4 pans. Bake the layers for about 15 minutes, or until a toothpick inserted in the center comes out clean.

Let the layers cool for a few minutes in the pans, then turn them out onto cooling racks. Brush on the Glaze, dividing evenly between the 4 layers.

Glaze
1 tablespoon water
1 tablespoon olive oil
1 tablespoon honey
1 strip (about 1 x 2½-inches) lemon peel
1 tablespoon lemon juice
1-inch true cinnamon stick, crumbled
3 whole cloves

Set all the glaze ingredients in a small saucepan over very low heat and let them steep while the cake is baking. Strain the mixture and brush onto the cake layers.


Frost the layers with Honey Butter Icing (found here).


My passion is teaching people how to create a harmony of flavors with their cooking, and passing along my love and joy of food, both simple or exotic, plain or fancy. I continue my journey in ethnic and domestic cuisines, continuing my journey to explore diverse culinary experiences and hopefully to start you on a journey of your own. Join me also at A Harmony of Flavors on Facebook, and Pinterest.

Monday, February 9, 2015

That Wine Tasting Time of Year

Lemon, Thyme, Chicken, Fillo Cups
Lemon Thyme Chicken Fillo Cups
Up here where I live, this seems to be the time for wine tasting events. The larger wine tasting event that will come in late March this year hasn't even started its planning yet, but I was asked to make a few appetizers for a smaller event on the 18th of this month. Less formal, this get-together takes place in someone's home, for about 25 people. I have not much information on what all will be taking place there, though I was given a list of the 9 wines to be served. The wines range from very light white to deep, dark and bold. Trying to pair 3 appetizers to cover all these wines (all but two are reds), well, I have been poring over my wine and food pairing charts to try and make my appetizers pair with the most wines possible. 

Yesterday I made 2 new appetizers, which I served as our dinner last evening, to get opinions on flavors and how things could be improved. I was the only wine drinker at the dinner table and I was not drinking any of the wines to be paired, though I believe for all intents these appetizers were great as is and will work well with the wines they were created to pair with. One little change will be made on the meat roll-ups. It will not change flavor, but only make it easier to roll and skewer. But I will get to that recipe when I finalize them with the changes I am making. 

Lemon, Thyme, Chicken, Fillo Cups, appetizer, finger food
Lemon Thyme Chicken Fillo Cups

When I am asked to make appetizers to pair advantageously with particular wines, I spend a lot of time in research before ever beginning the creation of the food. I want the food to taste good with the wine, and hopefully also enhance how the wine tastes. For example, some things I research:
  • What flavors are associated with the particular wine? Some possible adjectives: smoky, fruity, dark berry, strawberry, citrus, herbal, pepper, earth, leather, and the list is nearly endless. I use these to gear the foods towards these flavors or aromas.
  • What does the vintner suggest as a food to pair with the wine? The vintner knows best how his wine was made, and what flavors are involved, so he has the best idea. Many others also will comment on food pairings for particular wines also.
  • Are there particular herbs or cheeses that are recommended to pair with the wine? Not every site will get this involved, but there are many places that even have full recipes attached. I do not use these recipes, but I read them to become familiar with the thought process behind the pairing.
The next step in my process is to make a list of the flavors and foods to incorporate in the appetizer, things that will play well with the wine involved. To that end, in the last couple of years I have spent innumerable hours compiling lists of the particular foods
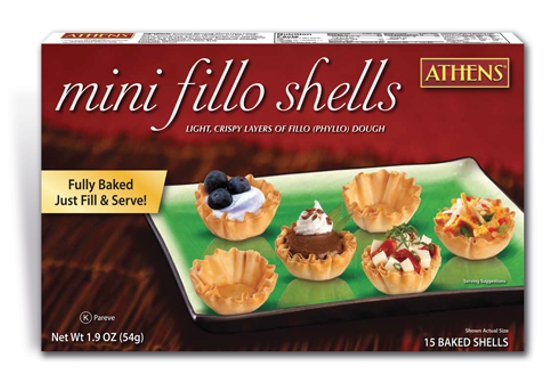
mini fillo shells, filo, phyllo, appetizer, finger food
mini fillo shells
(meat/fish, nuts, cheese, herbs, sauces and even desserts), that will pair with particular grape varieties. I add to these lists as I find new information. At this point in time I have lists for these white wine varietals:  Albarino, Chardonnay, Chenin Blanc, Gewurztraminer, Gruner Veltliner, Pinot Gris, Riesling, Sauvignon Blanc, Torrontes and Viognier. I have lists for these reds: Bordeaux type blends, Cabernet Sauvignon, Carmenere, Chianti blends, Gamay, Grenache, Malbec, Merlot, Mourvedre, Nebbiolo, Pinot Noir, Sangiovese, Shiraz, Tempranillo and Zinfandel.
Chicken, cheese, made as a cheese ball
Made into a cheese ball

For possible pairing with a full flavored Chardonnay and also for the Pinot Noirs to be served, the appetizer I created would use bacon and well flavored chicken. Some of the online suggested food pairings for these wines included things like curried dishes. Thyme was specifically mentioned as an herb to use. I prefer to make appetizers that need no utensils, so I chose to use Mini Fillo Shells to hold the mixture. While creating this recipe, I had very fixed ideas of how these would taste, and I geared my process to use flavors that would coincide with my mind's "taste-buds". I wanted a sort of lemon and pepper chicken concept as a base. I included bacon in the mixture to boost flavor and bring in a smoky note. Cream cheese and Chevre would bind the mixture. Thyme added that herbal note I was looking for. 
small bites, almond meal, thyme finger foods
Individual bites rolled in almond meal & thyme

I am extremely happy to report that the flavors came out tasting precisely as I imagined they should. I have no changes to make to this recipe. It is simple to make and can be made in advance. The actual filling of the mini fillo shells should take place last minute, but this part takes little time at all. I used a pastry bag with a large open star tip, but filling the little shells can be easily accomplished with a couple of small spoons. If refrigerated, the mixture could also be rolled into small balls - these little balls could be placed in the mini fillo shells (shown above), or on a cracker, or rolled in herbs or nuts and set out as individual bites, or even made into one large "cheese ball" to be served with crackers or pita chips. 

I used my own Pickled Red Onion as a garnish for these. I liked the pop of color and the pieces give just that tiny piquant bite. It takes about half an hour to make the pickled onions but requires at least 3 days for them to come to best flavor. If using these, plan ahead. They are a wonderful accent to most any dish and great to have around at any time. If not using the pickled red onion, other options might be slivers of scallion, thin slices of gherkins or just some more tiny thyme leaves sprinkled over the whole plate. The Tandoor Spice called for is my own mixture (find recipe here) and the flavors are great. You might easily substitute 1/2 teaspoon turmeric, or the full teaspoon of your favorite Curry Powder or Garam Masala (find one recipe here).

Making the mixture up to 3 days in advance helps with do-ahead planning.

Lemon, Thyme, Chicken, Fillo Cups, finger foods, appetizer
Lemon Thyme Chicken Fillo Cups

Lemon Thyme Chicken Cups


50 - 60 appetizer bites

6 ounces meaty bacon, fried
6 ounces cream cheese, softened
6 ounces Chevre (goat cheese), softened
2 teaspoons fresh lemon zest
2 teaspoons fresh thyme leaves
1 pound boneless, skinless chicken breasts (2 large)
1 teaspoon Tandoor Spice
1 teaspoon salt
2 cloves garlic, finely minced
fresh ground pepper, to taste
1 - 2 tablespoons olive oil
2 tablespoons lemon juice
4 boxes (15 each) mini fillo shells

Finely chop the fried, drained bacon. You should have at least a half cup. Set this into a large bowl. Add in the 2 cheeses with the lemon zest and thyme leaves and set aside.

Cut the chicken into approximately ¾-inch cubes. Place them in a bowl and sprinkle on top the Tandoor Spice, salt, garlic and pepper. Toss well to coat and let set for about 20 minutes.


Making the Chicken Filling
cheeses, thyme, bacon & zest in bowl  |   chicken browned   | cooked through with lemon juice  |        chopped chicken   
Heat a large non-stick skillet on high or medium high heat. Add in the olive oil and then the chicken pieces. Toss the chicken quickly and constantly to brown completely on all sides, about 4 - 5 minutes (You will need an extractor fan going for this!). Lower heat to medium low and add in the lemon juice, stirring often for another 4 - 5 minutes, until the chicken is cooked through. Set aside to cool to lukewarm.

Once you are able to handle the chicken, either chop it by hand into very small bits, or pulse in the food processor. Do not pulse too finely. Add the chicken to the bowl with the bacon and cheeses and with a mixer, beat until all ingredients are well combined. At this point the mixture can be refrigerated for up to 3 days if needed.

No need to thaw or bake the fillo cups before using. They are delicate, so do not apply pressure to the cup itself while filling. If using a pastry bag, the chicken mixture will have to come to room temperature first, or it will not pass through the piping bag. You will need a large tip with a wide opening for the mixture to pass through. Pipe mixture into shells. Conversely, use two teaspoons to drop bits of the mixture into the shells. Or, form balls and press the balls gently into the shells. Top with your preferred garnish. Even a small cilantro leaf would be lovely. Do not fill the cups too far in advance or they will lose their crispness and become soggy. 


My passion is teaching people how to create a harmony of flavors with their cooking, and passing along my love and joy of food, both simple or exotic, plain or fancy. I continue my journey in ethnic and domestic cuisines, continuing my journey to explore diverse culinary experiences and hopefully to start you on a journey of your own. Join me also at A Harmony of Flavors on Facebook, and Pinterest.

Thursday, August 14, 2014

Greek Style Stuffed Chicken Breasts for Dinner

Long, long ago, I made something similar to this, and it stayed in my memory. I remember the flavors being great. The most likely reason I never went back to make it again is because I dislike frying food. I really dislike the cleanup afterwards, with everything grease-spattered. Considering it has been at the very least 30+ years since the last time I stuffed chicken breasts and fried them, I thought maybe it was time to revisit this idea.

herbs, thyme, marjoram, oregano, rosemary
Clockwise from top: thyme, marjoram, oregano, rosemary
I had skinless boneless chicken breasts to use. My recollection from that last time was cutting a pocket into the meat. Basically, lay the breast flat on a cutting board and with a small, sharp paring knife, knife blade parallel to the cutting board, cut into the thicker side of the breast, keeping the opening small, but sliding the knife towards the top end and then see-sawing to the bottom end, creating a pocket, but without too large an opening on the outside. The most important thing is not to poke the knife out the other side, or even worse, through the top or bottom of the meat.

I chose Greek flavors to stuff the chicken, mainly because I already had a block of Feta cheese in the fridge. I thought about what else to use that would be Greek or Mediterranean and since my sister-in-law has all my herbs growing at her house, I took a walk over there and picked marjoram, oregano, thyme and rosemary. I particularly wanted marjoram for the flavors because of its somewhat more floral scent. If marjoram is not available, just use the whole amount of oregano. Along the way home, I stopped in the grocery for a lemon. Thinking of the possibility of using sun-dried tomatoes, I thought that oil packed would give more concentrated flavor. I considered capers, but left them out this time.
 
Greek Style. Stuffed Chicken Breasts entree, dinner ideas
Greek Style Stuffed Chicken Breasts

Putting the whole thing into practice was relatively simple. I made the pockets in the chicken breasts and set them aside. I put a chunk of the Feta into the food processor to break it up finely, adding minced garlic to ensure it was evenly distributed. I did the chopping of herbs by hand. I had more than I needed, and since I was steaming fresh green beans to accompany the chicken, I added the leftover chopped herbs to the beans when they were finished. I used seasoned flour and egg to make the outer coating for the chicken; first in flour, then egg, then flour.
 
chicken, frying, cooking chicken, stuffed chicken,
Chicken, frying

Actually frying the chicken took longer than I wished, but I kept the heat on medium low because I wanted the chicken cooked through but not burnt. I did not time it precisely, but I would estimate at least 15 minutes per side, before it reached an internal temperature of 165 degrees on my Thermapen instant-read thermometer. I realize how expensive this little tool is, but it is worth its weight in gold. Truly!

Ultimately, despite the mess all over the stove to clean, the chicken was most delicious. My husband again was thrilled with the outcome. My photos did not come out as I had wished, but hopefully they give enough of an idea of the great outcome of this dish.

Greek Style Stuffed Chicken Breasts


Makes 4 servings
Greek Style, Stuffed Chicken Breasts, dinner idea, recipe
Greek Style Stuffed Chicken Breasts

4 boneless, skinless chicken breasts
2 ounces Feta cheese
2 cloves garlic, minced
2 teaspoons fresh lemon zest
1½ teaspoons fresh, minced rosemary leaves
1½ teaspoons fresh, minced thyme leaves
1½ teaspoons fresh, minced oregano leaves
1½ teaspoons fresh, minced marjoram (
OR use 3 teaspoons fresh oregano, if marjoram not available)
1 tablespoon minced oil-packed sun-dried tomato
¾ cup all-purpose flour
1 teaspoon salt
¼ teaspoon fresh ground pepper
1 egg
1 - 2 tablespoons milk or water
2 tablespoons oil, for frying, as needed

Pat dry the chicken breasts with paper toweling. With a very sharp paring knife, insert the knife tip into the thicker side of the meat. Slide the knife upwards first to the rounded end of the meat, being careful not to poke all the way through. With a gentle, back-and-forth, sliding motion, slide the knife blade to cut a pouch, extending down as far as comfortable into the narrow end of the chicken. Try to keep the original opening no more than 2 inches wide. Do this with all 4 chicken breast pieces and set aside.

chicken, making a pocket, stuffing chicken breast
Cut a 2" slit, slide knife blade upwards and down to make pocket

Place the feta cheese into a food processor with the garlic and lemon zest and process fine. Chop all the herbs and add them to the processor and pulse once or twice. Pour the mixture into a bowl and add the minced sun-dried tomato, stirring to combine. Divide the cheese and herb mixture into 4 portions. With one hand, open the pocket of one chicken breast and with a small spoon, insert one portion of the cheese herb mixture. Use a fingertip to push the mixture both upwards and downwards in the pocket. Press the edge of the pocket to close and press the surface gently with fingers to spread the mixture to lay smoothly inside. Do this with the remaining 3 chicken breasts and filling.

Combine the flour, salt and pepper on a plate. In a separate, wider container, mix together the egg and milk or water with a fork to combine. Dredge the chicken breasts first in the flour mixture, then in the egg mixture, then back in the flour mixture. Set them aside for at least 20 minutes to set the coating. If longer, place them in the refrigerator.
 

Heat a large skillet and add the oil. Place the chicken breasts smooth side down into the hot oil. Start with medium low and fry the meat until very golden, about 15 minutes. Turn gently and fry the opposite side until golden and the internal temperature is at least 160 to 165 degrees. Do not cover the pan to speed the cooking as this will make the coating soggy and the cheese will ooze out.


NOTES: If other herbs than used in this recipe are desired, I would recommend using 1 - 2 tablespoons fresh dill instead and 3 - 4 teaspoons chopped capers instead of  the sun-dried tomatoes. This will be my next experiment!


My passion is teaching people how to create a harmony of flavors with their cooking, and passing along my love and joy of food, both simple or exotic, plain or fancy. I continue my journey in ethnic and domestic cuisines, continuing my journey to explore diverse culinary experiences and hopefully to start you on a journey of your own. Join me also at A Harmony of Flavors on Facebook, and Pinterest.

Friday, March 21, 2014

An Appetizer to Pair with Prosecco

map, Prosecco area, prosecco wine, Italy
That little dark green spot - Prosecco area
One of the wines I chose to use in the upcoming Winefest Renaissance wine tasting event (for the benefit of the Boys and Girls Club of Aberdeen) is Mionetto Il Prosecco. I had the very great pleasure some years back to actually meet Mr. and Mrs. Sergio Mionetto at a Mionetto luncheon wine tasting. Three Mionetto Proseccos and a Moscato were served with small portions of foods created to set off the flavors of each wine. It was an amazing experience, though I am not truly fond of any sparkling wine. "What!?" you might say? "You don't like sparkling wines?" Nope. It's the fizz I object to, which is the whole point of a sparkling wine, I realize. I cannot deal with the fizz in any beverage, so I completely left off drinking any soft drinks a very long, long time ago. 

Still. I know that sparkling wines are high on most peoples' lists, and so I am pleased to serve a Prosecco in my part of the wine and food pairing. Prosecco is a grape grown in  the hills north of Venice and Treviso, where the towns of Conegliano and Valdobbiadene mark the limits of the Prosecco area. The "Il Prosecco" line covers the lower end wines of Mionetto, though they are still a pleasure with their fresh, crisp, fruity flavors, and easy to open little bottle caps. At the Mionetto Prosecco tasting luncheon, each Prosecco was served with seafood; shellfish in particular. I love seafood, and shellfish in particular, though I have a slight allergy. If I am willing to swell up for a few days, I can eat it. My husband, however, dislikes any seafood, and shellfish in particular. If a very white fish has enough breading and is smothered with enough tartar sauce and ketchup, he will usually tolerate it. Shellfish however, he will not even try. Needless to say, we left that luncheon and he got a burger. I ate everything on my plates and some of his! 
Green Peas, appetizer, Smoked Salmon, Mousse
Green Pea Pancakes with Smoked Salmon Mousse


Anyway, back to the wine event. I am planning to pair the Il Prosecco with Green Pea Pancakes with Smoked Salmon Mousse. I have not tasted them paired with the wine myself, but I must say, the little appetizers are amazingly good. The crispness and fruitiness of the wine should pair well the Green Pea Pancakes, as well as the Mousse. I had originally planned to make little cheese wafers to hold the mousse, but then saw a recipe in the latest Food and Wine Magazine for Green Pea Pancakes (page 52) and got an idea. The recipe in the magazine is a thinner batter, meant to be made as small pancakes in a pan. I wanted the pancakes to be a little thicker, easier to pick up, and more uniform. 

Green Peas, tiny Pancakes
Green Pea Pancakes
I racked my brain overnight and came up with the idea to make them in the bottom of muffin tins! I added to the batter such things as capers and fresh dill and more flour than called for and spooned the batter into buttered muffin cups. They came out so pretty. Perfectly round and a bright, beautiful green. The lovely soft pink of the Smoked Salmon Mousse makes a great combination of colors that are very eye-catching. They are very easy to make too, which is always a plus. The pancakes can be made in advance and frozen, which is what I am doing. I made a first batch and we ate over half of them in taste testing! I made a second batch yesterday and those are all neatly frozen. They will remain frozen until the day of the event, and then brought to room temperature.

The Smoked Salmon Mousse is a simple enough recipe. It should not be made more than a couple of days in advance as the fishiness factor rises with time. Here are my recipes:

Green Pea Pancakes


Makes 24 to 34, depending on the measure
Green Peas, tiny pancakes, appetizer
Showing the size


1½ cups frozen peas
1 teaspoon salt
2 teaspoons capers
1 egg + 1 egg yolk
1 teaspoon lemon zest
¼ cup loosely packed fresh dill
½ cup heavy cream
6 tablespoons flour

Preheat oven to 350 degrees (325 on Convection). Butter the lower half of the muffin tin cups, or use a cooking spray. Set aside. 

Set the frozen peas in a colander and run hot water over for a few seconds to soften. Place the drained peas in a food processor. Add the salt, capers, egg and yolk, lemon zest, dill and cream and process until fine. Add the flour and pulse to combine. I find it easier to pour the batter out into a measuring cup before dropping by tablespoon into the muffin cups. Use a tablespoon measure or a small cookie scoop measuring approximately 1 tablespoon. Depending on your measuring, you may get up to 35 pancakes, or as little as 24. 

Bake the pancakes for about 8 minutes, or until set and dry, but not browned. Allow the pancakes to cool for about a minute before gently running a small spatula or table knife around the edges to loosen. Turn out onto waxed paper, top sides down, to allow them to cool and dry enough not to stick to each other. 

Make Ahead: Set them in a single layer on a tray or baking sheet and freeze solid before stacking them in a well sealed container or freezer zip-top baggies for up to a month. 

Green Peas tiny pancakes, Smoked Salmon Mousse
Green Pea Pancakes with Smoked Salmon Mousse


Smoked Salmon Mousse


brands, open star tip, icing tips, decorating tip
Ateco extra-large open star tip #829
Makes enough to top about 24 Green Pea Pancakes

1 (4.5 ounce) chunk smoked salmon
8 ounces cream cheese
4 scallions
2 - 3 tablespoons lemon juice
1 teaspoon lemon zest

Remove any skin from the salmon, break the fish into chunks and place in a food processor with the cream cheese, scallion (white and light green parts, roughly chopped; reserve the dark green tops to garnish), lemon zest and 2 tablespoons of the juice. Process until very fine. Taste and add more lemon juice if needed. Use a small spoon to place portions of the mouse onto the little green pea pancakes, or if you are adept with an icing bag and tip, use those for a lovely presentation. Garnish the appetizers with thinly sliced dark green scallion tops.

I find that using a piping bag with a large open star tip makes for a beautiful presentation. I love Ateco extra-large open star tip # 829 for this purpose, as well as many other beautiful applications like one giant shell shape of icing atop a cake slice. If you do not have a large icing tip, or know how to use an icing bag, just use a spoon to place a small amount of the mousse on the little green pea pancakes.  


My passion is teaching people how to create a harmony of flavors with their cooking, and passing along my love and joy of food, both simple or exotic, plain or fancy. I continue my journey in ethnic and domestic cuisines, continuing my journey to explore diverse culinary experiences and hopefully to start you on a journey of your own. Join me also at A Harmony of Flavors on Facebook, and Pinterest.

Thursday, January 9, 2014

Gremolata or Persillade or Pesto or Pistou

lemon, garlic, parsley
Basic Ingredients
It seems that many countries have the same basic idea for an herbed topping for foods. The idea is implemented and played upon, given names to fit the language and voila. Similar, I guess, to how my sisters and I could all look at a recipe, but once we took that recipe and made it ourselves, we each would end up with a different final product. It is so simple to take a recipe and change this, add that, leave out another thing and make it reflect our own taste and style.


Gremolata

lemon, parsley, garlic
Gremolata, freshly made
Somehow, somewhere through all of my cooking career, I "knew" about Gremolata. Enough so that when I brought up the subject with one of my daughters, I instinctively knew what the basic ingredients were, though I had not yet made it myself, to date. I knew that it had parsley, lemon zest and garlic. I "knew" it could have olive oil.


Pesto

The same could be said of pesto. Up to just a few years ago I had never made pesto, though I knew the basic ingredients were basil, garlic, pine nuts, olive oil and Parmesan. Now I make it all the time, and use it extensively. Pesto can be made by coarsely chopping all the ingredients, or finely chopping the ingredients. It can be made by pounding the ingredients in a mortar and pestle, or it can be made by either pulsing or pureeing in a food processor. It all depends on your particular need.


pesto, spread, condiment, basil, parsley,  garlic
My Favorite Pesto

My Favorite Pesto


Makes about 2 cups
2 cups basil leaves, packed into measure
2 cups Italian parsley, packed into measure
4 - 6 cloves garlic
3 tablespoons pine nuts
1 cup grated Parmesan
2 tablespoons butter
⅓ cup olive oil

Combine all but olive oil in a food processor. Process until very finely ground, scraping down sides as needed. Drizzle in olive oil while processing, until well blended.

NOTES: This recipe is versatile, and many variations on the theme are in evidence these days. Pine nuts are very expensive, but walnuts make a perfect substitution. Some make pesto with young spinach leaves instead of basil. Some use no parsley at all.

The amount of garlic is completely “to taste”, though if raw garlic is a problem, chop it first and soak in a tablespoon of white vinegar for up to 10 minutes before using. Drain the garlic and add to the food processor.

If 2 cups of pesto is too much, but basil is in abundance, this recipe freezes perfectly. Divide into small containers and freeze until needed. I had so much basil and parsley growing last summer, I made 5 (2-cup) containers and froze them. I had plenty of wonderful pesto, redolent of summer, to keep me all winter long.

Persillade

Another herb mixture is the French persillade. In French, "persil" means parsley, so it is no stretch to realize that a persillade contains parsley. Beyond that, I was unsure. It appears that the basic ingredients for a persillade are parsley and garlic, chopped together.

Pistou

A sort of crossover is from Provence, France, bordering the Mediterranean to the south and Italy to the east. Pistou is a Pesto crossbreed. "Pistou", in the Provencal language means "pounded" so similarly to pesto, it is a pounded mixture of basil, garlic and olive oil, but without pine nuts. The cheese used in Pistou is dependent on the particular area and what is available, although because the Pistou is used as a garnish to the Soupe au Pistou (Pistou Soup, similar to Italy's Minestrone), the cheese should not be one that would become stringy in the hot liquid.

Chimichurri

Argentinian chimichurri is yet another type of topping/sauce with the main ingredients of parsley and garlic with olive oil. They take it much farther and add a lot more ingredients, such as oregano and red wine vinegar to name only a few. Most of the Latin countries have some version of a chimichurri sauce. Guatemalan Chimichurri was most often used as a marinade for meat to be grilled instead of a topping for after cooking the meat.


Okay, that was a lot of information. I guess it just struck me how many countries have a similar thing, changing it to suit their need or availability of products. So, back to Gremolata. Gremolata is an underused condiment. Being so easy to make, I hope to spread the word a bit here and give some ideas. In its  basic form, Gremolata is parsley, lemon zest and garlic, chopped together. It can have other things added, depending on need, such as olive oil, or salt and pepper. It is best to have the parsley leaves dry when chopping, so be sure that they are washed well ahead and allowed to become completely dry before proceeding. Wash the lemon well before zesting. The garlic should be fresh, for the best flavor. Once garlic begins that little green sprout it becomes bitter; it might be okay for cooked foods but not when the fresh flavor is so important. The amounts can be completely up to the person making it. Yesterday I made some using about 3 tablespoons of finely chopped parsley, 2 garlic cloves and the zest of one very small lemon. When I made Gremolata Walnut Pinwheels, I added salt and pepper and some olive oil so it would stick inside the puff pastry.
gremolata, puff pastry,
Gremolata Walnut Pinwheels

Gremolata Walnut Pinwheels


Makes approximately 70 pinwheels


GREMOLATA:
¾ cup parsley, chopped
2 - 4 cloves of garlic, minced (use amount of garlic to taste)
3 - 4 tablespoons lemon zest (about 2 lemons)
¾ teaspoon salt
¾ teaspoon freshly ground pepper
3 tablespoons olive oil
------

1 cup walnuts, chopped
1 package Puff Pastry Sheets

Set the puff pastry sheets to thaw. This will take from 30 to 40 minutes, to thaw enough to open the sheets without breaking at the folds.

Combine the first 6 ingredients (the gremolata). Preheat the oven to 375 degrees.
When the pastry is thawed, first take one and roll it in only one direction, making a long piece about 18 inches long by the width of the original sheet. Spread half of the gremolata over the sheet. It will be quite sparse, but this is fine. Sprinkle ½ cup of the walnuts over the gremolata. Roll up from the long side, creating a long narrow roll. With a sharp knife, slice the roll into generous ¼-inch thick slices and lay them onto a baking sheet. If they are too distorted, press them slightly to a rounder shape, but they will round nicely in the oven.

Bake for 20 to 25 minutes, or until they are nicely golden.

NOTES: My daughter and I feel that these would serve as a lovely accompaniment to a nice soup such as a creamy tomato soup, or a salad, as well as an appetizer.


gremolata, condiment, flavor enhancer
Freshly Chopped Gremolata
Beyond using in puff pastry though, Gremolata is a wonderfully fresh way to lift and brighten the flavors of vegetables. Sprinkle it on cooked green beans or asparagus to brighten flavors. Sprinkle it into a soup, much like the Pistou. Sprinkle it over fish or seafood dishes, bean dishes, eggs. It is great as is, but switch the parsley to mint and you have an instantly perfect condiment for lamb. 

Think up new ways to use it. It is too simple to not take advantage. Without adding olive oil  it has no calories to speak of. Mix up a batch of whatever combination suits your need or mood.


My passion is teaching people how to create a harmony of flavors with their cooking, and passing along my love and joy of food, both simple or exotic, plain or fancy. I continue my journey in ethnic and domestic cuisines, continuing my journey to explore diverse culinary experiences and hopefully to start you on a journey of your own. Join me also at A Harmony of Flavors on Facebook, and Pinterest.

Disqus