Translate

Showing posts with label balsamic vinegar. Show all posts

Friday, July 8, 2022

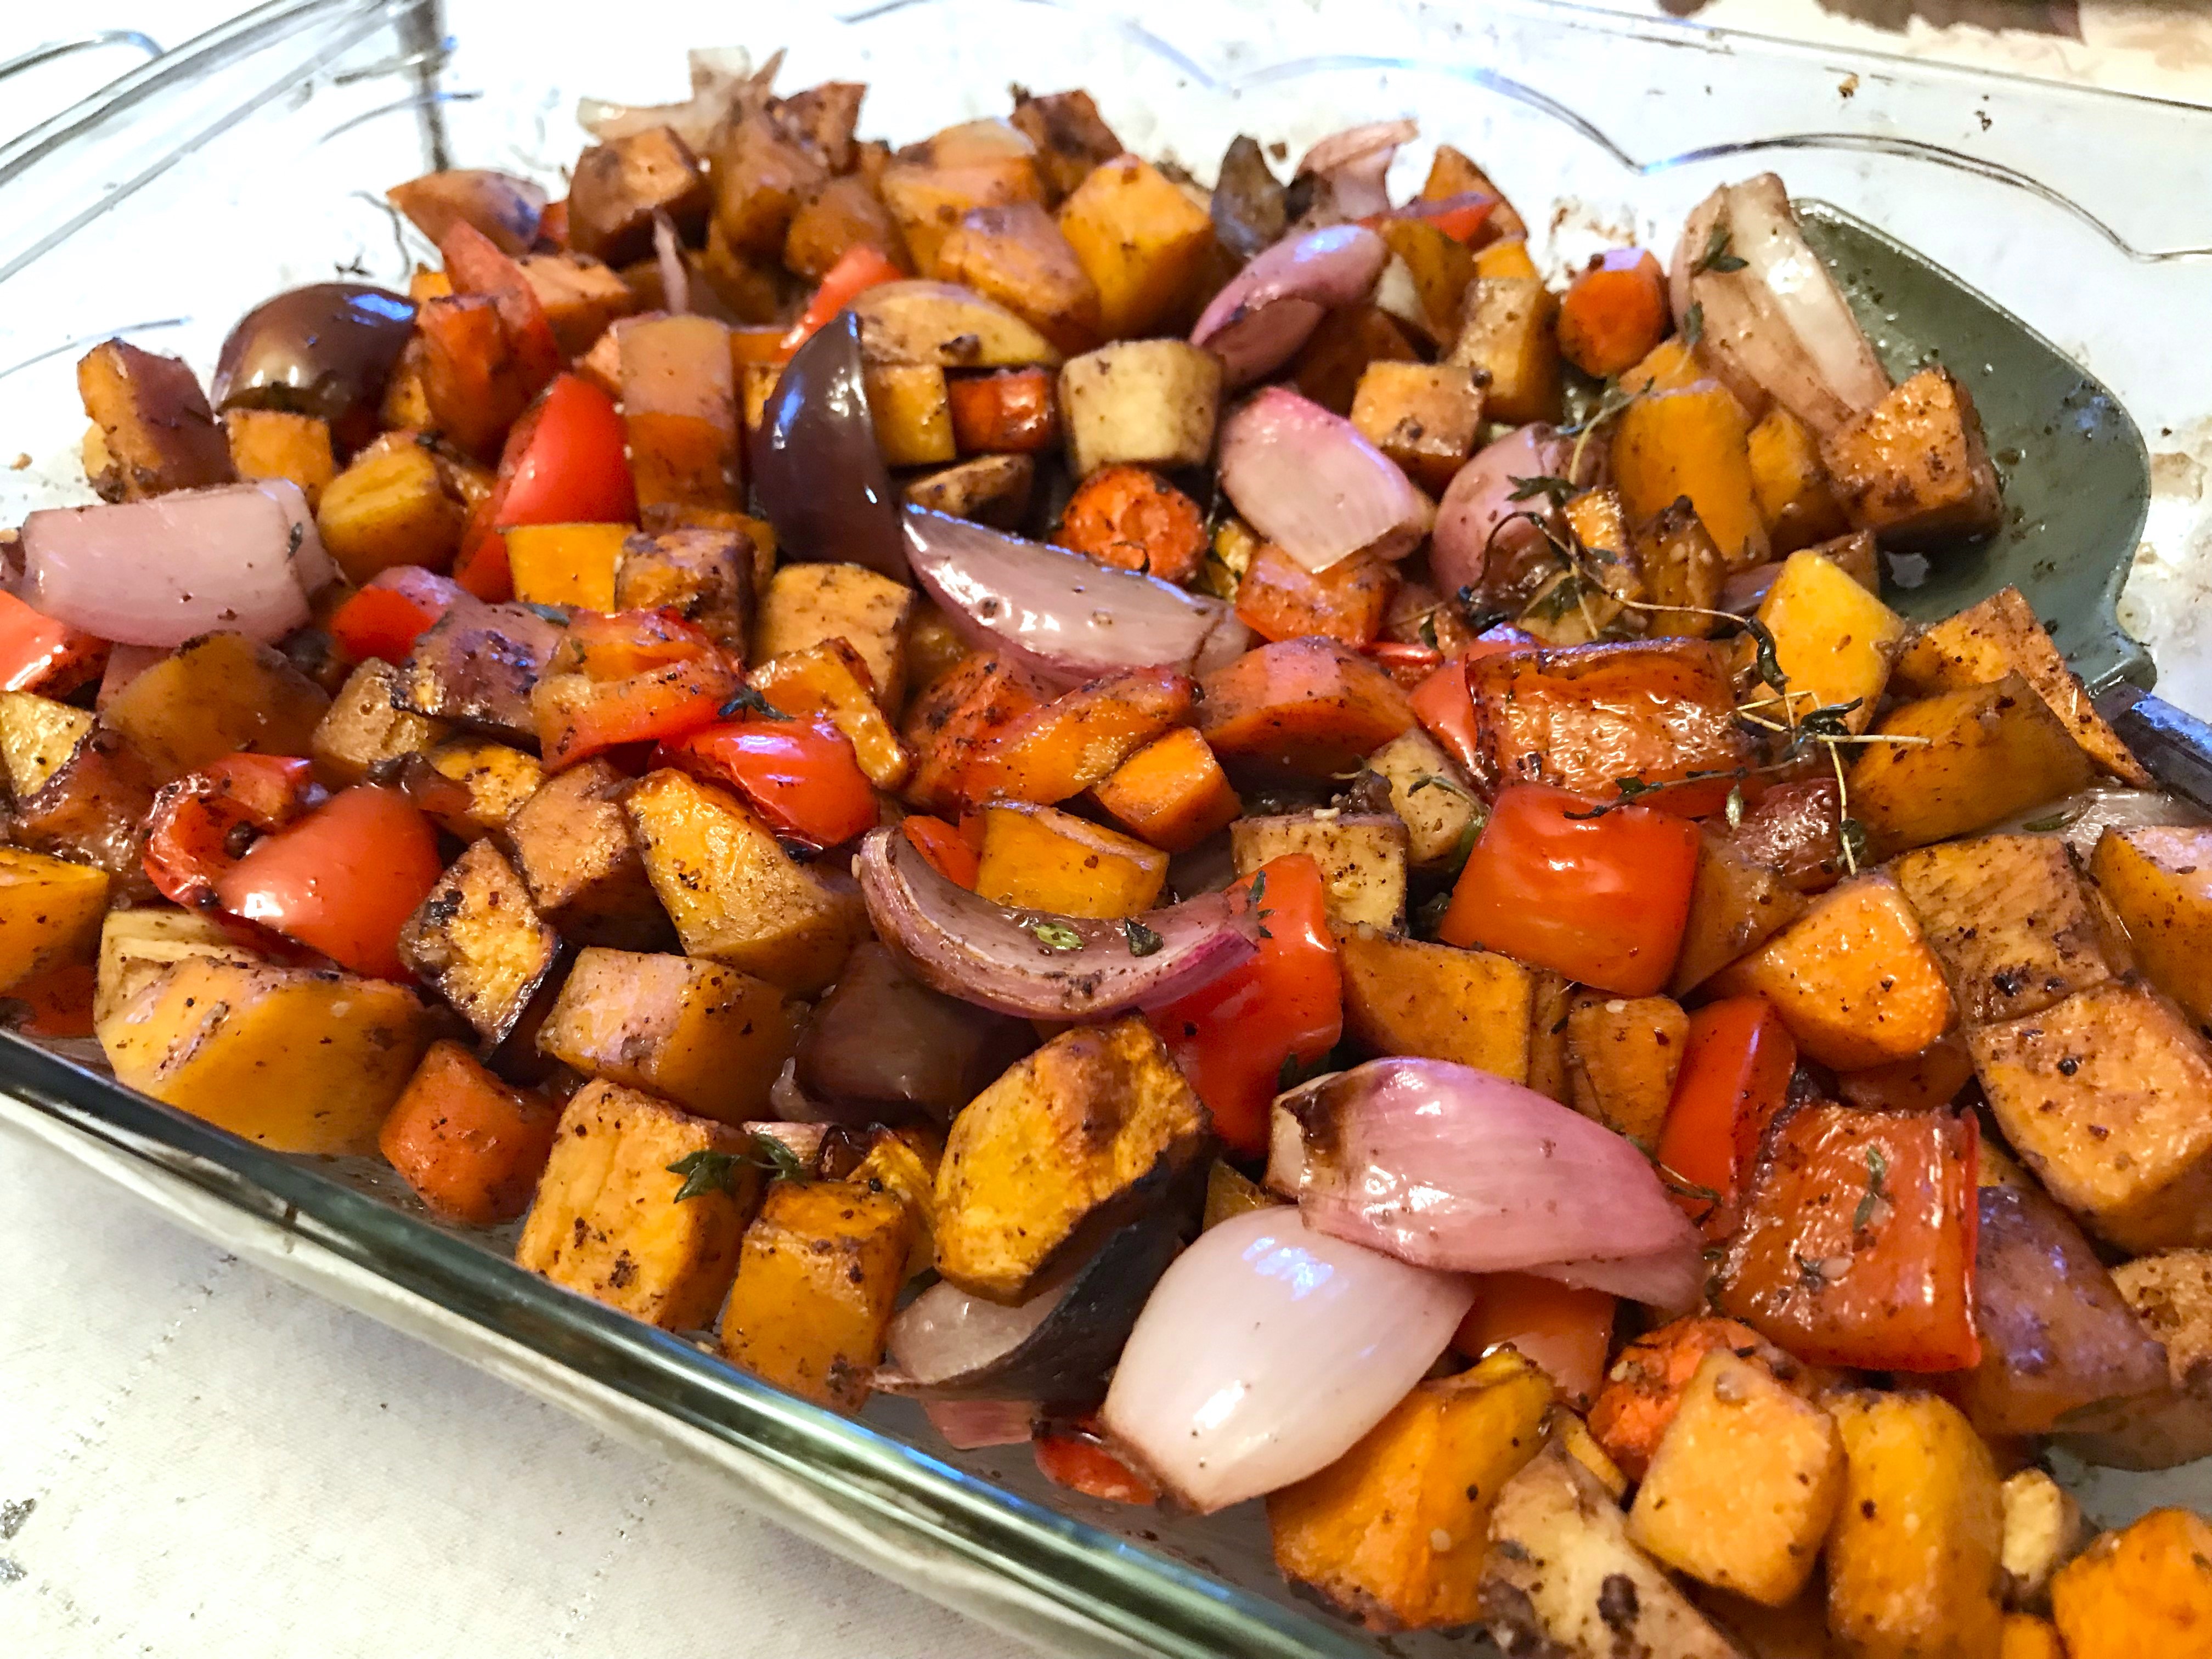
Root Vegetables in all their Glory

I love root vegetables. From beets to yucca and everything in between. There hasn't been much in the root vegetable or tuber family that I don't like, so they feature in many of my favorite recipes. 

Mixing parsnips with potatoes for mashed potatoes has been a habit of very long standing. Oven fries and potato salads make my husband particularly happy. Sweet potatoes, whether used in a "salad" application (like Sweet Potato & Black Bean Salad), baked in a casserole or made into oven fries, make me particularly happy.
root vegetables, squash, side dish, Fall recipe
Oven Roasted Root Vegetables

While we are just now coming into the full heat of summer and many people avoid heating their ovens, this recipe for Oven Roasted Root Vegetables (plus a couple of others thrown in 😉) should stay in your files for when Fall and cooler temps start moving in, because this is one fabulous recipe. 

When Fall does hit, squash of all kinds abound, and I love squash as much as most root vegetables. I cannot begin to say I have tried all the countless varieties of squash out there, though I can say with certainty that butternut is normally in my fridge, but come Fall, I wander into other types, like the Australian blue varieties such as Jarrahdale or Jamboree, or Hubbard, though I am not always able to find them, or acorn. So, I normally add some kind of squash to my root vegetables, just because of their similar dense texture and cooking times.

Speaking of cooking times, this will depend entirely on the size you cut your vegetables in preparation for baking. You might cut them into 1 to 1 1/2-inch cubes, or you might go with a much smaller cut. I made an extra tiny cube size for the topping for an appetizer recipe I made for my son's birthday (Rosemary, Brie & Goat Cheese Tarts with Balsamic Roasted Root Vegetables), so being an appetizer portion, the veggies were cut to about 1/4-inch cubes. For some reason I have the time listed for those tiny cubes as nearly the same as for larger ones, though my recollection was that it took about 30 to 35 minutes. If you have much larger, say 1 1/4-inch sized, it can take an hour or even a little more. 

I like using shallots when making the vegetable mixture, but any kind of onion, red, white or yellow, will work just fine. Go with personal preference, or what is on hand. And another vegetable I use, again just because I like them, is green or red bell pepper - and which to use is up to the individual, or what is currently on hand. 

Mix root vegetables for this recipe as you choose, but keep in mind that red beets will stain everything a pretty red color. An alternative if you like beets is to look for either golden beets or Chioggia beets. Yucca root is particularly hard, so should be cut a bit smaller than the other veggies, if using. 


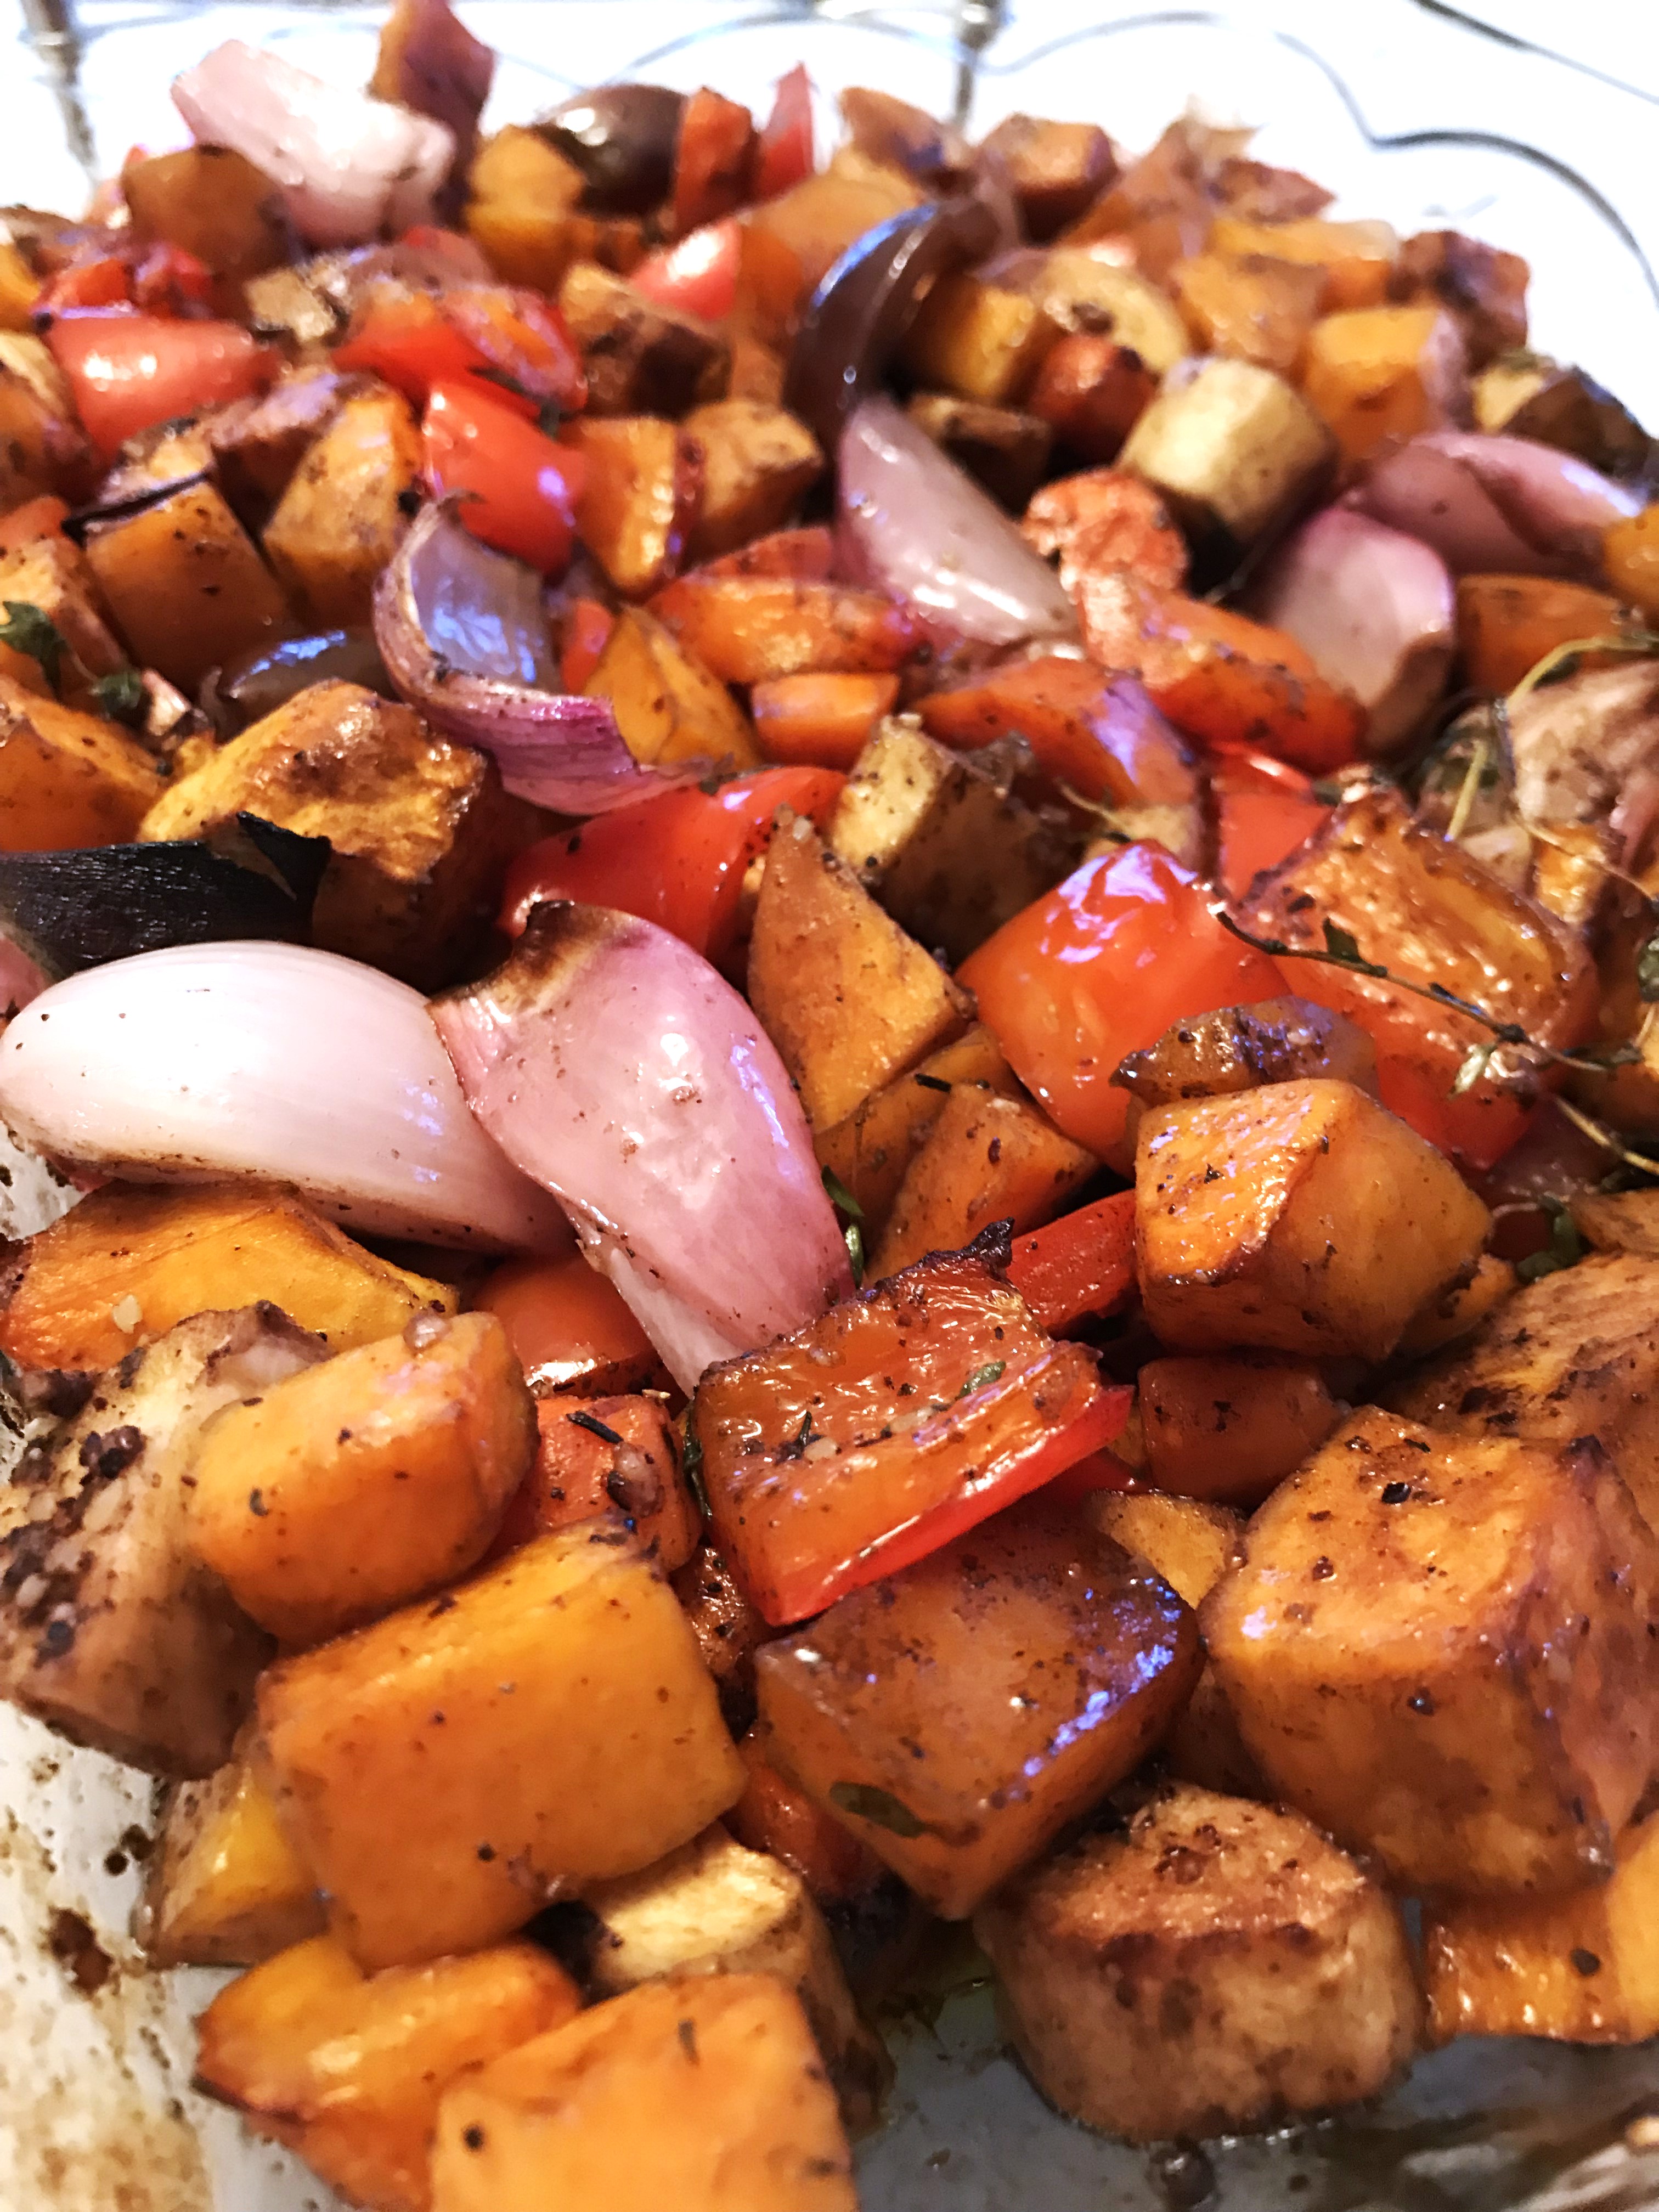
Oven Roasted Root Vegetables

Serves about 6
root vegetables, squash, side dish, Fall recipe
Oven Roasted Root Vegetables
VEGETABLES:
2 cups (10 ounces) kabocha squash, or butternut
2 cups (8.5 ounces) shallots
2 cups (8.3 ounces) red bell peppers
1¾ cups (8 ounces) sweet potato
1 cup (5.5 ounces) carrots
1 cup 4.5 ounces) parsnip

DRESSING:
½ cup Balsamic vinegar
¼ cup melted, unsalted butter
¼ cup olive oil
1 - 2 tablespoons fresh thyme leaves, or use a couple or three large whole sprigs 
1 teaspoon freshly ground black pepper
1 teaspoon salt
1½ teaspoons Zah’tar, optional
2 – 3 cloves garlic, minced

VEGETABLES: Preheat oven to 400 degrees. Grease or spray a 9 x 13-inch oven safe casserole and set aside. Peel and scoop out seeds from the squash and cut into ¾-inch cubes. Peel and cube the sweet potato, carrots and parsnip similarly. Cut ends from the shallots and slice into quarters, lengthwise. Clean seeds and membranes from the bell pepper and cut into squares. (Yes, the pepper is not a root vegetable, but it gives great flavor and color!)

DRESSING: Whisk together all the dressing ingredients and pour over the prepared vegetables in a bowl. Toss well to coat the vegetables evenly. Pour the vegetables with the dressing into the prepared casserole dish and bake for 40 to 50 minutes, or until the vegetables are easily pierced with the tip of a knife.


My passion is teaching people how to create a harmony of flavors with their cooking, and passing along my love and joy of food, both simple or exotic, plain or fancy. I continue my journey in ethnic and domestic cuisines, continuing my journey to explore diverse culinary experiences and hopefully to start you on a journey of your own. Join me also at A Harmony of Flavors on Facebook, and Pinterest.

Tuesday, September 29, 2020

Magnificent Appetizer for a Formal Dinner

menu
Birthday Dinner Menu
This past weekend was my son's 47th birthday, and as usual I made a dinner. It was a fancier type of dinner, with a lovely table setting, three kinds of wine and four courses. And a menu, shown here. 

My son loves fine food, as do I, along with loving to make it. It is a true labor of love, at times, to put together this type of meal, but once it is done and we are enjoying, and everything tastes SO GOOD, then it truly doesn't matter how long it took to prepare, or how many backaches went into the mix. We all enjoyed the meal, which thankfully all turned out great.

My idea for the savory cheesecake tarts I made as part of the appetizer were based on the recipe for little individual Savory Brie & Rosemary Cheesecakes. I made the original recipe in mini cheesecake pans, but for our birthday dinner I wanted something a little bigger than "mini," plus I wanted them in a different shape configuration; wider and less tall. I have some 3½-inch diameter metal rings, originally bought for making English muffins, but to date, I still haven't made any that way! I have used the rings to make buns, keeping them in shape while they bake. This time it seemed they would be the ideal size for my appetizer cheesecakes. 

rosemary, brie, chevre, cheesecake, savory
Rosemary, Brie & Goat Cheese Tarts with Balsamic Roasted Root Vegetables


One thing I had trouble with was the crust. When I made the original recipe, I used all-purpose flour. This time I wanted to try out a gluten free option and something did not work quite properly. I had to add, and revise as I went along. My suggestion would be to use the original recipe, cut in half.

As for the filling for these savory cheesecakes, I altered the original recipe by using Brie, Chevre and cream cheeses, with some Greek yogurt instead of sour cream. This worked out just amazingly good. To top off these appetizers, I made some Oven Roasted Root Vegetables, making about half the amount, more or less. To make them work with the smaller size of Cheesecake, I cut all the vegetable pieces into ¼-inch cubes. The shallots were cut into chunks about the same size as the golden beet, butternut squash, parsnip, and red bell pepper (not a root veg, but added for color). In keeping with the rosemary theme, I added some rosemary to the original balsamic mixture.

brie, chevre, cheesecake, tart, rosemary
Rosemary, Brie & Goat Cheese Tarts with Balsamic Roasted Root Vegetables

Topped off with a rosemary sprig and a large caper berry, these were not only gorgeous, but they tasted as good as they looked. I served a NV Mionetto Prosecco Extra Dry, which paired wonderfully.

The crusts can be made ahead, formed and frozen. The cheesecakes can be made and baked 1 to 2 days ahead with no perceptible deterioration in quality.


Rosemary, Brie & Goat Cheese Tarts

Serves 6

brie, chevre, rosemary, tart, cheesecake

CRUST:

5 tablespoons unsalted butter
⅓ cup almond meal
½ cup +2 tablespoons all-purpose flour
¼ teaspoon salt
¼ teaspoon cracked black pepper
1 teaspoon finely minced fresh rosemary

Cut all ingredients together, form into a ball, wrap and chill for 30 minutes.

Roll out the dough to slightly under a quarter-inch thickness. Whatever size diameter container you will use for baking the cheesecakes is the size you will need to cut out the tart bases. I used 3½-inch rings with no bottoms, using the ring to cut out the base. Set them onto a parchment lined tray or baking sheet and freeze until quite firm, covered well if leaving for more than an hour.

When ready to bake, set the same rings or the tart shells onto a parchment lined baking sheet. Cut pieces of parchment that will line the wall of the ring and extend a bit above the top of the ring. Set the frozen crust inside the parchment. Bake in a preheated 350 degree oven for about 12 to 13 minutes, or until set and just starting to turn golden. Set aside to cool slightly. Leave oven on.

CHEESECAKE FILLING:
6 ounces Brie cheese, at room temperature
4 ounces cream cheese, at room temperature
4 ounces Chevre cheese, at room temperature
4 ounces plain Greek yogurt
½ teaspoon sugar
2 pinches salt
1 egg plus 2 egg yolks
1 teaspoon finely minced fresh rosemary
Pinch Aleppo pepper or other chili flakes, optional
½ teaspoon coarsely cracked black pepper

Most small Brie rounds come in 8-ounce packages. I remove much of the outer coating of the Brie, leaving about 6 ounces, after trimming.

Using a hand mixer on low speed, beat together the Brie, Chevre, cream cheese and yogurt, just to combine. Add in the sugar, salt, rosemary Aleppo pepper and black pepper, then add in the eggs and yolks. Again, beat on low speed, for as little time as possible, just to make sure all ingredients are properly distributed.

Scoop equal portions of the Brie mixture into the pre-baked tart shells, lined with the parchment. The parchment will allow for easier removal later. Once filled, rap the baking sheet sharply onto a counter surface to eliminate any air bubbles from the filling. Bake the cheese tarts for 20 to 25 minutes, until the cheesecakes are mostly set, with just a tiny bit of jiggle in their centers. Set aside to cool. Once baked and cooled, they can be covered and refrigerated until needed, 1 to 2 days.

When serving, preheat oven to 350, uncover the cheesecakes and set the baking sheet in the oven to warm for about 10 minutes or less. If using the rings with no bottoms, use a spatula to lift the entire cheesecake with its ring onto a plate for serving, then lift off the ring and peel away and discard the parchment, leaving a clean outer edge. Top with any garnish desired, although the little cubed vegetables baked in the Balsamic mixture paired heavenly well.


Oven Roasted Root Vegetables


Makes 4.5 to 6 cups, depending on vegetable amounts.
roasted vegetables, shallot, squash, parsnip, beet
Oven Roasted Root Vegetables


2 to 4 shallots, 3/4 to 1 cup depending on size, cut into small chunks
1¼ cups butternut squash, in ¼-inch dice
1 large parsnip, peeled, cut in ¼-inch dice
1 medium to large golden beet, cut in ¼-inch dice
1 red bell pepper, cut into ¼-inch dice

DRESSING:
⅓ cup Balsamic vinegar
3 tablespoons butter
3 tablespoons olive oil
2 teaspoons fresh thyme leaves
2 teaspoons fresh rosemary leaves, minced finely
½ teaspoon salt
½ teaspoon cracked black pepper
1 teaspoon Zahtar, optional
2 cloves garlic, finely minced

Mix all dressing ingredients in a small saucepan to melt and meld flavors. Spray a 13 x 9-inch baking dish with cooking spray and add in all the prepped vegetables, then pour in the dressing. Stir well to coat, then bake in a preheated 400 degree oven for about 40 minutes, or until they can be easily pierced with the tip pf a knife. These can be made ahead and reheated just before using.


My passion is teaching people how to create a harmony of flavors with their cooking, and passing along my love and joy of food, both simple or exotic, plain or fancy. I continue my journey in ethnic and domestic cuisines, continuing my journey to explore diverse culinary experiences and hopefully to start you on a journey of your own. Join me also at A Harmony of Flavors on Facebook, and Pinterest.

Thursday, March 24, 2016

Caponata to Pair with Chianti

The Winefest Renaissance this year, scheduled for April 9th, has me working on creating appetizer foods that will pair with and set to advantage both the wine and the food with which it will be served. Often, when tasting a wine, some will immediately reject it out of hand. This has actually happened to me, and I fancy myself better than that in general! When trying a particular wine and the flavors do not agree, it is worthwhile to find a food that is meant to pair with the wine and try again. Some wines are meant to serve with food, and while all wine goes well with food, some wines do just fine all on their own.

In my case, my snap judgment came when long ago I tasted a Santa Margherita Pinot Grigio. I kept seeing ads about it, and hearing others say how they loved it, and yet, when I tasted it, it just struck me wrong. I did not try it later with food - it just tasted that bad, to me. I have had many most excellent Pinot Gris, which though the same grape, is made in other parts of the world.

I love Italian wines, and have had so many great ones, I just dismissed the Pinot Grigio as an aberration, and stayed away. That said, obviously that style of wine goes well for a great many people. So when this year's Winefest meeting came around, I ended up selecting four Italian wines. Pinot Grigio is among them. I decided enough prejudice! Time to try again. As I wrote a few days back, I did a test run of a Lemon Artichoke Pesto with Chicken to pair with a Pinto Grigio, and the pairing was perfect - and delicious.

Caponata, Italian Sausage, Toasted Ciabatta
Caponata with Italian Sausage atop Toasted Ciabatta

On this note, my whole purpose in pairing foods to a wine is specifically to set both the food and the wine in their very best light. Too often, though a wine may not be specifically to one's taste on its own, it will still taste great when paired with an appropriate food. So today I chose to test run a recipe to pair with a Chianti. The Chianti I will be pairing is Rocca delle Macie Chianti Classico. It is recommended that such foods as lasagna with meat, antipasti, or anything with a tomato sauce would pair excellently with this wine. To serve as an appetizer at the Winefest, I prefer to make them as easy to handle as possible, with a minimum of fuss. What first came to mind was Ratatouille, though that is a French version. I looked up "Italian Ratatouille" and came up with Caponata.

I chose to eliminate the zucchini, and add in some capers and green olives, as well as Italian sausage. I wanted this to be easy to pick up and eat, so I will serve a scoop of the Caponata atop a toasted slice of Ciabatta or Focaccia bread. I prefer to make my own breads, but today I just bought some thin, narrow Ciabatta breads and sliced them into approximately 3 x 3-inch squares. Brushed with garlic oil and broiled and they were ready. Next I set to making the Caponata. 
Cherry tomatoes, eggplant, sausage, basil chiffonade
Cherry tomatoes to roast, eggplant browned, sausage cooked, basil chiffonade


I used cherry tomatoes for that component, as they are already small and less juicy. I cut the small tomatoes into quarters or halves, depending on size, set them onto a baking sheet, sprinkled with salt, pepper and olive oil and baked them. They came out just as I wanted - slightly dried and more concentrated in flavor. They went into a bowl. I sliced the eggplant about ¼-inch thick, sprinkled with salt and broiled until nicely browned and cooked through, then chopped to small bits and added them to the bowl. Blackened green and red bell peppers, peeled and chopped were added. I quartered an onion and set it to broil, tossing as the tips and edges began blackening. Once nicely charred and cooked, they were chopped and added to the other ingredients. I slightly blackened some garlic, then chopped it and soaked it in a little vinegar to avoid any strongly raw flavors. I used Italian sausage and removed the casings, frying it quickly to a nice brown, while breaking it up into small bits to add to the bowl. With some chopped parsley, oregano and basil, and some capers and olives it was all set. 

I couldn't wait to try this out!
Toasted Ciabatta, Caponata, appetizer, Chianti wine
Toasted Ciabatta breads and Caponata all ready

I set a scoop onto one of the toasted Ciabatta slices and opened a Chianti. Wow!!! This was a most perfect pairing! Here is what I did:


Caponata with Italian Sausage

Makes 40 to 45 appetizer sized scoops

4 narrow Ciabatta loaves, about 15-inches long, cut appropriately to size (or use focaccia breads)

1 eggplant, about ¾ pound, cut in thin rounds
Caponata, Sausage, Toasted Ciabatta, appetizer, Chianti pairing
Caponata with Sausage,
atop Toasted Ciabatta Bread

1¾ to 2 pounds cherry tomatoes, quartered
1 red bell pepper
1 green bell pepper
1 onion
2 - 4 cloves garlic
salt for sprinkling (about 1 1/2 teaspoons, divided
fresh cracked pepper for sprinkling
olive oil for sprinkling
2 teaspoons capers
6 to 8 green olives, chopped
1½ tablespoons finely chopped fresh oregano
½ cup finely chopped fresh Italian flat-leaf parsley 
½ cup fresh basil leaves in fine chiffonade
8 ounces fresh Italian sausage, casings removed
1 tablespoon Balsamic vinegar

Set oven to 400 degrees. Spray a rimmed baking sheet with cooking spray. Set all the cherry tomatoes on tray, cut sides upwards. Sprinkle with some of the salt and pepper and sprinkle with olive oil. Bake them for 20 minutes, until nicely shriveled and beginning to brown. Remove to a bowl.

Change oven setting to broil, with a rack set in the 2nd position from the element. Line a large rimmed baking sheet with foil and spray with cooking spray. Set the bell peppers whole onto the sheet. Lay the eggplant slices onto the sheet and sprinkle with a little of the salt. Broil these vegetables, watching carefully. The peppers need to blacken all the way around, so turn them with tongs as needed. Once the eggplant slices are browned, turn them, sprinkling with a little more salt and brown the opposite sides, removing them to a cutting board as they are done. Chop the browned eggplant into small pieces, not more than ¼-inch in size.

Replace the eggplant slices with the onion: cut off stem and root ends and peel the outer dry layers. Cut the onion into quarters and break apart slightly. Set these on the vacated space on the baking sheet and toss with the tongs as they begin to blacken in spots. They should cook through while moving around on the sheet. When they are done to your liking, remove to the cutting board and chop into small pieces. Add to the bowl.

Set the garlic cloves, whole, onto the baking sheet and let them blacken slightly. Remove to cutting board and chop fine. Set them in a bowl with a little white vinegar to cut out the raw bite of garlic. After about 5 minutes, drain and add garlic to the bowl. Add also the capers, olives and the herbs.

Fry the sausage until well browned and broken up. Drain on paper toweling and then add to the bowl. Stir well, adding in the Balsamic vinegar and taste for seasoning. 

Brush olive oil onto the cut sides of the Ciabatta breads and set onto a baking sheet. Broil for 1 - 3 minutes, until lightly browned. Scoop the Caponata onto the toasted breads for serving as an appetizer. 


My passion is teaching people how to create a harmony of flavors with their cooking, and passing along my love and joy of food, both simple or exotic, plain or fancy. I continue my journey in ethnic and domestic cuisines, continuing my journey to explore diverse culinary experiences and hopefully to start you on a journey of your own. Join me also at A Harmony of Flavors on Facebook, and Pinterest.

Saturday, September 20, 2014

Ratatouille and the Nightshade Family Vegetables

It is hard for me to imaging a life where I could not have nightshade family vegetables. The most commonly known vegetables and/or fruits in the Solanaceae or nightshade family are eggplants, potatoes, capsicum peppers of all types (such as bell peppers, chili peppers), tomatoes of all kinds, tomatillos and ground cherries. Interestingly, one of the "super fruits," goji berries, also called wolfberries, also belong to the Solanaceae


nightshade, eggplant, tomatoes, potatoes,
 

Other fruits less well known are garden huckleberries (not to be confused with regular huckleberries of the Ericaceae family), cape gooseberries (not to be confused with regular gooseberries), pepinos, naranjillas and tamarillos. There are many other nightshade plants that are inedible or would never be thought of as food, including of course the "deadly nightshade" (belladonna) and tobacco. Others are mainly showy flowering plants such as Angel's Trumpet or Jimsonweed. 

So why this interest in Nightshades?

It seems that right now, they are all over the Farmers' Market here. Eggplants are finally in season, and each year I have been making a grilled or broiled version of a ratatouille. Most of the ingredients in ratatouille are nightshades: eggplant, tomatoes, peppers. Onion and zucchini are the two ingredients in ratatouille not of the nightshade family. The French dish called ratatouille (rat-tat-TOO-ee) can be made in various ways. The vegetables can all be cooked separately, then layered in a casserole and baked. The ingredients can be sauteed separately and then mixed all together in a pot to simmer. The dish can be made anywhere from soupy to thick.

Broiling, ratatouille, nightshades, eggplant
Broiled Ratatouille with Potato Pizza for dinner
And then a couple of years back I saw Michael Symon on The Chew making a grilled version. Obviously the grilled version has no real resemblance to the original layered and baked versions. He didn't even use tomatoes. But the concept, slicing the vegetables and grilling them separately, then combining with a splash of balsamic and olive oil with torn fresh basil - that got my attention.

I am not a huge fan of eggplant. Never have really loved it. Still, I try to be open minded and eat it occasionally. I have found ratatouille to be one way I do not mind it (Eggplant Parmesan is another). Mixed in with all the rest of the vegetables, whether in a casserole or in this grilled (or broiled) version, it becomes a part of the scenery, so to speak, and I can tolerate it. Long, long ago, while in Guatemala, I tried ratatouille for the very first time, using a recipe from Gloria Ivens book, Glorious Stew. Long out of print, my 1969 copy is extremely well used. She gives two options for making ratatouille; a wet and a dry version. The "wet" version has more sauce and is made in a lidded skillet on the stove, where the "dry" version uses tomato paste and almost no sauce and is baked in the oven. I made the dry version at least once a year for so many years. It is good with a nice crusty French bread alongside, and for me is enough to make a meal in and of itself. This is the version I had made in the past, though I had never photographed this dish back then:

Eggplant
Eggplant

Gloria Ivens "Dry" Ratatouille


Serves 8 - 10

2 - 3 small eggplants
3 - 4 small zucchini
2 cups chopped onion
2 medium green peppers, sliced
3 cloves garlic, sliced
4 cups (one 2-pound can) Italian plum tomatoes, drained
2 tablespoons tomato paste
4 tablespoons olive oil, more as needed

SEASONINGS:
1 teaspoon salt
¼ teaspoon freshly ground black pepper
1 teaspoon dried oregano, or 1 tablespoon fresh
1 teaspoon dried basil, or 2 tablespoons fresh
1 bay leaf
½ cup fresh parsley, finely chopped

Wash eggplants, remove ends, cut in 1/2-inch slices. If slices are very unequal in size, cut larger ones in half. Wash zucchinis, remove ends, cut in ½-inch slices.

Note: If eggplant and zucchinis are large they will have more moisture; to extract it, place sliced vegetables in a bowl, sprinkle with salt and put a weight on top. Allow to stand 30 - 60 minutes. Drain, wash and dry each piece. Cut eggplant so slices are about equal in size to the zucchini slices.

In a heavy skillet, heat oil and quickly saute eggplant and zucchini slices, a minute on each side, removing them as they are done to a bowl or plate. More oil will be needed; the eggplant soaks it up. In the same skillet, heat more oil. Slowly cook onions, peppers and garlic until tender but not brown. Add drained tomatoes mixed with the tomato paste.

Heat oven to 325 degrees. In bottom of a heavy, lidded 4 - 5 quart casserole, put 1/3 of the tomato mixture. Add a layer of half the eggplant and zucchini. Sprinkle lightly with salt and pepper. Put half the remaining tomatoes on top, then the rest of the eggplant and zucchini, and salt and pepper; finish with the remaining tomatoes.

Cover and place in the oven for 45 - 60 minutes, or until vegetables are tender. Check occasionally. If it appears too moist, leave the lid off for a while. May be served hot or cold.

Notes from "Glorious Stew": “This version is especially delicious served cold. It is a refreshing first course when eaten by itself, or spread on bread, or served with slices of Hungarian or Polish sausage. Hot, it is a good accompaniment for pork roast or chops, for a simply cooked chicken dish, or veal. It is excellent for a buffet - as relish, vegetable or salad - hot or cold.”


Grilling or Broiling?

Grilling, Ratatouille, recipe
Grilled Ratatouille, served in a stack
So now, coming back to the grilled or broiled version, I have found that often when it comes to grilling all these vegetables, it takes time, it is generally hot outside and standing next to a hot grill is tedious, and sometimes the weather does not cooperate. I have made this on the grill. I have now made this dish 3 separate times under the broiler. The broiler goes more quickly and there is not enough difference in flavors to make grilling imperative. Another thing I have to keep in mind up here where I live; it is so often extremely windy outside and it is very difficult to keep the grill lit under those circumstances! 

So for me, broiling is the way to go. One of the very best things about making ratatouille grilled or broiled is that all the vegetables are cooked separately and then tossed together at the end. Each individual flavor is distinct, and concentrated on its own. The flavors are far fresher, and the addition at the end of some capers and fresh basil just makes this dish all the more splendid. No real "recipe" is needed. Just use the vegetables you want, in the amounts you want. This latest version, made just a few days ago, is possibly the best yet. Not that there is great difference in what I have done, but i believe I broiled the vegetables for a little less time, leaving them with more texture. I also added in 5 mildly hot peppers, like banana peppers, and they gave a most wonderful spice to the dish.

Broiled Ratatouille
Broiling, vegetables, ratatouille, eggplant, tomatoes, peppers
My Colorful Broiled Ratatouille


Serves about 8

2 - 4 tablespoons olive oil
¼ cup balsamic vinegar
1 medium eggplant, sliced 1/2 inch thick
1 or 2 small zucchini, sliced 1/4 inch thick
1 - 2 green or red bell peppers
1 - 3 jalapeno peppers, to taste
1 large onion, in wedges
1 teaspoon salt, or to taste
3 - 5 Roma tomatoes, sliced in 1/4 inch slices
¾ cup fresh basil leaves, torn
2 tablespoons nonpareil capers, drained

If you own large rimmed baking sheets (half-sheet size) already well worn, just spray two of these with cooking spray. If your baking sheets are new, you may want to line them with foil. Having two sheets handy is helpful if one of them becomes too blackened.

Heat the broiler. If your eggplant is large in circumference, cut the slices into quarters. In a large bowl, set the sliced eggplant with the olive oil and balsamic and toss to combine. Remove all the eggplant slices and set them onto one of the baking sheets, reserving the oil and vinegar in the bowl. Sprinkle the eggplant slices with salt. Set the eggplant under the broiler on the highest rack. It will take 5 to 10 minutes or so to brown the eggplant. Turn the slices over and brown the other side. Once browned, remove the eggplant to a large bowl or casserole.

Add the zucchini slices to the bowl with the oil and vinegar and toss to coat. If there is room on the same sheet with the eggplant, you may add some or all of the zucchini slices at the same time, keeping an eye on the vegetables as some may brown earlier. Otherwise, once the eggplant is done, set the zucchini slices on the same sheet, sprinkle with salt and broil. Once browned, remove the zucchini to the bowl with the eggplant.

Set the whole peppers on the baking sheet and broil them until the skin blackens and blisters. Remove them to a zip-top bag and seal to steam for at least 10 minutes. Once well steamed, peel the skins and remove seeds and membranes. Slice the bell pepper(s) and mince the jalapenos. Add to the bowl with the cooked eggplant and zucchini.

Set the wedges of onion into the oil and vinegar and toss to coat. Remove them to the baking sheet and sprinkle with salt. Broil for a few minutes, toss them and continue broiling and tossing until well cooked and blackened in a few places. Remove the onions to the bowl with the cooked vegetables. Set the tomato slices in the oil and vinegar very gently. Remove them and set the slices onto the baking sheet and move the rack down at least one level. Broil the tomatoes gently, turn and broil on the other side. Add these to the bowl of cooked vegetables. If there is any remaining oil and vinegar in the first bowl, add this to the cooked vegetables with the capers and basil. Gently toss together the vegetables and taste for salt. Add a splash more of olive oil and balsamic vinegar and serve with crusty bread.


My passion is teaching people how to create a harmony of flavors with their cooking, and passing along my love and joy of food, both simple or exotic, plain or fancy. I continue my journey in ethnic and domestic cuisines, continuing my journey to explore diverse culinary experiences and hopefully to start you on a journey of your own. Join me also at A Harmony of Flavors on Facebook, and Pinterest.

Thursday, August 28, 2014

Using Caprese Flavors in Tomato Tartlets

Last Sunday I made appetizers to present at an open house for a beautiful home for sale here in town. One of the appetizers I created was Tomato and Mozzarella Tartlets with Pesto. Obviously, for anyone familiar with a Caprese Salad, the main components are fresh tomatoes, fresh mozzarella cheese and basil. Once baked, these tartlets had not too much in common with a Caprese Salad, except for the ingredients. 

appetizers, finger food, tomato, tarts, mozzarella, recipe
Tomato and Mozzarella Tartlets with Pesto, forefront
The other savory appetizers were raw items, since it is still summer and the tomato season has been in full swing. I filled cherry tomatoes with a Pesto Cream and I used lots of fresh herbs in making the Gorgonzola Cream I used in the fresh Belgian endive leaves. My basil has been growing like weeds, and I have made batch after batch of fresh basil pesto, which I freeze, so there is always some available in the long winter months. I wanted to make one appetizer that was baked, and my little Tomato and Mozzarella Tartlets with Pesto fit that bill.

The recipe is simple enough. I usually have pie dough in the freezer, making quick work of the tart shells. I dislike the mess involved in making pie dough, so when I do make it, I make my Never Fail Pie Crust. This recipe yields enough for four 9-inch single pie shells or three 10-inch pie shells. Since I usually make 10 inch pies, I divide the recipe into 3 and freeze whatever isn't used. I happened to have 2 bags in the freezer so I used them to make the tart shells. All it requires is getting the bags of pie crust out of the freezer an hour or so before using so it thaws.

appetizers, finger foods, tarts, tomato, mozzarella, recipeI did not measure the dough for the little tartlet shells, just eyeballing little chunks of dough to press into the molds. For this recipe, the little tartlet shells do not need to be blind baked (baked ahead of the filling), thankfully. In some cases, blind baking is a necessity, but again, this just drives me nuts, because it is nearly impossible to get a neat shell this way. The day before making the tarts, I pressed the dough into two tartlet pans, each with 24 wells. I placed the pans with the raw, formed dough back in the freezer. The next day, I chopped tomatoes and onion and cooked them with some garlic into a somewhat thick paste, allowed it to cool and added eggs and shredded mozzarella. To go with the caprese idea, I placed ¼ teaspoon of fresh pesto into the bottom of each of the little frozen tart shells before placing the tomato mixture in. Parmesan seemed a logical topper, to create a pretty golden crust. 

Another thing often found in a Caprese Salad is balsamic vinegar. Sometimes it is sprinkled over as is, and sometimes it is made into a syrup. I went the route of a syrup, cooking down a cup of balsamic to about 3 tablespoons worth of balsamic syrup. I drizzled a little of this syrup over the tarts once baked. The pesto in the bottom was just enough to make the little tarts really pop with flavor.

Tomato and Mozzarella Tartlets with Pesto


Made 48 mini tarts

appetizers, finger foods, tomatoes, mozzarella, recipe
Tomato and Mozzarella Tartlets with Pesto
pie pastry for two 10-inch pies¼ cup fresh Pesto
2 tablespoons olive oil
1⅓ cup finely diced onion
3 cloves garlic, minced
3 cups chopped fresh tomatoes
1¼ teaspoon salt
¼ teaspoon pepper, if desired
½ cup finely shredded mozzarella cheese
3 eggs
½ cup freshly shredded Parmesan cheese
1 cup balsamic vinegar

Divide the pastry dough into small balls and press these into the wells of 48 mini tart shells. Freeze the little shells at least 1 hour or overnight.

Heat a large skillet and add the olive oil. Saute the onions and garlic until very soft and golden. Add the tomatoes, salt and pepper and cook on medium high for 15 or 20 minutes, until most of the liquid has cooked out, leaving a loose paste. Allow the mixture to cool slightly.

Preheat oven to 400 degrees (375 on Convection). Remove the tartlet pans from the freezer and place a tiny ¼ teaspoon dollop of fresh pesto into the bottom of each well.

tarts, making tarts, fillings, pesto, recipe
Pesto in frozen shells              |         filling and Parmesan topping in place        |                baked tartlets, cooling

Once the tomato mixture is no longer hot, add in the shredded mozzarella and eggs and mix well. Drop this mixture into the tartlet shells, on top of the pesto. Top each with a small pinch of the shredded Parmesan cheese. Bake the tartlets for 15 to 20 minutes, or until the filling is set and golden. Remove the tarts from the pans and set on a rack to cool.

Place the balsamic into a small saucepan and bring to boil, cooking until the vinegar has reduced to a scant ¼ cup. Just before serving the tartlets, drizzle a little of this syrup over each tartlet.


My passion is teaching people how to create a harmony of flavors with their cooking, and passing along my love and joy of food, both simple or exotic, plain or fancy. I continue my journey in ethnic and domestic cuisines, continuing my journey to explore diverse culinary experiences and hopefully to start you on a journey of your own. Join me also at A Harmony of Flavors on Facebook, and Pinterest.

Wednesday, July 2, 2014

Fourth of July Preparations

We are having guests for the 4th of July, and I am once again planning a few days of meals. In advance prep, I made some Balsamic Onions and Dried Cherries, a Spicy Rub for Chicken, a new Barbecue Sauce and some Pickled Mustard Seeds, just because I wanted to see what they are like. I am like that. I see a new thing I never heard of before and just have to try it. 

The Balsamic Onions and Dried Cherries is an expansion on an older recipe for 

Balsamic Pearl Onions

For the older version, simply omit the cherries and halve the amounts for the Balsamic vinegar, butter, oil, thyme. pepper and salt. The remainder is the same.

I used a both red and white pearl onions plus a bag of dried Montmorency cherries. The Balsamic Pearl Onions are an excellent condiment or side dish as onions are sweet when cooked anyway, and with the balsamic vinegar they are just fabulous. I just wanted a bit of color and an extra note, so I added in the cherries to absorb more of that wonderful glaze. I will be serving them with grilled steaks on Saturday. For dessert that day I am making Blackberry Cobbler with whipped cream or ice cream on the side.

pearl onions, dried cherries, side dish, condiment, balsamic vinegar
Balsamic Onions and Dried Cherries


Balsamic Onions with Dried Cherries


Serves 6 to 8

2 pounds pearl onions
5 ounces dried Montmorency cherries
½ cup Balsamic vinegar
4 tablespoons unsalted butter
4 tablespoons olive oil
1 tablespoon fresh thyme leaves
1½ teaspoons freshly ground black pepper
¾ to 1 teaspoon salt

Preheat oven to 400 degrees (375 on Convection Bake).

Prepare the pearl onions one of 2 ways: 1) Bring a pot of water to a boil and pour in the onions. boil for 1 minute and drain; rinse in cold water. Trim off root end and slip off outer skins. 2) trim root ends and peel off outer skins.

In a saucepan, combine the balsamic vinegar, butter, olive oil, thyme, pepper and salt. Heat just until the butter is completely melted. Combine this sauce with the prepared onions and the package of dried cherries and toss to combine. Pour into a wide casserole that will accommodate all the onions in one layer (9 x 13-inch pan should work). Bake the onions for 35 to 40 minutes, stirring every 10 minutes until cooked through. Serve warm.

For the 4th of July, I am planning to make grilled chicken. I mixed up both a spice rub to apply the night before and a new barbecue sauce recipe to apply when the grilling is almost done. I am planning to grill the chicken low and slow, with only one side of the grill heated to keep down the temperature and the chicken set over the unlit side of the grill. I am going to periodically brush the chicken with orange juice while it cooks to add another layer of flavor. To go with the chicken, my sister-in-law is bringing cole slaw and I am going to make a Ramen Noodle Salad. That recipe will come later on, once i make it and get some photos. I am going to make a Chocolate Mousse Pie in a Chocolate Pastry shell with Mascarpone Whipped Cream for dessert.


BBQ spice, chicken, dry rub, recipe
BBQ Chicken Rub

BBQ Chicken Rub


Enough for 2 chickens, cut up

2 tablespoons dried onion flakes
1½ teaspoons black peppercorns
1 tablespoon dried sage leaves, or <1 teaspoon ground
1 teaspoon dried basil leaves. or 1/2 teaspoon powdered
½ teaspoon dried rosemary leaves
¼ cup sugar
1 tablespoon paprika
1 tablespoon smoked paprika
2 teaspoons salt
1½ teaspoons garlic powder
1½ teaspoons chili powder
1 teaspoon dried lemon peel
1 teaspoon ground sumac, optional
½ to 1 teaspoon chipotle powder

Combine the first 5 ingredients in a spice grinder or coffee grinder used only for spices and grind to a powder. Combine these with all the rest of the ingredients and mix well. Use this rub to coat two whole chickens, cut up the night before grilling. Set them in a single layer on a baking sheet and cover with foil. Refrigerate until 1 hour before grilling.


BBQ, Dry Rub, Barbecue Sauce, condiments
BBQ Dry Rub and Barbecue Sauce 2

Barbecue Sauce 2


Makes about 3 cups

2 cups ketchup
6 tablespoons fresh squeezed lime juice
2 tablespoons yellow mustard
2 tablespoons dried onion flakes/dried minced onion
2 teaspoons black peppercorns
1 teaspoon cumin seeds
1½ teaspoons celery seeds
½ cup brown sugar
1½ teaspoons salt
2 teaspoons garlic powder
4 tablespoons unsalted butter
1 teaspoon chipotle powder, optional

In a medium saucepan with lid, combine the first 3 ingredients. Separately, if using whole spices, place the onion flakes, black peppercorns, cumin and celery seeds into a spice grinder or coffee grinder used only for spices and grind to a powder. Add these along with the remaining dry spices to the saucepan and stir well. Bring the mixture to a boil. Be very careful, as the mixture will splatter alarmingly. Lower the temperature to a simmer, cover tightly with the lid and simmer for 25 to 30 minutes, carefully lifting the lid about every 7 to 10 minutes to stir the mixture and prevent sticking to the pan. Once time is elapsed, remove from heat and remove the lid. Add in the butter, about 1/2 tablespoon at a time, stirring well until it is completely incorporated before adding in the next piece of butter, until all the butter has been added.

Use this barbecue sauce at the very end of grilling time to coat the chicken, and pass the rest at table.


Tomorrow night I am going to make Sloppy Joes and Mustard Potato Salad, as it will not matter if the Sloppy Joes are in the pan for a while and the Potato Salad will keep just fine in the fridge. The point being, I don't know what time my guests will be arriving. I am going to make Andes mint chip cookies as a dessert. Once our guests leave, I will be back with more of the recipes I am creating! Happy 4th of July!


My passion is teaching people how to create a harmony of flavors with their cooking, and passing along my love and joy of food, both simple or exotic, plain or fancy. I continue my journey in ethnic and domestic cuisines, continuing my journey to explore diverse culinary experiences and hopefully to start you on a journey of your own. Join me also at A Harmony of Flavors on Facebook, and Pinterest.

Disqus