Translate

Showing posts with label sweet potato. Show all posts

Friday, July 8, 2022

Root Vegetables in all their Glory

I love root vegetables. From beets to yucca and everything in between. There hasn't been much in the root vegetable or tuber family that I don't like, so they feature in many of my favorite recipes. 

Mixing parsnips with potatoes for mashed potatoes has been a habit of very long standing. Oven fries and potato salads make my husband particularly happy. Sweet potatoes, whether used in a "salad" application (like Sweet Potato & Black Bean Salad), baked in a casserole or made into oven fries, make me particularly happy.
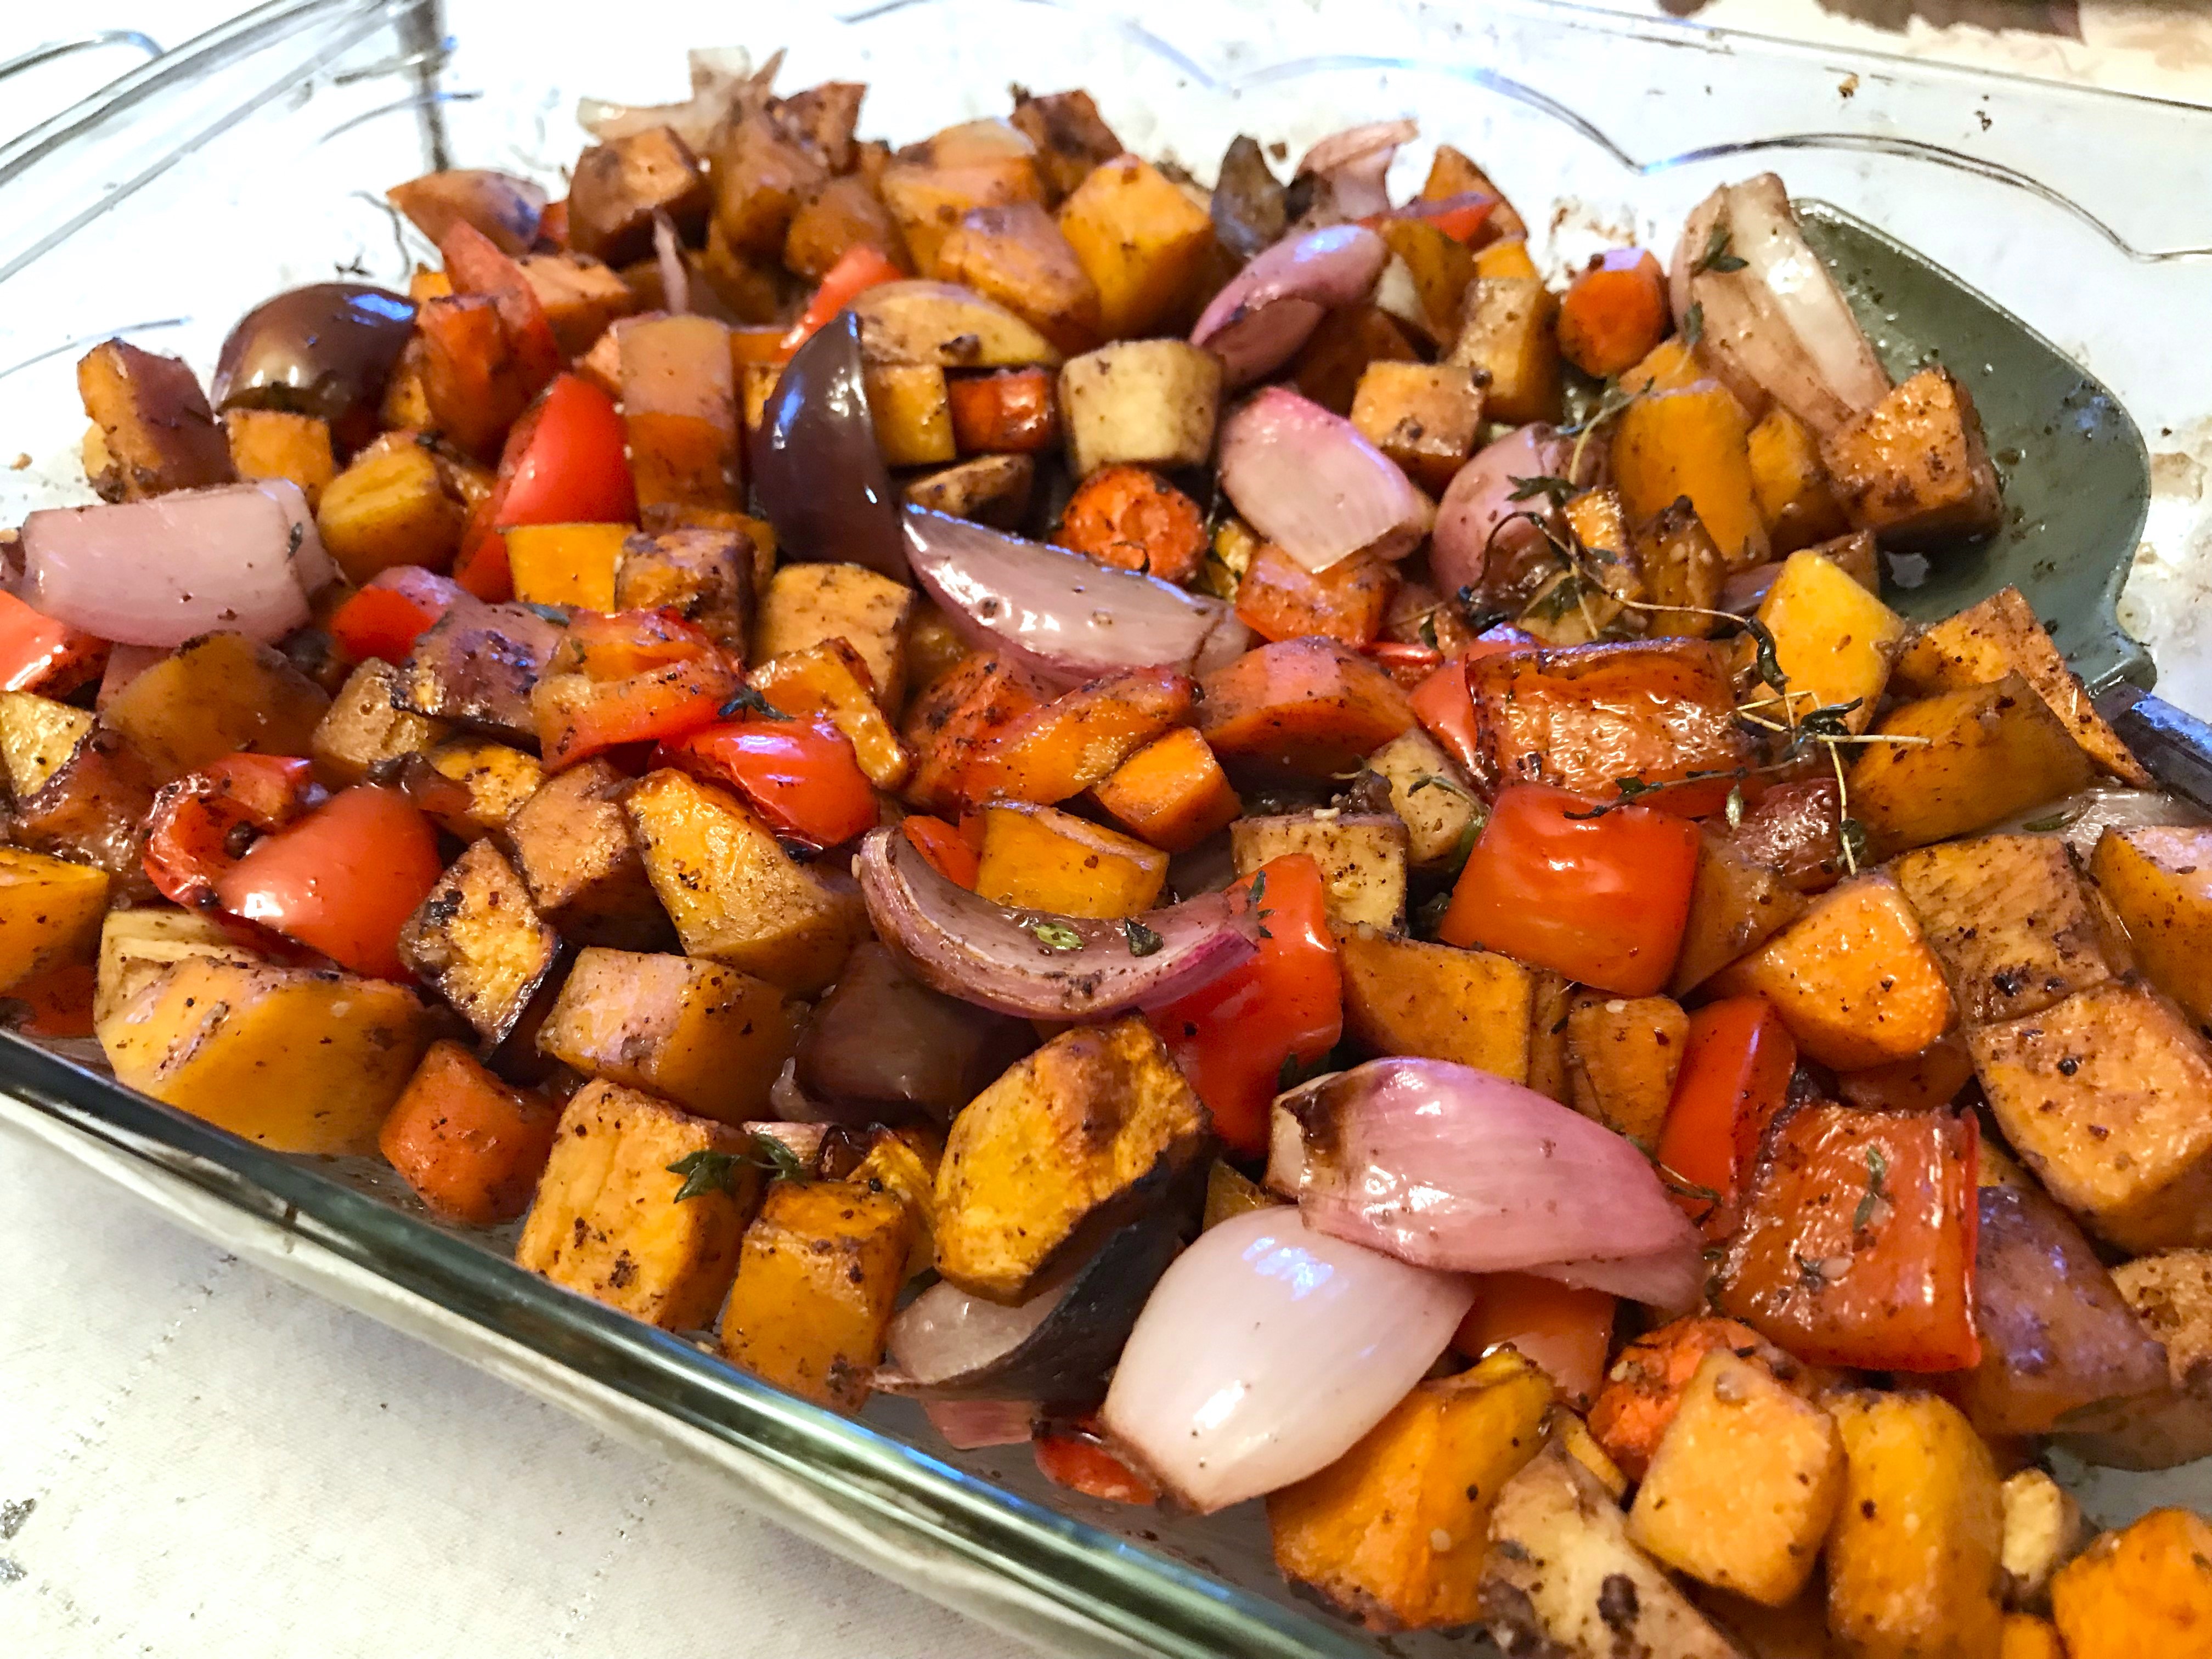
root vegetables, squash, side dish, Fall recipe
Oven Roasted Root Vegetables

While we are just now coming into the full heat of summer and many people avoid heating their ovens, this recipe for Oven Roasted Root Vegetables (plus a couple of others thrown in 😉) should stay in your files for when Fall and cooler temps start moving in, because this is one fabulous recipe. 

When Fall does hit, squash of all kinds abound, and I love squash as much as most root vegetables. I cannot begin to say I have tried all the countless varieties of squash out there, though I can say with certainty that butternut is normally in my fridge, but come Fall, I wander into other types, like the Australian blue varieties such as Jarrahdale or Jamboree, or Hubbard, though I am not always able to find them, or acorn. So, I normally add some kind of squash to my root vegetables, just because of their similar dense texture and cooking times.

Speaking of cooking times, this will depend entirely on the size you cut your vegetables in preparation for baking. You might cut them into 1 to 1 1/2-inch cubes, or you might go with a much smaller cut. I made an extra tiny cube size for the topping for an appetizer recipe I made for my son's birthday (Rosemary, Brie & Goat Cheese Tarts with Balsamic Roasted Root Vegetables), so being an appetizer portion, the veggies were cut to about 1/4-inch cubes. For some reason I have the time listed for those tiny cubes as nearly the same as for larger ones, though my recollection was that it took about 30 to 35 minutes. If you have much larger, say 1 1/4-inch sized, it can take an hour or even a little more. 

I like using shallots when making the vegetable mixture, but any kind of onion, red, white or yellow, will work just fine. Go with personal preference, or what is on hand. And another vegetable I use, again just because I like them, is green or red bell pepper - and which to use is up to the individual, or what is currently on hand. 

Mix root vegetables for this recipe as you choose, but keep in mind that red beets will stain everything a pretty red color. An alternative if you like beets is to look for either golden beets or Chioggia beets. Yucca root is particularly hard, so should be cut a bit smaller than the other veggies, if using. 


Oven Roasted Root Vegetables

Serves about 6
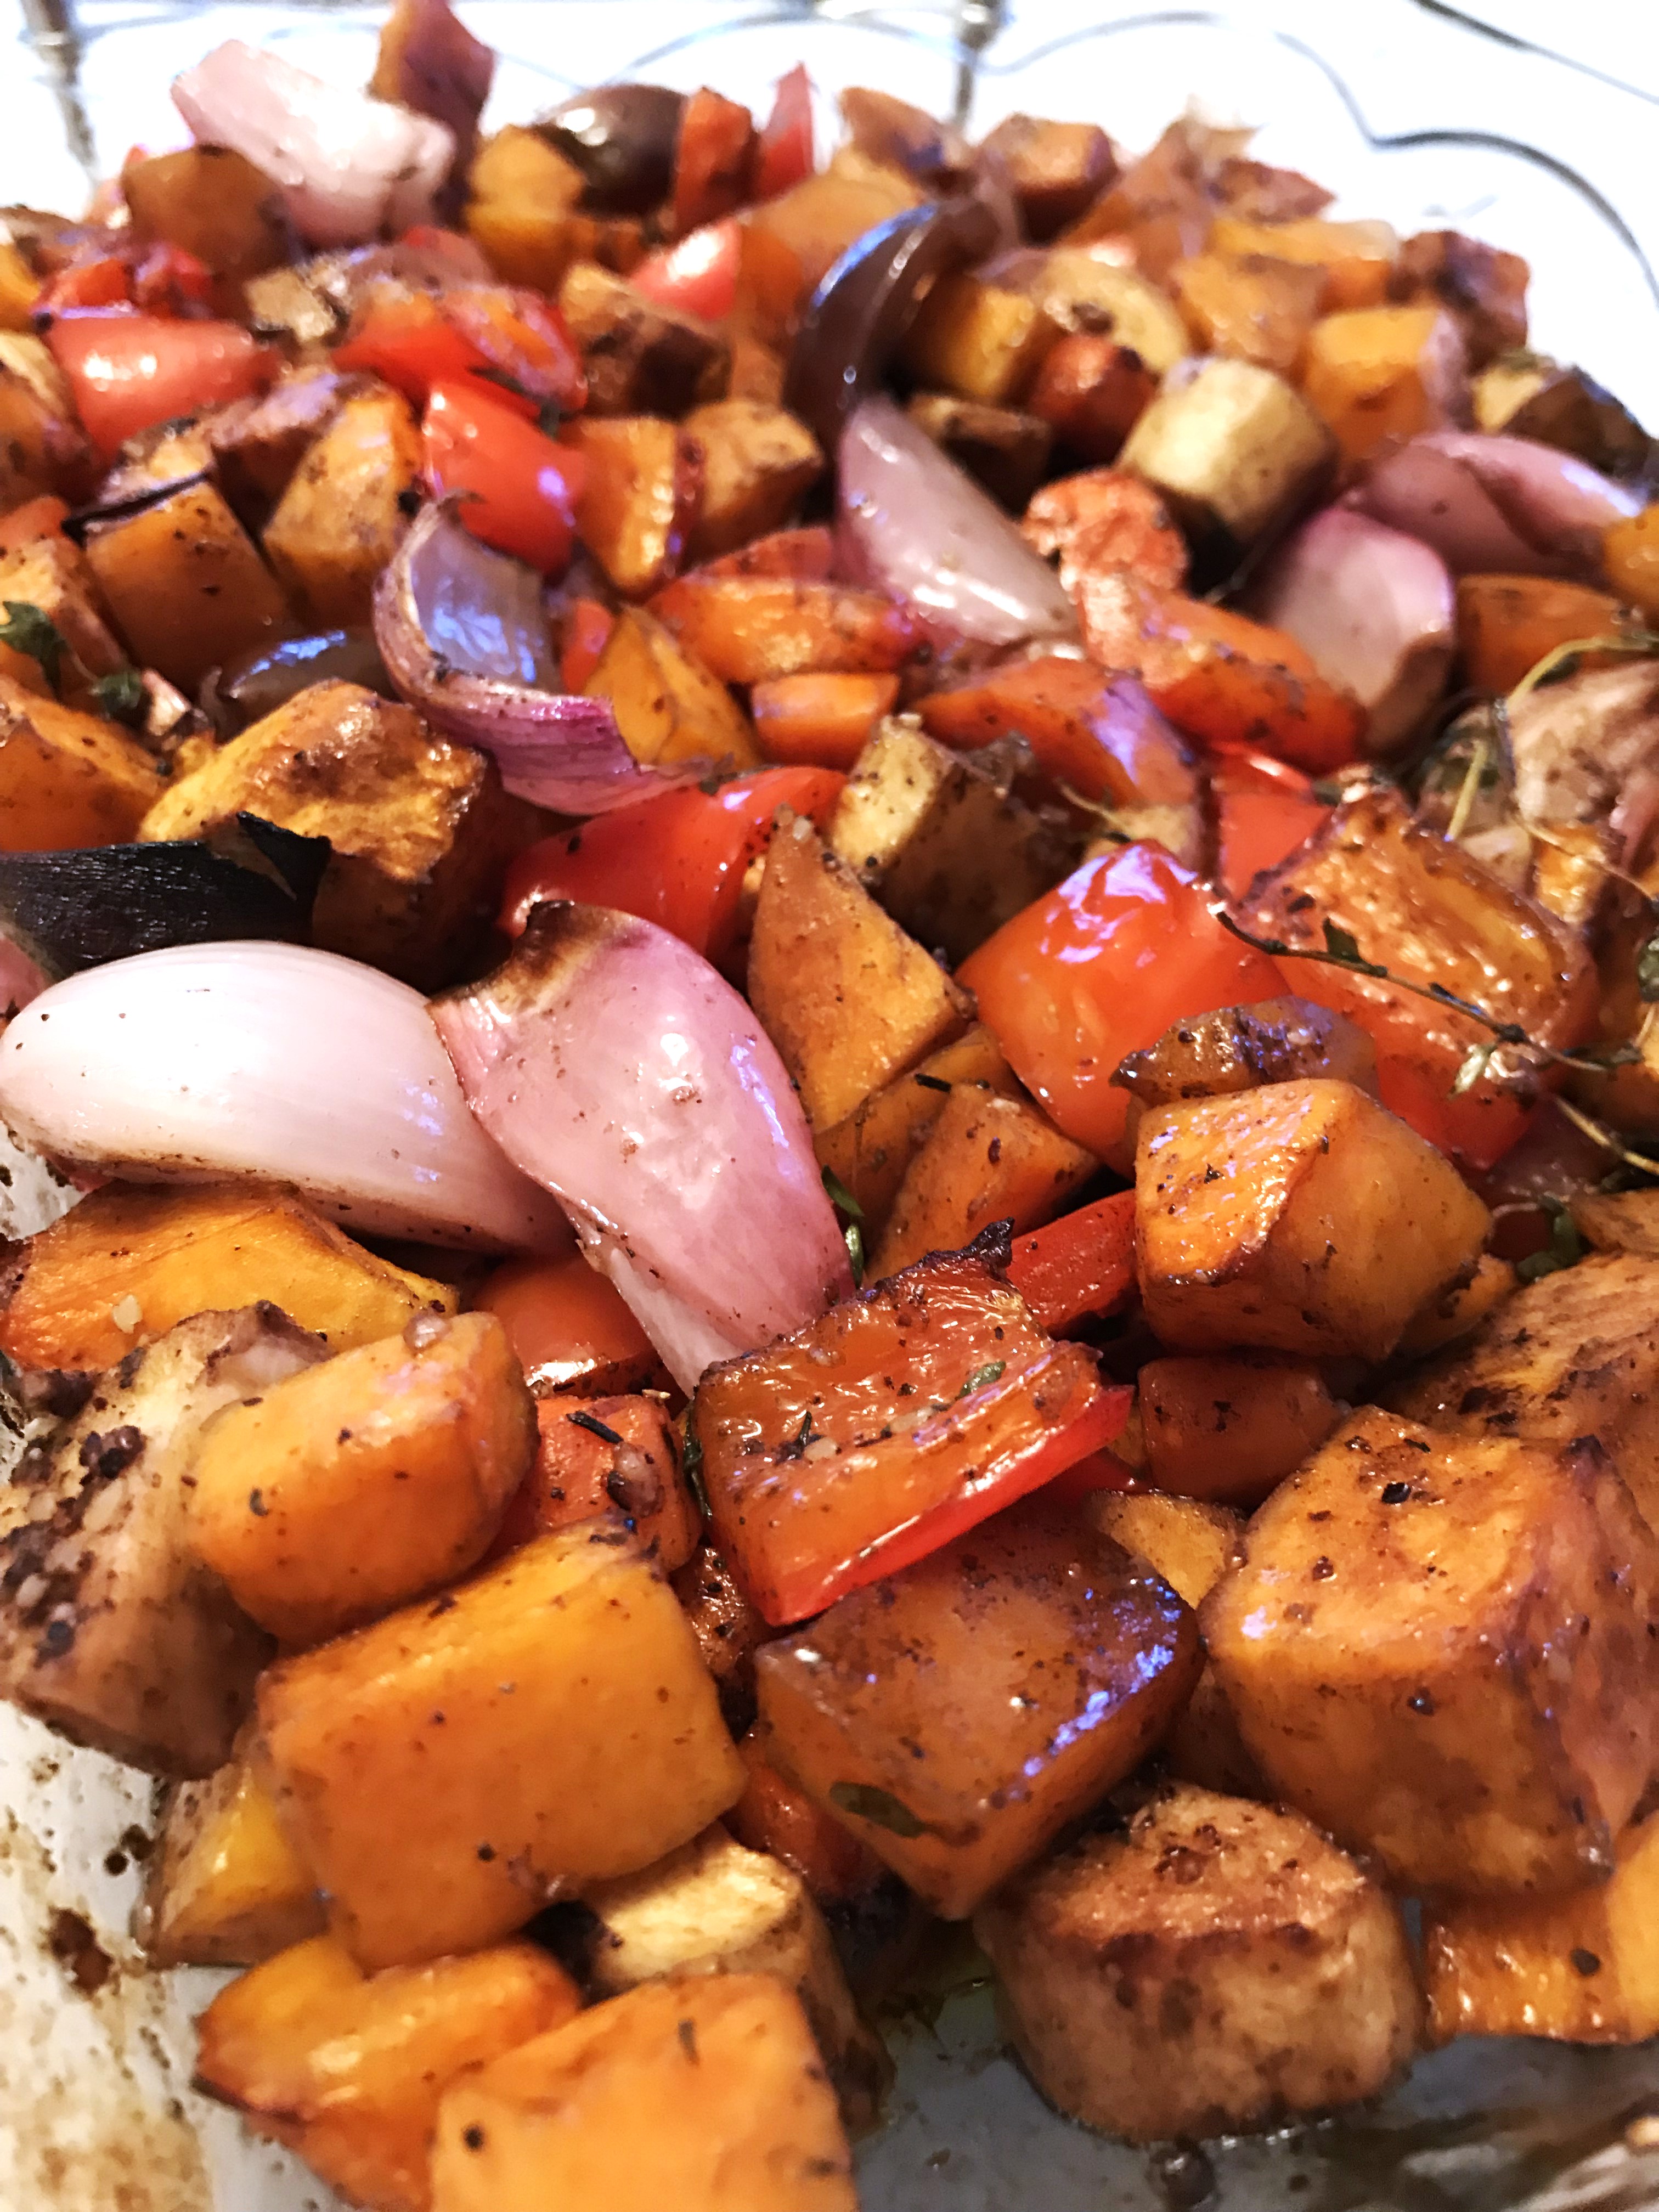
root vegetables, squash, side dish, Fall recipe
Oven Roasted Root Vegetables
VEGETABLES:
2 cups (10 ounces) kabocha squash, or butternut
2 cups (8.5 ounces) shallots
2 cups (8.3 ounces) red bell peppers
1¾ cups (8 ounces) sweet potato
1 cup (5.5 ounces) carrots
1 cup 4.5 ounces) parsnip

DRESSING:
½ cup Balsamic vinegar
¼ cup melted, unsalted butter
¼ cup olive oil
1 - 2 tablespoons fresh thyme leaves, or use a couple or three large whole sprigs 
1 teaspoon freshly ground black pepper
1 teaspoon salt
1½ teaspoons Zah’tar, optional
2 – 3 cloves garlic, minced

VEGETABLES: Preheat oven to 400 degrees. Grease or spray a 9 x 13-inch oven safe casserole and set aside. Peel and scoop out seeds from the squash and cut into ¾-inch cubes. Peel and cube the sweet potato, carrots and parsnip similarly. Cut ends from the shallots and slice into quarters, lengthwise. Clean seeds and membranes from the bell pepper and cut into squares. (Yes, the pepper is not a root vegetable, but it gives great flavor and color!)

DRESSING: Whisk together all the dressing ingredients and pour over the prepared vegetables in a bowl. Toss well to coat the vegetables evenly. Pour the vegetables with the dressing into the prepared casserole dish and bake for 40 to 50 minutes, or until the vegetables are easily pierced with the tip of a knife.


My passion is teaching people how to create a harmony of flavors with their cooking, and passing along my love and joy of food, both simple or exotic, plain or fancy. I continue my journey in ethnic and domestic cuisines, continuing my journey to explore diverse culinary experiences and hopefully to start you on a journey of your own. Join me also at A Harmony of Flavors on Facebook, and Pinterest.

Tuesday, October 9, 2018

Lots and Lots of Pork

If you like pork, in all its glorious forms, then this savory Four Pork Pie is going to be just what you want to try.

Four Pork, Pie, Hot Water Pastry, Crust
Four Pork Pie in Hot Water Pastry Crust

Yes, it does take a bit of time to prepare and assemble, and quite a long while in the oven, but this is a spectacular event of a dinner. Or, it is just as good cold, or lukewarm, can easily be taken with, whether on a picnic (though no picnics for a long while in our climes), or sliced for a lunch to go with you, or whatever takes your fancy. It is large, so there will be leftovers, unless you have a large family or a few guests.

This one is made in the same manner as my Beef and Pork Pie in Hot Water Pastry, though not packed into layers inside. It will hold together enough to slice when just made, but if you really want to see a lovely slice, wait to cut it chilled, the next day.
Four Pork Pie, Hot Water Pastry, Crust, Day 1, Day 2
Four Pork Pie in Hot Water Pastry Crust, Day 1 (just baked) and Day 2 (after cooling)
Cutting into the pie, still warm from the oven, made slices that were unable to stand upright. The fillings hold together well enough to place a slice on a plate, but not until the pie has chilled can it actually show the fillings in all their beauty, and stand upright with pride. The flavors are fabulous, either way. It's only a matter of choice.

Have the Filling Pre-Prepared

When making this pie, or any of these types of pie with a Hot Water Pastry Crust, the fillings must be all ready, before starting the pastry. This is because Hot Water Pastry is best worked while it is hot, and if you line your pan with the bottom pastry and do not have the filling ready to go in, then working with the top crust afterwards becomes far more difficult. Hot Water Pastry does not act at all like regular pie pastry crusts. It is quite warm and very soft, but with a slightly spongy feel. It does not lend itself to rolling out large and lifting to the pan as with a regular crust. It is (to me) much simpler to work the pastry up the pan once it is inside the pan. As the pastry cools, it becomes more difficult to work with, tending to tear more easily and stick together less well. Trust me; have your fillings already assembled.

Hot Water Crust Pastry, a la Paul Hollywood

The recipe for the Hot Water Pastry Crust, taken straight from watching The Great British Baking Show, consists of placing 150g lard and 200ml water into a saucepan and heating just to a simmer, when the lard will have melted. Granted, you do need a scale for this, though many measuring cups have milliliters marked on them. In a bowl, combine 450 grams (1 pound) of all-purpose flour and 100 grams of bread flour and rub in or cut in 75 grams of butter (⅓ cup). Once the lard and water are hot and melted, pour this into the flour mixture and mix with a spoon (it will be very hot at first) until most of the flour has been mixed in, then use hands (being careful not to get burned) to bring it all together in a somewhat spongy feeling ball. Use the pastry immediately.


A Part of the Filling You May Not Have on Hand

Hot Pepper, Mustard, Relish
Hot Pepper Mustard Relish
I happened to have some of my Hot Pepper Mustard Relish on hand. I just love this stuff. It's so delicious, it could be eaten as a dip, though it is fantastic on sandwiches and so much more. Since it is so delicious, and a little sweet and a little savory, I felt it would be a match made in heaven for pork. I used a fair amount of it, slathering it over layers of the filling as it went into the crust. I used about ¾ cup of the relish, ¼-cup at a time over three layers. If you do not have this relish on hand, you can just skip it. OR, possibly a substitute could be a mix of honey mustard with sweet pickle relish. To my mind, these flavors would also work. Just as an FYI.

Four Pork Pie in Hot Water Pastry Crust


Fills one 9-inch Spring-form Pan 
Four Pork, Pie, Hot Water, Pastry Crust
Four Pork Pie in Hot Water Pastry

Hot Water Crust Pastry (above)
8-ounces leftover pork roast, rough-chopped
8-ounces diced ham
20-ounces bulk pork sausage, fried
5-ounces bacon, cut in ¼-inch bits, fried
1 large onion, chopped, fried golden
4 cloves garlic, minced
1 medium sweet potato, peeled, cooked, chopped
1 chunk butternut squash (same weight as the sweet potato), cooked, chopped
3 tablespoons minced fresh sage
1 tablespoon minced fresh rosemary leaves
2 large kale leaves, stems discarded, in chiffonade
3 pickled walnuts, chopped, optional
-----
¾ cup Hot Pepper Mustard Relish, optional
1 egg plus 1 tablespoon water, whisked together for egg wash

Have ready a 9-inch spring-form pan.

Prepare all the meats, saute the onion and when nearly golden add the garlic for a few minutes more. Have the squash and sweet potato cooked in salted water and chopped coarsely. Place all these ingredients into a large mixing bowl. Add in the sage, rosemary and kale, along with the pickled walnuts, if available. Toss the mixture together to evenly distribute all the ingredients. Set aside.

Prepare the Hot Water Pastry as above noted. Use ⅔ of the pastry to press into and up the sides of the spring-form pan, ensuring there is an overhang. Work as quickly as possible, as it is easiest while warm, but make sure to patch any holes that may form. Press a third of the filling into the pastry lined pan, making sure it gets into the corners and edges. Spread about ¼-cup of the Hot Pepper Mustard Relish over this layer. Or use the suggested mix of Honey Mustard and sweet pickle relish or omit this step. Add another third of the filling mixture, pressing down evenly over the first layer, and well into the sides. Spread another ¼-cup of the Hot Pepper Mustard Relish over this layer (or one of the options). Press in the remaining filling evenly and spread with the last ¼-cup of the Hot Pepper Mustard Relish, or one of the options. 

Roll out the remaining ⅓ of the Pastry, large enough to hang over the edges of the pan. Brush just the top rim edge of the bottom crust with egg wash, then set the rolled pastry atop the pie, pressing the rim to seal the edges together. Trim away the overhang dough and set it aside to make decorative leaves or other forms  for the pie. Crimp the edges of the crust all around the pan, then make sure the crimped edges are all inside the pan, as later after partway through baking, the spring-form rim will be removed. If the crimped edge covers the top rim of the pan, the sides of the pan will not be easy to remove.

Cut a ½-inch hole in the center of the top crust. Roll out and cut decorative pieces for the top of the pie. Set them in place, then set the pan on a rimmed baking sheet into a preheated 350 degree oven. Bake the pie for about 70 to 75 minutes, and nicely golden. Remove from oven and increase oven temperature to 375 degrees. At this point, the pie should be strong enough to remove the spring-form rim. Unlatch and carefully remove the rim and set aside. Brush all over the top and sides of the pastry thoroughly with the egg wash. Place back into the oven for 10 minutes, then remove once more to apply a second coat of egg wash, then return to oven for 10 more minutes.

Allow the pie to cool for at least 30 minutes before slicing, or if time permits, cool completely. Refrigerate if you prefer to serve it chilled the following day.


My passion is teaching people how to create a harmony of flavors with their cooking, and passing along my love and joy of food, both simple or exotic, plain or fancy. I continue my journey in ethnic and domestic cuisines, continuing my journey to explore diverse culinary experiences and hopefully to start you on a journey of your own. Join me also at A Harmony of Flavors on Facebook, and Pinterest.

Friday, March 24, 2017

This Year it is called Renaissance Festival

This April marks the 5th Annual Fundraiser event to benefit the Boys and Girls Club of Aberdeen. In past years it was called Winefest Renaissance, but this year due to some technical difficulties, it is called Renaissance Festival. However, "a rose by any other name" and all that; it is the same event. 

This year, I got started on the menu first, due to the lateness of the first meeting. Usually, I select the wines that interest me, then build an appetizer that fits the flavor profile of the wine. In the past years I have created wine and food pairing sheets for just this reason, and have been adding to them each year. I search the internet diligently to find the wine varietal and it's flavor characteristics. These are helpful when pairing a food, as they help point the way. Then I search for any suggested food pairings for that particular varietal. One site in particular has been invaluable: Wine Folly. It is a blog, or an informational site, and when one searches for food pairing with a certain varietal, such as Petite Sirah, this site pops up more times than not. Check it out here: http://winefolly.com/review/petite-sirah-wine-guide/

This is not the only site I search, so between all the places I can find suggestions to pair a wine, I amass all the suggestions and compile a list. 

Sweet Potato, Bourbon, Tamales, Country Ham, Cheese, Fig Apricot Preserve
Sweet Potato Bourbon Tamales with Country Ham and Cheese and Fig Apricot Preserve

Anyway, I started doing things in reverse this year and came up with some proposed foods to make, hoping I could find proper wine pairings from the list, yet to be provided at the time. I did research on the foods I planned, trying to match the wine that had the most hits in the food pairing column. Two foods in particular were so much a match for particular wine varietals that I prayed these might be on the wine list. One of the foods was my recipe for Lamb Burgers with Feta and Tapenade. I planned to make the burgers into mini size, and add the Feta, grated, into the burger rather than try to grill it and keep it atop the little slider. I have already made these and frozen them. I will reheat them before heading to the venue. I made the tapenade also, which just absolutely makes these burgers pop. When searching my lists, Petite Sirah was the only wine that held all the flavors involved: lamb, strong cheese, oregano, mint, olives.
Image, bob's red mill, corn flour, tortillas
I looked through the wine list when it finally arrived and hurrah! there was one, and only one, Petite Sirah. I pray it is available for me.

Then the other food I planned to try was a version of Tamales. My version bears little resemblance to the flavors of a Mexican Tamal, but I am using corn tamale flour (masa harina) as a base ingredient, and the corn husks to wrap them! I used Bob's Red Mill brand of corn flour for one batch, and Maseca brand for another batch. The corn flour has to be the kind that has been treated with limewater and ground, not cornmeal. 

Sweet Potato, Bourbon, Tamales, Country Ham, Cheese
Tamales just steamed and unwrapped
Outside of that is where the other non-traditional flavors come in. I am calling them "Sweet Potato Bourbon Tamales with Country Ham and Cheese and Fig Apricot Preserve." Long name for these tiny, two-bite tamales, but then they are truly long on flavor. I researched all the possible wines that might fit this flavor profile and two were standouts: Chenin Blanc and Viognier. And guess what? There was one wine on the list - and it contained BOTH these varietals! It is a Terra d'Oro Chenin Blanc/Viognier. I actually found this wine in our local grocery, so since I had already gone ahead and made half the tamales, I thawed 2 for my husband and me to try with the wine. When I opened the wine, the bouquet was immediate and definite. Aromas mainly of fruit, tropical fruit, maybe flowers. It smelled so very inviting. I knew it would taste wonderful. And it did. Then I worried that it might not fit the flavors of the tamales. But after taking a bite, savoring the amazing flavors (if I do say so myself!), then sipping the wine again - well, it could not have been a more perfect match.


The goal I strive for in these wine and food pairings is that the wine taste good (or even better) with the food, and also the reverse. It is imperative that the food be enhanced when tasting the wine with it. In this case, it was both and amazing.

My learning curve on making the tamales was a little steep. I had never made Mexican style tamales before, and not even the Guatemalan ones that are quite similar but called Chuchitos. Getting used to the varying ideas and ways of making these little antojitos (AHN-toe-HEE-toes), or "little cravings," took a little bit of study, but once I got going, they went easily enough. They do take quite some time to make, but with the flavors that come out, they are well worth the effort.  


Sweet Potato Bourbon Tamales with Country Ham and Cheese and Fig Apricot Preserve

Sweet Potato, tamal, tamales, country ham, fig, apricot, preserves, wine pairing


Makes 62 mini tamales

MASA (batter):
2 cups corn masa flour for tamales (I used both Bob's Red Mill for one batch and Maseca brand for another)
2 cups hot water, plus more if needed
10 ounces lard
½ teaspoon Kosher salt
¼ teaspoon baking soda
2 tablespoons bourbon whiskey
1 tablespoon maple syrup
12 ounces baked, cooled, peeled, smashed sweet potato
Dried Corn Husks

FILLING:
5 ounces country ham, minced (or substitute Prosciutto or Serrano ham)
5 ounces Chevre or Montrachet soft goat cheese
4 ounces smoked Fontina, or regular Fontina

Earlier in the day, combine the Masa Flour with the hot water and stir to make sure all the flour is wet. If it is so dry that stirring comes to a screeching halt, add more hot water, until the mixture is somewhat stiff, but not dry. More water can be added later if needed. Cover and set the masa aside to fully hydrate, about 2 or 3 hours.

Meanwhile, bake the sweet potato and have it ready. Prepare the filling by setting the minced ham into a bowl. Crumble the chevre and grate the Fontina on a large holed grater. Stir the cheeses together with the ham and set aside.

When ready to mix the masa, place it into the bowl of a stand mixer. It should be perfectly cooled (not cold). Add the lard and salt and beat to combine, then beat on medium high speed for about 2 - 3 minutes. Add in the baking soda, bourbon, maple syrup and sweet potato. Beat on medium high for another 3 or more minutes. If the mixture is not the consistency of hummus, adjust by adding more masa flour (if they are too wet) or more water (if they are too dry).

Place the dried corn husks in a large bowl and pour boiling water over them. They will soften within a couple of minutes. You will need corn husks that are between 6 and 8-inches wide at their wider end. Many will be wider than this, in which case, just rip off any excess. You will also need narrow, ¼-inch wide strips torn from those leftover pieces to use for tying the husks closed for steaming.

masa, spread, place filling, edges together
measure out masa; spreadplace filling inside; bring edges together

Filling the husks is easiest with two level 1-teaspoon scoops; regardless, use two teaspoons of the masa set about ⅓ of the way up from the wider end of the husk. Spread it to about ¼-inch deep, making a roughly square blob about 3x3-inches. Down the length of the masa, place about 1 teaspoon of the filling. Start lifting both edges of the husk to encase the filling in the masa, then tuck the edge of the husk around the masa and roll to fully encase.
 
roll packet, fold end up, leave space, set upright in pot
roll the packet;  fold end upwardsleave space when tyingset upright in pot

Now, lift the little roll and fold the narrow end upwards, pushing the masa towards the wider end and letting the pointed end meet the open end. Using one of the narrow strips of corn husk, tie a loose band around the middle of the packet, to prevent the husk from unfolding and spilling all your work right back out. There should be adequate space in the opening for the tamal to "grow" while steaming. There may be some overflow, but hopefully not too much.

Set the little tamale packets standing upright into a large pot with a rack in the bottom (or two - I set two of them, criss-crossing each other). This is to prevent the tamales from actually setting in water. Continue standing, or just slightly leaning the tamales against each other as you roll and tie them shut. Once finished, or the pot is full, put water in the bottom, just to the very bottom of the tamales. Do not have them standing in water. Cover the pot and bring the water to boil, reduce the heat to a simmer and steam the tamales for 30 minutes. Keep an eye on the water level, that it does not burn dry!

 
One batch, tamales, cooling
Finished batch of tamales cooling


Once they are steamed, use tongs to remove them to a surface to cool. Store them in a zip-top bag in the refrigerator, or freeze for up to a month. To reheat, either set them on a rack in a lidded pan to steam for 10 to 15 minutes (half-hour if frozen), or set them onto a pan with foil to cover tightly and reheat slowly at 250 degrees for about 15 to 20 minutes. If they were frozen, they will take a bit longer, up to 30 minutes.
~~~~~~~~~~~~~~~

The Fig Apricot Preserve is not a total necessity - these little two-bite tamales are amazing on their own. The fruit compote just adds a flavor dimension, so if you want, here is the recipe:

Fig Apricot Preserve

fig, apricot, preserves, tamal, condiment
Fig Apricot Preserve, on Tamal


Makes about 4½ to 5 cups

1½ cups dried figs, chopped
1¾ cups dried apricots, chopped
zest of one orange
juice of one orange
3 cups water, divided
⅓ cup balsamic vinegar
1 teaspoon ancho chili powder
½ teaspoon salt
2 tablespoons Bourbon, or Port, optional

Place the figs, apricots, zest and juice with 1½ cups of the water, the balsamic vinegar and ancho powder. Bring to boil, lower heat and cook gently, covered for about 20 minutes, until the fruit is well softened.

Set aside to cool slightly, then pour into a food processor with the remaining water, salt and Bourbon, if using. Puree until very smooth. Return to the pot and cover. Bring back to simmer, then remove from the heat to stir, return to heat, and repeat. The mixture is thick, so as it boils, it will splash very hot blobs. Be very careful. Let the mixture simmer for about 5 to 7 minutes, to meld flavors. Once cooled, store in glass jars in the refrigerator for up to 2 weeks.


My passion is teaching people how to create a harmony of flavors with their cooking, and passing along my love and joy of food, both simple or exotic, plain or fancy. I continue my journey in ethnic and domestic cuisines, continuing my journey to explore diverse culinary experiences and hopefully to start you on a journey of your own. Join me also at A Harmony of Flavors on Facebook, and Pinterest.

Saturday, May 24, 2014

Another Take on Sweet Potato Cake

sweet potato, cupcakes, pistachio filling
My Valentine Cupcakes
Back in February for Valentine's Day, I made some spectacular Sweet Potato Cardamom Cupcakes and filled them with Pistachio Cream and topped them with Strawberry Rosewater Frosting, left. The cake itself was moist and delicious, and I went on to  make it again as a layer cake, below. While it was really a wonderful, moist and flavorful cake, I was not 100% happy with its texture. I'd been thinking about this for a while, wishing to get to a point where  I could get back to this concept and try again. 

Sweet Potato Cardamom CakeSweet Potato Cardamom Cupcakes with Pistachio Filling
& Strawberry Rosewater Frosting
A few days ago, amid making breads and starter doughs, I finally got to the cake. I'd had a couple of sweet potatoes in the fridge for a while, waiting to be used either for this cake or for sweet potato fries (whichever desire came first). I sat down with my recipe and pondered the way I had made it last time and what could be done differently. I looked up other recipes online to see what others did differently. I made a decision to try a few things such as using a melted butter and oil combination rather than creaming butter and sugar. More eggs and more sugar went in along with more sweet potato. There is little I didn't tweak. 

When creating a recipe this way, there is no way to be completely sure of the outcome unless you know the chemistry of combining ingredients (which I don't). Will the batter be too wet or too dry? Will it need more flour? Is there too much sugar? Will the combination and ratios of flour and other ingredients to leavening ingredients work? I like using buttermilk in cakes, as I feel it gives a tender moistness, but this time I opted for liquids in the form of the melted butter and oil and left the buttermilk, or any milk, out completely. Rather than cardamom, I went with coriander and some ginger. Coriander is not a spice I think about often enough when making cakes or other desserts, though I do empirically know that it has a lovely citrus-y note. The other thing I decided on was using nuts in the cake batter, where I had not in the previous recipe. I went to work and whipped up the cake; as far as the batter went it worked perfectly, and in the oven it went. Forty minutes later, I was rewarded with most perfect layers; not too domed, perfectly baked. Still, looking at the two cakes, the difference between them make it hard to think they are both sweet potato cakes!

Sweet Potato Walnut Cake

cake, dessert, sweet potato, walnuts, recipe
Sweet Potato Walnut Cake

Makes one (2-layer) 8-inch cake

2 cups cooked, mashed sweet potato
½ cup melted butter
½ cup vegetable oil
2 cups sugar
4 eggs
1 teaspoon vanilla
2¾ cups all-purpose flour
1
½ teaspoons ground coriander seed
1
½ teaspoons baking powder
1 teaspoon baking soda
½ teaspoon salt½ teaspoon ground ginger
1 cup ground walnuts

Preheat the oven to 350 degrees (325 if on Convection). Grease two 8-inch round baking pans, then line the pans with parchment circles. Grease the parchment. Set aside.

In a mixer bowl, beat together the cooled sweet potato with the butter, oil and sugar. Add the eggs, one at a time until they are completely incorporated, then the vanilla.

In a separate bowl, sift or whisk together the flour, ground coriander, baking powder and soda, salt and ginger. Add these ingredients to the sweet potato mixture in three parts, beating just until combined. Fold in the nuts. Divide the batter evenly between the prepared cake pans. Bake the cakes for about 35 to 40 minutes, or until a toothpick inserted in the center comes out clean.


Now I had to wait till the cakes cooled and meanwhile decide on a flavor for the frosting. My mind wandered through all my spice cabinets in search of a flavor or combination of flavors that would suit the "feeling" in my mind. After consideration, I decided on Chai.

Chai means "tea" in many languages, but it has become synonymous with a highly spiced (usually black) tea with a milk product added. I love chai. I have always been interested in spices, and have loved tea since childhood so this was no stretch. I used to get the Herb Companion magazine many years back when I was more actively gardening, and they once had a wonderful chai a recipe. For some time that was my go-to recipe. Then Starbucks and other places started featuring chai and I got hooked. We met a wonderful Indian couple in Louisiana and when we visited them, Priti would serve us her version of chai.

Masala Chai


Chai, Indian, ethnic, spices, black tea
Masala Chai

Serves 2

4 whole cloves
2 whole cardamom pods
1 (2-inch) piece cinnamon stick, preferably “true
cinnamon”: i.e. Ceylon, or Saigon cinnamon
1 tablespoon dried lemongrass leaves
1 star anise, whole
1 cups water
¼ teaspoon ground ginger
⅛ teaspoon black pepper
½ cup half & half, or milk
2 tablespoons black tea (Darjeeling is great)

In a mortar, crush the cloves, cardamom and cinnamon. Transfer crushed spices to a small saucepan, add the water, ginger and pepper (and lemongrass and star anise, if used) and bring to a boil. Remove pan from heat, cover and steep for 5 minutes. Add milk and sugar to pan and bring to the boil. Remove from heat and add tea. Cover and steep for 3 minutes. Stir, then strain into a warmed teapot. 


The use of tea in foods seems to be the latest flavor sensation. Watching TV shows or reading magazines, I see ground black or green tea used in recipes, or the tea is made and used as the liquid in a recipe, or a fruit is soaked in tea and added to a recipe. It was no stretch to use tea in the frosting and add in a small amount of spices, though far less than for chai. The use of cream cheese in the frosting took care of the milk part of the equation. Once I mixed the icing, I realized I must have done something wrong in the basic ingredients. My frosting was far softer than I meant for it to be. Still, it held the piped star decoration just fine so it worked. The flavor is really marvelous; creamy with that bit of chai spice.
Dried Lemongrass Leaves

I always use whole spices where possible and grind them myself in a little coffee grinder used only for spices. I used whole leaf Darjeeling black tea, a small chunk of true cinnamon quills, whole black peppercorns, whole cloves, cardamom seeds. Ginger is far harder to grate when dried, so I opt for pre-ground ginger. Lemongrass leaves are a part of my chai tea recipe and I had some in a little jar. Unfortunately, it left tiny, fine stem centers in the final grind which no amount of time seemed to touch. They are not noticeable in the icing itself, nor do I feel them in my mouth. My only concern would be trying to use an icing tip for decorating and having these little fibers clog the tip. I did use a piping bag to decorate the top, but the tip was a large, open star, so nothing would clog that.

Chai Cream Cheese Frosting

Chai, Cream Cheese, Frosting
Chai Cream Cheese Frosting

Makes enough to frost an 8-inch layer cake

8 tablespoons unsalted butter, at room temperature
12 ounces cream cheese, at room temperature
7 - 8 cups sifted confectioners' sugar (about 2 pounds)
½ teaspoon salt
1 tablespoon whole leaf black tea, ground, OR
(1½ teaspoons black tea from a tea bag)
½ teaspoon ground true cinnamon
¼ teaspoon ground ginger
⅛ teaspoon ground cardamom
⅛ teaspoon ground cloves
4 black peppercorns
1 teaspoon finely ground dried lemongrass leaves, optional

Place butter and cream cheese in a heavy duty stand mixer bowl and beat for 6 to 8 minutes, until very light and fluffy. Sift 4 cups of the confectioners' sugar with the salt and remaining ingredients and add these ingredients to the creamed mixture. On lowest speed, combine these dry ingredients. Sift the remaining 3 - 4 cups of confectioners' sugar and add about 2 cups more to the bowl, combining slowly. At medium speed, whip the frosting for another 5 or 6 minutes, stopping to add more confectioners' sugar if the frosting seems too soft.


My passion is teaching people how to create a harmony of flavors with their cooking, and passing along my love and joy of food, both simple or exotic, plain or fancy. I continue my journey in ethnic and domestic cuisines, continuing my journey to explore diverse culinary experiences and hopefully to start you on a journey of your own. Join me also at A Harmony of Flavors on Facebook, and Pinterest.

Sunday, February 16, 2014

Filled, Frosted Cupcakes: Finishing my Valentine Labor of Love

Yesterday, I wrote of the process involved in the creating of the recipes for these cupcakes, and the fact that the flavor combination was from a vaguely Middle Eastern palette; cardamom, black pepper, orange, pistachio, rosewater. I wanted to make filled and frosted cupcakes, something I had not yet tried. Pureed sweet potato would go in the cake, knowing this would give a great moist texture. I settled on a Pistachio Cream Filling, which was made in 2 steps. First the Pastry Cream, which is also wonderful as a pudding. Since the Pistachio Cream Filling recipe only needs a small part of the Pastry Cream recipe, you can give this a try as a pudding and taste its wonderful flavor. The frosting used freeze-dried strawberries, processed fine and added to the confectioners' sugar for the frosting. Rosewater was the combination with the strawberries to bring that Middle Eastern flavor to the frosting.

cupcakes, cakes, sweet potato, recipe, filling, frosting
Sweet Potato Cardamom Cupcakes with Pistachio Cream Filling & Strawberry Rosewater Frosting
Rosewater is not something just everyone has at home, I realize. If looking for it, you will likely need to find a specialty store or order online. It can be found on Amazon, of course; look for it under culinary - not health and beauty. This is not "rosewater and glycerin" for the face, but one made for ingesting. Even Nielson-Massey, whose vanilla extracts I adore (and buy by the pint!) has rosewater now, though I did try it and did not like it at all. I far prefer Cortas brand, the flavor is more authentic. While culinary rosewater can be used for beauty purposes, do not buy cosmetic rosewater to use for cooking.

cupcakes, filling, frosting
Inside the Cupcakes
This whole set of recipes may seem like a lot of work, and making everything on the same day can certainly be work. Instead, break the recipes up into components and make them ahead. The pastry cream can be made a couple of days in advance and kept chilled until needed. The Pistachio Cream can be completed and chilled 2 to 3 days in advance and kept tightly covered and chilled until needed. The frosting could possibly be kept for a day, though I am unsure of how the texture would fare. It may need to be beaten again to bring it back to usable form. 

Coring Cupcakes for filling
Coring & Extracting
cutting cores from cupcakes
All the cores & closeup of cupcake
Making the cupcakes with the intent to core and fill was something I had never attempted. On TV I saw someone using the exact same kind of apple corer that I own to take the core out of cupcakes. AHA! It was very simple. My corer, seen in these photos, has a little serration to the edge. Obviously this helps with coring an apple, and helps as well with taking the center from a cupcake. By gently twisting the corer as you work it into the cupcake, you can easily bring out the core without crushing the cupcake. Just as with slicing bread with a serrated knife, the object is to gently saw back and forth, rather than press down and crush the bread. A gentle twisting of the corer will do the same for the cupcakes without crushing. Just remember that you do not want to go all the way out the bottom of the cupcake when coring. Check the approximate height of the cupcake and then keep an eye out for the height when using the corer.

To finalize the cupcakes, use a piping bag, or a freezer-strength zip top bag with a corner cut out to fill in the centers with the Pistachio Cream. Make the filling mounded just slightly, as the filling will soak into the cupcake. Once the frosting is ready, use a piping bag and large star tip, or other open star tip to pipe a pretty design. The icing can just as easily be spread on with an icing spatula. Use a pinch of the reserved crushed freeze-dried strawberry over the top of the icing; see yesterday's post about the Strawberry Rosewater Frosting. 


Sweet Potato Cardamom Cupcakes


Makes about 24 cupcakes, or two 8-inch round layers, or one 9 x 13-inch cake
 

1 stick unsalted butter, room temperature
spices, cardamom
Cardamom Seeds & Pods
1½2 cups sugar
2 eggs
1 cup cooked, peeled, pureed sweet potato
fresh zest of 1 orange
juice of 1 orange (about ⅓ cup)
2¾ cups all-purpose flour
2 teaspoons baking powder
1 teaspoon baking soda
1 teaspoon salt
1 teaspoon finely ground cardamom
½ teaspoon freshly ground black pepper
¾ cup buttermilk
 

Preheat oven to 350 (325 on Convection). With a mixer, cream together the butter and sugar. Add in eggs, one at a time, beating until combined. Add the pureed sweet potato, orange juice and zest and mix well. In a separate bowl, whisk together the flour, baking powder, baking soda, salt, cardamom and black pepper. Add these ingredients to the creamed mixture in 3 parts, alternating with the buttermilk until all combined.
 

Set cupcake papers into two 12-cup muffin tins. Fill the papers about 2/3 full. Bake the cupcakes for about 20 minutes, or until a toothpick inserted in the center comes out clean. Allow the cupcakes to cool completely before attempting to core and fill.
 

If baking round cakes, the baking time may be 25 to 35 minutes. For a 9 x 13-inch cake, the bake time may be 35 to 45 minutes.


My passion is teaching people how to create a harmony of flavors with their cooking, and passing along my love and joy of food, both simple or exotic, plain or fancy. I continue my journey in ethnic and domestic cuisines, continuing my journey to explore diverse culinary experiences and hopefully to start you on a journey of your own. Join me also at A Harmony of Flavors on Facebook, and Pinterest.

Saturday, February 15, 2014

A Valentine Labor Of love

cupcakes, cake, dessert, sweet potato, cardamom
Sweet Potato Cardamom Cupcakes 


Anyone who knows me, or reads this blog, knows I love experimenting with recipes, trying different flavor combinations, and looking for things that are pushing the edge of where my husband will go with his food. I love trying new and different flavors, new spices or herbs, combining things in different ways. As I watch TV and hear about some of the more "out there" flavor combinations, I long to try them. So, in the back of my mind, I am always running through different flavors and how to combine them and in what. 

For some weeks now I have wanted to make cupcakes, core them, fill them with something and then frost them. In general I am not over fond of making cupcakes at all. I like eating them; they are cake, after all, and I love cake. However, I prefer to make one large something as opposed to lots of small somethings, at least in the cake or pie department. But, I had never "cored" or filled a cupcake, and wanted to try this out. The flavors and combinations were what was keeping me from starting, because I couldn't settle on a combination I liked. Yesterday morning, since I had not gotten my husband a Valentine gift, I sat down and focused. The process of creating the recipes and making all the components were almost a 6 hour job. Another time, with recipes already created, I know that much of it can be made over the course of days and finished easily in a short period of time when needed.

I settled on a sort of Middle Eastern set of flavors to work with. I had been thinking of a pistachio cream for the filling for a long while, but the rest of the equation had escaped me. So, pistachio filling was a start. Then I focused on the cupcake component. I prefer white cake. My husband also loves white cake. We will both eat chocolate, but it is not generally our first choice. I did not want to make a carrot cake, despite how much he loves that. With the Middle Eastern flavors I was going for, it was the wrong canvas. I wanted a moist cake, and had once made a cake with squash in it. I had a 10-ounce sweet potato in the fridge. I set it in a pan of water and boiled it for an hour, then cooled slightly and peeled it. I put it through a ricer and ended up with a perfect 1-cup. I decided on a yellow cake, as no  matter what, it would be yellow with the sweet potato. For the flavors, I went with cardamom, black pepper, orange zest and juice, all Middle Eastern flavors.

ingredients, freeze dried strawberriesA couple of months back, when grocery shopping, I found freeze dried strawberries, in among the regular dried fruits. I do not care for strawberries. I abhor anything fake strawberry "flavored." I like the real flavored cream that results from strawberries soaking in cream - but not the berries themselves. So, since I had freeze dried strawberries, and my husband is a real strawberry fiend, I figured the flavor was real enough and I was not actually eating the fresh berries I do not care for. To give the frosting vaguely Middle Eastern flavor, I added rosewater. So, my stage was set. Then I started working on recipes.

I wanted to make the pistachio filling with an idea I saw on TV. They added pastry cream to a mixture with ground pistachios. I have a recipe for a pastry cream I have used for years. As a matter of fact, long ago I used to make it as a cooked pudding for my kids, as the flavor is so delightful. I made a batch of that first, while the sweet potato was cooking. Then, I worked on how to proceed with the pistachio part. I took some raw, shelled, unsalted pistachios I have had for a while and placed them in the food processor with some confectioners' sugar and processed that for about 5 minutes. It resulted in a pretty green powder. While it was already finely ground, I still worked the powder through a colander to take out any larger pistachio bits that might remain, though there was not much. I creamed some butter for about 5 minutes, then added in the pistachio powder. Once that was well creamed, I added in some of the cooled pastry cream and mixed. That went in the fridge to set.

I am going to post here the Pastry Cream, Pistachio Cream Filling and the Strawberry Cream Cheese Frosting recipes. Tomorrow I will post the recipe for the cupcakes and the finalizing.

Pastry Cream


pastry cream, ingredients, recipe
Pastry Cream
Makes about 1 5/8 cups (you will need ½ cup for the Pistachio Cream Filling)

1/3 cup sugar
2 tablespoons all-purpose flour
1 tablespoon cornstarch
1/2 teaspoon salt
1 1/2 cups milk
1 egg + 1 egg yolk
1/2 teaspoon vanilla

In a bowl, whisk together the egg with the yolk and set aside. In a medium saucepan, combine the first 4 ingredients. Using a whisk, mix in the milk. Bring the mixture to a boil over medium heat and whisking constantly, allow the mixture to cook for another 2 to 3 minutes to cook out the raw starch taste. With a small ladle, scoop some of the hot mixture into the eggs and whisk quickly to temper the eggs. Add in another ladle of the hot mixture and whisk. Off the heat, add the whole egg mixture back into the hot pan. Place the pan back over very low heat, whisking constantly for 30 seconds to one minute, or until the mixture just begins to bubble. Remove from heat immediately, or the eggs will scramble If desired, strain the mixture. Place plastic wrap directly onto the hot surface of the pastry cream and chill completely before using. This can be made up to 2 days ahead and kept refrigerated.


Pistachio Cream Filling


Makes enough to fill 24 cupcakes

1/2 cup preferably raw, shelled, unsalted pistachios (or rinse salt off of regular pistachios and dry completely before proceeding)
1/2 cup confectioner's sugar
filling, cupcakes, cored cupcakes, pistachios
Pistachio Cream Filling

4 tablespoons unsalted butter, room temperature
1/4 teaspoon salt
1/2 cup pastry cream

Set the pistachios with the confectioners' sugar into the bowl of a food processor and process for at least 5 minutes, or until the mixture is a fine powder. With a mixer, cream the butter until very light. Add in the pistachio mixture with the salt and beat until well combined. Add the pastry cream and mix well. Chill. This recipe can be made 2 - 3 days in advance and kept refrigerated.

Strawberry Rosewater Frosting


frosting, freeze dried strawberries, rosewater
Strawberry Rosewater Frosting
Makes enough to frost 24 cupcakes
 

1 (1-ounce) package freeze dried strawberries
6 ounces softened cream cheese
1 stick (4-ounces) unsalted butter, softened

4 cups confectioners' sugar
½ teaspoon salt
2 tablespoons rosewater
 

Place 1 cup of the freeze dried strawberries in a food processor and process to a very fine powder. (Save the remaining few bits to crush and sprinkle over the finished cupcakes). Sift this powder with the confectioners' sugar and salt into a bowl and set aside. In a standing mixer, beat the cream cheese and butter for about 8 to 10 minutes, until light and creamy. Stop the mixer and add all the sifted ingredients. Start on very slow to incorporate the dry ingredients, then add the rosewater and increase speed and beat well. Can be made 1 day ahead and chilled. Bring to room temperature and beat to bring back the texture before using. 


My passion is teaching people how to create a harmony of flavors with their cooking, and passing along my love and joy of food, both simple or exotic, plain or fancy. I continue my journey in ethnic and domestic cuisines, continuing my journey to explore diverse culinary experiences and hopefully to start you on a journey of your own. Join me also at A Harmony of Flavors on Facebook, and Pinterest.

Disqus