Translate

Showing posts with label thyme leaves. Show all posts

Friday, July 8, 2022

Root Vegetables in all their Glory

I love root vegetables. From beets to yucca and everything in between. There hasn't been much in the root vegetable or tuber family that I don't like, so they feature in many of my favorite recipes. 

Mixing parsnips with potatoes for mashed potatoes has been a habit of very long standing. Oven fries and potato salads make my husband particularly happy. Sweet potatoes, whether used in a "salad" application (like Sweet Potato & Black Bean Salad), baked in a casserole or made into oven fries, make me particularly happy.
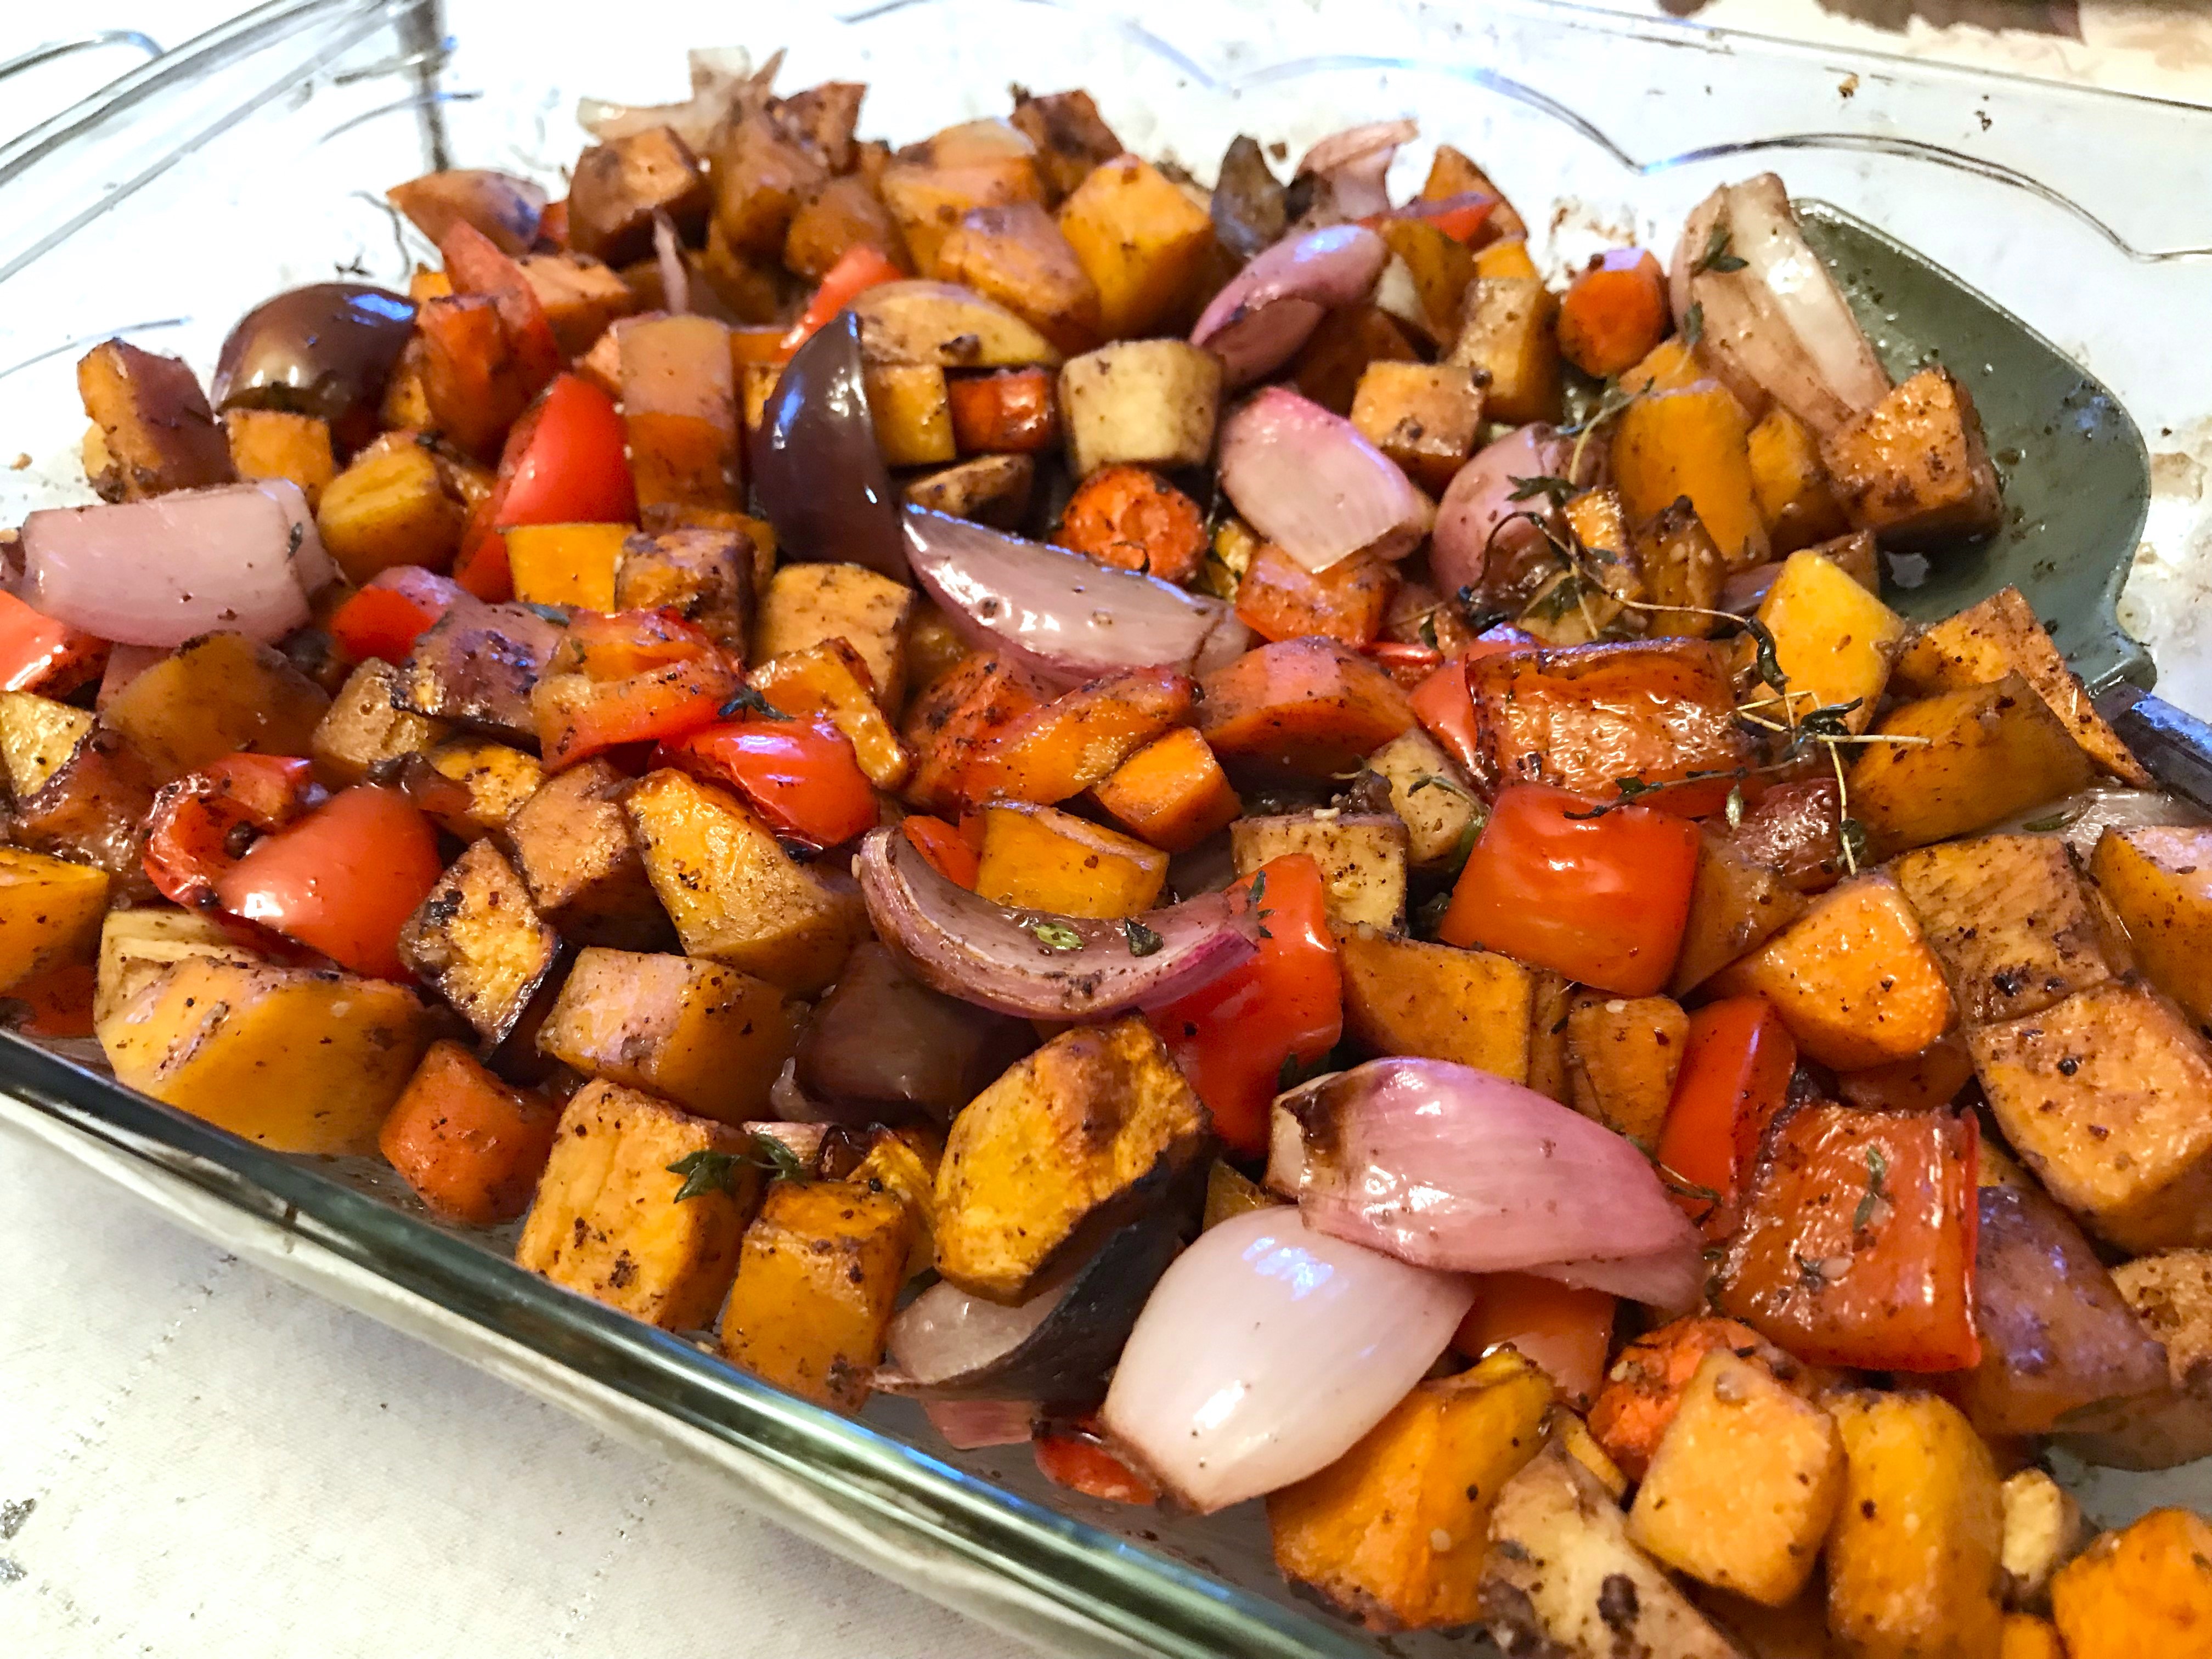
root vegetables, squash, side dish, Fall recipe
Oven Roasted Root Vegetables

While we are just now coming into the full heat of summer and many people avoid heating their ovens, this recipe for Oven Roasted Root Vegetables (plus a couple of others thrown in 😉) should stay in your files for when Fall and cooler temps start moving in, because this is one fabulous recipe. 

When Fall does hit, squash of all kinds abound, and I love squash as much as most root vegetables. I cannot begin to say I have tried all the countless varieties of squash out there, though I can say with certainty that butternut is normally in my fridge, but come Fall, I wander into other types, like the Australian blue varieties such as Jarrahdale or Jamboree, or Hubbard, though I am not always able to find them, or acorn. So, I normally add some kind of squash to my root vegetables, just because of their similar dense texture and cooking times.

Speaking of cooking times, this will depend entirely on the size you cut your vegetables in preparation for baking. You might cut them into 1 to 1 1/2-inch cubes, or you might go with a much smaller cut. I made an extra tiny cube size for the topping for an appetizer recipe I made for my son's birthday (Rosemary, Brie & Goat Cheese Tarts with Balsamic Roasted Root Vegetables), so being an appetizer portion, the veggies were cut to about 1/4-inch cubes. For some reason I have the time listed for those tiny cubes as nearly the same as for larger ones, though my recollection was that it took about 30 to 35 minutes. If you have much larger, say 1 1/4-inch sized, it can take an hour or even a little more. 

I like using shallots when making the vegetable mixture, but any kind of onion, red, white or yellow, will work just fine. Go with personal preference, or what is on hand. And another vegetable I use, again just because I like them, is green or red bell pepper - and which to use is up to the individual, or what is currently on hand. 

Mix root vegetables for this recipe as you choose, but keep in mind that red beets will stain everything a pretty red color. An alternative if you like beets is to look for either golden beets or Chioggia beets. Yucca root is particularly hard, so should be cut a bit smaller than the other veggies, if using. 


Oven Roasted Root Vegetables

Serves about 6
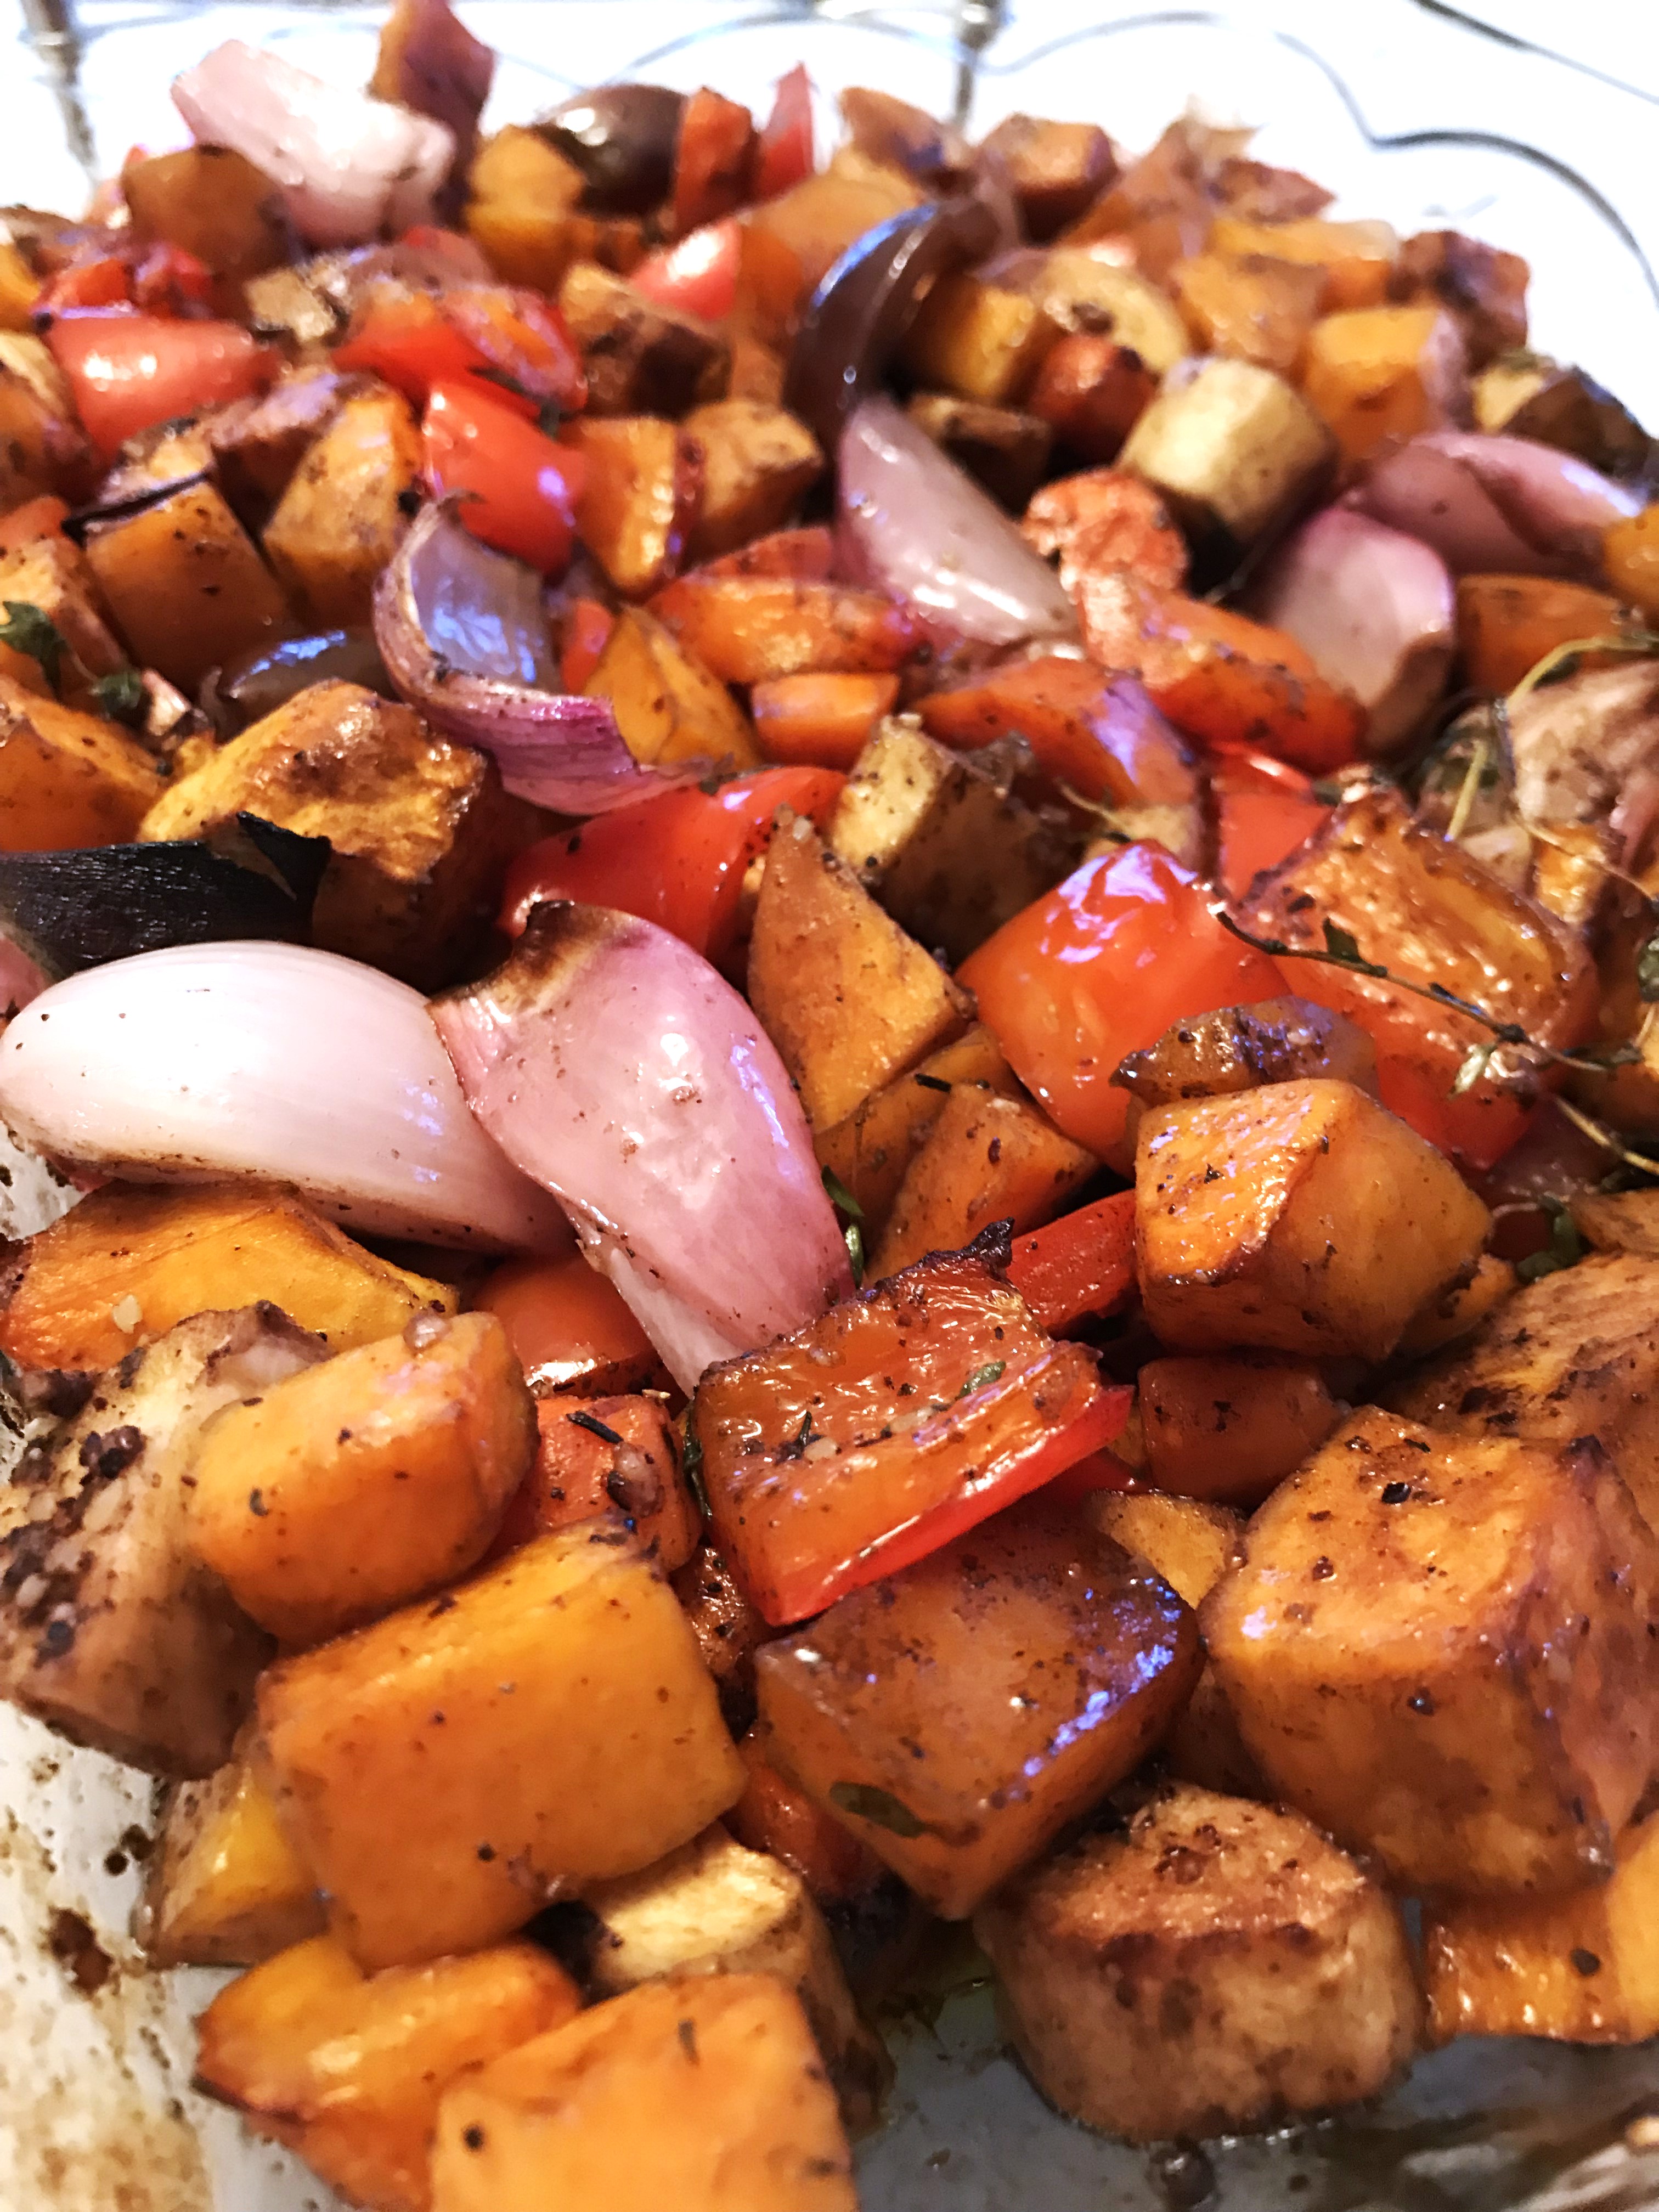
root vegetables, squash, side dish, Fall recipe
Oven Roasted Root Vegetables
VEGETABLES:
2 cups (10 ounces) kabocha squash, or butternut
2 cups (8.5 ounces) shallots
2 cups (8.3 ounces) red bell peppers
1¾ cups (8 ounces) sweet potato
1 cup (5.5 ounces) carrots
1 cup 4.5 ounces) parsnip

DRESSING:
½ cup Balsamic vinegar
¼ cup melted, unsalted butter
¼ cup olive oil
1 - 2 tablespoons fresh thyme leaves, or use a couple or three large whole sprigs 
1 teaspoon freshly ground black pepper
1 teaspoon salt
1½ teaspoons Zah’tar, optional
2 – 3 cloves garlic, minced

VEGETABLES: Preheat oven to 400 degrees. Grease or spray a 9 x 13-inch oven safe casserole and set aside. Peel and scoop out seeds from the squash and cut into ¾-inch cubes. Peel and cube the sweet potato, carrots and parsnip similarly. Cut ends from the shallots and slice into quarters, lengthwise. Clean seeds and membranes from the bell pepper and cut into squares. (Yes, the pepper is not a root vegetable, but it gives great flavor and color!)

DRESSING: Whisk together all the dressing ingredients and pour over the prepared vegetables in a bowl. Toss well to coat the vegetables evenly. Pour the vegetables with the dressing into the prepared casserole dish and bake for 40 to 50 minutes, or until the vegetables are easily pierced with the tip of a knife.


My passion is teaching people how to create a harmony of flavors with their cooking, and passing along my love and joy of food, both simple or exotic, plain or fancy. I continue my journey in ethnic and domestic cuisines, continuing my journey to explore diverse culinary experiences and hopefully to start you on a journey of your own. Join me also at A Harmony of Flavors on Facebook, and Pinterest.

Friday, February 28, 2014

Hash Browns, Hatch Chiles & Eggs

hash browns, potatoes, side dish, eggs
Hash Browns for One, with eggs
I have had a desire to create a "Hatch Chile Sauce" for a long while. This began many years ago, down in Tucson, where one of my sisters resides. Near her house is a park and Tea Garden called Tohono Chul. The park is lovely in the Southwest xeriscape way, showcasing the plants and critters local to the area. The "Tea Garden" or, as I see in the website is now called "Garden Bistro", showcases absolutely fantastic meals, but breakfast is the meal I have enjoyed most often. For years, as I would visit my sister, we would go there and I would order the same meal, every time. It was scrambled eggs, wrapped in corn tortillas, served with a pool of Hatch Chile Sauce and black beans, sour cream and some olives. A Southwest breakfast fit for a king. Everything in that meal caused me raptures. And then, they took it off the menu.

I realize that menus must change periodically. The locals would want something new I assume. But me - I just wished that breakfast was still on the menu. And this is what brings me to this blog. I have been dreaming of that Hatch Chile Sauce ever since. It had a little bit of bite, but was mild, overall. The southwest flavor was the thing that just enchanted me. The last time I was in Tucson, my husband and I drove back from there, via the Grand Canyon, the giant meteor crater (remember "Star Man"?), Hatch, New Mexico, Denver, CO, Aberdeen, SD, and on and on, till we got back to Florida, where we lived at the time. When passing through Hatch, we stopped and I bought a large string of Hatch chilies. I had not really used them; mainly I had them hanging as a decoration. My understanding is that "Hatch Chilies" are just chilies that grow in Hatch, NM, and not any particular variety. They could be hot chilies or mild. The string I have are relatively hot.

A few days ago I wanted some hash browns. My husband will absolutely not eat hash browns if the skins are on the potatoes. Skins are his big, fat no-no. Me - I love the skins, so if I make hash browns for myself, I leave the skins on. I made one little potato-worth of hash browns in a tiny skillet, just for me. I made 2 eggs in the same skillet to set on top of the potatoes and it was my supper. Here is the recipe:

Hash Browns for One

hash browns, potatoes, shredded,
Potato Mixture - In the pan


1 small potato, scrubbed
1 tablespoon olive oil 
3 scallions, chopped
3/4 teaspoon salt
a few grinds of pepper, optional
1 teaspoon cornstarch

hash browns, potatoes, cooking, side dish
One side cooked - Hash Browns served
Chop the scallions and set aside. Lay out a 2-layer thickness of paper toweling at least a foot long or more. Heat a small skillet over medium heat. With a large-holed grater, grate the little potato onto the paper toweling. Spread the shreds out relatively evenly, roll the paper toweling with the potato inside, then squeeze all along the roll to wring as much moisture from the potato shreds as possible. Unroll the paper toweling, dropping the potato shreds with the scallion. Add the salt, pepper if using, and the cornstarch. With fingers, toss the mixture to combine. Add the olive oil to the hot skillet and drop in the potatoes. Press them gently into an even circle. Cover with a lid, reduce heat to medium low and cook for about 4 minutes. Remove lid and set a spatula under one side of the potato cake. Using the pan's momentum, lift the pan and flip the potato cake with the spatula. Back on the heat, cover and cook for another 2 minutes. At this point the potatoes should be cooked through.
Delightful as my hash browns and eggs were, it got me thinking about that Hatch Chile Sauce again, and I started gazing fondly at my string of Hatch chiles and dreaming of how I could make a chile sauce that would be similar to the one at Tohono Chul. I have a large bag of dried Ancho peppers in my freezer. They are in 2 zip-top bags, as I do not use them often, and just want them as fresh as possible when I do want them. I wondered how many chilies it would require to get the sauce to be similar to the one at TC. Theirs was a relatively smooth sauce, a nice dusky orange in color. I figured there was no way to find out but by trying. This is what I did:

Hatch chilies, Ancho chilies, chili sauce
My Hatch Ancho Chile Sauce
Hatch Ancho Chile Sauce


Makes 1 pint

2 hot, dried chilies
1 large dried Ancho chili
Boiling water, for soaking 
1 large onion, or 2 small onions, coarsely chopped
2 tablespoons olive oil
1 teaspoon salt 
2 cloves garlic, coarse chopped
3 tablespoons double concentrated tomato paste (from a tube)
2 - 3 teaspoons fresh thyme leaves, rough-chopped
1 cup water, divided
1/2 teaspoon salt
1/2 teaspoon cider vinegar
pinch of dried epazote, optional
pinch of annatto powder, optional
1 tablespoon butter
 

In a small saucepan, heat some water to boiling. Reduce to lowest heat and add the 3 chilies. Allow them to steep in the water while starting the onions. Heat a medium skillet and add the olive oil. Add in the onions and teaspoon of salt; saute until translucent, stirring periodically. Add the garlic, thyme and tomato paste and stir to combine, cooking until the garlic is fragrant, about one minute. Add in half the water and stir.
 

Remove the chilies from the hot water. If you want the sauce to be very hot, leave in the seeds and membranes; otherwise, remove stems, seeds and membranes, coarsely chop and add to the skillet. Stir just to combine and pour into a blender or food processor. Process until the sauce is as smooth as you like and return the sauce to the skillet. Stir in the rest of the water, with the half teaspoon salt, vinegar and epazote and annatto, if using. These last may make no appreciable difference. The annato will give more depth of color. The epazote is a very southwest flavor and I have it in my cabinet! Add in the butter and stir until it melts and is well combined. Once cooled, store in the refrigerator for up to a week.
eggs, corn tortillas, hatch chilies, sauce, black beans
Corn Tortillas, Hash Browns for One, Eggs, Hatch Ancho Chile Sauce with a side of black beans, olives and sour cream

The sauce tasted really good, though it has been quite a few years since I last had it at Tohono Chul. This morning I made my Hash Browns for One, set them onto a couple of tortillas, topped that with two eggs, served myself some black beans and topped the eggs with the newly created Hatch Ancho Chile Sauce. It was a meal fit for a Southwest King - or Queen, as the case may be!


My passion is teaching people how to create a harmony of flavors with their cooking, and passing along my love and joy of food, both simple or exotic, plain or fancy. I continue my journey in ethnic and domestic cuisines, continuing my journey to explore diverse culinary experiences and hopefully to start you on a journey of your own. Join me also at A Harmony of Flavors on Facebook, and Pinterest.

Monday, February 24, 2014

A Small Sampling of Wines with Foods

The "Winefest Renaissance" benefiting the Boys and Girls Club of Aberdeen, will be held on April 12th this year. My husband has been busily recruiting people who will promote my part in the event, which, similarly to last year will be a selection of 6 different wines, and foods prepared specifically to pair with each wine. This is a wonderful way to show the differences in what a wine tastes like on its own, as opposed to tasting with a food, and most pertinently, if the food is made with only food items that pair well with that varietal or style. We also provide rating sheets to help people examine what exactly they like or dislike about any given wine, and why. These rating sheets are ones I have created, and are each person's to keep. Last year too many people seemed to be under the impression that we were "grading" them on how they rated. This was not the intent at all, but for each person to discover more about what they like or dislike in a wine, and why. There is no right or wrong to this process; only knowledge gained.

tarts, individual serving tarts, tasting, wine tasting
Chicken, Pear & Onion Tarts with Chevre Cream
appetizer, dip, spread, green peas, feta, mint
Green Pea, Feta & Mint Spread
In preparation, some of the people my husband has recruited are unfamiliar with rating wines. They will need to know what this is all about in order to drive people to my tables. Thus, as we did last year, we held a little mini wine tasting last Friday evening for a couple of young women, to teach them what is involved in rating a wine and learning what one can discover through this process. Then, I wanted to demonstrate the differences between tasting a wine on its own merits, and then tasting a wine paired appropriately with a food. I chose one white wine and one red, and made a couple of foods to taste with each. I chose a 2012 Pacific Rim Chenin Blanc with floral, pear and citrus flavors, and paired this wine with my Green Pea, Feta & Mint Spread on artisanal bread, and Chicken Pear and Onion Tartlets with Chevre Cream, a new creation of mine. The red wine was a 2003 Domaine du Vieux Telegraphe Chateauneuf du Pape. The Chateauneuf was served with Glazed Pecans with Garrigue Seasoning and Garrigue Seasoned Flank Steak with Cheddar and Arugula. I will touch on the red wine and its food pairings in my next blog. Today I will focus on the Chicken, Pear and Onion Tartlets recipe.

tart pastry, recipe, macadamia, cream cheese
Steps 1 & 2; cream cheese, butter, salt, 1/2 the flour and nuts
Tart pastry, macadamia nuts, cream cheese
Steps 3 & 4: second half of flour processed in
To date, I am able to pair wines with appropriate foods quite easily. With my Wine and Food Pairing Sheets, which I talked about in my blog of February 17th, I just run down the column under the particular wine style and select a few of the listed foods to create a recipe. I did this with the Chenin Blanc column, selecting chicken, pear, red bell pepper, macadamia nuts, cream cheese and Chevre cheese. First I wanted to make the tart shells with cream cheese and butter, and added ground macadamia nuts. As a matter of fact, though this was my plan, when I actually made the pastry I completely forgot about the nuts! I had already ground them and set them aside, but when it came time to add them to the food processor, I just forgot. No worries though; when I rolled out the pastry dough, I put the ground nuts onto the mostly rolled pastry, pressed them in, then finished rolling the pastry to the desired thickness. Voila! When I rolled the pastry, I used a 3-inch biscuit cutter and made little pastry rounds to fit into the mini tart pans. I wanted a bit of a lip to the pastry, so it would not slide down into the pans while blind baking, and I used a second, identical but empty tart pan to set on top. This kept the tart shells in place. If you do not have that many tart pans, you may have to work a bit harder to make the little shells stay put while baking, but it can be done.

Macadamia Cream Cheese Tart Pastry 


Makes about 35 mini tart shells or 1 9-inch tart crust


Tart Pastry, recipe, macadamia, cream cheese
Steps 5 & 6: adding liquids & forming dough

1 stick unsalted butter, cold in small cubes
1½ cups all-purpose flour, divided in 2 parts
½ teaspoon salt
1 cup macadamia nuts, pre-ground
½ of an 8-ounce package cream cheese
2 tablespoons cold water
2 tablespoons vodka
1 teaspoon vinegar

Into the bowl of a food processor, place half of the flour, the macadamia nuts, salt, butter and cream cheese. Pulse repeatedly until the mixture makes wet, large crumbs (Steps 1 & 2). Add in the rest of the flour and pulse to finer crumbs (Steps 3 & 4). In a small measure, combine the water, vodka and vinegar. Add to the food processor and pulse until the mixture forms a ball. Remove the dough from the processor, bring together to form a ball, flatten and wrap in plastic wrap or place in a zip-top bag (Steps5 & 6). Chill the dough thoroughly, at least 3 hours before using. The dough may be kept in the refrigerator for up to 3 days, or frozen for up to 2 months.

tart pastry, tart shells, blind baking
Steps 7 & 8: rolling, cutting, fitting in tart pans

Preheat oven to 375 degrees (350 on Convection). If making mini tarts, have tart pans handy. If the dough has been frozen, allow it to thaw in the refrigerator overnight, or set on the counter to thaw until workable. Flour the surface and Roll out the dough to ⅛-inch thickness, or less. Cut into 3-inch diameter rounds and fit the dough rounds into the mini tart tins, allowing a bit of a lip to overhang. Prick all over with a fork (Steps 7 & 8).

If you have extra identical size/shape tart tins, before baking carefully set one empty tart tin on top of the first. This will help in keeping the dough from slithering down into the well while baking. Bake the shells for 12 minutes. Remove the top tin and bake for another 3 – 5 minutes longer, or until golden. These can be kept in a tightly sealed container for 2 days ahead.

The filling was a combination of the other ingredients I chose, with some seasonings:

Chicken, Pear & Onion Filling

tart shells, chicken filling, pear, onion
Steps 9 & 10: baked shells and chicken filling

Makes about 35 mini tarts

1 recipe Macadamia Cream Cheese Tart Shells, baked
1 pre-cooked skinless, boneless chicken breast, chopped finely, (or rotisserie roasted chicken breast)
⅓ cup orange juice
1 – 2 tablespoons olive oil
2 large onions, quartered lengthwise and sliced ⅝-inch across
½ teaspoon salt
1 firm pear, cored and cut into tiny pieces
½ red bell pepper, chopped finely
2 teaspoons fresh thyme leaves, stripped from stems
Zest and juice of 1 lemon
A few grinds of white pepper
½ teaspoon anchovy paste

CHEVRE CREAM
1 (6-ounce) Chevre cheese, softened
Pinch salt
Zest of 1 lime
4 – 6 tablespoons heavy cream


appetizer, tarts, chicken, pear, onion fillings
Finished Tarts
Heat a large skillet over medium heat and add in the olive oil, swirl the pan, then add in the onions. Sprinkle on the ½ teaspoon salt. Cook the onions very slowly over low to medium-low heat for at least 45 to 55 minutes, stirring very often until caramelized and browned, not burnt. Add in the pear, red bell pepper, chicken, thyme, lemon zest and juice, pepper and anchovy paste. Continue cooking for another 15 minutes (Steps 9 & 10). This mixture can be made 1 to 2 days ahead and kept refrigerated until needed.
 

The anchovy paste makes the flavors more complex, but is not enough to taste. If not using anchovy paste, more salt may be needed. Taste the mixture and adjust accordingly.

pastry decorating tips
Open Star Tip 1M or 2110
In a small bowl, combine the Chevre, lime zest and 3 tablespoons of the cream. Mix with a hand mixer until smooth. This should be firm enough to stay in place, but loose enough to go through a piping bag. Add more cream as needed. Refrigerate until needed.
 
When ready to serve, pack the chicken & pear mixture tightly into the prepared tart shells. Top with the Chevre Cream, either using a piping bag with an open star tip (I used 1M), or using 2 spoons to place a dollop of the cream on top of each tart.


My passion is teaching people how to create a harmony of flavors with their cooking, and passing along my love and joy of food, both simple or exotic, plain or fancy. I continue my journey in ethnic and domestic cuisines, continuing my journey to explore diverse culinary experiences and hopefully to start you on a journey of your own. Join me also at A Harmony of Flavors on Facebook, and Pinterest.

Tuesday, February 18, 2014

Garrigue - A New Word and a New Spice Blend

I am trying to think up some appetizers for Friday; one is for a Chateauneuf du Pape (Vieux Telegraphe). In all the research while filling in those wine/food pairing sheets I made (see yesterday's blog), I came across the term “garrigue” as in a flavor or aroma and used in reference to Southern Rhone wines such as Chateauneuf or Bandol and others. We have had some bottles of Rhone called Domaine la Garrigue, Vacqueyras, but had not ever seen the word "garrigue" used as a flavor term, so I looked it up.

Turns out it is a term for the combined aromas of all the wild herbs and plants that grow in the chalky soil in that area, such as rosemary, sage, thyme, fennel, juniper, lavender, mint, lemon verbena, marjoram and others. One web site says: The reason we now hear this term in relationship to wine is that it refers to the flavorful, earthy, salty and pungent aromas and flavors often found in garrigue wines.
Garrigue Spices, pink peppercorns, lavender, pepper, sage, thyme
Garrigue Seasoning Spices

So today I got this idea. I was thinking of using a flank steak again, as it is easy to marinate and give all sorts of flavors, then broil and slice. I decided to pick from this palate of flavors and make a dry mix first, them blend that with a combination of balsamic and currants, a touch of honey and olive oil. I went shopping late this afternoon, so I just got the flank steak. I will probably wait till Thursday to open it and start the marinating. This is what I used:

Garrigue Seasoning Blend


Makes ½ cup

1½ tablespoons pink peppercorns (for their floral notes)
1 tablespoon each, dried: lavender flowers, black pepper, sage, thyme, fennel
15 juniper berries
1 tablespoon sea salt
 

All these spices went into a little spice grinder and ground fine. I will probably add in some dried lemon peel instead of lemon verbena (that I don’t have). I added the pink peppercorns to lend their floral notes, though they are not a part of the garrigue herbs. It is a pungent combination of ingredients and it smells really, REALLY good. I put the whole batch into a spice blender and made it into powder. This makes about 1/2 cup in all, so there is plenty left to use for other applications.

Meanwhile, as with everything I make now, I thought I should get some pictures of the herbs and spices, individually, and then mixed the whole batch together and took shots of the whole mélange. The pictures are so pretty I may just make this my wallpaper!
 

I am planning to marinate and broil the steak, slice it and serve it on little toasts with a couple pieces of arugula and a slice of sharp cheddar. Once I have used this and see how it goes, I will report here on the results.


My passion is teaching people how to create a harmony of flavors with their cooking, and passing along my love and joy of food, both simple or exotic, plain or fancy. I continue my journey in ethnic and domestic cuisines, continuing my journey to explore diverse culinary experiences and hopefully to start you on a journey of your own. Join me also at A Harmony of Flavors on Facebook, and Pinterest.

Disqus