Translate

Showing posts with label ginger. Show all posts

Sunday, September 4, 2022

Muffins so Very Delicious and Low Fat

Muffins are really good. Still, I generally prefer biscuits or scones. Once in a while, I see a recipe and think I might try it, then somehow, it just doesn't happen. 

A few nights back, I was looking through Facebook, and came on a recipe for Turmeric Carrot Muffins with Chia & Coconut, from VeganRicha. Just the title alone had me riveted, right there, because each ingredient in the title is one I use regularly, and love. If you are vegan, or must be gluten free, please check out her recipe by clicking on the link to her recipe, above.

muffins, breakfast, bread, carrot, turmeric, ginger, chia, coconut
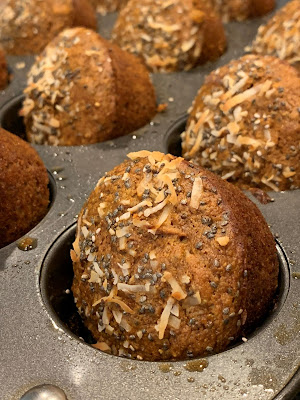
Turmeric Carrot Gingerbread Muffins

Okay, I looked up the recipe and saved it, and apparently my subconscious mind percolated and filtered through the recipe all night and into next day and finally I sat to think it through with my conscious mind. First off, I am not vegan, or vegetarian. Secondly, I don't have to be gluten free. So, I could make the recipe without those strictures, making it more a regular muffin recipe. I opted to use eggs. If milk was needed I would use it instead of a nut milk or coconut milk (I absolutely love coconut milk, but didn't want to open a can to use only a half cup!).

As it all turned out, I changed a lot of things. I truly didn't deviate much from the spirit of the recipe. I used almost everything in the recipe as stated, but changed amounts. 

  • I used a tiny bit more oil, but added a little snack cup of applesauce. 
    muffins, breakfast,  bread, ginger, turmeric, coconut, carrot, chia
    Turmeric Carrot Gingerbread Muffins


  • I opted to not use maple syrup, as it is expensive and I can never tell by taste that it is even in a recipe like this. I waffled between using honey or agave syrup, then switched to molasses. 
  • Mixed spices were in the original recipe, and cardamom, cinnamon and nutmeg mentioned as possibilities. I changed this to cardamom and ground ginger. 
  • I used a fair bit more fresh ginger than called for as well, as I truly love ginger. 
  • As the recipe called for coconut milk and lemon juice, I changed that to buttermilk, thereby eliminating the lemon. Lemon would bring acidity up to work with the baking soda, but buttermilk will as well.
  • I used more flour, as I was adding both eggs and applesauce, so it was 2 cups of flour total. I used 1 cup of a mixture of barley and buckwheat flour, and the other cup plain all-purpose flour. If preferred, use all purpose flour for the whole 2-cup amount, or substitute whole wheat or other whole grain flour for part of the whole amount. In another attempt, I may use a bit of wheat bran as a part of the two cups of "flour."
I will caution that this recipe needs initial prep work, in that there are so very many little amounts of things to be measured out. I got out all my little cups I use for measuring out sets of spices and things (I save the little 1/2-cup applesauce snack containers for this type of use) and set out all the individual dry ingredients (mixed spices, raisins, coconut, chia, sugar, and the freshly grated ginger). I set the finely grated carrots in a bowl (Richa's recipe calls for blending carrots and other wet ingredients together, but I see no need for extra dirty utensils).

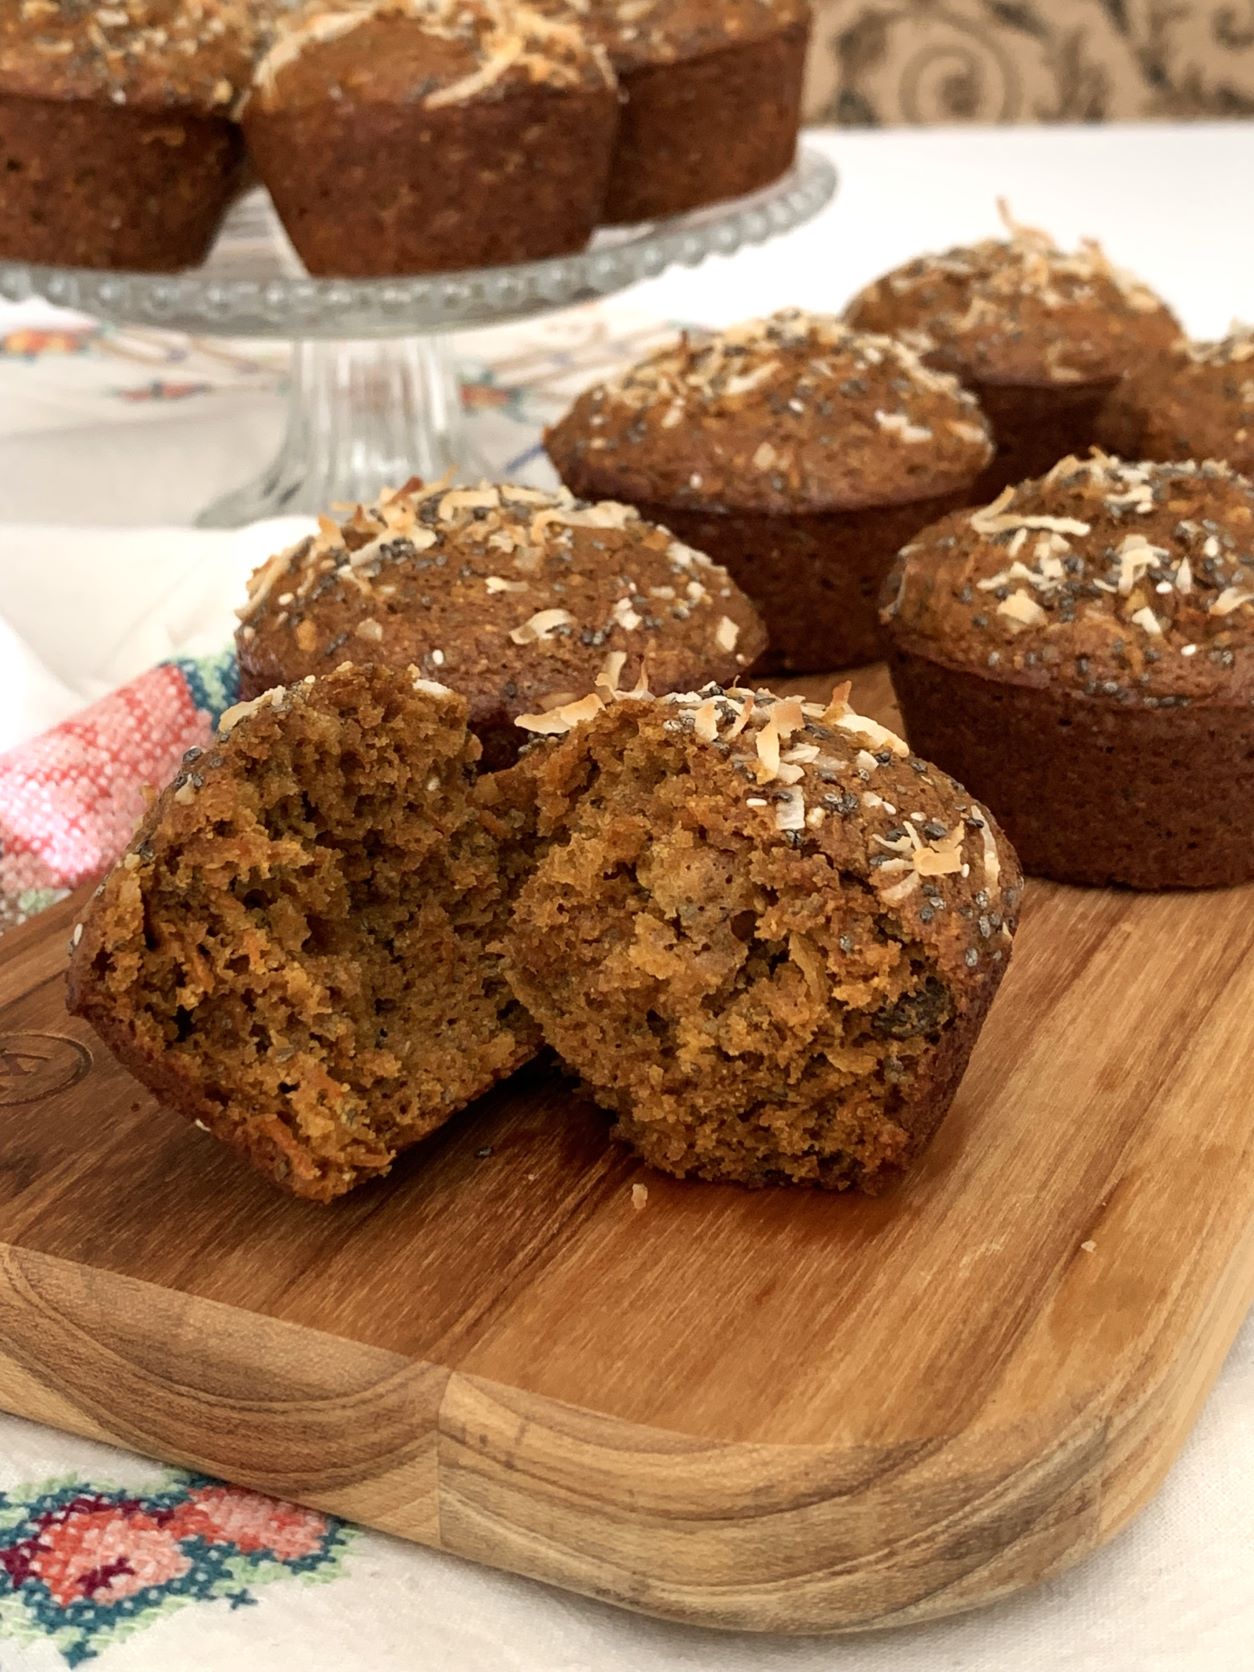
Ultimately, having used extra fresh ginger as well as adding dry ground ginger, along with the molasses, made these smell like the most heavenly gingerbread as they baked. All the extra textures and flavors, while not eclipsed completely, do give great texture. Carrots always make cakes moist, and that works here as well. These are exceptional muffins, and exceptionally good. Thank you Richa, for such an amazing combination!

Turmeric Carrot Gingerbread Muffins


Makes 12 muffins
muffins, breakfast, recipe, carrot, turmeric, coconut, chia, ginger
Turmeric Carrot Gingerbread Muffins


DRY INGREDIENTS:
1 cup all purpose flour (130 grams / 4.6 ounces)
1 cup whole grain or other flour, or simply use all purpose flour
1/2 teaspoon salt
2 teaspoons baking powder
1/2 teaspoon baking soda
3 tablespoons chia seed (32 grams / 1.15 ounce)
1/4 cup sugar or palm sugar (41 grams / 1.4 ounce)
1/4 cup raisins or chopped dates (34 grams / 1.2 ounce)
1/4 cup dry, unsweetened coconut shreds (18 grams / 0.65 ounce)

SPICES:
1 teaspoon ground cardamom seeds
1 teaspoon turmeric powder
1/2 teaspoon dry, ground ginger

WET INGREDIENTS:
2 carrots (155 grams / 5.25 ounces), finely grated
1/3 cup molasses
1/2 cup buttermilk
1/2 cup plain applesauce
2 tablespoons sunflower oil or coconut oil
1-inch fresh ginger, finely grated (15 grams / 0.55 ounce)
2 large eggs
--------
1 1/2 teaspoons each chia seed and shredded coconut for topping, optional

muffins, recipe, breakfast, carrots, chia seed, coconut, turmeric
Turmeric Carrot Gingerbread Muffins


Preheat oven to 400 degrees. Grease, or spray with cooking spray, the wells of a 12-well muffin tin. Set aside.

This is easiest to first measure out all the little ingredients and have at hand, "mise en place." A personal choice, but recommended.

In a medium mixing bowl, place all the dry ingredients together, plus the spices and stir together.

In another bowl, combine all the wet ingredients and stir well to combine, then pour all the wet into the dry ingredients and mix with a spoon or silicone spatula until no dry ingredients remain. Fill the muffin tin wells equally - the mixture is very generous. Separately, sprinkle some of the coconut for topping over each portion of batter, then repeat with chia seed.

Bake the muffins for 12 to 15 minutes. Test with a toothpick, as for cakes, at about 12 minutes. Remove from oven and set aside to cool for 10 minutes before trying to remove from the tins. (Muffin papers may be used, if preferred.) After 10 minutes, the muffins will release from the tins with very little coaxing. Set them aslant in the wells to continue cooling. Store at room temperature for up to 2 days, or freeze some in zip-top freezer bags for another time.


My passion is teaching people how to create a harmony of flavors with their cooking, and passing along my love and joy of food, both simple or exotic, plain or fancy. I continue my journey in ethnic and domestic cuisines, continuing my journey to explore diverse culinary experiences and hopefully to start you on a journey of your own. Join me also at A Harmony of Flavors on Facebook, and Pinterest.

Tuesday, October 6, 2020

Indian Food Updates and New Recipes

I am planning another Indian meal for two of my sisters next week. Some recipes are ones I have made before, like Kachche Gosht ki Biryani, and some I have made many, many times before, like Palak Paneer. I will be serving an array of chutneys, such as Dhania Poodina (Mint and Cilantro Chutney), Khajur Imli Chatni (Date Tamarind Chutney) and Am Chatni (Mango Chutney). One of my sisters in particular, really loves turning up the heat, so i returned to a recipe I had made in past, called Allam Pachadi, a Ginger Tamarind 'Pickle.'

ginger, tamarind, pickle, chutney, red chilies, curry leaves
Allam Pachadi / Ginger Tamarind Pickle

So, looking back over that recipe I used for Allam Pachadi, I thought maybe I should change some things. First off, while I like heat, sometimes it's just heat with no perceptible flavor, while your taste buds try to crawl away screaming, and hide. So I went back to look through the internet and some of my favorite Indian blogs, and others that are new to me, to see what other ingredients or methods might be used for this 'pickle.' I am putting that word in quotes, as these in no way resemble what we know here in the U.S as pickles. They fall more in the category of chutney, and some blog writers seem to use these words interchangeably for the same recipes. 

Looking through recipes then, I stopped at one that seemed to be very interesting, both for the change of ingredients as well as the method of making the pickle. In the first attempt for this pickle that I made some years ago, the main recipe I used, and made a few alterations to, called for 6 TABLESPOONS of Indian powdered chilis. Yikes! I reduced that to 2 tablespoons, substituting paprika for the remainder, but even so, it was too screaming hot for me to do anything but taste. When I encountered a recipe that sounded like it had promise, it was at the blog site called Hebbar's Kitchen. I used that recipe as a starting point, altering a few things as I went. I added more red chilies, more mustard seeds, more sugar. I added in some asafetida and turmeric. What I liked best was the method, which was simpler, IMHO.

As it turned out, while quite hot, this pickle is not as screaming hot as the last one, and it had flavors I could actually taste. I love it!


Allam Pachadi


Makes about 14 ounces
ginger, tamarind, pickle, chutney, garlic, red chilies
Allam Pachadi

Small ball of "seedless" tamarind
Boiling water for soaking the tamarind, about 3/4 cup
2 tablespoons cooking oil
1 1/2 tablespoons channa dal
1 tablespoon urad dal
1/2 teaspoon brown mustard seeds
1/4 teaspoon fenugreek seeds
1/4 teaspoon asafetida/hing
8 dried red Kashmiri chilies, broken
15 to 20 curry leaves, depending on size (mine were small)
2.5 ounces / 75 grams ginger root (about 4+ inches worth), peeled, in small chunks
4 cloves garlic, in small chunks
2 - 3 tablespoons jaggery or light brown sugar
1/4 teaspoon turmeric powder
1/4 teaspoon salt

TEMPERING:
1 tablespoon cooking oil
1/2 teaspoon brown mustard seeds
4 - 6 curry leaves
2 whole dried red Kashmiri chilies

Soak the tamarind in boiling hot water for at least 20 minutes to soften.

Heat 2 tablespoons of oil in a skillet and add in the channa and urad dal with the first half teaspoon mustard seeds and fenugreek seeds. Stir constantly until the dals just start to turn golden (not brown) and everything is fragrant. Add in the curry leaves, broken chilies (I did not use the seeds that fell out), the ginger and garlic. Cook this, stirring quickly until the garlic no longer smells raw, just a minute or two, then pour all the contents of the skillet into a blender container. Add in the turmeric powder and salt.

Separately, pass the softened tamarind through a sieve, pressing it through with the back of a spoon to get as much pulp as possible, using some of the soaking liquid to facilitate the process. Keep remaining soaking liquid aside. Add the tamarind pulp tot he blender, and blend the whole batch to a puree. You may need to add some of the reserved tamarind soaking liquid in order to puree the pickle. I had to use the better part of the entire 3/4 cup of liquid to blend the mixture down. 

Separately, heat the tablespoon of oil for tempering (meaning added flavors) and add in the mustard seeds, curry leaves and the two dried whole chilies and toast briefly. Pour this over top of the pickle when serving. Or, just stir it into the mixture. Store the pickle in a clean glass jar with a tight fitting lid and refrigerate up to 3 weeks. 

~~~~~~~~~~~~~~~~~~~~

Another thing I am working on for this dinner is dessert. I truly despise deep frying, so I am not making Gulab Jamun, and I do not want to make more paneer, as it has become nearly impossible, what with the ultra-pasteurization that has become so rampant, so I am not making Rasgulla, which now that I went to paste in a link, I realize I never posted my recipe! 

Milk, sweets, dessert, saffron
Rasgulla, recipe soon

At one of my Indian dinners I had made Gajar Burfi, a carrot fudge. This may sound strange, carrots in fudge, but after living in Guatemala as a young wife, and finding how many veggies went into desserts, I was no longer fazed when reading about carrots in fudge; it is absolutely delicious! So I thought I would return to that. But then again, I can never leave well enough alone, so I went looking at some Indian sweets recipes I had looked at before but never made. I opted then, to make an assortment of small batches of sweets, so we can all pick and choose. My first new recipe is called Badam Katli (Thin Almond Fudge). Since I used the recipe mostly as I found it, from Swasthi's Recipes, at Indianhealthyrecipes.com, while I will post what I did here, please read her recipe, made the long way.

My one error was cooking the mixture just slightly too long, as it really dried out. Good, in a way, because it is certainly not sticky, but I could absolutely not get the nuts to stay adhered to the top. I used almonds, since it is almond fudge, instead of the pistachios used in Swasthi's recipe.

As most of these sweets are festival or holy day treats, they are often made truly special by gilding with edible silver or gold foil. I happened to have silver foil on hand, so I used it.

almond meal, sugar syrup, Indian sweets
Badam Katli / Thin Almond Fudge

My understanding of the word 'katli' is that it means thin, as with rolling out the fudge into a thin layer. The meanings of different words gets mightily confusing at times, and I have seen this recipe, nearly identical, called Badam Burfi or Badam Halwa.

Trying to tease out the meanings and differences, Wikipedia had some things to say that made sense. I know these will not apply in every instance, but in this case, I'm just going with it. Any 'Burfi" (sometimes "Barfi" but I prefer the other spelling for obvious reasons) type fudge candy is made using milk, whether Khoya, plain milk, condensed milk or powdered milk (and sometimes all of them). My Carrot Burfi recipe in its original form, would use khoya or a cooked down milk, which can take literally hours and hours of stirring. Not gonna happen! I used powdered milk and it came together in minutes. Yum!

Halwa, on the other hand does not use milk, but generally uses a sugar syrup to create the mixture, but without milk.

Similarly with any recipe for laddoo/laddu/ladoo, whether deep fried or made quick cooked or simply ingredients mixed together (similarly to Bourbon Balls at Christmas time), are always made into round balls. Laddoo made with cooked semolina is on my list of things to try for this upcoming dinner as well.

On to the recipe. Simple and delicious. I doubled the recipe as it stood on Swasthi's site, but I did not quite double the amount of sugar. They are delightful.


Badam Katli
Indian sweets, almond meal, sugar syrup
Badam Katli or Thin Almond Fudge


Made about 20 - 25 pieces

2 cups fine almond meal with no brown skins
1 cup + 2 tablespoons white granulated sugar
1/2 teaspoon ground cardamom
1/2 cup water
-----
Almond slices or pistachio pieces for decoration

In a medium skillet over high heat, place the sugar and water and bring to boil. Stir, and once the sugar is all dissolved, add in all the almond meal and cardamom. Lower heat and while mixing, it is best to take the skillet off the heat. Mix well with a wooden spoon or silicone spatula until all the almond meal is evenly distributed, with no lumps. Return the pan to the heat and keep it at a simmer, because the mixture, as it boils, sends up geysers akin to watching lava burst from a volcano and with similar effect. You WILL get burned! Stir, quickly and constantly, to keep this from occurring. It will take about 6 to 8 minutes of stirring before the mixture comes together as one mass. Pour out onto a greased plat until it cools slightly.

Do not cool too long or you will not be able to knead the mixture. Knead the mixture until it comes together smoothly (I used a silicone spatula to do this, lifting, turning and forming over and over until smooth - it was just too hot!)), then place the mixture onto a piece of parchment and roll with a rolling pin to flatten. Place sliced almonds or pistachio pieces on top and roll again to make the nuts set evenly with the top of the fudge, which should be no more than 1/4-inch thick. With a sharp knife, trim edges neatly, then cut into about 1-inch wide strips. Separate the strips and cut into small squares or into diamond shapes. Store in a tightly sealed container. 


My passion is teaching people how to create a harmony of flavors with their cooking, and passing along my love and joy of food, both simple or exotic, plain or fancy. I continue my journey in ethnic and domestic cuisines, continuing my journey to explore diverse culinary experiences and hopefully to start you on a journey of your own. Join me also at A Harmony of Flavors on Facebook, and Pinterest.

Tuesday, February 16, 2016

Litle Chinese Dumplings or Pot Stickers

I was watching an episode of The Chew last week, with guest Danielle Chang. Until watching that show, I had never heard of or seen Danielle Chang, so I wasn't initially paying close attention. So when she started making Chinese Dumplings, I missed the beginning of what was happening. However, once the ingredients started going together, I got interested. The mixture sounded good, and the dumplings didn't seem too difficult to make. 

I went online to get the recipe. 

Chinese Dumplings, Pot-Stickers, Jiaozi
Chinese Dumplings or Pot-Stickers
And then, I searched around for other recipes for Chinese Dumplings, only to find that the type Chang made, called Jiaozi or Jiao Zi, had pretty much the same mixture for the filling no matter where I looked. Hmmm. There were some few places that used no meat and there were a couple that used shrimp or a combination of pork and shrimp. Other slight variations used the addition of one or all of water chestnuts, egg white, cornstarch and/or dried (reconstituted) shiitake mushrooms. 

While the main ingredients of Napa cabbage, ground pork, scallions, garlic chives, garlic, ginger, soy sauce and Asian sesame oil were in just about every recipe I saw, only the amounts varied. On reading Chang's recipe from The Chew website, I immediately felt that more ginger and Asian sesame oil would suit me better, and the fact I had no access to garlic chives meant I would use more regular garlic and more scallions. So I had already changed the recipe in my mind before ever sitting to create something of my own. I felt that the addition of some shiitake mushrooms and an egg white, along with a little dash of cornstarch and some water chestnuts would be nice. Ultimately, I am not sure that the water chestnuts made any real difference. I was expecting a tiny crunch, but never noticed that while eating, so I might just skip that ingredient next time.

There most certainly will be a next time! These things were fabulous. The recipe turned out 85 dumplings. We ate nearly 60 of them between the two of us. Admittedly, that was way too much. I would estimate that anywhere from 12 to 30 per person as a meal, depending on appetite, would constitute a meal. They were just so good, and we just kept marveling at how delicious they were - that we just couldn't stop. 
Chinese recipe, Dumplings, Pot-Stickers
Chinese Dumplings or Pot-Stickers

These particular dumplings can be made steamed, whether in a bamboo steamer or other steamer. They can be set into a pan with water and cooked or if the cooking continues until the water is gone and they are allowed to brown on the bottom, they are called pot stickers. I chose the simplest method, making pot stickers. I think these would be great made in any of these methods, so it's entirely up to the individual.

These dumplings can be made in advance and frozen. Just dust them with cornstarch, most particularly on the bottoms, and set them on a baking sheet. Freeze them for about 1 hour, then place them into a zip-top baggie and freeze until needed. To cook them just use them straight from the freezer. They are small, so it doesn't take much more time to cook them through, even from a frozen state.

Folding these dumplings might put some people off. I know I was rather dreading that part. The ideal is to find round dumpling wrappers (wheat based, and about 3-inches in diameter). It is important to press the water-moistened edges together very tightly so as to keep them from coming apart while cooking. That is probably the biggest and most important issue. The second most important is not to over-fill the dumplings because they can burst open while cooking. About 2 teaspoons of the filling is all that is needed per dumpling.

Once I finished with creating the first few dumplings, I made a test dumpling to see how they would hold up while cooking, and if they held together, and also how the dipping sauce would taste with them.  These came out great on all counts, so I proceeded with making the rest of them. I fully intended to eat some and freeze some, but that did not happen, so I will be making more soon.

One thing to note: for some reason, it is almost impossible to find plain ground pork in our town. Most ground pork meat comes already pre-seasoned with sausage seasonings. This is a bit frustrating, to be sure. What I usually do instead is cut some pork meat into small cubes and food process / pulse it until relatively fine, but not pasty. The food processor does not like to chop up fat, so my "ground" pork is always 100% lean. If you are using regular store-bought ground pork, with a high fat content, your outcome might be different from mine, though I cannot say in what way. 

Another thing I want to make clear: I used Kikkoman "light" soy sauce, with less sodium. I don't know if it was for this reason, or because I had added more ingredients, but I felt the mixture needed more saltiness, so I added 2 teaspoons to the original 3 teaspoons of less-sodium soy sauce for a total of 5 teaspoons. This is the only salt added to the recipe, so I felt it was not bad. Neither of us experienced any swelling after that meal, so I feel this worked well. If using regular soy sauce, you might need less. To determine how your mixture is seasoned, after mixing the ingredients together, use a couple of teaspoons to make a tiny patty and cook this little patty through in a fry pan. Once cooked, taste for flavor and season accordingly. Keep in mind that the sauce for dipping is also soy sauce based.


Chinese Dumplings or Pot-Stickers


Makes about 85
Folded Dumplings, , how to fold
Folded Dumplings, ready to steam


1 pound round wheat dumpling wrappers

FILLING:
½ pound ground pork
½ pound Napa Cabbage
8 scallions, or more if desired
3 cloves garlic, minced finely
1 tablespoon grated fresh ginger
5 dried shiitake mushrooms
1 small can (8-ounce / 5 ounce dry weight) water chestnuts, minced
1 egg white
1 teaspoon cornstarch
2 teaspoons Asian dark sesame oil
5 tablespoons low-sodium soy sauce

DIPPING SAUCE:
¼ cup soy sauce
2 tablespoons sake (rice wine), optional
2 tablespoons rice wine vinegar
1 teaspoon thinly sliced scallions
1 small clove garlic, minced finely
1 teaspoon honey
1 - 2 teaspoons Asian dark sesame oil
1 teaspoon grated fresh ginger
a few grinds of fresh black peppercorns

FILLING: Set the dried shiitake mushrooms in a bowl of hot water and cover. Set aside to reconstitute for about 1/2 hour, while preparing the remaining ingredients.

Coarsely chop the Napa cabbage, then place it (in batches, if necessary) into the food processor and pulse until quite fine but not pureed. Pour the chopped cabbage into a kitchen towel over a strainer. Finish pulsing the remaining cabbage (if in batches) and add this to the towel over the strainer. Gather up the towel and squeeze the liquid from the cabbage until relatively dry. Turn out the cabbage into a large mixing bowl.

If making your own "ground" pork, cut the 1/2 pound of fat-free pork into cubes. Place in food processor and process until it starts to form a ball. Do not over-process. Pour this into the bowl with the dry cabbage.

Finely chop the scallions, including the green parts and add to the bowl with the minced garlic, grated ginger and water chestnuts. Remove the shiitake mushrooms from their soaking water and squeeze them to remove excess water. Cut off and discard stems which are very tough, then mince the mushroom caps. Add to the bowl.

In a small bowl, whisk the egg white until it is no longer gelatinous, but slightly frothy. Add in the cornstarch and whisk to blend. Add the dark sesame oil and low sodium soy sauce and whisk briefly to combine. Pour this mixture into the bowl. Stir with a spoon or mix with hands to distribute all the ingredients well. Use 2 teaspoons of filling per dumpling.

How to, pleating, wonton wrappers, potstickers
How to pleat potstickers

To form dumplings, have the dumpling or won ton wrappers handy. Have a small bowl of water nearby. Take one dumpling wrapper in one hand. Place the 2 teaspoons of filling into the center. Moisten the edges of the wrapper with the water. Bring two opposite sides up together and pinch one end tightly to seal. Pleat only the side facing you, pushing the flap to pleat, pinch shut, another pleat, pinch shut and so on, until you reach the end of the dumpling. See illustration, left. Ensure that all the edges are completely sealed shut. Set the dumpling aside and continue with remaining mixture and wrappers. At this point the dumplings may be frozen for later or steamed for immediate use.

TO STEAM: Heat a skillet with a large surface. Add in a little oil, so the dumplings will not stick. Add in about 1 cup of water and bring to boil. Lower heat and cover tightly. Allow them to cook until the liquid is all evaporated, 12 to 15 minutes. Once water is evaporated, the bottoms will be slightly browned. If water has not completely evaporated, remove lid and allow liquid to escape.

DIPPING SAUCE: Mix all the ingredients together in a small bowl and serve in small bowls for individual dipping.


My passion is teaching people how to create a harmony of flavors with their cooking, and passing along my love and joy of food, both simple or exotic, plain or fancy. I continue my journey in ethnic and domestic cuisines, continuing my journey to explore diverse culinary experiences and hopefully to start you on a journey of your own. Join me also at A Harmony of Flavors on Facebook, and Pinterest.

Thursday, October 1, 2015

Making Peace with Kimchi

Kimchi. 

I hear this word everywhere these days. For many years now I had heard of kimchi, but had resisted any urge to try it. I had heard of the ingredients, varying depending on who the information originated from, and the fiery spiciness of the condiment. None of these things called my attention in the least. 

Kimchi, condiment, fermenting
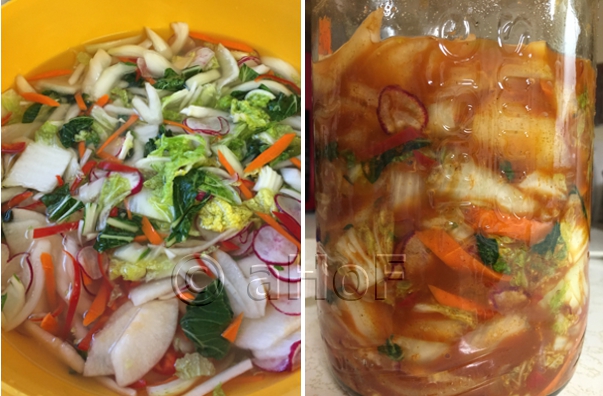
Kimchi

Some years ago, I finally gave in and bought a bottle at the local grocery. I took one taste and threw out the entire bottle. I hated the flavors completely and utterly. I could not even get far enough past the flavor to object to the spiciness. And so it has been that even though I started fermenting foods 3½ months ago now, with many absolutely wonderful (and some not so wonderful) results, I had no interest at all in even attempting kimchi.

Enter my son and his wife. They came to visit just a couple of weeks past and were talking of eating kimchi very often. Since we have so very many food tastes in common, I wondered at this. Even my son, who was particularly picky as a child, talked of eating kimchi. While still wondering what in heaven they were finding in this taste profile to love, I also thought maybe it was time to give this condiment a try on my own. 

There are as many ways to make kimchi and as many ingredient variations as there are kimchi makers, it appears. I was at the Farmer's Market last week and mentioned to someone that I was going to attempt making kimchi and another woman commented that I "Absolutely had to include turnips. Without turnips, it isn't kimchi", she said. Since turnips were absolutely not one of the ingredients I had planned to use, I nodded and continued on my way.  

Ingredients

Kimchi, condiment, fermenting
Kimchi
Meanwhile, I went online to research what ingredients are actually in kimchi and also what process do they use to make it. Ingredients as I can understand them seem to be based on cabbage and Daikon or other Korean radish. After that it is open for interpretation. Ingredients can be regular cabbage or Napa cabbage,  bok choy, Daikon, regular radishes, carrot, onion, Asian Pear, regular pear, apple, garlic, ginger and hot chili peppers. Obviously I missed turnips in there! And who knows how many other ingredients might be used? 

Spices

One of the main spices, and which gives the finished product its red-orange color is Korean chili powder. I do not have Korean chili powder, but someplace online someone suggested mixing up ½ cup of sweet paprika with 2 tablespoons of cayenne to approximate this. In the end, since I was making far less kimchi, I whittled down this mix to 2 tablespoons of paprika and ½ tablespoon of cayenne. On further consideration, while I like spicy foods, I don't care to truly go crazy with hot chilies, so I lessened the actual cayenne to only 1 teaspoon. Even with that much I had trepidation. Today, once the kimchi was finished and I gave it a taste, I love the amount of spice just fine. The heat is noticeable, but very tolerable. I probably could have added the extra ½ teaspoon, and probably will next time. And there will be a next time!

The other spices are ginger and garlic. I know I added them into the ingredient possibilities list, but the amounts are also very scalable, according to taste. Some swear by adding in one little teaspoon of sugar, and others add a lot more. Others add no sugar at all. The last ingredient is some kind of fish sauce. Here I balked.

I do not keep fish sauce, as it is not an ingredient I use. My husband does not like fish, and if something smells fishy in the least, there is no hope. So I just don't bother to use it. I do have anchovy paste in the fridge, and which I use - sparingly - in things like Caesar Salad. Since the kimchi ingredients are first brined in a heavily salted mix, I hesitated to use salty anchovy paste, even though I am sure hubby will never be eating my kimchi! I live in hope . . . Someone online mentioned using kelp powder mixed with water. I had no kelp powder, but did have dried kombu seaweed, so I pulverized a piece of this and used it. I could not tell it was in there at all, so who knows?

Fermentation

There seem to be two schools of thought here. Some, and possibly more traditionally, first brine the vegetables, anywhere from a few hours to overnight. Some brine only the cabbage portion of the ingredients, and some brine all the vegetables at once. Once the brining is done, the vegetables are rinsed well and the spice mixture is massaged in, and then the mixture is packed in jars or crocks to ferment. I opted for this second method of pre-brining all the vegetables together.

Others eschew this pre-brine step and just add salt with the spice mixture and massage all the veg together well and pack in jars or crocks to ferment. 

Vegetables, brine, ferment, kimchi
Vegetables in brine and then packed into jar to ferment

Cutting Vegetables

In this matter, as with everything else, there are varying ideas on how this should be performed. Some say to cut the Napa cabbage into quarters, lengthwise, brine and then after thorough rinsing, each layer of leaf is lifted and the spice paste is layered between. Others shred all the vegetables. Others said they preferred to have all the vegetables cut in different ways, making the finished product visually interesting. I opted for this last variation. 

Kimchi, condiment, Korean, spicy
Kimchi

Kimchi

Makes 1½ tightly packed quarts

1 (1-pound) head Napa Cabbage (12 cups, prepped)
1 small piece Daikon radish (1-cup, shredded)
3 - 4 stalks bok choy (3½ cups, sliced)
9 - 10 small red radishes (1½ cups, thinly sliced)
1 carrot (1 cup, julienned / matchsticks)
1 onion (1½ cups, thin wedges)
1 Asian pear (3 cups, thin wedges)
2 Fresno chilies (½ cup, thin slices, mainly for color)

BRINE:
1½ quarts (6 cups) filtered water
6 tablespoons coarse sea salt

PASTE:
1 tablespoon minced garlic
1 tablespoon minced fresh ginger root
1 teaspoon sugar
2 tablespoons paprika
1½ teaspoons cayenne
2 tablespoons filtered water
1 teaspoon Kombu or Kelp powder

Prepare all the vegetables as desired. I cut the Napa cabbage across into 1½-inch sections. The Daikon was shredded on a larger-holed shredder. The bok choy I sliced at angles into about ¼-inch thick slices, the carrot was julienned, the radishes sliced very thinly on a mandoline. The Asian pear I cut into quarters, cored and then sliced in long wedges about ⅛-inch thick. The onion was cut in narrow wedges and the Fresno chilies were sliced across into thin rings. 

Combine the brine ingredients, stirring until the salt is completely dissolved. With all the vegetables in a large bowl, pour the brine over top and cover the container. Allow to brine for anywhere from 4 to 24 hours. I stopped at 8 hours, whereupon the vegetables were very salty. Set the vegetables into a large colander and rinse very well, immersing in clean water 2 or 3 times. Taste the vegetables. If they are too salty for your taste, rinse some more. Once well rinsed, set the vegetables in the colander to drain for about 1 hour.

Make the paste by first combining the garlic and ginger and pounding slightly to make a paste. Add in the sugar, paprika, cayenne, kelp or kombu powder and then add in about 2 tablespoons of water, to make a paste. Once the vegetables are well drained, set them into the large bowl and massage this paste mixture well into the vegetables, ensuring that the paste covers all the vegetables. Pack this mixture tightly into a large jar with at least ⅓ of the jar free as head-space. Alternatively, pack this into a large crock. Press down well, to release more juices from the vegetables, and keeping the vegetables submerged, allow this mixture to ferment covered for 3 to 5 days, or until the mixture tastes good to you.

In actuality, the vegetables tasted absolutely splendid just after mixing in the paste mixture! I intended to leave this to ferment for 5 days, and then forgot yesterday, so it ended up going for 6 days. When I tasted it today, I absolutely love the flavors, love how it looks, love the textures. There is nothing I do not love about this kimchi. I hope you will attempt this mixture yourselves.


My passion is teaching people how to create a harmony of flavors with their cooking, and passing along my love and joy of food, both simple or exotic, plain or fancy. I continue my journey in ethnic and domestic cuisines, continuing my journey to explore diverse culinary experiences and hopefully to start you on a journey of your own. Join me also at A Harmony of Flavors on Facebook, and Pinterest.
Sunday, September 13, 2015

Kalbi Flank Steak and Wild Rice Corn Salad

My son and his wife were visiting over the course of 2 weekends and whenever they are around, we tend to try new recipes and revisit old ones. We all love food and we all love wine and between us we really have an excellent time at table. They brought some wines with them that were discovered earlier this year on a trip out to the Seattle area. The winery, tiny and kept that way on purpose is called Harbinger, and the 3 wines they brought were all wonderful. My favorite of all was a Tempranillo blend caller "Bolero", and not far behind was a Sangiovese called "Rapture". Another really good one was a Cabernet Franc.
 
Wild Rice, Corn, Salad, side dish
Wild Rice and Corn Salad

On the last evening they were here, I had marinated a flank steak with Kalbi type flavorings. The first time I ever heard of Kalbi was on a cruise ship. On the first afternoon onboard there is generally a sort of cafeteria style lineup of foods, and I tried some thin strips of meat that were just out of this world. I raved so much that the chef gave me the recipe. Unfortunately, trying to pare down a recipe for thousands into a recipe for home use obviously didn't translate well, and when I tried it at home it fell so far short that I never tried it again. That was a long time ago.

Many, many years have passed since then, and I have become far more confident of concocting my own recipes. When recently I was reading a little blurb on a restaurant somewhere that served Kalbi, made using some sort of short ribs, I was first just struck by the name. I know the thin strips of meat I ate onboard the cruise ship were not short ribs by anyone's definition, but the flavors certainly came up in the "Asian" category. I revisited the recipe.

I added some things and took out others and generally just made it my own way, using a flank steak. Flank Steak can be a really tough cup of meat if overcooked. It can also be difficult to eat unless it is sliced across the grain. There is little to no fat on a flank steak, so long cooking will only dry the meat further. I have made many many flank steaks through the years, and I truly love them. They play well with marinades and are quick to broil or grill. A match made in heaven for a Kalbi flavored marinade.

Kalbi Flank Steak

Kalbi Flank Steak, grilling, marinade
Kalbi Flank Steak
Serves 4 to 6

1½ to 2 pounds flank steak

MARINADE:
⅓ cup soy sauce
⅓ cup brown sugar
¼ cup Mirin (or use Sake)
½ onion, finely chopped
4 cloves garlic, minced
2 tablespoons dark (toasted) sesame oil
1 - 2 teaspoons finely ground black pepper
1 walnut-sized piece of fresh ginger, grated or minced

Combine all the marinade ingredients in a large flat container or a gallon sized zip-top bag. Place the flank steak into the marinade, coating it on both sides. Press out all the air if using a bag. Marinate the steak for at least 6 hours or preferably overnight, turning occasionally so the meat is flavored on both sides equally.

Preheat a broiler or a grill. Grill or broil the meat over high heat for about 6 minutes per side. It should stay pink in the center, or it tends to toughen. Once grilled to desired doneness, set the meat on a platter and cover with foil for a few minutes before slicing. Slice the meat across the grain either very thinly, or in less than 1-inch thick slices to serve. 

Racking my brain for something new to make as a side dish for this meal, I finally settled on something with a wild rice base. This came about because as it happened, I had about 3 cups of cooked wild rice in the fridge. It had set on the burner for too long and had all burst open. none of those pretty black strands for this dish! There was nothing wrong with the flavors though, and adding in a lot of other flavors would only be absorbed the better for its burst open state. As I sat thinking about what I had and what I would like to add, I came up with this recipe, and as it happens it was truly inspired. We were practically inhaling it! It made a perfect side for the Kalbi Flank Steak.
Wild Rice, Corn Salad, side dish
Wild Rice and Corn Salad

I used 3 cups of cooked wild rice and 1 cup of white rice, as these were the amounts I had already existing in the fridge. The quantities can be changed, reversed, or used half and half, but about 4 cups of rice will be needed in total. You will need to cook about ¾ cup wild rice in about 2½ to 3 cups of water with 1 teaspoon salt for nearly an hour, covered. For 1 cup of white rice, cook ½ cup white rice with ½ teaspoon salt and 1 cup water, covered, for 15 minutes.

Wild Rice and Corn Salad

Serves 6 to 8
Wild Rice, Corn Salad, side dish
Wild Rice and Corn Salad

3 cups cooked wild rice (¾ cup dry wild rice)
1 cup cooked white rice (½ cup dry white rice)
2 tablespoons pine nuts or cashews
½ green bell pepper, chopped (about ¾ cup)
½ red bell pepper, chopped (about ¾ cup)
3 - 4 scallions, chopped
2 ears fresh corn, shucked
2 to 3 ounces crumbled Feta cheese
chopped cilantro to taste

DRESSING:
3 tablespoons olive oil
1 - 2 tablespoons lemon juice
1 teaspoon crushed Sichuan / Szechuan peppercorns, optional
1 teaspoon Asian Dark Sesame Oil

½ teaspoon salt, or more, if needed

Have the rice cooked and cooled well ahead of time, or the day before.

Heat a grill or broiler and grill the corn until there is some char on about ⅓ to ½ of the kernels, turning often to grill evenly.

Place both the cooled rices in a large bowl and fluff the rice to separate the grains. Add in the pine nuts, green and red pepper, scallions and Feta. Cut the kernels from both of the cobs of corn and add them in. Whisk together the dressing ingredients in a small bowl and pour over the rice mixture and toss well. Add in cilantro and mix well. I used at least 1/2 cup of cilantro. If this is not to your taste, alter the amount as needed. Taste the mixture and add in the salt if needed.


My passion is teaching people how to create a harmony of flavors with their cooking, and passing along my love and joy of food, both simple or exotic, plain or fancy. I continue my journey in ethnic and domestic cuisines, continuing my journey to explore diverse culinary experiences and hopefully to start you on a journey of your own. Join me also at A Harmony of Flavors on Facebook, and Pinterest.

Thursday, February 27, 2014

Versatile Squash in a Cake

I have stopped using canned pumpkin for my pumpkin pies since some years ago. One of the first times I was so happy with the substitution of actual squash for the canned stuff was when I found a Jarradale squash here locally. It was the prettiest squash, all slate green-blue colored, but when I baked it and cut it open, it was also the brightest yellow-orange color inside that I had ever seen to date. The following year, I found a Jamboree squash; this one looked the same on the outside, but unfortunately it was all moldy on the inside. A complete waste of the hour of baking. Oh well, I guess that can happen.

squash, squash varieties, blue squash
Jarradale Squash
The other thing about the Jarradale squash that I loved so much was the density of the meat. It was a small squash, by comparison to most pumpkins. The meat was so dense though, that it doubled the weight of a pumpkin that was twice its size. When I baked and scooped the meat out, I put it into the food processor in batches and got the smoothest, most beautiful puree I could ever have wished. It also made the most delicious "pumpkin pies" that Thanksgiving. When I could not duplicate that with the Jamboree squash the next year, it really was too bad, and since it was rather last minute, I had to go back to cans for that year's pies. 

This past year, I couldn't find a Jarradale or Jamboree squash at all, so I did some online research on squash and which ones were best for making pie puree. I found a very interesting comparison one woman did, trying out 9 different squash, and making 9 separate pumpkin pies. Her results? Good old butternut squash was, for her, the tastiest, with best pie color. Okay, I can always find butternut squash. I bought one large squash, baked, pureed and came up with enough for 4 pies. I was amazed. Butternut, also, is very dense and smooth. I knew this empirically, but had never paid much attention with an eye to a pie.

I guess by now, you may be wondering what all this reflection on squash varieties is all about. I was getting something out of the freezer the other day and noticed a couple of zip-top baggies of pureed squash tucked in back. This made me think I should make something with it, which led to thinking about what pumpkin recipes I might have. I decided to try Mom Rawstern's recipe for Pumpkin Bars.

pumpkin, cake, squash
Pumpkin Cake
For starters, I changed all her spices, though I kept the basic recipe amounts. I substituted ¾ cup of the sugar with coconut sugar, and ⅓ of the butter called for with coconut oil. I have no idea where her recipe came from, or if she made it up. It was scribbled on a little sheet of paper and stapled into her one cookbook, with absolutely no instructions. This was not uncommon. Most of her recipes assumed one knew how to make a thing, because most of the time there were no instructions, or only a minimalistic "bake at 350." Imagine my surprise then, when I baked this "bar" recipe in a 9 x 13-inch pan and it baked up high as a regular cake! It also took terribly long to bake, far longer than most cakes in that size pan, at 50 minutes. It seemed it would never test done, as I timed it another 5 minutes, then another 5 minutes, and so on. There is nothing at all wrong with the flavor. I am very pleased with my spice additions. It just came out as a cake, rather than bars. This is the recipe:
Pumpkin, Cake, squash
Pumpkin Cake

Pumpkin Cake


One 13 x 9-inch cake

1 stick unsalted butter
¼ cup coconut oil (or use all butter)
2 cups sugar (or substitute part coconut sugar)
4 eggs
2 cups squash/pumpkin puree
2 tablespoons Bourbon, or 2 teaspoons vanilla
2 cups all-purpose flour
2 teaspoons baking powder
2 teaspoons cinnamon
2 teaspoons dried orange zest
1 teaspoon ginger
½ teaspoon salt
¼ teaspoon cloves
¼ teaspoon allspice

Preheat oven to 350 degrees (325 on Convection). Grease a 9 x 13-inch pan and set aside. In a stand mixer, cream together the butter & coconut oil with the sugar(s), until light. Add the eggs, one at a time, beating until combined before adding the next. Beat in the squash puree. Sift or whisk together the dry ingredients, and then add in three batches to the creamed mixture, beating gently just until combined. Pour batter into the prepared pan and bake for 45 - 55 minutes, or until a toothpick inserted in the center comes out clean.

While the cake was baking, I wanted to try out something new for a frosting. First, I wanted to incorporate sour cream into the mix, but had never done this before. I wanted a little tang in the flavor. Another thing I wanted to try was making glazed nuts (walnuts or pecans) and then placing them in a food processor to pulverize, then add these to the frosting. I started with the nuts.

Burnt Sugar Glazed Nuts

Burnt Sugar Glazed Pecans


⅓ cup granulated sugar
1 cup walnuts or pecans 
(I used walnuts this time; photo shows pecans from last week's wine tasting)
 

Cut a large sheet of waxed paper and place onto a counter top. Place the sugar and nuts into a medium sized, preferable non-stick skillet over medium heat. Cook, stirring constantly with a silicone spatula or wooden spoon, until the sugar melts and caramelizes to deep amber and completely coats the nuts. Once the nuts reach that point, stir for a few seconds more, then remove from the hot burner and continue stirring for 1 minute. Turn the nuts out onto the waxed paper and with 2 forks, separate the nuts. Allow them to cool completely.

***These glazed nuts are wonderful to eat on their own. They are great in salads. You could sprinkle them with cinnamon or other spices, as desired. Do not attempt to add any liquid to the hot nuts or it could be explosive. The sugar has reached extreme temperatures to melt. For my purposes, once cooled, I poured all the caramelized nuts into the food processor with 1 cup of confectioners' sugar and processed until very fine. This way, they would also be wonderful sprinkled over ice cream.


Caramel Walnut Frosting


Caramel, Walnuts, Frosting
Caramel Walnut Frosting
½ stick (4 tablespoons) unsalted butter, at room temperature
4 ounces cream cheese, at room temperature
½ cup sour cream
4 cups confectioners' sugar
The whole recipe for pulverized glazed nuts
1 teaspoon bourbon, or vanilla
½ teaspoon salt (preferably medium ground sea salt)

In a heavy duty stand mixer, beat the room temperature butter and cream cheese for 6 - 8 minutes, until very pale and fluffy. NOTE: This will not work properly unless the ingredients are room temperature. Add the sour cream and beat to combine. Add the 4 cups confectioners' sugar and starting on lowest speed for one minute, combining the dry into the creamed mixture. Increase speed to medium high and beat for another 6 to 8 minutes. Pour in the nut mixture, salt and flavoring and beat to just combine. Spread this over the cake once the cake has completely cooled.

The cake and the frosting were delicious. Neither turned out exactly as I had anticipated, but the flavors are excellent in both, and the icing goes excellently with the cake. I would like to try this again, using pecans in the frosting (I had none yesterday when I started this). I might also try using less sugar in the cake. It seemed a little too much, though the flavor is wonderful.


My passion is teaching people how to create a harmony of flavors with their cooking, and passing along my love and joy of food, both simple or exotic, plain or fancy. I continue my journey in ethnic and domestic cuisines, continuing my journey to explore diverse culinary experiences and hopefully to start you on a journey of your own. Join me also at A Harmony of Flavors on Facebook, and Pinterest.
Thursday, July 25, 2013

Making Dehydrator Jams for Anyone

I have been getting back to using my dehydrator lately. I used it nearly daily when I was on the RAW food diet a few years back, and it was fun to find how many wonderfully tasty foods could be made this way. Not that one must be on a raw diet to benefit from a good dehydrator, as the subject of this blog will go to show.

Jam, strawberries, dehydrator
Strawberry Dehydrator Jam,
with cinnamon and cardamom
My last blog was about my Champagne Pink Currant Dehydrator Jam, and how it turned out so tart. This is not the case with regular sweet fruits. I had made Strawberry Dehydrator Jam in the past, and it was completely, deliciously sweet and fresh-fruity. I love strawberry jam, though I am not crazy about fresh strawberries. I am sure I have a lot of people wondering what is wrong with me, right now. 'What? How could you not love strawberries?!" I get that a lot, but it's true. I like the fresh flavor of this jam, or the juices mixed with cream on a strawberry shortcake - but not the berries. Oh well. But raspberries, I love. Just about any way at all. I love them fresh, as jam, as a sauce. I have even eaten them fresh with chunks of Gorgonzola cheese. I had never tried making them into dehydrator jam. Yesterday I did.

Making Dehydrator Jams


It is really extremely simple to make dehydrator jam. You need to start early in the day, to give it enough time to get thick, and it is helpful to be available to stir it every couple of hours or so, to expose the more wet parts underneath. As far as "work" goes, there really isn't any to speak of. I have added in some spices to the strawberry jam that make it a bit exotic, but if you aren't ready for the spices, they can certainly be left out.

In essence, you will need approximately a pound of fruit per cup of finished jam. This is just a rough estimate. It will depend on how long it is dried, for starters. Yesterday I used 1 pound of strawberries for the strawberry jam which yielded about 1¼ cups. I had a 12 ounce package of beautiful fresh raspberries for the raspberry jam, yielding 1 cup exactly.

How To


I cleaned the fruit and hulled the strawberries. Since I use my food processor, I cut the fruit into like-sized chunks to process evenly. Even this is not necessary; a potato masher would work just as well to crush the fruit. To the pound of strawberries I added 1/2 cup of honey. The honey could be replaced with stevia or other sweetener of choice. Originally I was making this for a RAW diet, and honey just tasted good in this jam. I could have used Agave Syrup also.

To the crushed strawberries and honey I added freshly grated orange zest from one orange, a half-inch chunk of true cinnamon, crushed and between 1/4  - 1/2 teaspoon of crushed green cardamom seeds. I used my mortar and pestle to grind the cinnamon and cardamom. A pinch of salt is the only other ingredient. Mix and place into a wide, low container that will give a large surface area. This will speed the drying process. All of this presupposes that one owns a good dehydrator with various shelves, allowing for the use of such a large container. I own an Excalibur dehydrator with something like 9 shelves, so it is easy to remove most of them and set in the containers of fruit. Yesterday I made both strawberry and raspberry jams, so halfway up I had one extra shelf so they were nicely separated and had plenty of ventilation.

Jam, dehydrator, raspberry
Raspberry Dehydrator Jam, with crystallized ginger

For my raspberry jam I used the 12 ounces of raspberries, crushed with 1/3 cup of honey and a teaspoon of crystallized ginger, minced fine. Some or all the seeds may be strained out if they are a bother. I left all the seeds in, but realize that once removing seeds, the total finished volume will be less.

Once the fruit mixtures are in their containers and in the dehydrator at about 110 - 115 degrees, they should be stirred every couple of hours or so, in order to help with even drying. The tops will get quite dry and sticky, where underneath it is still very liquid. In all, it took 8 - 9 hours for the raspberry jam to get to a good consistency, and the strawberry was not done for about 5 hours more.

Using the Jam, RAW Diet or not


Obviously, when I was on the RAW food diet, bread was not on the menu. Not regular yeast bread, anyway. I made some little flat unleavened "breads", more like soft crackers. Still, the jam was a really great addition to the diet. Another way it could be used on a RAW diet is as a sauce over RAW Ice Cream. I have made a couple of raw ice creams lately and they are really marvelous.
breakfast foods
Currently, however, I am not following a RAW diet, and this morning I had two pieces of toasted No-Knead Bread, one with some of the Strawberry Dehydrator Jam and one with some Raspberry Dehydrator Jam. Just for kicks I also had a couple strips of bacon (photo at right). Yum! Just because the jam is made raw, does not preclude using it on any diet. It is just a little healthier jam than most, and flexible enough to make using alternate sweeteners so it could be used on most dietary regimens. The jams are naturally gluten-free and dairy free. They are vegetarian and without using honey to sweeten, can be vegan also.

I hope some of you may try these. Having a really good dehydrator does help, of course. My next trials will be with peaches or blueberries. 


My passion is teaching people how to create a harmony of flavors with their cooking, and passing along my love and joy of food, both simple or exotic, plain or fancy. I continue my journey in ethnic and domestic cuisines, continuing my journey to explore diverse culinary experiences and hopefully to start you on a journey of your own. Join me also at A Harmony of Flavors on Facebook, and Pinterest.

Disqus