Translate

Friday, August 2, 2013

Things I am working on lately

My last post was about dehydrator Jam, and I left with the idea that the next jam I would make this way would be blueberry. It didn't happen that way. The very next day my sister-in-law arrived for dinner bearing gifts - a bag of delectably ripe peaches. They couldn't have been any more perfectly ripe, so they needed eating or working with, pronto. Since I was on a roll with the dehydrator jams, I decided on that.

Spices, Peaches, Dehydrator Jam
Spiced Peach Dehydrator Jam
I love fresh peaches. Along with mangoes and raspberries, those are my favorite of fruits. I set about getting the peaches prepped for the dehydrator early the next morning. Most of the jams I have made have started with about 3 cups of the prepped fruit. I add in honey, and sometimes some spices. Sherri, my sister-in-law, loves peaches more than almost any other fruit, so I thought to make some of this jam for her to try. The thing is, she is a purist. She does not like tainting the fruit with other flavors. I, on the other hand, just love to add in spices. So although the batch of fruit was enough for what would usually be just one container, this time I divided it into two containers of about 1½ cups each, and adding spices to one of the containers. I added in cinnamon and cardamom and a little bit of vinegar. The other container was just the peaches and honey.

While both taste wonderful, I really liked the spiced batch better. Peaches really lend themselves to spices and even vinegar. My next project, tomorrow morning, is to make Spiced Pickled Peaches. I don't have any precise measures in mind yet. That will have to be another post. I believe I must have tasted Spiced Pickled Peaches before at some time in my life, because I can almost taste them in my mind. I can't wait to try this out.

Another thing I want to make is Blondies or blond "brownies". I have never made them, although I have eaten them. I am not terribly over fond of chocolate, though brownies are good once in a great while. Watching The CHEW the other day, Carla Hall made Blondies, and it just looked so good. Okay, so I went back to my recipe for brownies, to see if I could come up with a suitable combination of ingredients to make Blondies out of that as a basis. Carla also made a Praline Sauce, and I want to make that also. As a matter of fact, I think I might just go and do that right now, so we can have them for dessert tonight!  This will have to be continued later!


7:40 PM

I ran downstairs earlier (from my "office" in one of the upstairs bedrooms) and made my recipes for Blondies and the Praline Sauce. Both turned out fantastically well. The Blondies are chewy and rich and the Praline Sauce has just the right consistency and makes the perfect counterpoint. Too bad I had no vanilla ice cream, but this was surely enough on its own. I do not believe I would change a single thing about either of these recipes. 

Blondies with Macadamia Nuts and White Chocolate

Blondies, Pecan Praline Sauce
Blondies with Pecan Praline Sauce

⅔ cup unsalted butter
2 cups light brown sugar, packed
4 eggs
2 teaspoons vanilla extract
1¾ cups all-purpose flour
1 teaspoon baking powder
1 teaspoon salt
1 cup nuts of choice: macadamia, pecans, walnuts
1 cup white chocolate chips, optional


Heat oven to 350 (or Convect to 325). In a medium-large saucepan, melt the butter. Remove pan from heat and add the brown sugar and whisk until smooth and creamy. Add eggs, one at a time, whisking until completely incorporated before adding the next. Add in the vanilla to combine. Separately, combine the flour, baking powder and salt, then add this to the saucepan and mix until almost combined. Add in the nuts and white chocolate chips if using and mix well. Pour into a greased 13 x 9-inch pan and bake for about 40 minutes, or until a toothpick inserted in the center comes out just barely moist. To maintain proper chewiness, do not over bake.

Pecan Praline Sauce


2 tablespoons butter
Pecan Praline Sauce, Blondies
Pecan Praline Sauce over Blondies

1 cup light brown sugar, whisked together with-
1 tablespoon cornstarch
2 tablespoons dark corn syrup
¾ cup evaporated milk
½ teaspoon salt
1 teaspoon vanilla
1 teaspoon cinnamon
¼ teaspoon Pralines & Cream flavoring, optional
2 tablespoons unsalted butter, cut into ½-inch cubes


In a 4 cup saucepan melt the first 2 tablespoons butter. Add in the next 4 ingredients and whisk together well. Bring to a boil, lower heat slightly and allow to maintain a soft boil for about 6 to 8 minutes. Remove from heat and add in the salt, vanilla, cinnamon and Pralines & Cream flavoring, if using. Whisk in and then add the second 2 tablespoons of butter, 2 small cubes at a time, whisking until completely absorbed before adding in the next 2 cubes, and so on. Allow to cool slightly. Pour over Blondies to serve. Also great over ice cream.


My passion is teaching people how to create a harmony of flavors with their cooking, and passing along my love and joy of food, both simple or exotic, plain or fancy. I continue my journey in ethnic and domestic cuisines, continuing my journey to explore diverse culinary experiences and hopefully to start you on a journey of your own. Join me also at A Harmony of Flavors on Facebook, and Pinterest.

Thursday, July 25, 2013

Making Dehydrator Jams for Anyone

I have been getting back to using my dehydrator lately. I used it nearly daily when I was on the RAW food diet a few years back, and it was fun to find how many wonderfully tasty foods could be made this way. Not that one must be on a raw diet to benefit from a good dehydrator, as the subject of this blog will go to show.

Jam, strawberries, dehydrator
Strawberry Dehydrator Jam,
with cinnamon and cardamom
My last blog was about my Champagne Pink Currant Dehydrator Jam, and how it turned out so tart. This is not the case with regular sweet fruits. I had made Strawberry Dehydrator Jam in the past, and it was completely, deliciously sweet and fresh-fruity. I love strawberry jam, though I am not crazy about fresh strawberries. I am sure I have a lot of people wondering what is wrong with me, right now. 'What? How could you not love strawberries?!" I get that a lot, but it's true. I like the fresh flavor of this jam, or the juices mixed with cream on a strawberry shortcake - but not the berries. Oh well. But raspberries, I love. Just about any way at all. I love them fresh, as jam, as a sauce. I have even eaten them fresh with chunks of Gorgonzola cheese. I had never tried making them into dehydrator jam. Yesterday I did.

Making Dehydrator Jams


It is really extremely simple to make dehydrator jam. You need to start early in the day, to give it enough time to get thick, and it is helpful to be available to stir it every couple of hours or so, to expose the more wet parts underneath. As far as "work" goes, there really isn't any to speak of. I have added in some spices to the strawberry jam that make it a bit exotic, but if you aren't ready for the spices, they can certainly be left out.

In essence, you will need approximately a pound of fruit per cup of finished jam. This is just a rough estimate. It will depend on how long it is dried, for starters. Yesterday I used 1 pound of strawberries for the strawberry jam which yielded about 1¼ cups. I had a 12 ounce package of beautiful fresh raspberries for the raspberry jam, yielding 1 cup exactly.

How To


I cleaned the fruit and hulled the strawberries. Since I use my food processor, I cut the fruit into like-sized chunks to process evenly. Even this is not necessary; a potato masher would work just as well to crush the fruit. To the pound of strawberries I added 1/2 cup of honey. The honey could be replaced with stevia or other sweetener of choice. Originally I was making this for a RAW diet, and honey just tasted good in this jam. I could have used Agave Syrup also.

To the crushed strawberries and honey I added freshly grated orange zest from one orange, a half-inch chunk of true cinnamon, crushed and between 1/4  - 1/2 teaspoon of crushed green cardamom seeds. I used my mortar and pestle to grind the cinnamon and cardamom. A pinch of salt is the only other ingredient. Mix and place into a wide, low container that will give a large surface area. This will speed the drying process. All of this presupposes that one owns a good dehydrator with various shelves, allowing for the use of such a large container. I own an Excalibur dehydrator with something like 9 shelves, so it is easy to remove most of them and set in the containers of fruit. Yesterday I made both strawberry and raspberry jams, so halfway up I had one extra shelf so they were nicely separated and had plenty of ventilation.

Jam, dehydrator, raspberry
Raspberry Dehydrator Jam, with crystallized ginger

For my raspberry jam I used the 12 ounces of raspberries, crushed with 1/3 cup of honey and a teaspoon of crystallized ginger, minced fine. Some or all the seeds may be strained out if they are a bother. I left all the seeds in, but realize that once removing seeds, the total finished volume will be less.

Once the fruit mixtures are in their containers and in the dehydrator at about 110 - 115 degrees, they should be stirred every couple of hours or so, in order to help with even drying. The tops will get quite dry and sticky, where underneath it is still very liquid. In all, it took 8 - 9 hours for the raspberry jam to get to a good consistency, and the strawberry was not done for about 5 hours more.

Using the Jam, RAW Diet or not


Obviously, when I was on the RAW food diet, bread was not on the menu. Not regular yeast bread, anyway. I made some little flat unleavened "breads", more like soft crackers. Still, the jam was a really great addition to the diet. Another way it could be used on a RAW diet is as a sauce over RAW Ice Cream. I have made a couple of raw ice creams lately and they are really marvelous.
breakfast foods
Currently, however, I am not following a RAW diet, and this morning I had two pieces of toasted No-Knead Bread, one with some of the Strawberry Dehydrator Jam and one with some Raspberry Dehydrator Jam. Just for kicks I also had a couple strips of bacon (photo at right). Yum! Just because the jam is made raw, does not preclude using it on any diet. It is just a little healthier jam than most, and flexible enough to make using alternate sweeteners so it could be used on most dietary regimens. The jams are naturally gluten-free and dairy free. They are vegetarian and without using honey to sweeten, can be vegan also.

I hope some of you may try these. Having a really good dehydrator does help, of course. My next trials will be with peaches or blueberries. 


My passion is teaching people how to create a harmony of flavors with their cooking, and passing along my love and joy of food, both simple or exotic, plain or fancy. I continue my journey in ethnic and domestic cuisines, continuing my journey to explore diverse culinary experiences and hopefully to start you on a journey of your own. Join me also at A Harmony of Flavors on Facebook, and Pinterest.

Tuesday, July 23, 2013

Experiments with Currants; Good and Bad

fruit, currants
'Champagne Pink' Currants
I guess one never really knows how a thing will turn out. Even basing one recipe on another that was a success does not guarantee perfection. So here's what happened. A friend asked me to come with her to an older gentleman's house to pick vegetables from his wonderful garden. Turns out, he loves the planting and care of the garden, which is huge, but is not as interested in trying to eat all that produce. The garden is a veritable paradise; everything laid out in perfect rows, or caged to grow upwards. Everything perfectly weeded. Neat and tidy and just bursting at the seams with great produce. Aside from just vegetables, there are fruit trees and other wonderful bushes, like the "Champagne Pink" Currants.

My friend raved about the currants, and how pretty they are and how good to eat, but she said she didn't have the time to devote to picking the little things. So, when we arrived, I took it upon myself to pick currants. They are so pretty it almost hurts. They look like little pearls; palest pink. They hang on the plant like little strands of pearls, too. Just the prettiest sight ever. I spent the entire time there picking these little gems, ending up with 3½ pounds of them.
currants, jam, dehydrator
'Champagne Pink' Currant Dehydrator Jam
Okay, so what to do with them? I have made jams and jellies in past. I have also made freezer jam with Sure Jell, and made dehydrator jam when I was on a RAW food diet. Since it is wise to watch the sugar intake, I decided to take the route of making dehydrator jam. I hadn't used the dehydrator in some time, so I dusted it off and got to work. I cleaned all those tiny fruits, and in batches I whirled them in the food processor. Unfortunately the seeds are large, for such tiny fruit, and quite a distraction, so I decided to pass them through a strainer. I added in some honey for sweetness, since the fruit is tart, with the belief (wrongly) that once the fruit dehydrated down, the honey sweetness would become more apparent. Long and short, I ended up with 6 cups of puree with honey. I divided it up between two old Tupperware marinating containers; low and flat. I set them in the dehydrator at 5 PM, and let it run through the night. I pulled the containers out to stir them at 10 PM, and then again at 5 AM. They were still a little too runny at 5 AM, so I left them until about 8. I ended up with a grand total of 2½ cups worth.

beverage, refreshing beverage, currants
'Champagne Pink' Currant-ade
I tasted my wonderful pink jam. OMG. It was so mouth-puckeringly tart. No way would most people use this. And then I thought what a terrible waste of so much work picking all that fruit, to end up with a jam that was inedible. Well, not totally, because I like it okay. But it is really tart. So, how could I use it? The first thought was that since it was a very tart medium with only a little sweetness, it might make a lemonade type drink. This was a wonderful bit of serendipity. It did taste quite like a lemonade in its tartness. I used 3 tablespoons of the jam in a 12 ounce glass of water. It had a lot of pulp that wanted to settle, but it was wonderful and refreshing.

My next thought was to make some kind of ice cream like dessert. I made a RAW Cashew Currant "Ice Cream", in quotes because it used no cream or dairy. I had soaked the cashews ahead and put them in the food processor with ½ cup of the currant jam and more honey. I added a little vanilla and ginger and processed the mixture till fine and chilled it. I put it into my old DAK Gelatissimo and oh, it was good.  Okay, 2 for 2.
cashew, currant, frozen dessert
Cashew Currant Ice Cream

pork chops, dinner, currant jamThat night I made pork chops. I have often made pork chops by setting them in a cold fry pan and heating up to medium high. I season the top with salt and pepper and once browned underneath, flip them over and season that side, adding in chopped garlic, either rosemary or sage and some Marion blackberry jam. The pork chops are just divine this way. So on the basis of that idea, I made my pork chops and used 1 tablespoon of my dehydrator currant jam on each pork chop, with sage as the herb of choice. The pork chops were just wonderful. The fruity flavor came through brightly. The whole combination was just perfect. So far that is all I have done with my too tart Champagne Pink Currant Dehydrator Jam. My next thought is to try making a frozen granita. I will see where that takes me.


My passion is teaching people how to create a harmony of flavors with their cooking, and passing along my love and joy of food, both simple or exotic, plain or fancy. I continue my journey in ethnic and domestic cuisines, continuing my journey to explore diverse culinary experiences and hopefully to start you on a journey of your own. Join me also at A Harmony of Flavors on Facebook, and Pinterest.

Tuesday, July 16, 2013

A Wedding Cake, Birthday Cake and other great food

cake, cake decoration
The Wedding Cake
Hello again. Just me, the stranger. I have so many intentions to get back into the swing and write blog posts more often and somehow it just doesn't happen.

Aside from still unpacking things in the new house, I had a wedding cake to make for July 6th. My niece-in-law got married in a small town here. Their cake was a dummy of Styrofoam, except for the tiny top tier, but the cake was immense and I nearly gave up with trying to get the fondant onto the largest tier, at 24 inches square! I am not a large bakery with huge equipment for rolling fondant. As it was, there was only one doorway wide enough to get the finished cake, on its board, out of our house. I am glad it occurred to me to measure before decorating! The only door it could be taken through was the front door, so trying to decorate in the kitchen would have been tragic, with no way to get it out of that room. That said, I still had to do the rolling of fondant in the kitchen and then cart it to the dining room to put in place. This made that huge tier even more difficult to finalize.

cake, cake decorating
Birthday Cake
After two attempts to carry the fondant in one piece - all 12 pounds of it - with it oozing down, tearing and breaking, I nearly gave up, in tears. I thought to try it out in 4 separate quarters, and this did finally work out, but just barely. The places where the fondant joined curled as they dried and separated a bit. I put scroll work over that part and carried on. After that huge tier, the others, even the next one at 17 inches, were a breeze.

We got the cake out to the car with no mishaps, despite Mercury being retrograde, and up to the hall and in place the day before, minus the top tier. It was in the 90s here and the hall had no air conditioning! I decided it would be best not to put the real cake in that heat until it had to be.

The wedding was just beautiful, the bride and groom just gorgeous. The bride's dress was so very pretty and unlike any I had seen. The heat was the one unfortunate factor, though it didn't ruin anyone's day. And the following day, with all my cake decorating equipment still all over the place, I made a birthday cake for a dear friend here. After that mammoth cake, this simple, round, 8-inch cake was so simple as to be laughable. It did turn out as I wanted, and she was happy, so all is well. And now, for the first time in two months, all the cake stuff is put away, out of sight. Whew!

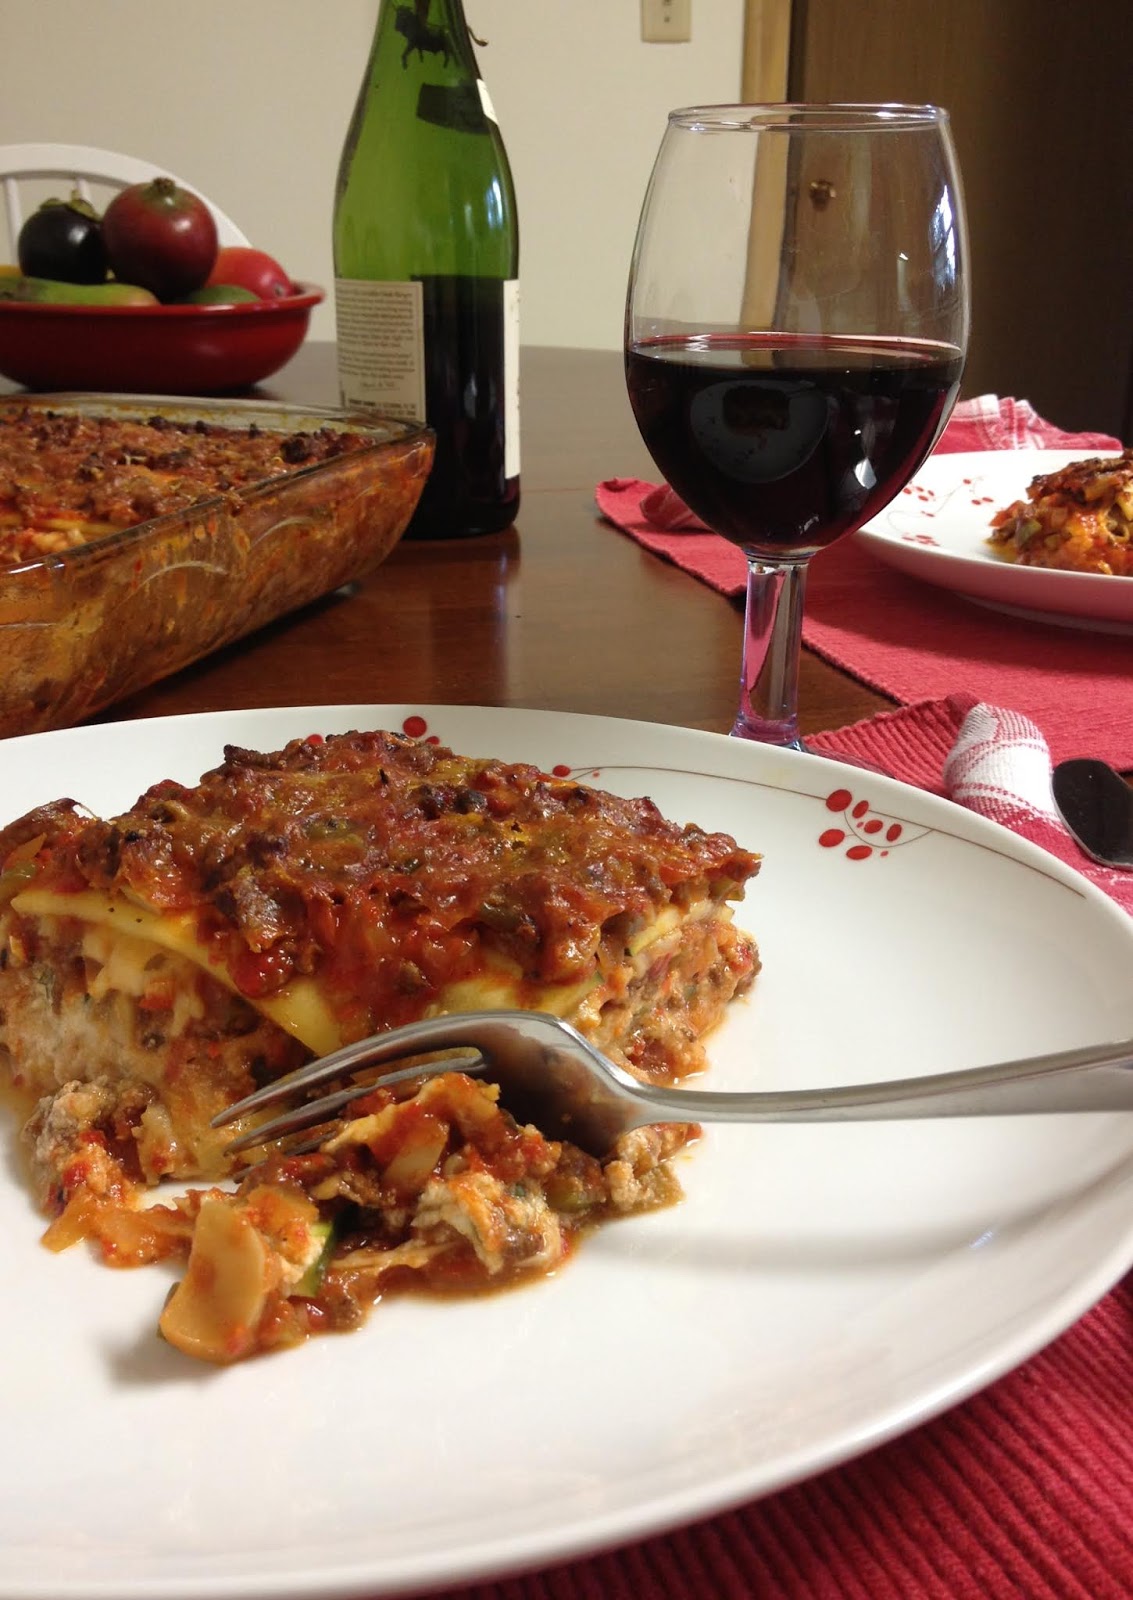
I have been sort of gradually getting back into making new recipes. Recently I made some cookies that were just so tasty. They were Cinnamon Apple Oatmeal Cookies. They could probably use a little tweaking of the recipe, but they were absolutely delicious, cinnamon-y and chewy. I got some zucchini at the local Farmer's Market with the intention of making Zucchini Lasagna. I've made it many times before, but never written down my recipe.

Zucchini Lasagna

Zucchini Lasagna, alternate lasagna,
Zucchini Lasagna

Makes one 9 x 13-inch pan; 8 servings

Per serving: 425 calories, 13 carbs, 1 g. fiber

15 ounces part skim ricotta
¼ cup fresh oregano leaves, finely chopped (or 1 teaspoon dried)
¼ cup fresh basil, finely chopped (or 1 teaspoon dried)

1 teaspoon salt
½ teaspoon freshly ground black pepper
1½ ounces freshly grated Parmesan, divided
2 (12 ounce) jars roasted red bell pepper, drained & pureed
2 cups spaghetti sauce
1 teaspoon cornstarch
2 teaspoons olive oil
1 pound lean hamburger
1 medium onion, chopped, about 1½ cups
1 bell pepper, chopped, about 1 - 1½ cups
2 - 3 cloves garlic, minced
½ teaspoon dried oregano
½ teaspoon dried basil
1 teaspoon salt
1 can (13.25 ounces) mushroom stems and pieces, drained
8 ounces part skim mozzarella, shredded
2 - 4 small to medium zucchini

In a medium bowl, combine the first 5 ingredients and half the grated Parmesan; set aside. Drain the roasted red peppers well and place in a food processor or blender to puree; they need not be completely smooth. This will make about 2 cups. Add 2 cups of the spaghetti sauce to the pureed peppers along with the cornstarch and stir to combine; set aside.

Zucchini Lasagna, assembling lasagna

Heat the olive oil in a large skillet and fry the hamburger meat until well browned. Add the onion and sauté together for 5 to 7 minutes. Add in the green pepper, garlic, dried herbs and salt and sauté another 5 minutes. Add in the mushrooms and the reserved red pepper and spaghetti sauce mixture and heat through; set aside off the heat. Preheat oven to 375 (350 on convection).

Using a mandolin slicer set to less than 1/8-inch thickness, slice the zucchini lengthwise to create an approximation of lasagna noodles. Spray a 9 x 13-inch oven-safe pan with cooking spray and layer zucchini slices in a single layer in bottom of pan. Top the zucchini with half the reserved ricotta mixture, spreading gently. Top this with a third of the meat sauce. Layer on half the shredded mozzarella. Repeat this process: zucchini slices, ricotta mixture, meat sauce and mozzarella. Top with one more layer of zucchini slices and the remaining meat sauce and sprinkle the reserved grated Parmesan over top.


Bake the lasagna for about 40 to 50 minutes, until it is bubbling and the zucchini slices are cooked through (test with a knife). Remove from oven and allow to stand for at least 20 minutes before cutting and serving.


NOTES: This recipe can be made without meat and become a vegetarian dish, if desired. Instead of frying the meat, sauté the onions and green pepper together, add the garlic toward the end. Add in the mushrooms if desired and then the red pepper/spaghetti sauce mixture and heat through.


Cinnamon Apple Oatmeal Cookies

Cinnamon, Apple, Oatmeal, Cookies
Cinnamon Apple Oatmeal Cookies
Makes about 6 dozen 3-inch cookies

2 sticks unsalted butter, room temperature
1 cup white sugar
1 cup light brown sugar
½ teaspoon butterscotch flavoring
1½ teaspoons vanilla extract
2 eggs
2 cups flour
½ teaspoon salt
½ teaspoon baking soda
1½ teaspoons baking powder
1 fresh apple, peeled, grated, rough chopped (about 1 cup)
1 cup walnuts, roughly chopped or broken
1 cup Cinnamon Sweet Bits (King Arthur Flour website)

Preheat oven to 350 degrees (if using convection, set temperature to 325).
In a stand mixer cream together the butter and the sugars. Add in the flavorings (if butterscotch flavor is not available, use all vanilla) and the eggs and mix well. It is easy to prepare the apple if it is peeled, then grated on a large holed grater. Using a large knife, roughly chop across the long grated strands to break them up. Add the apples to the mixer bowl and beat to combine. Whisk to ether the flour, salt, soda and baking powder and all to the bowl on low speed to just moisten, then higher speed to combine. Add in the walnuts and Cinnamon Sweet Bits and mix to combine.

Drop dough onto lightly greased cookie sheets using either two small spoons or a cookie scoop, placing them about 2-inches apart. Bake the cookies for approximately 12 minutes, until puffed and brown around the edges. Allow the cookies to remain on the pans for 2 minutes before removing to a rack to cool completely.

NOTES: The King Arthur Flour website carries Cinnamon Sweet Bits. I love adding them to scones as they give a wonderful burst of cinnamon flavor. With that in mind, I thought they would also be fabulous in cookies. Cinnamon mini-chips would also work well in these cookies, but the pure flavor in the little bites is hard to duplicate.

dessert, peach, almond, ice cream
Peach Crisp with Coconut Almond Ice Cream
 

~~~~~~~~~~~~~~~~~~~~~~~

Yesterday was my dear sister-in-law's birthday. She loves peaches, and requested Peach Crisp as her dessert rather than cake. I decided to try an ice cream, based on a recipe I saw calling for a quart of milk heated with honey and poured over almonds and strained. I thought that was a huge waste of almonds, plus I am not over fond of using milk. I created a recipe, which I revised 3 times before I even made it, but it turned out most delicious. I called it Coconut Almond Ice Cream, though it has no dairy (or eggs) in it at all. For this I soaked 1 cup of raw almonds overnight in a 2 cup measure, filled to the 2 cups with water. Yesterday morning I drained the almonds and placed them into my Vita Mix with one (13.5 ounce) can of Coconut Milk and about 6 ounces of coconut water. I blended the almonds to a fine powder and strained them out with a nut milk bag, squeezing well to get every last bit of liquid out of the almonds. I rinsed the blender container and returned the strained coconut almond milk to the container with a half cup of honey and a half teaspoon of almond extract, blended for a few seconds to thoroughly mix, and then refrigerated the mixture for the next few hours.

I have an old DAK "Gelatissimo" ice cream machine. I don't use it very often, but now and again it is very handy. I set the ice cream maker to start just as we sat down to dinner, so it would be done and not too hard when it came time for dessert. I will say that though it didn't have the creamy smoothness of some commercial ice creams, it was rich and most delicious. Best of all, it went just splendidly with the Peach Crisp. A real match made in heaven!


My passion is teaching people how to create a harmony of flavors with their cooking, and passing along my love and joy of food, both simple or exotic, plain or fancy. I continue my journey in ethnic and domestic cuisines, continuing my journey to explore diverse culinary experiences and hopefully to start you on a journey of your own. Join me also at A Harmony of Flavors on Facebook, and Pinterest.

Thursday, June 20, 2013

Goan Style Chicken

I got this idea for Goan Style Chicken from the knowledge that Goa, in the west part of India, was populated by Portuguese long ago. Goa is one of the few places in India that uses recipes for pork or beef. Another ingredient I have seen in marinades is vinegar, which gives a nice piquancy. With these things in mind, along with a love of all Indian spices, I threw together a marinade for some chicken I had. I used cilantro, some onion and garlic, along with some of the more common spices such as coriander, cumin,  cardamom, cinnamon, cloves and a little curry powder, moistened with coconut oil and vinegar.

baked chicken, Indian flavors, chicken
Goan Style Chicken, baked
The first time I tried making this recipe was shortly after moving in to our new home and things were such a mess that I couldn't even get the grill out of the garage, much less use it in the spring showers we were having at the time. So, this first time, while the marinade smelled heavenly, once baked it left a lot of liquid in the baking sheet, so the chicken was more steamed than baked or roasted. Don't get me wrong - it was very delicious! I served it with a chutney I had just made up a few days prior, along with saffron rice and peas and it was a delightful dinner.

However, I couldn't help thinking that it would be better if grilled. I had butterflied the chicken breasts the first time, but left them still connected. The second time, I cut through the boneless, skinless breasts, making two pieces. I also bought some boneless, skinless chicken thighs, as my husband prefers dark meat. With all the extra meat, I made about 1½ times the recipe for the marinade and set the chicken in the marinade for about an hour while preparing the chutney and rice.

My suspicion was spot-on, because the flavors of the chicken done on the grill were spectacular. I made a repeat of the meal with the chutney, saffron rice and peas, to ensure that the flavors would be the same. sometimes, when making the same dish but with different accompaniments, it can taste different, much like with wines. The grilled version is clearly the winner in this comparison, but even if you cannot grill, though I would recommend using a rack a rack in the pan, baking the chicken is still a really fine option. Do try this recipe if at all possible because it is a Harmony of Flavors in the mouth! 

Goan Style Chicken

Chicken, grilled, entree, Indian flavors
Goan Style Chicken, grilled

Serves 4

1 cup cilantro, loosely packed
2 - 3 cloves garlic
1 large chunk fresh ginger, peeled, loosely chopped
½ large onion, or 1 small onion, in chunks
2 teaspoons curry powder of choice
2 teaspoons coriander seed
1 teaspoon black peppercorns
1 teaspoon cumin seed
1 teaspoon salt
½ teaspoon cardamom seed
2 inches true cinnamon stick
4 whole cloves
2 - 4 tablespoons white vinegar
2 tablespoons oil or melted coconut oil
4 boneless, skinless chicken breasts (or thighs)

Prepare the chicken breasts by butterflying to make them of even thickness. Alternately, pound the breasts or thighs to an even thinness. Make shallow slashes in the meat on both sides, not cutting all the way through. Set aside.

Place the first 12 ingredients into a blender container and blend to break up large pieces. Add in the oil or coconut oil, then the vinegar to allow the mixture to become a thick paste. Scrape out the marinade onto the prepared chicken and rub the marinade into the chicken, including into the shallow cuts on both sides. Set aside to marinate for at least ½ hour, or longer if you have the time.Preheat oven to 425. If baking the chicken, place onto a greased baking sheet with sides. This will be best on a rack, though not necessary. Drizzle oil or melted coconut oil over the chicken. Bake for about 10 to 12 minutes, or until the internal temperature reaches 165 degrees. Alternatively, grill the chicken until done.

This is great served with saffron rice and a chutney of choice. I served it with Apple Onion Chutney with Sultanas.


NOTE: Hot chilies may be added to the marinade as desired. Two to 6 jalapenos or serranos will impart a nice heat.

~~~~~~~~~~~~~~~~~~~~~~~ 

Apple Onion Chutney with Sultanas

Apple, Onion, Chutney, Sultanas
Apple & Onion Chutney with Sultanas


Makes about 2 cups

3 tablespoons unsalted butter

2 tablespoons olive oil
1 large white onion
1 large Fuji apple, or apple of choice
1 teaspoon salt
3 tablespoons Worcestershire sauce
½ cup sultanas (white raisins)
¼ cup light brown sugar

Cut off root end of onion and peel off skin. Cut onion in half lengthwise and then slice across into ¼ inch slices.

In a large skillet, melt the butter with the olive oil and add the onions. Over medium heat or lower, slowly saute the onions until nicely golden brown, stirring very often, about 15 minutes. Peel and core the apple. Quarter the apple and cut each quarter in half again. Slice thinly across and add to the onions along with the salt and Worcestershire. Cook about 10 minutes until apples are tender, stirring occasionally. Add the sultanas and toss for about 2 to 3 minutes. Add the brown sugar and cook just until the sugar is completely melted and the sauce is syrupy.


My passion is teaching people how to create a harmony of flavors with their cooking, and passing along my love and joy of food, both simple or exotic, plain or fancy. I continue my journey in ethnic and domestic cuisines, continuing my journey to explore diverse culinary experiences and hopefully to start you on a journey of your own. Join me also at A Harmony of Flavors on Facebook, and Pinterest.

Monday, June 10, 2013

Sloppy Joe Conundrum

Chicken Salad, vegetables, nuts, healthier
Uniquely Fine Chicken Salad
Hi again! It seems like that old saying about that road paved with good intentions. I keep wanting to get to this blog, and I am still so bogged down with unpacking. Admittedly, I have too much stuff. No question. And now, with a large enough house to really unpack it all, one month later and I am still working on it. On top of that, I have a wedding cake to make. I have finally gotten a little preliminary work done, but there's a lot to do, and the wedding is less than a month away.


Pork Tenderloin, sweet smoky spice
Sweet Smoky Pork Tenderloin
I have also been busy trying out new recipes and getting photos of some that have been around quite some time in  my kitchen, like my Uniquely Fine Chicken Salad. A couple days back I made Goan Style Chicken. Before that, I had made Sweet Smoky Pork Tenderloin, accompanied by Apple Onion Chutney with Sultanas

But on to the title of this blog: Sloppy Joe Conundrum. Last evening I thought I would make something quick and easy; Sloppy Joes. We have a lot of hamburger meat left from the side of beef we bought 2 years back, so I look for new ways to use it, but often just fall back onto old standbys. My husband is picky about certain sauces like spaghetti or Sloppy Joes. If they are too thin, he just doesn't like them. Store bought ones do have thickeners, such as flour or Guar Gum or Xanthan Gum, among others. He likes the Manwich original so that is what I buy. My preference would be to make a recipe of my own, but have not bothered.

Chicken, Indian SPices, green masala
Goan Style Chicken
Okay, so I had thawed a package of what I thought was hamburger, only to find it was pork sausage instead! Great. I usually don't thaw too much ahead, so it wasn't like I couldn't just substitute some ground beef. I heat a pot, add some oil, set the frozen meat in there, allow to brown a bit, flip, scrape off the cooked part flip again and scrape, repeating until I have cooked the whole package of frozen meat. It works.

My original thought was to just make the one pound of ground beef, since I only had one can of the Manwich. I would just save the sausage meat for something else. Then I started reading the ingredients on the can. I got thinking I'd like to try out some semblance of the canned flavor by creating a sauce of my own. Granted, once I did this, it was combined with the actual Manwich, so I couldn't be completely impartial about the flavors. I added in the ground pork sausage to brown with the beef. I will have to give this a go all on its own to see how it tastes. However, that said, my husband and sister did not know the difference. I guess that says something.

Having gone on to remake this on its own, using just ground beef, this is the recipe:

Sloppy Joes, Entree, Quick Meals
Sloppy Joes

Sloppy Joes


1 pound hamburger meat
1 (14.5 or 15 ounce) can tomato sauce
1 (6 ounce) can tomato paste
1 large onion, chopped
2 cloves fresh garlic, minced
1 green pepper, finely chopped
1 tablespoon white corn syrup
1 tablespoon white vinegar
¼ cup double concentrated tomato paste (from a tube)
2 teaspoons Barbecue Spice Mix
1½ teaspoons salt
½ teaspoon freshly ground black pepper

In a 6 quart pot, brown the hamburger meat well. Add in the onion and continue to stir and cook for about 10 minutes more. Add in all the rest of the ingredients and stir well. Bring to a boil, reduce heat to low and simmer, covered, for at least a half hour for flavors to meld. Serve on hamburger buns.


My passion is teaching people how to create a harmony of flavors with their cooking, and passing along my love and joy of food, both simple or exotic, plain or fancy. I continue my journey in ethnic and domestic cuisines, continuing my journey to explore diverse culinary experiences and hopefully to start you on a journey of your own. Join me also at A Harmony of Flavors on Facebook, and Pinterest.

Friday, May 24, 2013

Organizing a New Kitchen

Finally back after our move. I've been digging myself out from boxes everywhere for the last 2 weeks, after frantically packing for the weeks prior. Moving is stressful at best. My husband keeps asking where an item is. All I can say with any certainty is, "I just don't know!" Of course, that is not the answer he hoped for so it continues to be stressful. Such is life and moving.

I have no new photos to attach here for this blog. Maybe tomorrow, or maybe next week, but I wanted to at least write a little bit here. I am making an effort to do a little light cooking, in an attempt at "getting to know my new kitchen
." It is hard to get things in an order so they are handy and useful, and every kitchen is set up differently. I have plenty of room, but things are laid out differently in each house. Yesterday I made brownies. I had been warned that the stove here runs hot, so I set the temperature 25 degrees lower. The brownies were not done in the usual time called for, so I upped the temp and they were finally done with about 7 extra minutes. They came out delightfully chewy, so that was great, but I am not sure the oven temp really runs much hotter than normal, after that experiment. Here is my recipe:

My Best Brownies
brownies, dessert, easy dessert


4 ounces unsweetened chocolate
2/3 cup unsalted butter
2 cups sugar
4 eggs
1 teaspoon vanilla
1 1/4 cups all-purpose flour
1 teaspoon baking powder
1 teaspoon salt
1 cup chopped nuts

In a medium saucepan, melt together the chocolate and butter (11 tablespoons). Once melted, remove from heat. Add in the sugar and mix to combine. Add the eggs and beat to combine. Add in the flour, baking powder, salt and nuts and stir until just mixed. Pour into a greased 9 x 13 pan and bake at 350 for about 30 minutes. Do not overbake.

I made my Cheesy Scalloped Potatoes with Ham a few days ago, in the midst of complete chaos. They also turned out perfectly and it was so wonderful to have a home cooked meal again, instead of store bought rotisserie chicken, potato salad and coleslaw, or spiral sliced ham with potato salad and coleslaw. Not that I am complaining. My wonderful sister-in-law provided the foods during the move, so I didn't have to panic trying to find things to make in such a chaotic situation. I am completely and utterly grateful for all she provided. It is still nice to get back to some semblance of normalcy. This coming weekend I am hoping to make Mom Rawstern's Famous Baked Beans with the ham bone from that spiral sliced ham we have been eating for the last week.

Cheesy Scalloped Potatoes with Ham


Cheese, Potatoes,Ham
Cheesy Scalloped Potatoes with Ham
Serves 6 to 8
Makes one 9 x 13-inch casserole

2 cups ham, cut in small chunks
3 - 3½ pounds russet potatoes, peeled, sliced ¼" thick
½ medium onion, sliced thinly, then roughly chopped
8 ounces shredded cheddar cheese, reserving ¾ cup aside
6 tablespoons flour
1½ teaspoon salt
¼ - ½ teaspoon freshly ground black pepper
2 tablespoons unsalted butter
2 cups milk, evaporated milk or cream
2 tablespoons Dijon mustard

Preheat oven to 400 degrees (375, if convection). Spray a 9 x 13-inch casserole with cooking spray. Divide the potatoes into three piles, making one pile of the best and most even shaped slices, and one with the smallest bits and pieces. Place the latter pile into the bottom of the casserole. Layer half the ham over the potatoes, then half the onion, and half the cheese. Sprinkle on 3 tablespoons of the flour, then half the salt and pepper. Place pats of one tablespoon of the butter over the surface. Repeat with another layer of potatoes, then the ham, onion, cheese, flour, salt, pepper and the butter. Top with the best looking potato slices.

Heat the milk to just warm, and whisk in the Dijon mustard. Pour this over the casserole, cover the casserole with foil and bake for45 minutes. Remove the foil and continue to bake for another 45 minutes. Ten minutes before the potatoes are done, sprinkle the reserved cheddar cheese over top of the casserole and allow to finish baking. Allow to rest for 15 minutes before serving. 


Today my husband requested my Uniquely Fine Chicken Salad. He loves it for lunch sandwiches, though it is equally good for noshing, served on crackers, tortillas or buns. It is also wonderful for appetizers. Eventually I will get some photos to put in my blog and website, but for today, at least the recipe is available. It is completely gluten free, if served on something other than wheat breads or crackers. It is delightful on a bed of lettuce or tomatoes, too.

Uniquely Fine Chicken Salad


Chicken Salad, healthier chicken salad, vegetables, nuts,
Uniquely Fine Chicken Salad
Makes 6 to 7 cups

½ cup raisins or craisins
½ cup pecans, walnuts or almonds
3 to 4 stalks celery, in 1-inch chunks
1 carrot, scrubbed, in half-inch slices
1 green pepper, seeded, in 1-inch chunks
1 whole rotisserie chicken, skin and bones removed
¾ cup sweet pickle relish
¾ - 1 cup mayonnaise
¼ cup yellow mustard

In a food processor, place the raisins and nuts and process for about 20 to 30 seconds, until in smaller bits. Remove to a large bowl. Next, process the celery in about 4 to 5 short pulses and remove to the bowl. Repeat with the carrot and then the green pepper. Do not process too fine. Repeat with the chicken in two batches and add to the bowl, along with the pickle relish, mayonnaise and mustard. With a spatula, combine all the ingredients well. 


It is good to be back!


My passion is teaching people how to create a harmony of flavors with their cooking, and passing along my love and joy of food, both simple or exotic, plain or fancy. I continue my journey in ethnic and domestic cuisines, continuing my journey to explore diverse culinary experiences and hopefully to start you on a journey of your own. Join me also at A Harmony of Flavors on Facebook, and Pinterest. 

Disqus